background image

P S I

G P M

0

10 20 30 40 50 60 70 80

0

1 5

2

2 5

3

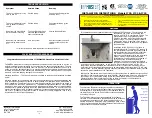
Gather the necessary tools as shown below to complete the installation of this 

faucet. Some may not be needed depending on the model of faucet you are 

installing. Check with your local hardware store on the requirements of your 

installation situation.

Tools:

PLUMBERS

PUTTY

FLASHLIGHT

BASIN WRENCH

SAFETY GLASSES

SCREW DRIVER

PLIERS

CHANNEL LOCKS

ADJUSTABLE


WRENCH

SEALED-TUBE

HEX-KEY

TAPE

Connect to water supply lines with either

A  3 8  O D copper tubing ball nose

risers with the coupling nuts or

B  3 8 copper tubing no ball with

supplied tube head interior connector or

C  IPS faucet connectors 1 2

Tighten connection 

with two wrench to 

prevent damage to 

tube body. Be 

careful not to bend 

the stem as this will 

void the product 

warranty.

800-101

A .

B .

C .

Helpful Information

Flow Rate Chart

Important

Le Duo Faucet 

0

5

-

3

1-201

7

Summary of Contents for Le Duo

Page 1: ...ASIN WRENCH SAFETY GLASSES SCREW DRIVER PLIERS CHANNEL LOCKS ADJUSTABLE WRENCH SEALED TUBE HEX KEY TAPE Connect to water supply lines with either A 3 8 O D copper tubing ball nose risers with the coupling nuts or B 3 8 copper tubing no ball with supplied tube head interior connector or C IPS faucet connectors 1 2 Tighten connection with two wrench to prevent damage to tube body Be careful not to b...

Page 2: ...s thoroughly Three Hole Installation Installation size map Single Hole Installation Test Faucet Installation Simply rinse the surface with clear water or mild liquid detergents if necessary Dry the faucet with a clean soft cotton cloth Do not use any cleaning agents containing acids polish abrasives or harsh cleaners Maintenance Spout body Sink Deck E Hand tighten Lock Nut 6 use a screwdriver to t...

Page 3: ...n Step 1 Unscrew shank Step 3 Screw shank back in place Etape 1 Dévisser la tige filletée Etape 2 Bien serrer chaque tuyau en position car ils peuvent ce deplacer durant le transport ne pas trop serrer pour ne pas endommager les joints statiques Etape 3 Replacer la tige filletée et initier l installation Step 2 Ensure hoses are tightly screwed in position as they may move during transportation and...

Page 4: ...EVIS PINCES PINCES MULTIPRISES CLÉ ANGLAISE TUBE DE SCELLAGE CLÉ HEXAGONALE RUBAN À MESURER Connectez à une ligne d alimentation en eau avec soit A 3 8 O D tuyau de cuivre clapet bille à tube plongeur avec les écrous d accouplement ou B 3 8 tubes plongeurs sans clapet bille avec connecteur de tube de tête intérieur C Connecteurs de robinet IPS 1 2 Serrez la connexion avec deux clés anglaises pour ...

Page 5: ...a manette à jet et laissez l eau froide et chaude couler pour une minute Ceci aidera à nettoyer tout débris qui pourrait autrement bloquer le système Replacez la manette à jet D Opérez la poignée vers le haut et le bas avec les positions d eau froide et chaude pour vider les lignes d eau à fond Carte de dimension d installation Testez l installation du robinet Rincez simplement la surface avec de ...

Page 6: ...n Step 1 Unscrew shank Step 3 Screw shank back in place Etape 1 Dévisser la tige filletée Etape 2 Bien serrer chaque tuyau en position car ils peuvent ce deplacer durant le transport ne pas trop serrer pour ne pas endommager les joints statiques Etape 3 Replacer la tige filletée et initier l installation Step 2 Ensure hoses are tightly screwed in position as they may move during transportation and...

Reviews: