background image

Installation/Operation/Maintenance

Tumble Dryers

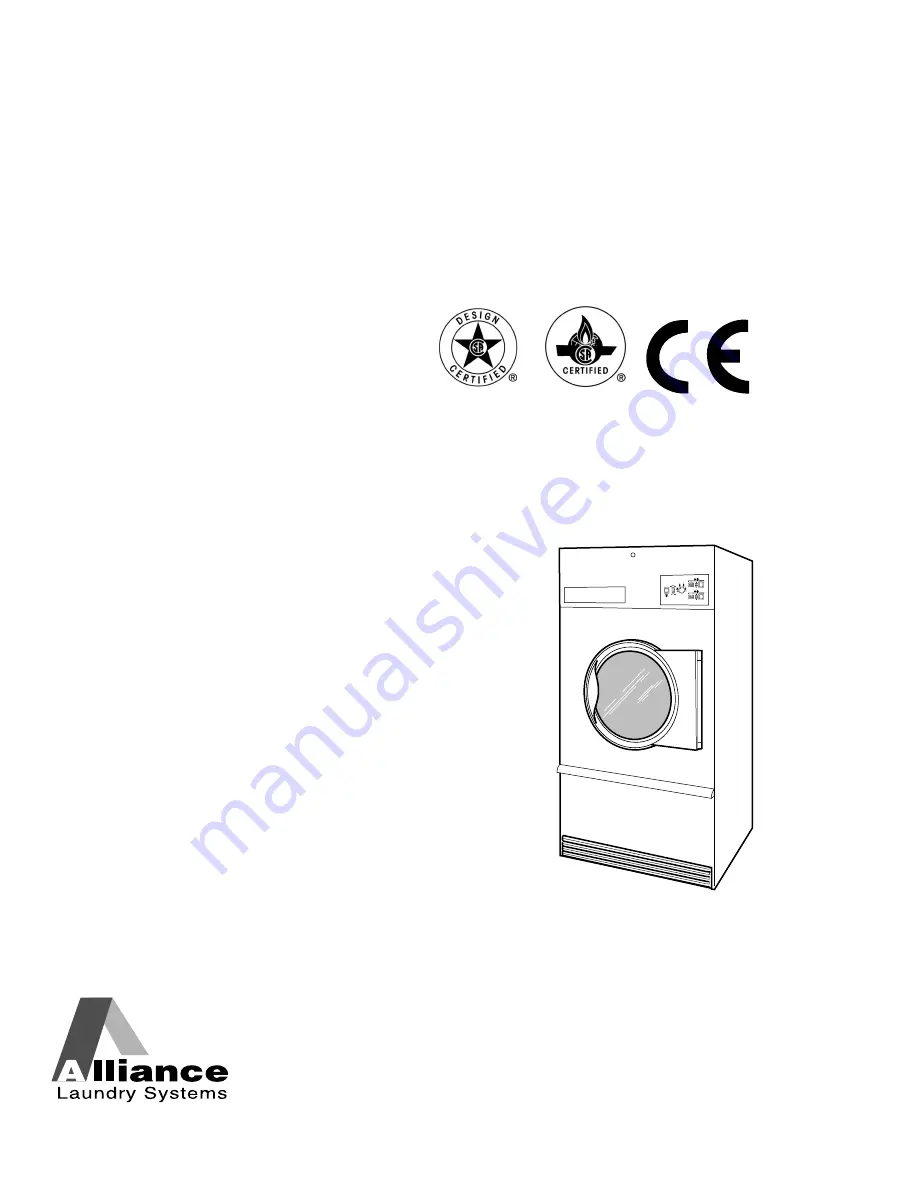
50 Pound (25 Kilogram) Capacity
75 Pound (34 Kilogram) Capacity

Starting Serial No. 0904004427

Refer to Page 9 for Model Identification

TMB1277C_SVG

Original Instructions
Keep These Instructions for Future Reference.

(If this machine changes ownership, this manual must accompany machine.)

www.alliancelaundry.com

Part No. 70457901ENR12

September 2015

Summary of Contents for YU050E

Page 1: ...ogram Capacity Starting Serial No 0904004427 Refer to Page 9 for Model Identification TMB1277C_SVG Original Instructions Keep These Instructions for Future Reference If this machine changes ownership this manual must accompany machine www alliancelaundry com Part No 70457901ENR12 September 2015 ...

Page 2: ......

Page 3: ...cinity of this or any other appli ance WHAT TO DO IF YOU SMELL GAS Do not try to light any appliance Do not touch any electrical switch do not use any phone in your building Clear the room building or area of all occupants Immediately call your gas supplier from a neighbor s phone Follow the gas supplier s instructions If you cannot reach your gas supplier call the fire department Installation and...

Page 4: ...stic venting materials If flexible metal foil type duct is instal led it must be of a specific type identified by the appliance manufacturer as suitable for use with tumble dryer Refer to section on connecting exhaust system Flexible venting materials are known to collapse be easily crushed and trap lint These conditions will obstruct tumble dryer airflow and increase the risk of fire W752R1 The f...

Page 5: ...ermits 24 Water Requirements 24 Water Connections 24 Electrical Requirements 25 Auxiliary Alarm 25 Bolt On Angle Option 26 To Reverse the Loading Door 27 Before Placing Tumble Dryer into Service 29 Required for CE Models Only 31 Installing CE Gas Drying Tumble Dryer 31 General Information 31 CE Orifices 32 Properties of CE Gases 33 Changing Gas Configuration 34 Specific Conversion Procedures 35 Ex...

Page 6: ...ions 56 Ferrite Ring Installation 57 Electrical Specifications 59 Steam Requirements 62 Steam Requirements 62 Piping Recommendations 64 Installing Steam Trap and Making Condensate Return Connections 64 Thermal Oil Prep 64 Single Drop Timer 65 Power Up Mode 65 Ready Mode 65 Start Mode 65 Run Mode 65 Door Open Mode 65 End of Cycle Mode 65 Setting Dry Time Dipswitches 65 Models Through Serial No 0908...

Page 7: ...re 86 Troubleshooting 86 Proper Electrode Location 87 Flame Current Measurement 87 Ignition Control Operation for Non CE Models Through 3 10 13 87 Ignition Control Operation for CE Models Through 3 10 13 88 System Tests 89 Diagnostic LED DGN LED Error Codes 89 Adjustments 90 Adjustments 90 Gas Burner Air Shutter 90 Airflow Switch 91 Loading Door Switch 91 Loading Door Catch 92 Drive Belt Nonrevers...

Page 8: ...Disposal of Unit 99 Copyright Alliance Laundry Systems LLC DO NOT COPY or TRANSMIT 8 Part No 70457901ENR12 ...

Page 9: ...0N PK050N PT050L PT050N PU050L PU050N SA050L SA050N SK050N ST050D ST050L ST050N SU050L SU050N UA050L UA050N UK050N UT050L UT050N UU050L UU050N YT050L YT050N YU050L YU050N CT050S CT050T CU050S CU050T DR50S2 BT050S DR50S2 BT050T DR50S2 BU050S DR50S2 BU050T DR55S2 BT050S DR55S2 BT050T DR55S2 BU050S DR55S2 BU050T HT050S HT050T HU050S HU050T IPD50S2 IT050S IT050T LT050S LT050T LU050S LU050T MT050S MT05...

Page 10: ...A075L UA075N UK075N UK075R UT075L UT075N UT075R UTF75L UTF75N UU075L UU075N UU075R YT075L YT075N YU075L YU075N CT075S CT075T CU075S CU075T DR75S2 BT075S DR75S2 BT075T DR75S2 BU075S DR75S2 BU075T DR80S2 BT075S DR80S2 BT075T DR80S2 BU075S DR80S2 BU075T HT075S HT075T HU075S HU075T IPD75S2 IT075S IT075T LT075S LT075T LU075S LU075T MT075S MT075T PT075S PT075T PU075S PU075T ST075S ST075T SU075S SU075T U...

Page 11: ...ral pay LL network adaptable prep for central pay LW reversing network adaptable prep for coin LX network adaptable prep for coin LY network adaptable prep for card LZ reversing network adaptable prep for card OM OPL micro QT dual digital timer R3 reversing DX4 OPL RD reversing DMP OPL RE reversing LED OPL RM reversing OPL micro RQ reversing dual digital timer RU reversing UniLinc OPL SD single dr...

Page 12: ...To reduce the risk of serious injury or death DO NOT repair or replace any part of the unit or attempt any servicing unless specifically recommended in the user maintenance instructions or in published user repair instructions that you understand and have the skills to carry out W329 If replacement parts are required contact the source from where you purchased your unit or call 1 920 748 3950 or 3...

Page 13: ...ce must not be activated without lint foam filter When you perceive a gas odor immediately switch off the gas supply and ventilate the room Do not switch on electrical ap pliances and do not pull electrical switches Do not use matches or lighters Do not use a phone in the building Warn the fitter and if so desired the gas company as soon as possi ble To avoid fire and explosion keep surrounding ar...

Page 14: ...irt The interior of the tumble dryer and the exhaust duct should be cleaned periodically by qualified service personnel Solvent vapors from dry cleaning machines create acids when drawn through the heater of the drying unit These acids are corrosive to the tumble dryer as well as the laundry load being dried Be sure make up air is free of solvent vapors At the end of each working day close off all...

Page 15: ...4 x 81 1054 x 1433 x 2057 41 5 x 56 4 x 81 1054 x 1433 x 2057 Slat Crate Packaging Weight Pounds Kilograms 669 303 742 337 837 380 Slat Crate Shipping Dimensions Inches Millimeters 44 5 x 55 x 87 75 1130 x 1397 x 2229 44 5 x 59 25 x 87 75 1130 x 1505 x 2229 44 5 x 59 25 x 87 75 1130 x 1505 x 2229 Cylinder Size Inches Millimeters 37 x 30 940 x 762 37 x 36 940 x 914 37 x 36 940 x 914 Cylinder Capaci...

Page 16: ...Hz 110 000 116 1 32 2 225 000 237 65 94 Electric Models Heating Element Rating Kilowatts 21 kW 240 V 50 Hz 30 kW other vol tages Classic Line 30 kW Eco Line 21 kW Not Applicable Steam Models Steam Connection 3 4 in NPT 3 4 in NPT Not Applicable Steam Coil Rating at 100 psig Btu hr kg hr recommended operating pressure 80 100 psig 177 500 83 14 210 300 98 5 Not Applicable NOTE All machines are shipp...

Page 17: ... 87 in 860 mm 54 25 in 1378 mm 76 625 in 1946 mm 36 in 914 mm 38 625 in 981 mm 075 Series Steam 30 75 in 781 mm 33 87 in 860 mm 54 25 in 1378 mm 76 625 in 1946 mm 36 in 914 mm 38 625 in 981 mm F75 Gas 30 75 in 781 mm 33 87 in 860 mm 53 in 1346 mm 76 625 in 1946 mm 36 in 914 mm 38 625 in 981 mm Models G H I J K L 050 Series Gas and Electric 33 in 838 mm 7 1 in 180 mm 5 5 in 140 mm 6 53 in 166 mm 29...

Page 18: ... in 140 mm 6 53 in 166 mm 35 5 in 902 mm 39 22 in 996 mm F75 Gas 33 in 838 mm 7 1 in 180 mm 5 5 in 140 mm 6 53 in 166 mm 35 5 in 902 mm 39 22 in 996 mm Fire suppression system optional may not be on machine Exhaust Outlet Locations TMB2238N_SVG C A B Models A B C 050 075 Series 5 375 in 137 mm 8 in 203 mm 13 375 in 340 mm F75 6 5 in 165 mm 10 in 254 mm 6 5 in 165 mm Specifications and Dimensions C...

Page 19: ...tions TMB2239N_SVG B A Diameter A B 050 075 1 2 in NPT 14 75 in 375 mm 65 75 in 1670 mm F75 3 4 in NPT Specifications and Dimensions Copyright Alliance Laundry Systems LLC DO NOT COPY or TRANSMIT 19 Part No 70457901ENR12 ...

Page 20: ...VG B A 1 2 B A 1 Gas and Steam 2 Electric A B 3 25 in 83 mm 75 5 in 1918 mm NOTE These figures are approximate dimensions only Specifications and Dimensions Copyright Alliance Laundry Systems LLC DO NOT COPY or TRANSMIT 20 Part No 70457901ENR12 ...

Page 21: ...G B A C D E Diameter A B C D E 3 4 in NPT 15 25 in 387 mm 79 23 in 2013 mm 7 5 in 190 mm 64 64 in 1642 mm 78 14 in 1985 mm Specifications and Dimensions Copyright Alliance Laundry Systems LLC DO NOT COPY or TRANSMIT 21 Part No 70457901ENR12 ...

Page 22: ...le dryer Steam Models One steam shut off valve for steam service line to be connected upstream of solenoid steam valve Two steam shut off valves for each conden sate return line Table continues Materials Required Obtain Locally Flexible steam hoses with a 125 psig pounds per square inch gauge 8 79 kg sq cm working pressure for connecting steam coils Refer to Figure 29 for sizing and con nection co...

Page 23: ...dryer from skid NOTE Do not throw bolts away they are the level ing legs 3 Remove four nuts from the literature package and screw one fully on to each leveling leg 4 Screw the four leveling legs bolts back into the level adjust ing fittings from the bottom 5 Slide tumble dryer to its permanent location Adjust the level ing legs until the unit is level or no more than 0 125 inch 3 18 mm higher in t...

Page 24: ...s located in an area where it will be exposed to cold freezing temperatures pro visions must be made to protect these water lines from freezing IMPORTANT Temperature of the water supply must be kept between 40 F and 120 F 4 4 C and 48 9 C If wa ter in the supply line or water solenoid valve freezes the fire suppression system will not operate IMPORTANT If temperature sensors inside the tumble drye...

Page 25: ...lable at extra cost Order 44073301 Hose 39 in 99 cm Electrical Requirements WARNING Electrical power must be provided to tumbler at all times The fire suppression system will be inopera tive if the main electrical power supply is discon nected W690 No independent external power source or supply connection is necessary Power to operate the 24 Volt fire suppression system is from the rear junction c...

Page 26: ...ryer depth to be reduced to 34 5 16 inches 871 mm The tumble dryer should then fit through a 36 inch 914 mm door opening actual 34 5 inches 876 mm 1 Remove the loading door access panel front panel and lint panel Refer to Figure 7 TMB2014K_SVG 1 4 3 2 5 1 Loading Door 2 Front Panel 3 Access Panel 4 Cylinder 5 Lint Panel Figure 7 2 Remove the drive guard Refer to Figure 8 Installation Copyright All...

Page 27: ... Location 7 Number of Shims for this Channel Figure 9 10 Remove the motor s and motor bracket s Refer to Figure 8 11 Unbolt and remove the two vertical trunnion channels 12 Remove the junction contactor box Refer to Figure 8 13 Remove the exhaust thimble 14 The gas supply line may require removal if it extends past the rear panel If so disconnect the union located between the gas and shutoff valve...

Page 28: ... from switch Take off front panel Refer to Figure 11 6 Exchange switch and plug locations Depress tabs with an ad justable pliers to remove plug and switch from front panel Reinstall switch orienting button toward center of machine Reinstall plug in switch s previous location Refer to Figure 11 TMB1995N_SVG 2 3 4 5 1 1 Plug 2 Switch 3 Side Screw 4 Door Hinge Lug 5 Door Assembly Figure 11 7 Cut wir...

Page 29: ...g tumble dryer should stop when door is opened TMB1997N_SVG 2 3 1 4 1 Switch New location 2 Plug New location 3 Door Assembly 4 Side Screw Figure 13 NOTE If machine is converted back to right hand hinge operation the door switch harness must be rerouted Before Placing Tumble Dryer into Serv ice 1 Remove or open all panels and check accessible bolts nuts screws terminals and fittings for tightness ...

Page 30: ...e lint panel The heating systems should shut off when the lint panel is opened a maximum of 1 5 inches 38 mm The airflow switch operation may be affected by shipping tape still in place lack of make up air or an obstruction in the exhaust duct These should be checked If there is a problem contact an authorized service person WARNING Do not operate tumble dryer if airflow switch is faulty An explos...

Page 31: ...ollow ing items Review and verify machine operation with customer Leave all literature and a signed Declaration of Conformity with customer Review machine warranty information with customer Apply warning sticker on front panel of machine in language appropriate to country of sale included in literature packet Installing CE Gas Drying Tumble Dryer General Information This information is to be used ...

Page 32: ...s that are available in different CE countries and how the machines need to be configured to op erate with those gases In the CE there are Natural Gas configu rations that do not allow for machine regulation and L P Gas configurations that must be regulated For L P Gas third family B P at 50 mbar 5 kPa order Regulated Natural Gas machines and convert according to Table 1 CE Orifices Gas Typ e Gas ...

Page 33: ...3 7 Unregulated 50 0 0820 2 1 M40102 7 2 75 0 0785 2 0 M40099 9 3 Table 1 Properties of CE Gases Gas Type Gas Fami ly Group Gas De scrip tion Gas Desig nation Wi Hi Ws Hs d Wobb e In dex net Heat ing Value net Wobb e In dex gross Heat ing Value gross Densi ty Btu ft3 MJ m 3 Btu ft3 MJ m 3 Btu ft3 MJ m 3 Btu ft3 MJ m 3 Natural Gas Second I2H E Not Ap plicable G20 1226 45 67 913 34 02 1362 50 72 101...

Page 34: ...rt from the factory supplied configuration to the desired config uration 2 Perform the conversions required so the machine is properly configured for the desired country and gas Refer to the fol lowing sections How to Convert Gas Valve from Regulated to Unregulat ed How to Change Burner Orifice Size How to Adjust Gas Valve Governor Regulator WARNING When converting the tumble dryer to a different ...

Page 35: ...e 1 4 If applicable peel off the appropriate conversion sticker in cluded with machine and apply it to the serial plate over the ADJUSTED FOR ______ GAS ______ information 5 Commission tumble dryer for use How to Change Burner Orifice Size 1 Disconnect electrical power from tumble dryer Close gas shut off valve to tumble dryer Refer to Figure 15 2 Remove spud holder Unscrew spud holder nut near ga...

Page 36: ...gure 16 2 Remove screw plug from pressure tap 3 Connect a U tube manometer or similar pressure gauge to the burner orifice manifold pressure tap 4 Start tumble dryer and note pressure once flame is burning Remove regulator cap and adjust regulator screw until the burner orifice pressure per applicable table is achieved Re place regulator cap Refer to Figure 16 5 Commission tumble dryer for use Bur...

Page 37: ...s and or gas fired hot water heater or other gravity vented appliances must be increased sufficiently to prevent downdrafts in any of the vents when all tumble dryers are in operation Do not locate grav ity vented appliances between tumble dryer s and make up air openings If it is necessary to duct make up air to tumble dry er s increase area of duct work by 25 to compensate for re strictions in a...

Page 38: ...ead 3 Minimum distance between exhaust opening and roof ground or other obstruction 36 in 914 mm 4 2 in 51 mm minimum clearance on both sides of duct 5 Exhaust airflow maximum length of rigid duct 14 ft 4 3 m or 7 87 ft 2 4 m of flexible metal duct Figure 18 NOTE Do not install wire mesh or screen in exhaust duct opening to avoid lint build up or impacting proper discharge of air from tumble dryer...

Page 39: ... the outdoors a main collector duct may be used if it is sized accord ing to Figure 20 and Figure 21 This illustration indicates mini mum diameters and should be increased if the collector length exceeds 14 feet 4 3 m and two 90 elbows The diameter of a round duct must be increased by 10 for each additional 20 feet 6 1 m Cross sectional area of a rectangular or square duct must be increased 20 for...

Page 40: ...483 mm 24 in 610 mm F 21 in 533 mm 26 in 660 mm G 23 in 584 mm 28 in 711 mm H 25 in 635 mm 30 in 762 mm I 26 in 660 mm 32 in 813 mm J 27 in 686 mm 33 in 838 mm K 29 in 737 mm 35 in 889 mm L 30 in 762 mm 36 in 914 mm Table 4 NOTE Table 4 represents units with the same vent size If multiple vent sizes are used consult a local HVAC specialist NOTE Duct clean out recommended every 6 feet 183 cm Exhaus...

Page 41: ...A A I 1 Outlet duct diameter combined largest duct diameter of both sides 2 45 typical Figure 21 Refer to Table 4 for measurements for each manifold Exhaust Requirements Copyright Alliance Laundry Systems LLC DO NOT COPY or TRANSMIT 41 Part No 70457901ENR12 ...

Page 42: ... Natural Gas and Propane In stallation Code in Canada In Australia and New Zealand installation must comply with the Gas Installations Standard AS NZS 5601 Part 1 General Installations Obtain specific gas service pipe size from the gas supplier Refer to Table 5 and Table 6 for general pipe size The following must be furnished and installed by the customer for the gas service line to each tumble dr...

Page 43: ... in the drying mode If burner does not light and unit goes into lockout open and close the door and restart Repeat these steps until burner ig nites Use pipe compound resistant to actions of L P gas on all pipe threads WARNING Check all pipe connections internal and external for gas leaks using a non corrosive leak detection fluid To reduce the risk of explosion or fire DO NOT USE AN OPEN FLAME TO...

Page 44: ... Btu hr 237 Mj hr 65 94 kW each Figure 23 SAMPLE CALCULATIONS Equivalent length Total length of main gas supply pipe to the far end of the tumble dryers 25 ft 19 ft 7 6 m 5 8 m gas supply pipe 44 ft 13 4 m Total Gas Line Total Btu hr The sum of the Btu hr of all 050 series tumble dryers being fed by the main gas supply pipe 9 x 130 000 137 38 1 1 170 000 Btu hr 1 234 Mj hr 342 9 kW Using Table 5 a...

Page 45: ... 75 1 5 38 10 1 5 38 10 1 5 38 10 1 5 38 10 500 000 1 25 31 75 1 5 38 10 1 5 38 10 1 5 38 10 1 5 38 10 2 50 80 600 000 1 25 31 75 1 5 38 10 1 5 38 10 2 50 80 2 50 80 2 50 80 700 000 1 5 38 10 1 5 38 10 2 50 80 2 50 80 2 50 80 2 50 80 800 000 1 5 38 10 1 5 38 10 2 50 80 2 50 80 2 50 80 2 50 80 900 000 1 5 38 10 2 50 80 2 50 80 2 50 80 2 50 80 2 5 63 50 1 000 000 1 5 38 10 2 50 80 2 50 80 2 50 80 2 ...

Page 46: ...5 88 90 3 000 000 2 5 63 50 3 76 20 3 76 20 3 5 88 90 3 5 88 90 3 5 88 90 For L P Gas correct the total Btu hr by multiplying it by 0 6 The answer is the equivalent Btu on the above chart Table 5 High Pressure Gas Pipe Sizes NOTE Sizing calculations based on National Fuel Gas Code IMPORTANT A high pressure regulator is required Gas Pipe Size Required for 1000 Btu Natural Gas Standard Conditions at...

Page 47: ...05 0 75 19 05 0 75 19 05 700 000 0 5 12 70 0 75 19 05 0 75 19 05 0 75 19 05 0 75 19 05 1 25 40 800 000 0 5 12 70 0 75 19 05 0 75 19 05 0 75 19 05 0 75 19 05 1 25 40 900 000 0 5 12 70 0 75 19 05 0 75 19 05 0 75 19 05 0 75 19 05 1 25 40 1 000 000 0 75 19 05 0 75 19 05 0 75 19 05 0 75 19 05 1 25 40 1 25 40 1 100 000 0 75 19 05 0 75 19 05 0 75 19 05 0 75 19 05 1 25 40 1 25 40 1 200 000 0 75 19 05 0 75...

Page 48: ... 1 25 31 75 1 5 38 10 2 600 000 1 25 40 1 25 40 1 25 31 75 1 25 31 75 1 25 31 75 1 5 38 10 2 800 000 1 25 40 1 25 40 1 25 31 75 1 25 31 75 1 25 31 75 1 5 38 10 3 000 000 1 25 40 1 25 40 1 25 31 75 1 25 31 75 1 25 31 75 1 5 38 10 For L P Gas correct the total Btu hr by multiplying it by 0 6 The answer is the equivalent Btu on the above chart Table 6 High Altitude Burner Orifice Sizing For proper op...

Page 49: ...820 2 1 M401027 98 800 104 8001 10 000 2441 3050 46 0 0810 2 1 M401003 88 400 93 Classic Line 075 Series Natural Gas 2001 4000 610 1220 29 0 1360 3 4 3 M400997 151 800 160 4001 6000 1221 1830 30 0 1285 3 3 M401021 138 600 146 6001 8000 1831 2440 1 8 0 1250 3 2 M402489 125 400 132 8001 10 000 2441 3050 31 0 1200 3 0 M401017 112 200 118 L P Gas 2001 4000 610 1220 45 0 0820 2 1 M401027 165 000 174 40...

Page 50: ...831 2440 0 1299 3 3 44253801 98 800 104 8001 10 000 2441 3050 1 8 0 1250 3 2 M402489 88 400 93 F75 Series Natural Gas 2001 4000 610 1220 22 0 1570 4 0 3 M402996 207 000 218 4001 6000 1221 1830 24 0 1520 3 9 M402980 189 000 199 6001 8000 1831 2440 26 0 1470 3 7 M401000 171 000 180 8001 10 000 2441 3050 28 0 1405 3 6 M401014 153 000 161 L P Gas 2001 4000 610 1220 41 0 0960 2 4 M401015 225 000 237 40...

Page 51: ... inches mm Quantity Part Number Btu hr Mj hr Btu hr derate of 4 per 1000 feet 305 meters of altitude NOTE Eco line is only available in natural gas Table 7 Gas Requirements Copyright Alliance Laundry Systems LLC DO NOT COPY or TRANSMIT 51 Part No 70457901ENR12 ...

Page 52: ... possible If more than one tumble dryer is being installed a circuit breaker must be provided for each NOTE Connect machine to an individual branch circuit not shared with lighting or other equipment NOTE 3 Phase Machines Only Do not use fuses to avoid the possibility of single phasing and causing premature failure of the motors WARNING In case of servicing or putting the tumble dryer out of order...

Page 53: ...to operate at 24 Volts AC or DC If the central pay system provides 200 240V AC conversion is possible Loosen screw and move the BLK wire to the adjacent open terminal and tighten securely Refer to Figure 24 and Figure 25 TMB2406N_SVG BLK BLU GRY BRN 1 1 Move BLK wire here to configure control to accept 200 240 Volts from central pay system Figure 24 1 2 3 VCC COIN COIN COM IN1 IN2 24V 24V CP INPUT...

Page 54: ... service box to the tumble dryer ground screw does not constitute a ground A dedicated ground conduit wire must be connected be tween the electrical service box ground bar and tumble dryer ground screw WARNING To reduce the risk of electrical shock de energize the electrical circuit being connected to the tumble dryer before making any electrical connections All electrical connections should be ma...

Page 55: ... Block Locations for Non CE Models TMB2269N_SVG 1 2 3 4 1 Junction Box 2 Terminal Block 3 Earth Ground 4 Electrical Service Figure 26 Electrical Requirements Copyright Alliance Laundry Systems LLC DO NOT COPY or TRANSMIT 55 Part No 70457901ENR12 ...

Page 56: ...rsing is selected and momentarily start the tumble dryer Check the direction of the cylinder rota tion If the cylinder rotates clockwise viewed from the front the phase sequence is correct If the cylinder rotates counterclockwise proceed with step b NOTE When viewed from the front the fan should rotate clockwise on 050 and 075 series models and counterclockwise on F75 series models b Disconnect an...

Page 57: ...trols and will void control warranty To install 1 Immediately after connection of power leads and before ap plying power to machine locate each of the incoming service leads including ground 2 Snap the ferrite ring closed over all the service leads inside of the contactor box as shown It is important that the ferrite ring be installed inside the contactor box Refer to Figure 28 Do not install the ...

Page 58: ...2270N_SVG 2 1 CE Models TMB2271N_SVG 2 1 3 1 Ferrite Ring 2 Junction Box 3 Models Through 7 31 11 Figure 28 Electrical Requirements Copyright Alliance Laundry Systems LLC DO NOT COPY or TRANSMIT 58 Part No 70457901ENR12 ...

Page 59: ...red Serial Plate Amps Recommended Circuit Nonre versing Revers ing Breaker Rating Wire Size AWG mm 2 120V 60Hz 1ph L1 Neutral and ground 9 3 N A 15A 1 pole 14 2 5 120 208 240V 60Hz 1ph L1 L2 Neutral and ground N A 12 15A 1 pole 14 2 5 208 240V 60Hz 1ph L1 L2 Neutral and ground 5 1 N A 15A 1 pole 14 2 5 200 208 240V 60Hz 1ph L1 L2 and ground 5 1 N A 10A 2 pole 14 2 5 230 240V 50Hz 1ph L1 Neutral an...

Page 60: ... 3 5 4 5 10A 3 pole 14 2 5 230 240V 50Hz 3ph L1 L2 L3 and ground 3 5 4 9 10A 3 pole 14 2 5 380V 50 or 60Hz 3ph L1 L2 L3 and ground 1 8 2 1 10A 3 pole 14 2 5 400 415V 50Hz 3ph L1 L2 L3 and ground 1 8 2 1 10A 3 pole 14 2 5 440V 60Hz 3ph L1 L2 L3 and ground 1 9 2 1 10A 3 pole 14 2 5 460 480V 60Hz 3ph L1 L2 L3 and ground 1 9 2 1 10A 3 pole 14 2 5 N A Not Applicable Table 9 F75 Gas Models Only Serial P...

Page 61: ... 44 60A 3 pole 6 16 440V 60Hz 3ph L1 L2 L3 and ground 41 41 50A 3 pole 6 16 480V 60Hz 3ph L1 L2 L3 and ground 38 38 50A 3 pole 6 16 Table 11 Eco Line 075 Series Electric Models Serial Plate Rating Terminal Block Con nections Required Serial Plate Amps Recommended Circuit Nonrevers ing Revers ing Breaker Rating Wire Size AWG mm2 200 208V 60Hz 3ph L1 L2 L3 and ground 63 63 80A 3 pole 4 25 240V 60Hz ...

Page 62: ...and steam return line it is recommended that each have a pipe union and shut off valve This will ena ble you to disconnect the steam connections and service the tumble dryer while your laundry facility is in operation Connect the steam solenoid valve to the related steam coil in let connection with nipples flex hoses unions and tees Strainers may require cleaning due to materials from hoses or pip...

Page 63: ...ly 2 12 in 305 mm Riser 3 Shut Off Valve 4 Condensate Return Line from Supply Line 5 Return 6 Check Valve 7 Vacuum Breaker Optional 8 18 in 457 mm Drop 9 Solenoid Valve Supplied with machine 10 Steam Bonnet 11 Flexible Line 12 Union 13 Trap with Built In Strainer Figure 29 Steam Requirements Copyright Alliance Laundry Systems LLC DO NOT COPY or TRANSMIT 63 Part No 70457901ENR12 ...

Page 64: ...ondensate return lines The following steps outline the procedure for installing the steam trap and con necting the condensate return lines Refer to Figure 29 for typical installations 1 Use flexible lines between steam inlet solenoid and steam coils as well as outlet between steam coil and traps 2 If necessary install a strainer at the end of each flexible hose 3 Install a steam trap to each strai...

Page 65: ...en for each coin pulse The additional drying time is add ed to the factory default minimum heat time of one minute A value of 1 to 64 minutes of additional drying time is available for each coin drop pulse Models Through Serial No 0908xxxxx The last two switches are used to program the amount of addi tional cool down time The additional cool down time is added to the factory default minimum cool d...

Page 66: ... 3 OFF ON OFF OFF OFF OFF 4 ON ON OFF OFF OFF OFF 5 OFF OFF ON OFF OFF OFF 6 ON OFF ON OFF OFF OFF 7 OFF ON ON OFF OFF OFF 8 factory de fault ON ON ON OFF OFF OFF 9 OFF OFF OFF ON OFF OFF 10 ON OFF OFF ON OFF OFF 11 OFF ON OFF ON OFF OFF 12 ON ON OFF ON OFF OFF 13 OFF OFF ON ON OFF OFF 14 ON OFF ON ON OFF OFF 15 OFF ON ON ON OFF OFF 16 ON ON ON ON OFF OFF 17 OFF OFF OFF OFF ON OFF 18 ON OFF OFF OF...

Page 67: ...32 ON ON ON ON ON OFF 33 OFF OFF OFF OFF OFF ON 34 ON OFF OFF OFF OFF ON 35 OFF ON OFF OFF OFF ON 36 ON ON OFF OFF OFF ON 37 OFF OFF ON OFF OFF ON 38 ON OFF ON OFF OFF ON 39 OFF ON ON OFF OFF ON 40 ON ON ON OFF OFF ON 41 OFF OFF OFF ON OFF ON 42 ON OFF OFF ON OFF ON 43 OFF ON OFF ON OFF ON 44 ON ON OFF ON OFF ON 45 OFF OFF ON ON OFF ON 46 ON OFF ON ON OFF ON 47 OFF ON ON ON OFF ON Table continues ...

Page 68: ...N ON OFF ON ON 56 ON ON ON OFF ON ON 57 OFF OFF OFF ON ON ON 58 ON OFF OFF ON ON ON 59 OFF ON OFF ON ON ON 60 ON ON OFF ON ON ON 61 OFF OFF ON ON ON ON 62 ON OFF ON ON ON ON 63 OFF ON ON ON ON ON 64 ON ON ON ON ON ON Cool Down Per Cycle in minutes Cool Down Switch Number 7 8 1 factory default OFF OFF 2 ON OFF 3 OFF ON Table continues Single Drop Timer Copyright Alliance Laundry Systems LLC DO NOT ...

Page 69: ...e that allows the temperature selector switches to be tested When the temperature selector is changed the new setting is dis played by flashing the IN USE LED as follows High Normal 4 flashes Table continues Medium PP 3 flashes Low Delicate 2 flashes No Heat 1 flash NOTE To change dipswitch settings refer to Dipswitch Settings section To Program a Short Test Cycle 1 Unplug machine power cord 2 Wri...

Page 70: ...ART pad or button NOTE Activation of the emergency stop button stops all machine control circuit functions but DOES NOT remove all electrical power from ma chine Operating Instructions WARNING To reduce the risk of fire electric shock or injury to persons read the IMPORTANT SAFETY INSTRUC TIONS before operating this appliance W727 IMPORTANT This appliance shall not be used to dry off solvents or d...

Page 71: ...en switched to nonreversing it will continue for a few seconds and then start up in the proper di rection Refer to Programming Manual for more information on reversing IMPORTANT After any electrical maintenance is done make sure that the blower motor is turning clockwise as viewed from the front of the 050 and 075 series tum ble dryers and counterclockwise on the F75 tumble dryers Then set the rev...

Page 72: ...remove the laun dry WARNING To prevent the risk of fire remove laundry imme diately in case of power failure W779 NOTE This machine includes an anti wrinkle ex tended tumble feature After the drying cycle is complete the cylinder will tumble without heat ev ery few minutes The intermittent tumbling will con tinue for one hour or until the door is opened Anti wrinkle feature will tumble the load wi...

Page 73: ...W or NO HEAT for items that should not be dried with heat A light to the left of the se lected pad lights up HIGH Temperature 180 F 82 C MEDIUM Temperature 160 F 71 C MED LOW Temperature 140 F 60 C LOW Temperature 120 F 49 C To use a Time Dry or Custom Cycle refer to the Programming Manual TMB1483N_SVG Figure 37 NOTE Do not press directly on lights or the center of pad For proper selection press o...

Page 74: ... perature knob HIGH Temperature 190 F 88 C MED Temperature 160 F 71 C LOW Temperature 130 F 54 C TMB2147N_SVG Figure 42 2 Insert the coin s in the coin slot TMB1492N_SVG Figure 43 3 Press START button to start tumble dryer TMB2150N_SVG Figure 44 IMPORTANT To stop the tumble dryer at any time during the cycle OPEN DOOR To restart the tumble dryer CLOSE door and press START button 4 When the cycle i...

Page 75: ... temperature pad HIGH Temperature 190 F 88 C MED Temperature 180 F 82 C LOW Temperature 160 F 72 C DELICATES Temperature 130 F 54 C 2 Insert the coin s in the coin slot or card into the card opening 3 Press START pad to start tumble dryer IMPORTANT To stop the tumble dryer at any time during a cycle OPEN DOOR To restart the tumble dryer CLOSE door and press START pad 4 When the cycle is complete o...

Page 76: ...ORTANT To stop the tumble dryer at any time during a cycle OPEN DOOR To restart the tumble dryer CLOSE door and press START pad 4 When the cycle is complete open door and remove the laun dry WARNING To prevent the risk of fire remove laundry imme diately in case of power failure W779 NOTE This machine includes an extended tumble feature Starting 20 minutes after a cycle ends the cylinder will tumb...

Page 77: ... and remove laundry WARNING To prevent the risk of fire remove laundry imme diately in case of power failure W779 NOTE This machine includes an anti wrinkle extended tumble feature After the drying cycle is complete the cylinder will tumble without heat ev ery few minutes The intermittent tumbling will con tinue for one hour or until the door is opened After an hour the machine enters delayed tumb...

Page 78: ...2 P Models Through 5 31 15 START BACK STOP TMB2369N_SVG Figure 53 L Models Through 5 31 15 TMB2370N_SVG START STOP BACK Figure 54 L and P Models Starting 6 1 15 TMB1464R_SVG Figure 55 UniLinc Control Operating Instructions Copyright Alliance Laundry Systems LLC DO NOT COPY or TRANSMIT 78 Part No 70457901ENR12 ...

Page 79: ...ti wrinkle extended tumble feature After the drying cycle is complete the cylinder will tumble without heat ev ery few minutes The intermittent tumbling will con tinue for one hour or until the door is opened After an hour the machine enters delayed tumble and will tumble for two minutes every hour for up to 18 hours or until the door is opened TMB1276C_SVG Figure 56 DX4 Coin Control 3B 3K 3L 3V 3...

Page 80: ...76 F 80 C 35 min 2 min Table 16 IMPORTANT To stop the tumble dryer at any time during the cycle OPEN DOOR To restart the tumble dryer CLOSE door and press START button 3 When the cycle is complete open door and remove the laun dry WARNING To prevent the risk of fire remove laundry imme diately in case of power failure W779 Diagnostic Microprocessor Control General Operation The Diagnostic Micropro...

Page 81: ...rammed correctly the display will flash E2F for 4 seconds and the default set tings will be used Follow steps 4 through 7 to reprogram any program number When finished set DIP switch 8 to OFF The programs are now stored 8 During the Program Mode if the Up Down arrows REV or Display button is not pressed within 10 seconds the default program settings will be used 9 Temporary Reprogramming of Curren...

Page 82: ...light appears either the sensor is out of range or the key pulley or the sensor is bad In addition if the light stays on continuously then the sensor is too close to the component or the sensor is bad Safety Tumble Anti Wrinkle At the end of the cool down cycle the tumble dryer will stop and display END The DMP control will automatically rotate the basket for 5 seconds every 2 minutes for a total ...

Page 83: ...ogram LEDs Illumination shows which user program is currently being displayed 9 Display Select Toggles the display between the drying time cooling time and temperature settings Pressing the Display but ton for 3 seconds allows the user to display the drying cycle temperature 10 DRYING LED Illuminated when in the drying cycle 11 COOLING LED Illuminated when in the cooling cycle or when the display ...

Page 84: ... Timer This DIP switch determines the length of time that the end of cycle buzzer will remain on OFF indicates that the buzzer will sound for 5 seconds when the drying cy cle is completed ON indicates that the buzzer will sound continuously until the STOP button is pressed or the loading door is opened 7 Safety Tumble OPL or Coin count Pay Coin If DIP switch 1 is set for OPL then DIP switch 7 in t...

Page 85: ...r coin and the number of coins deposited into the tum ble dryer The maximum time that can be accumulated and dis played is 99 minutes The drying time is the difference between the run time and the cooling time The cooling time is pre pro grammed to be 2 to 5 minutes The drying temperature can be se lected from LOW MEDIUM or HIGH temperature settings by pressing the TEMP button Coin Programming The...

Page 86: ...d tight Verify all system wiring is correct Verify there is a proper system ground The igniter flame sen sor and igniter module must share a common ground with the burner Nuisance shutdowns are often caused by a poor or erratic ground Verify that the system is powered and that the control is calling for heat If the control proceeds to an error code on the red diagnostic LED troubleshoot per the Fa...

Page 87: ...mbly is important for optimal system performance The electrode assembly should be located so that the tips are inside the flame envelope and about 1 2 inch 1 2 cm above the base of the flame Refer to Figure 61 TMB2317K_SVG Figure 61 Flame Current Measurement Flame current is the current that passes through the flame from sensor to ground To measure flame current connect a True RMS or analog DC mic...

Page 88: ...gnostic LED on the ignition control will turn or ange yellow If a fault is detected the ignition control will enter Lockout Mode If no faults are detected the Diagnostic LED will turn Green and the ignition control will enter Standby Mode Standby Mode While in Standby Mode the ignition control will continually monitor the system for faults Once 24VAC is applied to termi nals TH and GND on the cont...

Page 89: ...c LED displaying Error Code 2 Flame Probe Tests The Unexpected Presence of Flame test is performed when no flame is expected Failure of this test results in the ignition con trol entering Lockout Mode with the Diagnostic LED displaying Error Code 3 During the Flame Monitoring test the flame is checked to ensure the gas is being burned when the gas valve is on Failure of this test will result in th...

Page 90: ... up air and line gas pressure Opening the shutter increases the amount of primary air supplied to the burner while closing the shutter decreases the primary air supply Adjust air shutter as fol lows Refer to Figure 64 1 Open the access panel and remove the burner inspection hole plate TMB2410N_SVG Figure 63 2 Start the tumble dryer and check the flame pattern If the flame pattern is straight up in...

Page 91: ...f a load not drying the airflow switch bracket may need to be checked for proper alignment Be sure the locator pins are securely in their respective holes before tightening the bracket mounting screws This will assure proper alignment of the airflow switch arm in the channel of the airflow switch bracket and prevent binding of the arm Loading Door Switch The door switch should be adjusted so the c...

Page 92: ...h 2 Door Catch 3 Acorn Nut Figure 66 Drive Belt Nonreversing Models 1 Remove guard from rear of tumble dryer 2 To adjust belt tension loosen idler housing bolts holding idler housing assembly to the guide rails 3 Position housing assembly by turning adjusting bolt until proper belt tension is reached then retighten idler housing bolts 4 Replace the guard on rear of tumble dryer TMB2412N_SVG 1 2 3 ...

Page 93: ...ls 3 Position housing assembly by turning adjusting bolt until proper belt tension is reached then retighten idler housing bolts NOTE Adjusting the cylinder belt tension will change the drive tension Drive belt tension must al so be adjusted 4 Loosen the locking bolt 5 Loosen the adjusting nut and use the adjusting screw to move the motor up or down 6 Once proper belt tension is reached retighten ...

Page 94: ...ld detergent Rinse with clean water DO NOT use products that contain alcohol on the control panel TMB2281N_SVG1 4 2 1 3 1 Thermistor 2 Thermostat 3 Blower 4 Lint Screen Figure 69 Monthly 1 Remove lint and debris from inside exhaust duct to maintain proper airflow and avoid overheating a Remove external duct and duct access covers if present b Clean inside of duct with a vacuum c Clean dampers and ...

Page 95: ... but is easily accessible to person performing tests NOTE Failure to maintain the fire suppression system will void the tumble dryer warranty NOTE The auxiliary output is activated during the fire suppression system maintenance test sequence Con sider this fact prior to testing the system every three months Example If the external system uses the auxiliary output to call the fire department inform...

Page 96: ...um Weight lbs kg lbs kg lbs kg 50 25 11 40 44 18 20 35 16 75 40 18 57 61 26 28 52 24 Table 18 9 Clean up any water on the floor 10 Lock the fire suppression system control box 11 If the separate alarm option is being used reconnect the auxil iary alarm output 12 Start the tumble dryer to dry the test load 13 On maintenance record check box if fire suppression system passed the test date and sign r...

Page 97: ...y into the elec trical outlet Drying timer is in OFF position Check the main fuse and circuit breaker Check fuses located in the machine Insufficient airflow Gas shut off valve in OFF position Are controls properly set Broken drive belt Call the service person Tumble dryer is in Cool Down Mode Lint screen clogged Clean lint screen Exhaust duct to outside is blocked Clean out Before You Call for Se...

Page 98: ...t on machine 3 Turn off gas supply external to machine 4 Turn off manual gas shut off valve on machine 5 Turn off steam supply external to machine 6 Remove all electric gas and steam connections Removing Tumble Dryer from Service Copyright Alliance Laundry Systems LLC DO NOT COPY or TRANSMIT 98 Part No 70457901ENR12 ...

Page 99: ...ent En suring this product is disposed of correctly will help prevent po tential negative consequences for the environment and human health which could otherwise be caused by inappropriate waste handling of this product The recycling of materials will help to conserve natural resources For more detailed information about recycling of this product please contact the local city office household wast...

Reviews: