


ALIEN HERO INSTRUCTION MANUAL
1
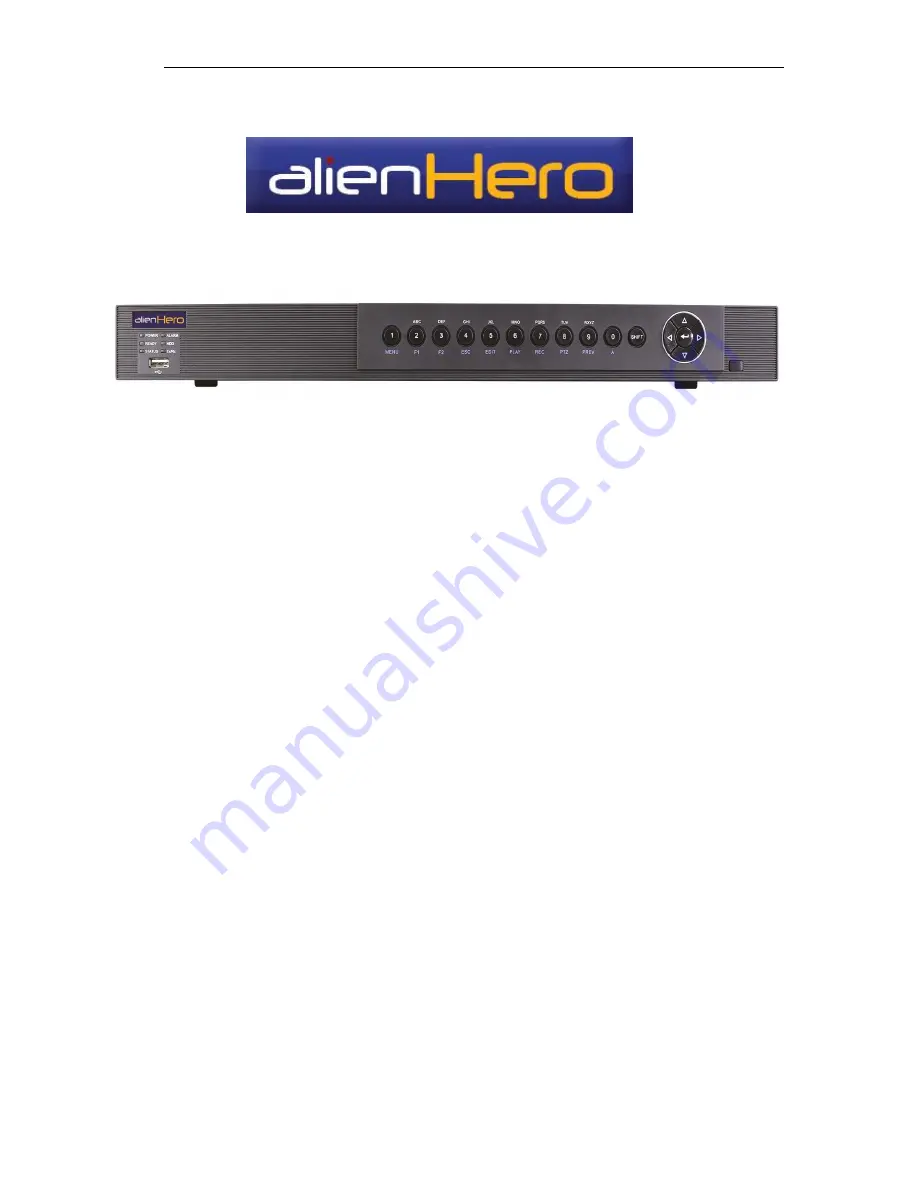
Models
ALIEN654 ALIEN658 ALIEN666
ALIEN674(HD) ALIEN678(HD)
Operations Manual
Alien Hero models
1080P recording at 12fps per channel on HD model –
4CIF recording at 25fps per channel on Stnd models -
Supports Universal Plug & Play for Port Forwarding –
2 x Hard Drive bays in 8 and 16 channel units –
Uses up to 4Tb per Hard Drive -
HDMI and VGA video outputs on HD model-
HDMI, VGA & Composite on Stnd models
Instant Detective –
Network access from IPhone, IPAD &
Android phones
Version 1.0


