background image

Owner’s Instructions

PT50DL24 
PT61DL34

This device is a Class B digital apparatus.

BP68-00548B-00Eng(cover)  5/9/06  4:07 PM  Page 3

Summary of Contents for PT50DL24

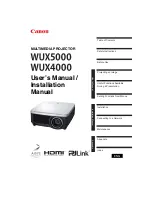
Page 1: ...Owner s Instructions PT50DL24 PT61DL34 This device is a Class B digital apparatus ...

Page 2: ...d parties In particular this product is licensed under the following US patents 5 991 715 5 740 317 4 972 484 5 214 678 5 323 396 5 539 829 5 606 618 5 530 655 5 777 992 6 289 308 5 610 985 5 481 643 5 544 247 5 960 037 6 023 490 5 878 080 and under US Published Patent Application No 2001 44713 A1 This license is limited to private non commercial use by end user consumers for licensed contents No ...

Page 3: ...y it was originally encoded for broadcast This is a big advantage for DTV over analog TV there is no noise ghosting static or scratchy audio 3 How can I connect an antenna in my townhouse co operative apartment condominium or apartment The Federal Communications Commission s OTARD Rule part of the Telecommunications Act of 1996 allows residents of condominiums townhouse or members of neighborhood ...

Page 4: ...Jacks 21 Connecting a DTV Set Top Box 22 Connecting to Y PB PR 22 Connecting to HDMI High Definition Multimedia Interface 22 Connecting to DVI Digital Visual Interface 23 Connecting a Digital Audio System 23 Connecting to an Analog Amplifier 24 Operation 26 Turning the TV On and Off 26 Plug Play Feature 26 Viewing the Menus and On Screen Displays 29 Selecting a Menu Language 30 Memorizing the Chan...

Page 5: ...d Reset 82 Special Features 84 Setting the Function Help 84 Menu Transparency Level 85 Using Game Mode 86 Using the V Chip 87 Using the V Chip for Digital channels 97 Viewing Closed Captions On Screen Text Messages 99 Viewing Closed Captions On Screen Text Messages 101 PC Display 104 Using Your TV as a Computer PC Display 104 Adjusting the Picture Quality 107 Changing the Picture Position 108 Adju...

Page 6: ...AKAI ...

Page 7: ...Your New Wide TV ...

Page 8: ...f time sit as far back from the screen as possible Your New Wide TV English 8 When installing the product make sure to keep it away from the wall more than 10 cm 4 inches for ventilation purposes Poor ventilation may cause an increase in the internal temperature of the product resulting in a shortened component life and degraded performance ...

Page 9: ...sible A built in multi channel sound decoder for stereo and bilingual listening Built in dual channel speakers A special sleep timer Widescreen TV with adjustable image size Life like clear images provided by DCE technology My Color Control Mode for corresponding with your color style Color weakness Mode Digital Input jack Digital Audio Output OPTICAL jack Game Mode Checking Accessories Antenna Ca...

Page 10: ...lower the volume and to select items when using the on screen menu Press to change channels and move between items on the on screen menu Press to activate or change a particular item Side Panel Jacks Use the right side panel jacks to connect a component that is used only occasionally a camcorder or video game for example The product color and shape may vary depending on the model Connect the video...

Page 11: ...p cover on the rear of the set is not properly shut Check if the ventilation hole on the rear of the set is blocked because if the inner temperature is too high the power will shut off Lamp may be defective Please contact a certified technician LAMP STAND BY TEMP Indication Light is On Light is Blinking Light is Off It takes about 30 seconds for the TV to warm up so normal brightness may not appea...

Page 12: ...CR or DVD players Refer to pages 19 and 21 VIDEO AUDIO output jacks Sends video audio signals from the TV to an external source such as a VCR These jacks are available only in TV Video and S Video modes Refer to pages 19 and 24 COMPONENT IN 1 2 jacks Y PB PR AUDIO L R Use these jacks to connect the component video audio signals from a DVD player or a Set Top Box Refer to pages 21 22 PC VIDEO Input...

Page 13: ...t Refer to page 75 15 MTS Multichannel Television Stereo Press to choose Stereo Mono or SAP Secondary Audio Program 16 Mode TV DVD STB CABLE VCR Selects a target device to be controlled by the AKAI remote control i e TV DVD STB CABLE or VCR 17 SOURCE Press to display all of the available video sources TV AV1 AV2 AV3 S Video1 S Video2 S Video3 Component1 Component2 PC HDMI1 and HDMI2 18 PRE CH Tune...

Page 14: ...nd new batteries in the remote control If you won t be using the remote control for a long time remove the batteries and store them in a cool dry place 1 Lift the cover at the back of the remote control upward as shown in the figure 2 Install two AAA size batteries Make sure to match the and ends of the batteries with the diagram inside the compartment 3 Close the cover as shown in the figure NOTE...

Page 15: ...Connections ...

Page 16: ...nnas If you do not have a cable system you will need to connect an antenna to your TV Antennas with 75 ohm Round Leads If your antenna looks like this it has 75 ohm round leads 1 Plug the antenna lead into the ANT 2 IN AIR on the rear panel of your TV ...

Page 17: ...ble without a Cable Box 1 Plug the incoming cable into the ANT 1 IN CABLE on the rear panel of your TV Cable with a Cable Box that Descrambles All Channels 1 Find the cable connected to the ANTENNA OUT terminal on your Cable box This terminal might be labeled ANT OUT VHF OUT or simply OUT 2 Connect the other end of the cable to the ANT 1 IN CABLE terminal on the rear panel of your TV ...

Page 18: ...minal of the splitter and the IN terminal of the Cable box 3 Connect a coaxial cable between the ANTENNA OUT terminal of the Cable box and the B IN terminal of the RF A B switch 4 Connect another cable between the other OUT terminal on the splitter and the A IN terminal on the RF A B switch 5 Connect the last coaxial cable between the OUT terminal of the RF A B switch and the ANT 1 IN CABLE on the...

Page 19: ...oded input terminals and cable jacks TV Rear Panel Incoming Cable or Antenna Stereo VCR or 2 1 Connecting a Second VCR to Record from the TV 1 Connect a video cable between the VIDEO OUT jack on the TV and the VIDEO input jack on the VCR 2 Connect a set of audio cables between the AUDIO OUT jacks on the TV and the AUDIO input jacks on the VCR NOTES Refer to your VCR s instructions for more informa...

Page 20: ...corder If you have a mono Camcorder connect L mono to the Camcorder audio out using only one audio cable 3 Connect a video cable between the VIDEO IN or S VIDEO IN jack on the TV and the VIDEO or S VIDEO output jack on the Camcorder The audio video cables shown here are usually included with a Camcorder If not check your local electronics store If your Camcorder is stereo you need to connect a set...

Page 21: ... Y CB CR OUT jacks on the DVD player Connecting to Audio and Video Jacks 1 Connect a set of audio cables between the AUDIO IN 1 or 2 jacks on the TV and the AUDIO OUT jacks on the DVD player 2 Connect a video cable between the VIDEO IN 1 or 2 jack on the TV and the VIDEO OUT jack on the DVD player NOTES Component Video separates the video into Y Luminance Brightness PB Blue and PR Red for enhanced...

Page 22: ...jacks on the Set Top Box NOTE Please be sure to match the color coded input terminals and cable jacks Connections English 22 TV Rear Panel DTV Set Top Box Incoming Cable or Antenna 1 2 Connecting to HDMI High Definition Multimedia Interface 1 Connect an HDMI cable between the HDMI IN 1 jack on the TV and the HDMI OUT jack on the Set Top Box NOTE Make sure the HDMI DVI source s power is on or you w...

Page 23: ...re are many types of digital audio systems on the market today A simplified illustration of an audio system is shown below For more information see your audio system owner s manual 1 If your audio system has an optical digital audio input connect to the DIGITAL AUDIO OUT OPTICAL jack on the TV NOTES OPTICAL converts the electric signal into an optical light signal and transmits it through glass fi...

Page 24: ... using the HDMI DVI PC or Component input on the TV the audio output signal is available only when the TV s Internal Mute is set to on Refer to page 79 Connections English 24 TV Rear Panel Amplifier 1 When Internal Mute is set to On Sound menus except Multi Track Options cannot be adjusted RF AV S Video Component PC HDMI Internal Mute Off Internal Mute On Internal Speakers Internal Mute Off Intern...

Page 25: ...Operation ...

Page 26: ...ton to select language then press the ENTER button Selects the antenna to execute the Auto Program Function menu is automatically displayed 3 Press the or button to memorize the channels of the selected connection Press the ENTER button to select Start Continued Plug Play Skip Select the language of the OSD Language English Español Français Plug Play Enter Skip Air Cable Air Cable Selects the ante...

Page 27: ...mode is automatically displayed 6 Press the ENTER button to select Clock Mode Press the or button to select Auto or Manual then press the ENTER button Continued Plug Play Enter Skip Selects a cable signal type for your location Move Start HRC IRC Auto Program Skip Auto Program is incomplete 14 channels are memorized Air 9 Cable 5 Plug Play Sets the current time manually or automatically Clock Mode...

Page 28: ...there is a difference between the real time and set time please set the time manually Plug Play Enter Skip Select the time zone where you are located Move Newfoundland Atlantic Eastern Central Mountain Pacific Alaska Hawaii Plug Play Set to daylight saving time DST Enjoy your watching i OK Option 2 Setting the Clock Manually If you set Clock Mode to Manual in step 6 follow the instructions below 7...

Page 29: ...ups Input Picture Sound Channel and Setup 2 Press the or button to select an item you want in the menu Press the œ or ENTER button to display change or use the selected items Use the ENTER button to enter items in the menu 3 Press the EXIT button to exit Viewing the Display Press the INFO button on the remote control The TV displays the current channel the status of certain picture sound settings ...

Page 30: ...Press the or button to select English Español or Français then press the ENTER button Press the EXIT button to exit Setup Language English Time Game Mode Off V Chip Caption MenuTransparency Medium Blue Screen Off Move Enter Return Setup Language English Time Game Mode Off V Chip Caption MenuTransparency Medium Blue Screen Off Move Enter Return More More English Español Français ...

Page 31: ...on to select Antenna Press the or button to select Air or Cable then press the ENTER button 3 Press the or button to select Auto Program then press the ENTER button Continued NOTE All available DTV and analog channels are automatically stored in memory Selecting the Video Signal Source Before your television can begin memorizing the available channels you must specify the type of signal source tha...

Page 32: ...stems Contact your local cable company to identify the type of cable system that exists in your particular area At this point the signal source has been selected Auto Program Move Enter Return The TV must be connected to an antenna in order to receive digital TV signals Even if a particular channel is deleted from the memory you can always tune to that channel directly by using the number buttons ...

Page 33: ... press 7 then then 1 For channel 7 2 analog press 7 then then 2 Using the Previous Channel Press the PRE CH button The TV changes to the last channel you were watching Press the CH or CH button to change channels Press the number buttons to go directly to a channel For example to select channel 27 press 2 then 7 The TV will change channels when you press the second number NOTE HD indicates the TV ...

Page 34: ...l 3 Press the SET button on your TV s remote control 4 Using the number buttons on your remote control enter three digits of the VCR code listed on page 38 of this manual for your brand of VCR Make sure you enter three digits of the code even if the first digit is a 0 If more than one code is listed try the first one 5 Press the POWER button on the remote control Your VCR should turn on if your re...

Page 35: ...enter three digits of the code even if the first digit is a 0 If more than one code is listed try the first one 5 Press the POWER button on the remote control Your cable box should turn on if your remote is set up correctly If your cable box does not turn on after set up repeat steps 2 3 and 4 but try one of the other codes listed for your brand of cable box If no other codes are listed try each c...

Page 36: ... you enter three digits of the code even if the first digit is a 0 If more than one code is listed try the first one 5 Press the POWER button on the remote control Your DVD should turn on if your remote is set up correctly If your DVD does not turn on after set up repeat steps 2 3 and 4 but try one of the other codes listed for your brand of DVD If no other codes are listed try each code 000 throu...

Page 37: ...you enter three digits of the code even if the first digit is a 0 If more than one code is listed try the first one 5 Press the POWER button on the remote control Your STB should turn on if your remote is set up correctly If your STB does not turn on after set up repeat steps 2 3 and 4 but try one of the other codes listed for your brand of STB If no other codes are listed try each code 000 throug...

Page 38: ... 018 026 037 070 025 038 025 081 082 083 021 056 059 007 008 018 021 026 037 062 006 036 073 074 075 076 021 006 021 024 025 034 005 019 041 075 Brand MITSUBISHI MONTGOMERY WARD MTC MULTITECH NEC OPTIMUS PANASONIC PENTAX PENTEX RESEARCH PHILCO PHILIPS PIONEER PORTLAND PROSCAN QUARTZ QUASAR RADIOSHACK REALISTIC RCA SANSUI SANYO SCOTT SEARS SHARP SHIMTOM SIGNATURE SONY SYLVANIA SYMPHONIC TANDY TASHI...

Page 39: ...HDDCOMBOPremium Code 010 011 012 013 014 SET TOP BOX Code 023 043 018 034 019 035 015016017019022045060061062065066067 068 074 069 070 069 018 024 032 027 025 069 070 071 069 069 065 046 047 048 063 064 069 056 022 015 017 020 020 059 063 069 070 Brand ALPHASTAR ANAM CHANNEL MASTER CROSSDIGITAL CHAPARRAL DIRECT TV DAEWOO DISHNETWORKSYSTEM DISHPRO DRAKE DX ANTENNA ECHOSTAR EXPRESSVU GOI GE GENERALI...

Page 40: ...S MATHES CYBER HOME CLARION CIRRUS CINEVISION DAEWOO DENON FARENHEIT FISHER GPX GO VIDEO GE GREENHILL HITACHI HITEKER HOYO HARMAN KARDON IRT INTEGRA JBL JVC JATON KENWOOD KISS KONKA KLH LG Goldstar LOEWE LASONIC MOBILE AUTHORITY MEMOREX MALATA MAGNAVOX MINTEK MONYKA Brand NORCENT NEXT BASE NEC NANTAUS NESA OPTOMEDIA ELECTRONICS OPTIVIEW ONKYO PHILCO PRINCETON PROSCAN PANASONIC PHILIPS ROTEL RIO RC...

Page 41: ...h Day Year Hour Minute or am pm Set the clock you want by pressing the or button then press the ENTER button Press the EXIT button to exit Option 1 Setting the Clock Manually You can set the month day year hour and minute directly by pressing the number buttons on the remote control Time Clock SleepTimer Off OnTimer Inactivated OffTimer Inactivated Move Enter Return Clock Clock Mode Auto Clock Set...

Page 42: ...utton 5 Press the or button to select DST Daylight Saving Time then press the ENTER button Press the or button to select Off or On then press the ENTER button Press the EXIT button to exit When you set up Auto Time the set time may not be correct depending on the broadcasting station and signal If there is a difference between the real time and set time please set the time manually Clock Clock Mod...

Page 43: ...with the setting entered set Activation to Yes by pressing or button When finished press the EXIT button to exit You can set the hour minute and channel directly by pressing the number buttons on the remote control On Timer Move Adjust Return Enter the OnTimer options Channel Volume Activation 3 10 No Hour Minute am pm Antenna 12 00 am Air Off Timer Move Adjust Return Enter the OffTimer options Ho...

Page 44: ...Activation to Yes automatically Press the EXIT button to exit Alternate method Press the SLEEP button on the remote control repeatedly until the appropriate time interval appears any of the preset values from 30min to 180min Time 1 1 2005 12 00 am Clock SleepTimer Off OnTimer Inactivated OffTimer Inactivated Move Enter Return Sleep Timer Move Adjust Return Sets the SleepTimer options Minute Activa...

Page 45: ...RCE button on the remote control repeatedly to select an external signal source NOTES Only connected devices can be selected Before selecting an input source connect an external device first HDMI input can be selected only when the external device is turned on and connected to the TV AV1 When you connect equipment to the TV you can choose between the following sets of jacks AV1 AV2 S VIDEO1 S VIDE...

Page 46: ...TB PVR STB AV Receiver DVD Receiver Game Camcorder DVD Combo DVD HDD Recorder PC Internet TV Recv Interactive TV Recv VOD Video On Demand STB TV Press the ENTER button Set other signal sources AV2 AV3 S Video1 S Video2 S Video3 Component1 Component2 PC HDMI1 HDMI2 using the same method as listed above Press the EXIT button to exit Input Source List TV Edit Name Move Enter Return Input Source List ...

Page 47: ...Channel Control ...

Page 48: ... NOTE Only memorized channels can be set as favorite channels Channel Control Selecting Your Favorite Channels You can store your favorite channels for each available input source such as TV and Cable box Then when you press the FAV CH button on the remote control the TV displays only the favorite channels you previously stored allowing you to quickly and easily find frequently watched channels Pr...

Page 49: ...NOTE Watch Add Delete or Favorite setting on the channel is available in the Favorite channel list To Watch Favorite channels Press the FAV CH button repeatedly to jump from one favorite channel to another Channel Antenna Air Auto Program Channel Manager Name FineTune Signal Strength LNA On Move Enter Return Channel Manager All Added Favorite Default List mode All Move Enter Return Channel Manager...

Page 50: ... All Channel List the Added Channel List or the Favorite Channel List is selected sequentially Yellow button Press to delete all channels memorized Alternate method Press the CH MGR button on the remote control to display a list of channels Channel Antenna Air Auto Program Channel Manager Name FineTune Signal Strength LNA On Move Enter Return Channel Manager All Added Favorite Default List mode Al...

Page 51: ...select Added then press the ENTER button All channels on the Channel Manager are added and displayed Press the œ button to select a channel then press the ENTER button and an option window will appear Continued Channel Antenna Air Auto Program Channel Manager Name FineTune Signal Strength LNA On Move Enter Return Channel Manager All Added Favorite Default List mode All Move Enter Return Channel Ma...

Page 52: ...e All Channel List the Added Channel List or the Favorite Channel List is selected sequentially Press the EXIT button to exit Channel Manager Added List Mode Delete All Move Enter Return Air 2 Air 2 Air 3 Air 4 Air 5 Air 6 Air 7 Air 8 Air 9 Air 10 Air 11 Air 12 Air 13 Air 14 Air 15 Air 16 Watch Add Delete Favorite Channel Manager Added List Mode Add All Delete All Move Enter Return Air 2 Air 2 Air...

Page 53: ...en press the ENTER button All All of the memorized channels Added Added channels Favorite Favorite channels 4 Press the CH MGR button on the remote control then Default List mode will be displayed Channel Antenna Air Auto Program Channel Manager Name FineTune Signal Strength LNA On Move Enter Return Channel Manager All Added Favorite Default List mode All Move Enter Return Channel Manager All Adde...

Page 54: ...a blank Results in this sequence A Z 0 9 blank 4 Press the button to switch to the next field which will be selected Select a second letter or digit pressing or button as above Repeat the process to select the last three digits Press the ENTER button After all settings are completed select OK using the button Press the ENTER button to save the settings and return to the previous menu To erase the ...

Page 55: ... fine tuning setting press the button to select Reset then press the ENTER button 5 Press the EXIT button to exit NOTES Only analog TV channels can be fine tuned will appear next to the name of fine tuned channels Channel Antenna Air Auto Program Channel Manager Name FineTune Signal Strength LNA On Move Enter Return Channel Antenna Air Auto Program Channel Manager Name FineTune Signal Strength LNA...

Page 56: ...he or button to select Channel then press the ENTER button 2 Press the or button to select Signal Strength then press the ENTER button If the signal strength meter indicates that the signal is weak physically adjust your antenna to increase the signal strength Continue to adjust the antenna until you find the best position with the strongest signal Press the EXIT button to exit Channel Antenna Air...

Page 57: ...the ENTER button 4 Press the EXIT button to exit NOTES LNA functions only when antenna is set to Air The settings will be stored separately in each channel If the picture is noisy with the LNA set to On select Off The LNA setting needs to be set individually for each channel Channel Antenna Air Auto Program Channel Manager Name FineTune Signal Strength LNA On Move Enter Return Channel Antenna Air ...

Page 58: ...AKAI ...

Page 59: ...Picture Control ...

Page 60: ...epeatedly to select the desired picture mode Choose Dynamic for viewing the TV during the day or when there is a bright light in the room Choose Standard for general TV watching mode Choose Movie when viewing a movie Choose Custom if you want to adjust the settings according to personal preference see Customizing the Picture Settings page 61 Picture Mode Dynamic Size 16 9 Digital NR On DCE On My C...

Page 61: ...ghtness Sharpness Color Tint and Color Tone according to personal preference You can select Standard which automatically recalls your personalized picture settings Contrast 80 You can also select these options Contrast Brightness Sharpness Color or Tint by pressing the or button Picture Mode Dynamic Size 16 9 Digital NR On DCE On My Color Control Film Mode Off Move Enter Return Mode Mode Dynamic C...

Page 62: ...ress the EXIT button to exit The previously adjusted settings will be reset to the factory defaults Resetting the Picture Settings to the Factory Defaults Mode Mode Standard Contrast 80 Brightness 50 Sharpness 50 Color 50 Tint G R G50 R50 ColorTone Cool1 Reset Move Enter Return Mode Mode Standard Contrast 80 Brightness 50 Sharpness 50 Color 50 Tint G R G50 R50 ColorTone Cool1 Reset Move Enter Retu...

Page 63: ... mode Zoom1 Magnifies the size of the picture on screen Zoom2 Magnifies the size of the picture more than Zoom1 Wide Fit Enlarges the aspect ratio of the picture to fit the entire screen 4 3 Sets the picture to 4 3 normal mode NOTES You can select only the 16 9 and 4 3 screen sizes in the DTV Component 720p 1080i mode or HDMI 720p 1080i mode For Zoom1 and Zoom2 you can adjust the vertical position...

Page 64: ... the ENTER button 2 Press the or button to select Digital NR then press the ENTER button 3 Press the or button to select Off or On then press the ENTER button Press the EXIT button to exit Picture Mode Dynamic Size 16 9 Digital NR On DCE On My Color Control Film Mode Off Move Enter Return Picture Mode Dynamic Size 16 9 Digital NR On DCE On My Color Control Film Mode Off Move Enter Return Picture M...

Page 65: ...DCE then press the ENTER button 3 Press the or button to select Off Demo or On then press the ENTER button Off Switches off the DCE mode Demo The screen before applying DCE appears on the left and the screen after applying DCE appears on the right On Switches on the DCE mode Press the EXIT button to exit Picture Mode Dynamic Size 16 9 Digital NR On DCE On My Color Control Film Mode Off Move Enter ...

Page 66: ...the right side and an adjustment bar is shown on the bottom of the screen Press the ENTER button to accept the selected mode Press the EXIT button to exit Blue Emphasizes Clear Blues Green Emphasizes Mild Greens Pink Emphasizes Warm Skin Colors Standard Standard Picture Custom Customise Colors on the Screen NOTES Changing the settings in the Detail Control menu see next page will automatically set...

Page 67: ...etting the My Color Control Colors to the Factory Defaults You can return to the factory default settings for My Color Control colors 4 Press the MENU button to display the Detail Control menu Press the or button to select Reset then press the ENTER button The previously adjusted My Color Control colors will be reset to the factory defaults Press the EXIT button to exit Picture Mode Dynamic Size 1...

Page 68: ...ress the ENTER button 4 Press the or button to select a color to be adjusted then press the ENTER button Press the œ or button to adjust the value of the color selected Press the EXIT button to exit 0 Color Weakness Adjust Move Return Red Setup Language English Time Game Mode Off V Chip Caption MenuTransparency Medium Blue Screen Off Move Enter Return Setup Color Weakness PC Function Help On Move ...

Page 69: ... then press the ENTER button 3 Press the or button to select Off or On then press the ENTER button Press the EXIT button to exit NOTE Film mode is supported in 480i only Picture Mode Dynamic Size 16 9 Digital NR On DCE On My Color Control Film Mode Off Move Enter Return Picture Mode Dynamic Size 16 9 Digital NR On DCE On My Color Control Film Mode Off Move Enter Return Picture Mode Dynamic Size 16...

Page 70: ...rol English 70 Freezing the Picture Press the STILL button to freeze a moving picture Normal sound will still be heard To cancel this function press the STILL button again or press any button on the remote control ...

Page 71: ...on 2 Press the or button to select Blue Screen then press the ENTER button 3 Press the or button to select Off or On then press the ENTER button Press the EXIT button to exit Setup Language English Time Game Mode Off V Chip Caption MenuTransparency Medium Blue Screen Off Move Enter Return Setup Language English Time Game Mode Off V Chip Caption MenuTransparency Medium Blue Screen Off Move Enter Re...

Page 72: ...AKAI ...

Page 73: ...Sound Control ...

Page 74: ... again or press either the VOL or VOL button Customizing the Sound The sound settings can be adjusted to suit your personal preference Alternatively you can use one of the automatic settings See next page 1 Press the MENU button Press the or button to select Sound then press the ENTER button 2 Press the or button to select Equalizer then press the ENTER button Continued Mute Sound Mode Custom Equa...

Page 75: ...hen press the ENTER button 2 Press the ENTER button to select Mode Press the or button to select a particular item then press the ENTER button Press the EXIT button to exit Alternate method Press the S MODE button on the remote control repeatedly to select one of the standard sound settings NOTES Choose Standard for the standard factory settings Choose Music when watching music videos or concerts ...

Page 76: ...or button to select Sound then press the ENTER button 2 Press the or button to select Auto Volume then press the ENTER button 3 Press the or button to select Off or On then press the ENTER button Press the EXIT button to exit Sound Mode Custom Equalizer DSE Off Multi Track Options Auto Volume Off Internal Mute Off Melody On Reset Move Enter Return Sound Mode Custom Equalizer DSE Off Multi Track Op...

Page 77: ... button to exit Alternate method Press the MTS button on the remote control You can listen in a language other than the favorite language by pressing the MTS button NOTE You can only select the language from among the actual languages broadcast by the station For example if the current program is not broadcast in French yet you select French as your Preferred language you will hear the default lan...

Page 78: ...the MTS button on the remote control repeatedly to select an external signal source NOTES Choose Mono for channels that are broadcasting in mono or if you are having difficulty receiving a stereo signal Choose Stereo for channels that are broadcasting in stereo Choose SAP to listen to the Separate Audio Program which is usually a foreign language translation Sound Mode Custom Equalizer DSE Off Mul...

Page 79: ... the or button will alternate between Off and On Press the EXIT button to exit NOTES The VOL VOL and MUTE buttons do not operate when the Internal Mute is set to On When Internal Mute is set to On Sound menus except Multi Track Options cannot be adjusted Sound Mode Custom Equalizer DSE Off Multi Track Options Auto Volume Off Internal Mute Off Melody On Reset Move Enter Return Sound Mode Custom Equ...

Page 80: ...ess the or button to select Melody then press the ENTER button Press the or button to select Off or On then press the ENTER button Press the EXIT button to exit Sound Mode Custom Equalizer DSE Off Multi Track Options Auto Volume Off Internal Mute Off Melody On Reset Move Enter Return Sound Mode Custom Equalizer DSE Off Multi Track Options Auto Volume Off Internal Mute Off Melody On Reset Move Ente...

Page 81: ...ssing the or button will alternate between Off and On Press the EXIT button to exit Alternate method Press the DSE button on the remote control repeatedly to select Off or On Sound Mode Custom Equalizer DSE Off Multi Track Options Auto Volume Off Internal Mute Off Melody On Reset Move Enter Return Sound Mode Custom Equalizer DSE Off Multi Track Options Auto Volume Off Internal Mute Off Melody On R...

Page 82: ...utton Press the or button to select Sound then press the ENTER button 2 Press the or button to select Reset then press the ENTER button Press the EXIT button to exit Sound Mode Custom Equalizer DSE Off Multi Track Options Auto Volume Off Internal Mute Off Melody On Reset Move Enter Return Sound Mode Custom Equalizer DSE Off Multi Track Options Auto Volume Off Internal Mute Off Melody On Reset Move...

Page 83: ...Special Features ...

Page 84: ...e EXIT button to exit NOTE The function Help default setting is On Special Features English 84 Setting the Function Help Displays Help on the menu functions Switches the Function Help on Setup Language English Time Game Mode Off V Chip Caption MenuTransparency Medium Blue Screen Off Move Enter Return More Setup Color Weakness PC Function Help On Move Enter Return More Setup Color Weakness PC Funct...

Page 85: ...enu Transparency then press the ENTER button Press the or button to select level then press the ENTER button Press the EXIT button to exit Setup Language English Time Game Mode Off V Chip Caption MenuTransparency Medium Blue Screen Off Move Enter Return Setup Language English Time Game Mode Off V Chip Caption MenuTransparency Medium Blue Screen Off Move Enter Return More More High Medium Low Opaqu...

Page 86: ...shakes slightly If Game Mode is On Picture Mode is automatically changed to Custom and users cannot change the mode Sound Mode in the Sound menu is deactivated Adjust the sound using the equalizer The Reset Sound function is activated Selecting the Reset function after setting the equalizer resets the equalizer to the factory defaults Setup Language English Time Game Mode Off V Chip Caption MenuTr...

Page 87: ...he or button to select Change PIN then press the ENTER button 4 Press the number buttons to enter your new 4 digit PIN Re enter your new PIN to confirm Press the EXIT button to exit V Chip Return Enter PIN Enter PIN Change PIN Enter new PIN Confirm new PIN NOTES If you forget the PIN press the remote control buttons in the following sequence which resets the PIN to 0 0 0 0 POWER Off MUTE 8 2 4 POW...

Page 88: ...ess the ENTER button so that V Chip Lock field is On Pressing the or button will alternate between Off and On Press the ENTER button Press the EXIT button to exit Special Features English 88 How to Enable Disable the Rating Controls V Chip V Chip Lock Off TV Parental Guidelines MPAA Rating Canadian English Canadian French Downloadable U S Rating Change PIN Move Enter Return V Chip Return Enter PIN...

Page 89: ...ton 2 Press the number buttons to enter your current 4 digit PIN The default PIN for a new TV set is 0000 V Chip menu is displayed 3 Press the or button to select TV Parental Guidelines then press the ENTER button continued V Chip Return Enter PIN Enter PIN V Chip V Chip Lock On TV Parental Guidelines MPAA Rating Canadian English Canadian French Downloadable U S Rating Change PIN Move Enter Return...

Page 90: ...d over TV MA Mature audience Press the EXIT button to exit NOTES These categories consist of two separate groups TV Y and TV Y7 young children through age 7 and TV G through TV MA everybody else The restrictions for these two groups work independently If a household includes very young children as well as young adults the TV parental guidelines must be set up separately for each age group See page...

Page 91: ... Press the or button to select MPAA Rating then press the ENTER button 4 You can independently lock the movie ratings The locked movie ratings are indicated by the symbol To unlock a locked channel press the ENTER button again Press the ENTER buttons to activate the appropriate restrictions for movie rating system Press the EXIT button to exit MPAA Rating Move Enter Return Block G PG PG 13 R NC 17...

Page 92: ...ren from ages two to six TV Y7 Directed to older children The Themes and elements in this program may include mild physical or comedic violence or may frighten children under the age of seven TV G General audience It contains little or no violence no strong language and little or no sexual dialog or situations TV PG Parental guidance suggested This program may contain infrequent coarse language li...

Page 93: ...4 digit PIN The default PIN for a new TV set is 0000 V Chip menu is displayed 3 Press the or button to select Canadian English then press the ENTER button continued V Chip Return Enter PIN Enter PIN V Chip V Chip Lock On TV Parental Guidelines MPAA Rating Canadian English Canadian French Downloadable U S Rating Change PIN Move Enter Return 0 9 Setup Language English Time Game Mode Off V Chip Capti...

Page 94: ...k shows music videos and variety programming C Programming intended for children under age 8 C8 Programming generally considered acceptable for children 8 years and over to watch on their own G General programming suitable for all audiences PG Parental guidance 14 Programming contains themes or content which may not be suitable for viewers under the age of 14 18 Adult programming Canadian English ...

Page 95: ...4 digit PIN The default PIN for a new TV set is 0000 V Chip menu is displayed 3 Press the or button to select Canadian French then press the ENTER button continued V Chip Return Enter PIN Enter PIN V Chip V Chip Lock On TV Parental Guidelines MPAA Rating Canadian English Canadian French Downloadable U S Rating Change PIN Move Enter Return 0 9 Setup Language English Time Game Mode Off V Chip Captio...

Page 96: ...mentaries and other information programming talk shows music videos and variety programming G General 8 ans Not recommended for young children 13 ans Programming may not be suitable for children under the age of 13 16 ans Programming is not suitable for children under the age of 16 18 ans Programming restricted to adults Canadian French Move Enter Return Allow All Block All Block E G 8 ans 13 ans ...

Page 97: ...ed from the broadcasting station the Downloadable U S Rating menu is deactivated Parental restriction information is automatically downloaded while watching DTV channels It may take several seconds The downloadable U S Rating menu is available for use after information is downloaded from the broadcasting station However depending on the information from the broadcasting station it may not be avail...

Page 98: ... on the broadcasting station The default menu name and Downloadable U S Rating changes depending on the downloaded information Even if you set the On screen display to your desired language the Downloadable U S Rating menu will appear in English only The rating will automatically block certain categories that are more restrictive The rating titles For example Violence Level etc and TV ratings For ...

Page 99: ...e ENTER button 2 Press the or button to select Caption then press the ENTER button 3 Press the ENTER button to select Caption Press the or button to select On then press the ENTER button continued Caption Caption On Caption Mode Default Caption Options Move Enter Return Analog Setup Language English Time Game Mode Off V Chip Caption MenuTransparency Medium Blue Screen Off Move Enter Return More Se...

Page 100: ...ent information carried in the program CC3 Secondary Synchronous Caption Service Alternate program related caption data typically second language captions CC4 Special Non Synchronous Use Captions Similar to CC2 Text1 First Text Service This may be various non program related data Text2 Second Text Service Additional data usually not program related Text3 Text4 Third and Fourth Text Services These ...

Page 101: ...press the ENTER button 5 Press the or button to select Caption Options then press the ENTER button continued NOTE Caption Options are available only when Service1 Service6 can be selected in Caption Mode Digital Caption Caption On Caption Mode Default Caption Options Move Enter Return Setup Language English Time Game Mode Off V Chip Caption MenuTransparency Medium Blue Screen Off Move Enter Return...

Page 102: ...een Blue Yellow Magenta and Cyan You can change the color of the letter The default is White Background Color This option consists of Default White Black Red Green Blue Yellow Magenta and Cyan You can change the background color of the caption The default is Black Foreground Opacity This option consists of Default Transparent Translucent Solid and Flashing You can change the opacity of the letter ...

Page 103: ...PC Display ...

Page 104: ...V may be different depending on the model Connecting a PC 15p D SUB to the TV 1 Connect a PC cable between the PC Output jack on the PC and the RGB input jack PC IN on the TV 2 Connect a Audio cable between the Audio jack on the PC and the Audio input jack PC AUDIO IN on the TV NOTE You cannot connect this TV to a PC via HDMI DVI 15Pin D Sub Cable PC Audio Cable TV Rear Panel 1 2 ...

Page 105: ...dialog box will be displayed 4 Click on the Monitor tab then set the Screen Refresh Rate with reference to the Display Modes Table Set the Vertical Frequency and Horizontal Frequency individually if you can do so instead of setting the Screen Refresh Rate 5 Press the OK button close the window then press the OK button on the Display Registration Information window Automatic re booting may commence...

Page 106: ...n about connecting your PC to a TV display monitor Same modes as PC are supported for the signal input to the DVI jack Only a separate sync signal is supported Resolution 640 x 350 720 x 400 640 x 480 800 x 600 1024 x 768 640 x 480 720 x 400 800 x 600 1024 x 768 1920 x 1080i 1280 x 720p 720 x 483p Horizontal Frequency KHz 31 47 31 47 31 47 35 00 37 86 37 50 35 16 37 88 48 08 46 87 48 36 56 40 60 0...

Page 107: ...Image Lock then press the ENTER button 5 Press the or button to select Coarse or Fine then press the ENTER button 6 Press the œ or button to remove the picture noise Press the EXIT button to exit NOTE This feature may change the width of the image If necessary adjust the position to center You can also select these options Coarse or Fine by pressing the or button Image Lock Move Enter Return Coars...

Page 108: ...elect PC then press the ENTER button 4 Press the or button to select Position then press the ENTER button 5 Adjust the position of picture by pressing the œ button Press the EXIT button to exit Position Adjust Enter Return Setup Language English Time Game Mode Off V Chip Caption MenuTransparency Medium Blue Screen Off Move Enter Return Setup Color Weakness PC Function Help On Move Enter Return Mor...

Page 109: ...ew seconds later Press the EXIT button to exit English 109 Adjusting the Picture Quality and Position Automatically This feature allows the TV to self adjust to the incoming video signal The values of fine coarse and position are adjusted automatically Setup Language English Time Game Mode Off V Chip Caption MenuTransparency Medium Blue Screen Off Move Enter Return Setup Color Weakness PC Function...

Page 110: ... to exit NOTES Wide TV Scales the picture to the size of the TV screen regardless of the aspect ratio of the input source Wide PC Scales the picture to 92 of the TV screen regardless of the aspect ratio of the input source The picture position and size adjustment are available by pressing the œ button 4 3 Displays the picture as it is without changing the aspect ratio of input source Alternate met...

Page 111: ...select PC then press the ENTER button The resolution information is displayed on the screen Press the EXIT button to exit NOTE To change the resolution see pages 105 106 Setup Language English Time Game Mode Off V Chip Caption MenuTransparency Medium Blue Screen Off Move Enter Return Setup Color Weakness PC Function Help On Move Enter Return More More PC Image Lock Position Auto Adjustment Image R...

Page 112: ...press the ENTER button 4 Press the or button to select Image Reset then press the ENTER button The picture settings are replaced with the factory default values Press the EXIT button to exit Setup Language English Time Game Mode Off V Chip Caption MenuTransparency Medium Blue Screen Off Move Enter Return Setup Color Weakness PC Function Help On Move Enter Return More More PC Image Lock Position Au...

Page 113: ...Appendix ...

Page 114: ...e TV It is also indicated on the lamp case 3 After checking the code number for the lamp give the code number to the store where you purchased the TV or to a AKAI Service center Caution 1 Replace with the correct code numbered lamp to avoid damage to the TV 2 Turn the power off and wait for 30 minutes before replacing the lamp as it will be hot 3 Do not touch the glass part of the lamp with your b...

Page 115: ...locker and pulling it out 4 Remove the screw securing the Lamp by using a screwdriver 5 Separate the Lamp from the engine by holding the handle and pulling it out NOTES Be sure the replacement Lamp is the same type After replacing the lamp align the lamp cover with the groove and secure the screws The TV will not turn on if the lamp cover is not correctly closed as this will activate the protectiv...

Page 116: ... visual qualities of digital channels may vary depending on the original production method analog or digital If the original production method is digital High visual quality program If the original production method is analog The digital program displayed on the screen is originally an analog program which has been converted The visual quality is of an SD grade The HD caption that appears when swi...

Page 117: ...rge screen by applying an optical system If you place the TV set face down it might cause a problem because dirt or some other contaminant may become attached to the inside of the TV set Temperature If your TV is suddenly moved from a cold to a warm place unplug the power cord and allow at least two hours for moisture that may have formed inside the unit to dry completely Using Your TV in Another ...

Page 118: ...This page is intentionally left blank ...

Page 119: ...This page is intentionally left blank ...

Page 120: ......

Reviews: