background image

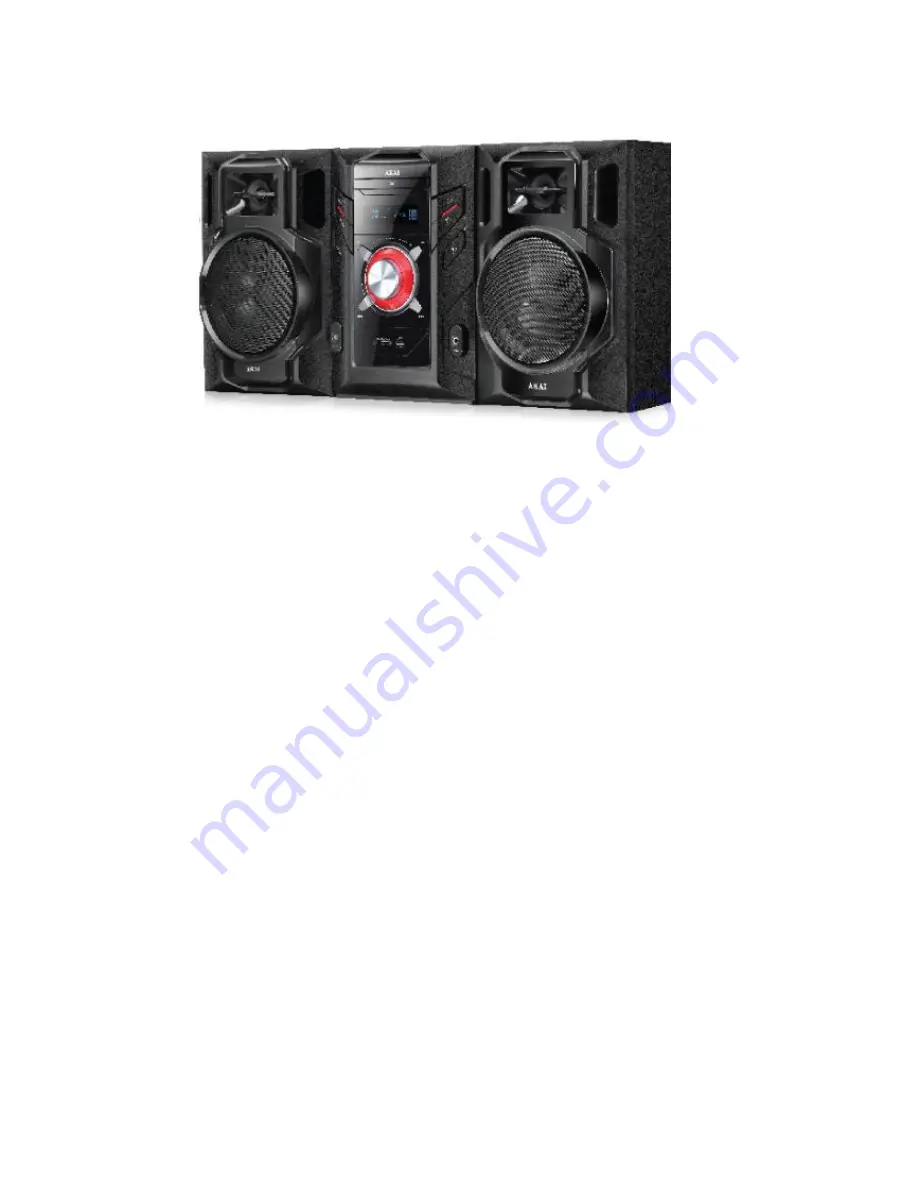
AMN250UC Manual 


Index 


1. Intended use 


2. Safety 

o


2.1. Labels in this manual 

o


2.2. General safety instructions 


3. Preparations for use 

o


3.1. Unpacking 

o


3.2. Package contents 


4. Installation 

o


4.1. Install batteries 

o


4.2. Connecting the system 

o


4.3. Connecting random equipment 

o


4.4. Connecting to the mains 


5. Functions 

o


5.1. Remote control 

o


5.2. AMN250UC DVD Micro System 


6. Operation 

o


6.1. Quick start 

o


6.2. General setup menu operation 

o


6.3. DVD/CD functions 

o


6.4. Radio functions 

o


6.5. LINE-IN 

o


6.6. USB and memory card 

o


6.7. Karaoke function 


7. Cleaning and maintenance 

o


7.1. Handle and care of a disc 


8. Technical data 


9. Disposal of used electrical and electronic equipment 


Summary of Contents for AMN250UC

Page 1: ...em o 4 3 Connecting random equipment o 4 4 Connecting to the mains 5 Functions o 5 1 Remote control o 5 2 AMN250UC DVD Micro System 6 Operation o 6 1 Quick start o 6 2 General setup menu operation o 6 3 DVD CD functions o 6 4 Radio functions o 6 5 LINE IN o 6 6 USB and memory card o 6 7 Karaoke function 7 Cleaning and maintenance o 7 1 Handle and care of a disc 8 Technical data 9 Disposal of used ...

Page 2: ...ing from a disc to any media If a video recorder is connected to the appliance the video output image will be distorted during recording Manufactured under license from Dolby Laboratories Dolby and the double D symbol are trademarks of Dolby Laboratories Confidential unpublished works Copyright 1992 1997 Dolby Laboratories All rights reserved The product complies with Kodak picture CD format and w...

Page 3: ... The appliance can fall and can cause serious injury CAUTION Do not spill any liquid on the appliance WARNING Do not insert any objects in the ventilation holes CAUTION Do not block the ventilation holes This appliance is double insulated therefore no earth wire is required Always check that the mains voltage corresponds to the voltage on the rating plate This appliance employs a laser system To p...

Page 4: ...n case it ever becomes necessary to return your product for service This is the only way to safely protect the product against damage in transit If you do dispose of the carton and the packing materials please remember to recycle with due care to the environment 3 2 Package contents The following items are included in the received package 1x AMN250UC DVD Micro System 2 x Speaker 1 x Remote control...

Page 5: ...the and polarity markings CAUTION Incorrect installation can cause battery leakage and corrosion which will damage the appliance Corrosion oxidation battery leakage and any other gradually acidic defect of this nature will invalidate the guarantee 4 2 Connecting the system Connect the speakers to the appliance ...

Page 6: ...4 3 Connecting random equipment Connect the tv Use one of the cables as presented in the image below To connect the aerial to the appliance o Insert an FM aerial or a suitable cable into the connection ...

Page 7: ...4 4 Connecting to the mains Connect the appliance to the mains Switch on the appliance ...

Page 8: ...TO button 4 SETUP button 5 PBC button 6 PROGRAM button 7 VOLUME button 8 FAST FORWARD button 9 FAST REWIND button 10 TITLE button 11 Arrow buttons 12 AUDIO button 13 S EFFECT button 14 USB button 15 REPEAT button 16 STEP button 17 OPEN CLOSE button 18 PLAY PAUSE button ...

Page 9: ...EXT button 25 PREVIOUS button 26 SUBTITLE button 27 ENTER button 28 MENU button 29 CH LEVEL button 30 TONE button 31 ZOOM button 32 STOP button 33 A B button Radio 1 STANDBY button 2 Digit buttons 8 SEARCH button 11 MEMORY button 23 RADIO button 24 AUTO button 26 MO ST button 30 STOP button ...

Page 10: ...5 2 AMN250UC DVD Micro System 1 SOUND EFFECT 2 SOURCE 3 STANDBY 4 FAST REWIND 5 DISPLAY 6 FAST FORWARD 7 OPEN CLOSE 8 PLAY PAUSE 9 STOP 10 Loudspeaker 11 HEADPHONE 12 PREVIOUS ...

Page 11: ...ME 15 USB 16 NEXT 17 MICROPHONE 18 ON OFF 19 SPEAKER OUTPUT 20 Y 21 AUDIO OUTPUT L 22 CB PB 23 AUDIO OUTPUT R 24 CR PR 25 COAX 26 S VIDEO OUTPUT 27 VIDEO OUTPUT 28 LINE IN R 29 LINE IN L 30 AM ANTENNA 31 FM ANTENNA 32 SCART ...

Page 12: ...erwise 6 1 Quick start General functions Set the appliance in the standby mode To switch on the appliance press the STANDBY button 1 To switch back to the standby mode press the STANDBY button 1 again Use the SOURCE 22 key to select LINE IN DVD or TUNER To adjust the volume press the VOL button or the VOL button 9 To mute or restore sound press the MUTE button 19 ...

Page 13: ... Tuner functions Switch on the appliance To select the source mode TUNER press the SOURCE button 22 LINE IN To select the source mode LINE IN press the SOURCE button 22 Connect the external appliance to your AMN250UC Mirco DVD System USB and Memory card functions Turn on the television Switch on the appliance Insert the USB device in the slot The device can only be connected one way To select the ...

Page 14: ...following actions have to be carried out with the remote control Press the SETUP button 4 Press the arrow buttons left and right 11 to select a menu The submenu is displayed directly Press the arrow buttons up and down 11 to scroll through the submenu Press the ENTER button 27 to select a setting or the left arrow button to cancel the selection Press the SETUP 4 button to store the settings and ex...

Page 15: ... no picture last memory on off When the DVD is paused playback will automatically resume from where last stopped Audio setup page Speaker settings DOWNMIX Select LT RT to mix 5 1 channel audio into left channel and right channel Select STEREO to mix 5 1 channel audio into signal stereo DIGITAL OUTPUT Select SPDIF RAW to set the digital audio signal output to its raw format DTS Dolby Digital 5 1 Se...

Page 16: ...ideo output in RGB format when SCART output is used SHARPNESS Adjust the screen sharpness BRIGHTNESS Adjust the screen brightness CONTRAST Adjust the contrast of the image HUE Adjust the colour intensity SATURATION Adjust the saturation of the image GAMMA Adjust the colour intensity Preference setup page Select the video output format to match the appliance to the TV system PAL AUTO or NTSC The vi...

Page 17: ...ental rating encoded SET PASSWORD Change the default password Enter the current password in the first box Enter the new password in the second box Enter the new password again in the third box to confirm The default password 136900 is always active Even if the password has been reset DEFAULT Restore all default settings of the appliance except the settings for the menu items PARENTAL and PASSWORD ...

Page 18: ...ress the button three times to cancel the function Press the button once again to exit the REPEAT function To play the DVD frame by frame press the STEP button 16 Press the PLAY PAUSE button 18 to resume normal playback To view a specific title of a DVD press the TITLE button 10 Use the arrow buttons to select the title To switch on the subtitles of a DVD press the SUBTITLE button 26 Press the but...

Page 19: ...he small images you can also select the functions SLIDE SHOW MENU PREV or NEXT Use the arrow keys 11 to select the desired functions and ENTER 27 to confirm Press the PLAY PAUSE button 18 to hold the slide show at the current picture Press the PLAY PAUSE button 18 to resume the slide show Press the PREV or NEXT buttons 24 25 to select the previous or next picture To magnify the picture press the Z...

Page 20: ...tton 8 Press the MEMORY button 12 when the desired frequency is found Select the desired preset number with the digit buttons 2 to save the frequency as a preset station Use the number keys to set the frequency of the pre set station To search for frequencies automatically press the AUTO button 26 To stop the automatic search for frequencies press the STOP button 32 To skip to the next preset stat...

Page 21: ...6 5 LINE IN Connect the external appliance to your AMN250UC DVD Micro System To select the source mode LINE IN press the SOURCE button 22 6 6 USB and memory card Preparation Turn on the television ...

Page 22: ... digit buttons 2 to select a folder or to play the file Press the arrow button 11 up and down to select a folder or a file Press ENTER 27 to confirm Press the MENU button 28 to return to the content menu during playback During playback the following functions are available To select a track press the PREV button 25 or the NEXT button 24 until the desired track is set To pause playback press the PL...

Page 23: ... favourite music To connect the microphone insert the cable plug in the microphone jack Press the OPEN CLOSE button 17 Place a karaoke disc in the disc tray To select the source mode DVD press the SOURCE button 22 Press 12 to include or eliminate the original singing voice To adjust the volume press the VOL button or the VOL button 9 ...

Page 24: ... care of a disc Hold the disc with fingers Hold the disc outer edge and or the centre spindle hole Do not touch the disc surface Do not bend or press the disc Do not expose the disc to direct sunlight or heating sources Clean the disc surface with a soft dry cleaning cloth Wipe the disc surface gently radially from centre towards the outer edge Do not apply thinner alcohol chemical solvent or spra...

Page 25: ...0Hz 20KHz Signal noise ratio 80dB 1kHz Dynamic range 70dB 1kHz Distortion 60dB 1kHz Wow en flutter Remote control Battery size AAA Radio Frequency range 87 5 108 MHz Supported media formats Disc types DVD CD CD DA V CD Picture formats JPEG Kodak Picture CD Video formats MPEG4 WMA AVI Audio formats MP3 Working environment Operating temperature 10 35 C elsius Relative humidity 5 90 ...

Page 26: ...sal of this product you will help prevent potentially hazardous to the environment and to human health which could otherwise be caused by unsuitable waste handling of this product The recycling of materials will help conserve natural resources Please do not therefore dispose of your old electrical and electronic equipment with your household waste For more detailed information about recycling of t...

Reviews: