AIC J2012-01, User Manual
Get the User Manual for the AIC J2012-01 easily and for free! Whether you need help setting up, troubleshooting, or simply understanding your device, this manual is the perfect guide. Download it today from manualshive.com and make the most out of your AIC J2012-01.
Share
Download


Reviews:
No comments
Related manuals for J2012-01

CHUB-E
Brand: Engage Communication Pages: 11

FCM-CHS2 Series
Brand: AAxeon Pages: 16

kvm-tec SMARTflex 6021
Brand: Ihse Pages: 4

MC-993A
Brand: Goldstar Pages: 36
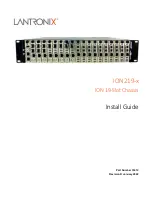
ION219-x
Brand: Lantronix Pages: 34

ASCENDER 22
Brand: Kelty Pages: 7

HTPC 3000B
Brand: nMedia Pages: 4

HTPC 1000B
Brand: nMedia Pages: 4

HTPC 280 BA
Brand: nMedia Pages: 7

HTPC 100 SA
Brand: nMedia Pages: 8

HTPC 180 BA
Brand: nMedia Pages: 9

ME-10-T
Brand: Moxa Technologies Pages: 6

Quantum Vector FTW3 RTX 3080
Brand: EK Pages: 10


