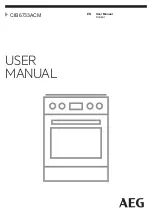
AEG CIB6733ACM, User Manual
The AEG CIB6733ACM User Manual is a comprehensive guide that allows you to effortlessly navigate the features and functions of this cutting-edge product. Download this manual for free from our website and take full advantage of your appliance's capabilities.
Share
Download


Reviews:
No comments
Related manuals for CIB6733ACM
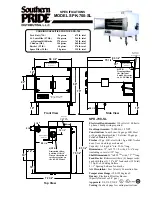
SPK-700-SL
Brand: Southern Pride Pages: 2

USK EKP 2
Brand: Kalorik Pages: 20

EC 540 SFT
Brand: FAVORIT Pages: 80

16 OZ. LITTLE DIPPER SLOW COOKER
Brand: Crock-Pot Pages: 4

3125
Brand: Crock-Pot Pages: 6

CB36500X
Brand: Bertazzoni Pages: 14

C36500X
Brand: Bertazzoni Pages: 16

FSC110
Brand: Goldair Pages: 6

KGCP482KSS05
Brand: KitchenAid Pages: 5

KGCP483KSS - 48" Commercial-Style Gas Cookto
Brand: KitchenAid Pages: 5

KGCP482KSS01
Brand: KitchenAid Pages: 4

KGCP482KSS03
Brand: KitchenAid Pages: 5

KGCP482KSS04
Brand: KitchenAid Pages: 5

KGCP484KSS05
Brand: KitchenAid Pages: 5

KGCP484KSS03
Brand: KitchenAid Pages: 5

KGCP483KSS01
Brand: KitchenAid Pages: 4

KGCP484KSS02
Brand: KitchenAid Pages: 4

KGCP487JSS07
Brand: KitchenAid Pages: 5


