background image

A92860GNX0

EN

FREEZER

USER MANUAL

Summary of Contents for A92860GNX0

Page 1: ...A92860GNX0 EN FREEZER USER MANUAL ...

Page 2: ...se spend a few minutes reading to get the very best from it ACCESSORIES AND CONSUMABLES In the AEG webshop you ll find everything you need to keep all your AEG appliances looking spotless and working perfectly Along with a wide range of accessories designed and built to the high quality standards you would expect from specialist cookware to cutlery baskets from bottle holders to delicate laundry b...

Page 3: ... 16 What to do if 19 Technical data 19 Installation 23 Environmental concerns The following symbols are used in this user manual Important information concerning your personal safety and information on how to avoid damaging the appliance General information and tips Environmental information Subject to change without notice Contents 3 ...

Page 4: ...he plug out of the socket cut the connection cable as close to the appliance as you can and remove the door to prevent playing chil dren to suffer electric shock or to close themselves into it If this appliance featuring magnetic door seals is to replace an older appliance having a spring lock latch on the door or lid be sure to make that spring lock unusable before you discard the old appliance T...

Page 5: ... appliance to direct sunlight Bulb lamps2 used in this appliance are special purpose lamps selected for household ap pliances use only They are not suitable for household room illumination Daily Use Do not put hot pot on the plastic parts in the appliance Do not store flammable gas and liquid in the appliance because they may explode Do not place food products directly against the air outlet on th...

Page 6: ...enser to prevent possible burn The appliance must not be located close to radiators or cookers Make sure that the mains plug is accessible after the installation of the appliance Connect to potable water supply only 4 Service Any electrical work required to do the servicing of the appliance should be carried out by a qualified electrician or competent person This product must be serviced by an aut...

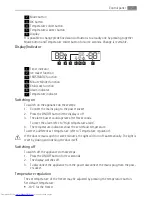
Page 7: ... display is off 3 The alarm buzzer could operate after few seconds To reset the alarm refer to High temperature alarm 4 The temperature indicators show the set default temperature To select a different set temperature refer to Temperature regulation If the door remains open for some minutes the light will turn off automatically The light is reset by closing and opening the door itself Switching of...

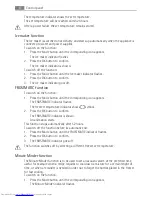
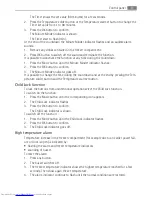
Page 8: ...nding icon appears The FROSTMATIC indicator flashes The freezer temperature indicator shows symbol 2 Press the OK button to confirm The FROSTMATIC indicator is shown An animation starts This function stops automatically after 52 hours To switch off the function before its automatic end 1 Press the Mode button until the FROSTMATIC indicator flashes 2 Press the OK button to confirm 3 The FROSTMATIC ...

Page 9: ...re colder button and the Temperature warmer button Child Lock function To lock the buttons from unintentional operation select the Child Lock function To switch on the function 1 Press the Mode button until the corresponding icon appears 2 The Child Lock indicator flashes 3 Press the OK button to confirm The Child Lock indicator is shown To switch off the function 1 Press the Mode button until the...

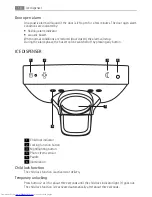
Page 10: ...buzzer can be switched off by pressing any button ICE DISPENSER 1 2 5 6 3 4 1 Child lock indicator 2 Locking function button 3 Night lighting button 4 Photo electric sensor 5 Paddle 6 Illumination Child lock function The child lock function is activated at delivery Temporary unlocking Press button 2 or 3 for about three seconds until the child lock indicator light 1 goes out The child lock functio...

Page 11: ...Press the button 3 until the lighting goes out about three seconds Delivery of ice The delivery of ice start when the paddle 5 is fully depressed and continues until the pad dle is released Stop delivery by removing the container from the paddle Switch off the ice maker Refer to Ice maker function under Control panel Night mode This function switches off the noise producing parts of the ice maker ...

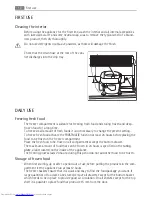
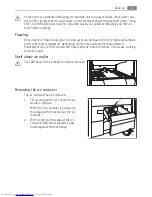
Page 12: ...t 24 hours before placing the food to be frozen in the freezer compartment Place the fresh food to be frozen in all compartments except the bottom drawer The maximum amount of food that can be frozen in 24 hours is specified on the rating plate a label located on the inside of the appliance The freezing process lasts 24 hours during this period do not add other food to be frozen Storage of frozen ...

Page 13: ...t ment or at room temperature depending on the time available for this operation Small pieces may even be cooked still frozen directly from the freezer in this case cooking will take longer Shelf above ice maker The shelf above the ice maker cannot be removed Removing the ice container The ice container can be removed 1 Tilt up and pull the ice container out wards to removal When the ice container...

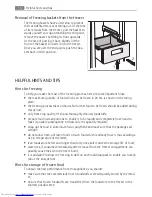
Page 14: ...oodstuffs prepare food in small portions to enable it to be rapidly and completely frozen and to make it possible subsequently to thaw only the quantity required wrap up the food in aluminium foil or polythene and make sure that the packages are airtight do not allow fresh unfrozen food to touch food which is already frozen thus avoiding a rise in temperature of the latter lean foods store better ...

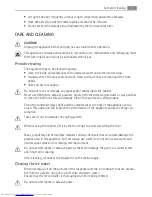
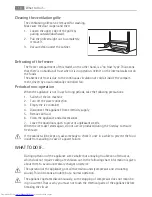
Page 15: ...rior as this will damage the surface and leave a strong odour Clean the condenser black grill and the compressor at the back of the appliance with a brush This operation will improve the performance of the appliance and save energy con sumption Take care of not to damage the cooling system When moving the cabinet lift it by the front edge to avoid scratching the floor Many proprietary kitchen surf...

Page 16: ...container 4 Disconnect the appliance from electricity supply 5 Remove all food 6 Clean the appliance and all accessories 7 Leave the door doors open to prevent unpleasant smells When the ice maker starts again do not use ice produced during the first day to ensure fresh taste If the cabinet will be kept on ask somebody to check it once in a while to prevent the food inside from spoiling in case of...

Page 17: ...closed correctly Refer to Closing the door The door has been opened too frequently Do not keep the door open longer than necessary The food temperature is too warm Let the food temperature de crease to room temperature be fore storage The room temperature is too warm Decrease the room temperature There is too much frost and ice The door is not closed correctly Refer to Closing the door The door ga...

Page 18: ... the door is blocked Remove the obstacle No water supply Carry out the necessary measures on the water supply Reset the system by pressing the button 2 on the ice dispenser The lamp does not work The lamp is defective Refer to Replacing the lamp The door has been open to long Close the door Door interferes with venti lation grill The appliance is not levelled Refer to Levelling Misaligned door The...

Page 19: ...ted available from your specialist shop Do not connect the appliance in spaces where ambient temperature can decrease to be low freezing The appliance may only be connected to drinking water supplies The appliance may only be connected to cold water supplies INSTALLATION WARNING Read the Safety Information carefully for your safety and correct operation of the appli ance before installing the appl...

Page 20: ...bove the appliance behind and above the top cupboard In this case the space behind the top cupboard must be at least 50 mm deep Electrical Connection CAUTION Any electrical work required to install this appliance should be carried out by a qualified electrician or competent person WARNING This appliance must be earthed The manufacturer declines any liability should these safety measures not be obs...

Page 21: ...e electricity supply voltage is the same as that indicated on the appliance rating plate 6 Switch on the appliance The appliance is supplied with a 13 amp plug fitted 2 In the event of having to change the fuse in the plug supplied a 13 amp ASTA approved BS 1362 fuse must be used WARNING A cut off plug inserted into a 13 amp socket is a serious safety shock hazard Ensure that it is disposed of saf...

Page 22: ...ing the water hose Water supply should be provided with a tap and 3 4 male connector within 1 5 m from the appliance This work is to be carried out by a skilled plumber There are different type approved taps and tap assemblies on the market The water hose must not be cracked squeezed or put in tight bends Before the appliance is placed its final location ensure that the water connection has been c...

Page 23: ...ection of the door The water supply goes through the hinge to the water dispenser Contact your dealer for more information ENVIRONMENTAL CONCERNS The symbol on the product or on its packaging indicates that this product may not be treated as household waste Instead it should be taken to the appropriate collection point for the recycling of electrical and electronic equipment By ensuring this produ...

Page 24: ...www aeg com shop 855813200 A 092011 ...

Reviews: