background image

33620

 DK

-M


Electric Ceramic Hob


Operating Instructions

Summary of Contents for 33620 DK-M

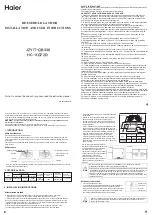
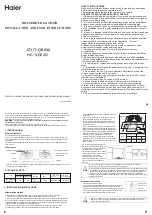
Page 1: ...33620 DK M Electric Ceramic Hob Operating Instructions ...

Page 2: ......

Page 3: ...e of the operating instructions enables you to use them as a reference manual The first part of the operating instructions contains a general description of your new product Then follows a short introduction of the things to do before you use the Hob for the first time The section How to use describes how the Hob is used in everyday life Use this section until you are familiar with your new Hob Th...

Page 4: ...ng the cooking zones 9 Cleaning and maintenance of 11 Stainless steel surfaces 11 The ceramic glass hob 11 Tips on the use of the ceramic hob unit 12 For the installer Installation 14 Electrical connection 15 Building in dimensions 17 Technical Data 19 Table of contents 1 2 Step by step Safety information Hint and tips Environmental information How to read the operating instructions ...

Page 5: ... when not in use Do not use the hob if it is damaged in any way contact your local AEG Service Centre Never use plastic or aluminium dishes on the hob Never leave the hob unattended while deep fat frying or heating fats and oils The appliance is not intended for use by young children or infirm persons without supervision Child Safety Young children should be supervised to ensure that they do not p...

Page 6: ...Description of the product 6 Residual heat indicator Rear cooking zone Front cooking zone Control knobs Pilot light ...

Page 7: ...egulating of heat is graduation free for both plates on a scale from 1 to 3 1 Represents lowest heat 3 Represents maximum heat 0 Represents OFF Do not use the ceramic hob if the glass is damaged If a fault or crack appears during cooking disconnect the hob immediately and contact AEG Service How to use 1 2 3 0 1 2 3 0 Pilot light Control knobs ...

Page 8: ...s 80 C even if the cooking zone is switched off This table should be used as a guide only The settings depend on the saucepan you use quantity and contents After a while you will learn to choose the correct settings See also the section Advice and hints for using the cooking zones Settings for ordinary cooking zones Step Function 0 The cooking zone is switched off Keeping warm 1 Gentle simmering S...

Page 9: ... the item in question upside down on a work top and positioning a ruler on the base A curved base both inwards and outwards will prolong the cooking time and increase the energy consumption The saucepan should match the cooking zone or be slightly larger Remember that a large saucepan can also hold small quantities If the diameter of the base is too small the energy consumption will increase and a...

Page 10: ...th inwards and outwards will prolong the cooking time and increase the energy consumption If the diameter of the base is too small the energy consumption will increase and any food boiling over will burn onto the hot cooking zone Cooking utensils with very shiny bright bases will prolong the cooking time slightly compared with cooking utensils with matt dark bases ...

Page 11: ... with a damp cloth with washing up liquid For severe soiling you can follow these steps 1 Remove stains etc with the ceramic hob scraper 2 Make sure that the ceramic hob has cooled down Use a ceramic cleaning agent such as vitroclen 3 Wipe the ceramic hob clean with a damp cloth or kitchen roll Tough stains can be removed by rubbing the stain hard with kitchen roll 4 Wipe off remaining cleaning ag...

Page 12: ...e This helps to reduce cleaning and prevents scratching the hob glass Wipe off spills whilst the hob is warm Select the highest setting for the cooking zones until the food is brought to the boil then reduce the setting Use saucepans with an even base An uneven based saucepan may increase the electricity consumption by up to 50 The saucepan should match the cooking zone or be slightly larger Use a...

Page 13: ...dstuff containing sugar including natural sugar as these can create permanent pockmarks and craters on the ceramic surface After scraping polish thoroughly with the cleaning agent supplied with the unit Utensils which have been in contact with the above mentioned melted materials must be cleaned throughly before used again on the ceramic top hob unit Defects in the ceramic surface which can be rel...

Page 14: ...th the same height l If connecting the hob directly to the power mains a double pole switch should be fitted with a minimum gap of 3 mm between the switch contacts and of a type suitable for the required load in compliance with the current electric regulations The switch should be sited within 2m of the hob and be easily accessible upon completion of the installation l Proper arrangements must be ...

Page 15: ...at any point Ensure that the hob supply cord does not come into contact with surfaces whose temperature exceed 90 C over room temperature Replacement of connection cable The connection of the voltage cable to the appliance s terminal block is of type Y This means that its replacement requires the specific equipment of a technician In this case only cable type H05V2V2 F T90 must be used The cable s...

Page 16: ... If the hob must be installed beside a cupboard ensure a minimum distance of 40 mm is observed and the side of the cupboard is covered with heatproof material l Before making the cut out in the worktop ensure that the edges of the hob that are to be near the rear wall have a minimum distance of 55 mm l A minimum distance of 100 mm must be observed between the hob and an eventual side wall exceedin...

Page 17: ...t Size The dimensions of the cut out are given in the diagram If 30 cm hobs with different functions must be built in one beside the other e g 2 Plate Hob 2 burners Hob the minimum distance shown in the diagram must be observed 17 ...

Page 18: ...ssistance is needed 50 Before fitting the hob into the cut out the sealing gasket supplied with the hob must be fitted to the edge of the cut out It is essential that no gaps are left in this seal in order to prevent spillage near the hob seeping into the cabinet below 1 Place the sealing gasket A all around the edge of the cut out 2 Fit the hob in the cut out and push it down until it comes in co...

Page 19: ...90 Heating Elements Ratings in Watt Front Hotplate Ø 145 mm 1200 Rear Hotplate Ø 180 mm 2900 Total rating in Watt 3000 Electrical supply This appliance is manufactured according to the following EEC directives 73 23 EEC 90 683 EEC 93 68 EEC 89 336 EEC current edition 19 230 V 50 Hz ...

Page 20: ... which are quoted on the label attached on the back cover of this Instruction Book These data enable the After sales Service to make a focused spare part specification so that your hob can be repaired at the first engineer visit This will save you the additional costs of any possible repeated visits by the After sales engineer AEG Hausgeräte GmbH Copyright by AEG Sie können Ersatzteile Zubehör und...

Reviews: