Addonics Technologies ADSA4R5, Руководство пользователя
Пользовательский мануал для продукта Addonics Technologies ADSA4R5 доступен для бесплатного скачивания на нашем сайте. Получите подробную инструкцию по использованию этого продукта, чтобы настроить его по своему усмотрению. Посетите manualshive.com, чтобы скачать мануал прямо сейчас.
Поделиться
Скачать


Отзывы:
Нет отзывов
Похожие инструкции для ADSA4R5
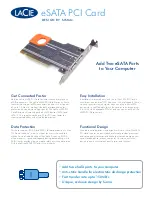
eSATA PCI Card
Бренд: LaCie Страницы: 2

50540
Бренд: UGREEN Страницы: 24

ME910X1
Бренд: Telit Wireless Solutions Страницы: 56

1405809
Бренд: Renkforce Страницы: 4
NVIDIA GeForce PX8000
Бренд: Jaton Страницы: 42

OME-PCI-1002
Бренд: Omega Страницы: 48

UR100
Бренд: QVSR Страницы: 4

Video-PX7600GS-256
Бренд: Jaton Страницы: 25

SCARAB 2
Бренд: Natec Страницы: 10

V7500-P64
Бренд: Diablotek Страницы: 1

34-EXP-PCI4
Бренд: Cool Gear Страницы: 3

GeForce GTX 650 2GB
Бренд: Gainward Страницы: 1

GEFORCE 210 1024MB DDR3
Бренд: Gainward Страницы: 2

Fast EtherTX-10
Бренд: Netopia Страницы: 36

IDvisor Mobile
Бренд: Tokenworks Страницы: 6

JVA06
Бренд: J5create Страницы: 42

NanoPlayer MKII
Бренд: I.D. AL Страницы: 2

ProtectServer Internal Express 2
Бренд: SafeNet Страницы: 15


