Acura AEVU-751-X86, User Manual
The Acura AEVU-751-X86 User Manual is a comprehensive guide that provides step-by-step instructions for operating your AEVU-751-X86 model. Easily accessible for free download on our website, this manual ensures you maximize the potential of your Acura experience. Get your free digital copy today at manualshive.com.
Share
Download


Reviews:
No comments
Related manuals for AEVU-751-X86
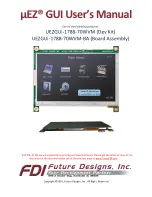
uEZ GUI
Brand: FDI Pages: 30

Access Touch 2.0
Brand: Idesco Pages: 12

LZ-7500
Brand: Kenwood Pages: 36
LZ-T700
Brand: Kenwood Pages: 40

LZ-760R
Brand: Kenwood Pages: 24

M2DIS
Brand: AUDAC Pages: 32

PC PSG2-EN Series
Brand: panel Pages: 25

LCTOUCH10
Brand: RAB Lighting Pages: 10

IntelliTouch Ultra
Brand: Elo TouchSystems Pages: 105

IntelliTouch SecureTouch
Brand: Elo TouchSystems Pages: 105

PRV47OPT
Brand: Primeview Pages: 3

PRV65OPT
Brand: Primeview Pages: 4


