


1
English
N1-2400 Quick Start Guide
Important safety instructions
Please read the following instructions carefully.
1
To clean the N1-2400 screen:
•
Turn off the N1-2400 and unplug the power cord.
•
Spray a non-solvent cleaning solution onto a rag and clean the screen gently.
2
Do not place the N1-2400 near a window. Exposing the monitor to rain, moisture or sunlight can severely
damage it.
3
Do not apply pressure to the LCD screen. Excessive pressure may cause permanent damage to the
display.
4
Do not remove the cover or attempt to service this unit yourself. An authorized technician should perform
servicing of any nature.
5
Store the N1-2400 in a room with a temperature of -20° to 60° C (-4° to140° F). Storing the N1-2400
outside this range may result in permanent damage.
6
Immediately unplug your monitor and call an authorized technician if any of the following circumstances
occur:
•
Monitor-to-PC signal cable is frayed or damaged.
•
Liquid spills onto the N1-2400 or the monitor is exposed to rain.
•
The N1-2400 or case is damaged.
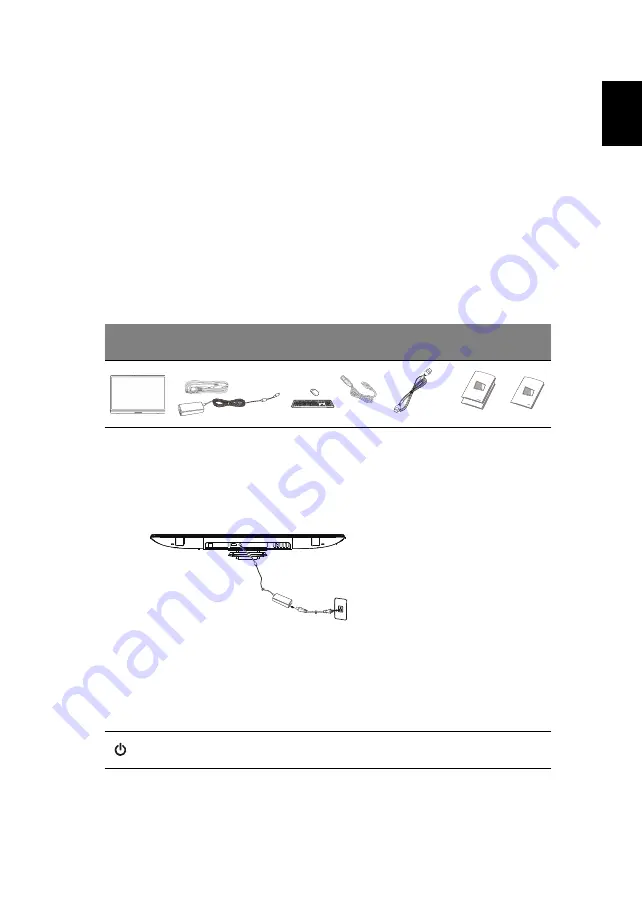
Package contents
*
: Optional
Connecting your monitor to a computer
1
Turn off your computer and unplug your computer's power cord.
2
Connect the HDMI cable to the HDMI input socket of the monitor, and the HDMI output socket of the
graphics card on the computer.
3
Optional: Connect the micro USB port of the N1-2400 and the USB-out port on the computer with the USB
cable.
4
Plug the N1-2400’s power adapter into the power port at the back of the monitor.
5
Plug the power cords of your computer and your monitor into a nearby electrical outlet.
6
Press the power button and the N1-2400 turns on.
7
To switch to HDMI display, press the function keys to select or adjust an option.
Please refer to the User Guide for information about setting up your N1-2400.
Turning on for the first time
You will be asked some questions before you can use your monitor as a N1-2400.
To set up or access a Google account, connect your N1-2400 to an Ethernet or Wi-Fi access point.
External controls
To change the volume, press the right function button to view the OSD. Slide the volume bar left or right.
N1-2400
Power cord and adapter
* Keyboard
and Mouse
* Mini USB
cable
* HDMI cable
(with MHL
support)
Quick start
guide and
setup guide
* User
manual
Power button
Turns the display on/off. White indicates power on.
When using the HDMI input, press the left function button to select or adjust an
option.


