Acer Aspire One AOA150-1570 Disassembly
Model
The Acer Aspire One AOA150-1570 is the model with the 120GB hard drive (not the Flash drive) and
1GB RAM with Windows XP.
Disassembly
Beware of the ESD (ElectroStatic Discharge) hazard. Wear a grounding wrist strap.
Remove the
battery
.
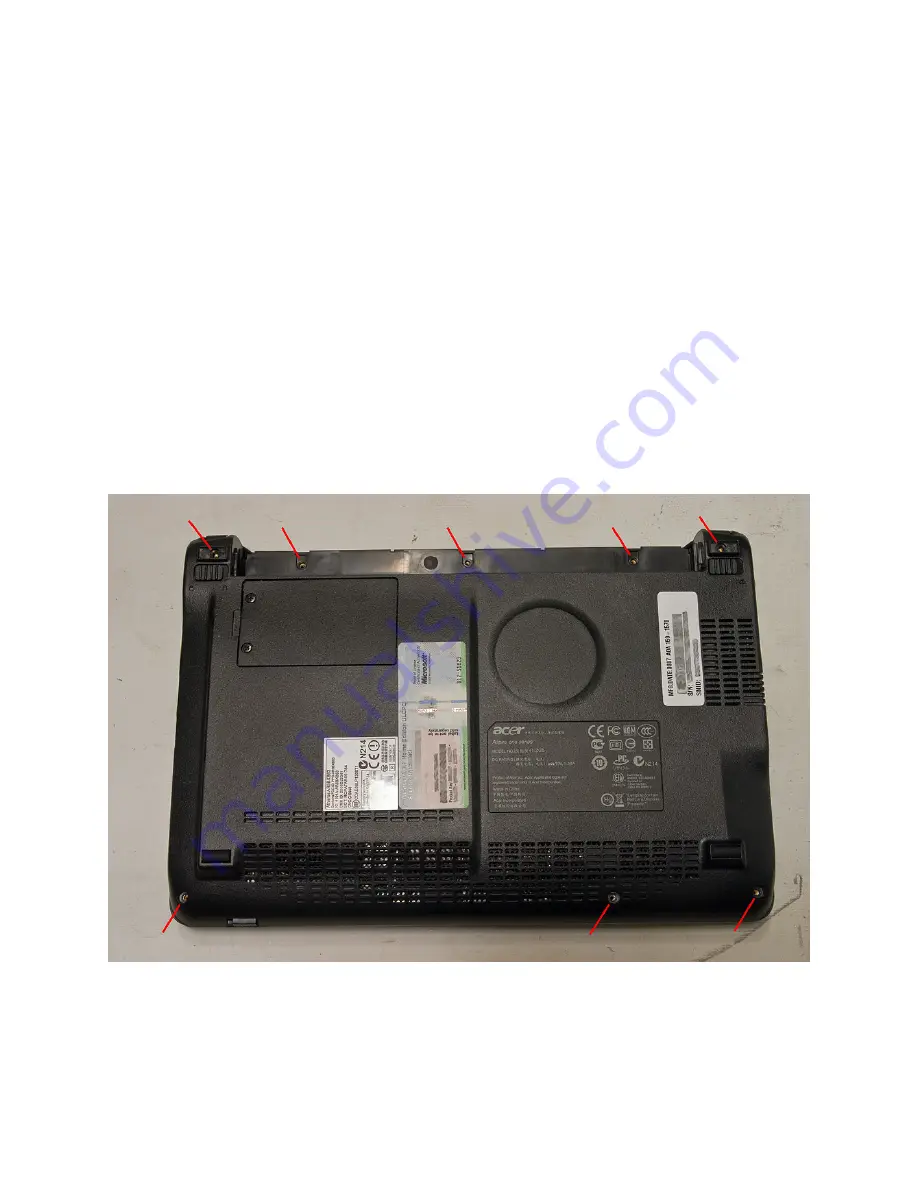
Remove the
6 screws
from the bottom of the case. There are 3 across the front and 3 in the battery
compartment.
Pry up the 2 rear
rubber feet
and remove the
2 screws
underneath them. Stick the feet to the battery for
safekeeping.
Bottom of machine with locations of screws marked
Note: The 3 short screws go in the battery compartment.