background image

17373-Mv1.4 


1400


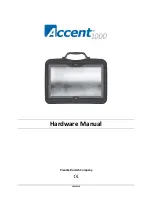
Hardware Manual  

for Dedicated Devices 


Prentke Romich Company 


Summary of Contents for 1400

Page 1: ...17373 Mv1 4 1400 Hardware Manual for Dedicated Devices Prentke Romich Company...

Page 2: ...Move this product farther away from the television or radio Plug this product into an outlet that is on a different circuit from the television or radio that is this product should be controlled by di...

Page 3: ...t fault tolerant and is not designed manufactured or intended for use or resale as online control equipment in hazardous environments requiring fail safe performance such as in the operation of nuclea...

Page 4: ...Accent 1400 Hardware Manual for Dedicated Devices Page 4 This page intentionally left blank...

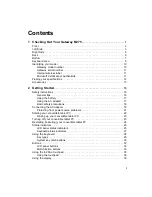
Page 5: ...Stand 14 Opening the Wire Stand 14 Removing the Wire Stand 15 Removing or Reattaching the Handle 16 Attaching the Port Cover 17 Applying a Screen Protector 18 Removing or Replacing the Device Frame 1...

Page 6: ...eras 33 Managing Power Settings 34 Using the Maintenance Menu Power Options 34 Performing a Full Shutdown 35 Setting Up a Wi Fi Connection 36 Updating NuVoice 37 Updating NuVoice via a Wi Fi Connectio...

Page 7: ...e NuVoice software that comes with your device use the Help button to the right of the text display area when the device is turned on You can also download the latest versions of the NuVoice Software...

Page 8: ...ccess mini port allows you to connect to an external device if you have the integrated feature pack 3 The HDMI port allows you to connect a secondary screen to the device for visually challenged commu...

Page 9: ...ct to an external device if you have the integrated feature pack 2 The USB 2 0 ports support USB 2 0 accessories only 3 The USB 3 0 port supports USB 3 0 and USB 2 0 accessories 4 The HDMI port allows...

Page 10: ...on page 39 Power Button When you press the power button the power LED will illuminate and the device will open to NuVoice For detailed information about using this button see Turning the Accent On or...

Page 11: ...ails see Charging the Batteries on page 12 Putting to Sleep Waking the Accent When you finish using the Accent for the day put it in sleep mode overnight To put the device to sleep do either of the fo...

Page 12: ...eeds charging locate the charging port on the back of the device and connect the battery charger Charging Dangerously Low or Dead Batteries To fully charge dangerously low batteries will take about 10...

Page 13: ...azard 1 From one of the corners of the device remove the mounting screw and the bumper guard Note Save the screw You will need it to attach the replacement bumper guard in step 3 2 Push the replacemen...

Page 14: ...Stand The stand in the latched position provides a slight angle for viewing the screen when the device is sitting on a flat surface When the user needs an additional angle extend the legs of the stand...

Page 15: ...he holders at the end of each of the stand s legs 3 Pull the holders free and put them in a safe place in case you need to use them later Loose holders could be a choking hazard 4 Spread the legs apar...

Page 16: ...emove the two screws that hold it in place Note If you are not going to mount a NuPoint unit you will need to attach the port cover to protect the Mini USB Connector See Attaching the Port Cover on pa...

Page 17: ...ni USB Connector on the top of the device 1 Line up the holes in the cover with the holes on the back of the device 2 Insert and tighten the two screws that previously secured the handle To remove the...

Page 18: ...Do not dry the screen before applying the screen protector You may find it easier to smooth out the protector and remove air bubbles step 7 below if the screen is slightly damp 3 Peel a screen protec...

Page 19: ...frame to the device two on the top and two on the bottom Note If you are replacing the frame set these screws aside You will use them to reattach the new frame If you are not replacing the frame store...

Page 20: ...r the screen 1 Line up the Keyguard tabs with the slots on the top of the device 2 Press the tabs into the slots 3 Pull out slightly on the sides of the frame 4 Push the sides down until they fit over...

Page 21: ...equently you may not want to use the screws 1 Place the device face down on a flat surface 2 Insert the two small screws that you removed earlier page 19 Removing the Frame step 2 through the holes in...

Page 22: ...tion the Keyguard so that the tabs are on the bottom The tabs must be able to lie flat against the screen allowing the Keyguard to snap into place 2 Insert one of the Keyguard pins into the opening ne...

Page 23: ...Keyguard in the middle 2 Pull upward to release the bottom tabs 3 Leaving the pins inserted in the top of the device frame simply lift the bottom of the Keyguard to uncover the screen The Keyguard wil...

Page 24: ...the top right corner of the TouchGuide slightly and insert the tab into the top right slot of the frame Then insert the bottom tabs of the TouchGuide into the slots at the bottom edge of the frame Not...

Page 25: ...strap to the top or bottom holders on the device 2 Detach the loop connector from the strap by pressing in on the sides of the quick release connector 3 Thread the loop through a strap holder on the...

Page 26: ...e washers that are with the two top screws 3 Store the plate screws and washers in a safe location in case you need to mount the plate later To reattach the mounting plate 1 Place the device face down...

Page 27: ...me attached remove the two bottom screws that hold the frame in place Store or discard these screws 2 Line up the connector on the NuEye module with the NuEye USB connector on the bottom edge of the b...

Page 28: ...m the device shown in these photos 1 Remove the device handle or port cover See Removing or Reattaching the Handle on page 16 or Attaching the Port Cover on page 17 You will use the screws you remove...

Page 29: ...lect Connect Freedom Switch The following message will appear Freedom Switch is ON Hit the switch to pair it with NuVoice 5 Within 10 seconds activate the switch by pressing the large button on the to...

Page 30: ...lowing steps 1 and 2 and then moving the white slide bar to position 2 as shown on the label Position 2 is one position to the left of position 1 Refasten the battery cover 6 Connect the Freedom Switc...

Page 31: ...bsite at Store Prentrom com under Mounts and Brackets To attach the switch to a loc line mount 1 Peel off the paper backing from the ring and press the adhesive side firmly onto the bottom of the Free...

Page 32: ...ase a replacement battery is printed on the battery 3 Insert the replacement battery with the plus sign facing up toward you 4 Press the large Freedom Switch button If the blue LED illuminates you kno...

Page 33: ...y The rear camera is located on the upper left side on the back of the device The NuVoice Toolbox contains a Camera Menu Your vocabulary may also have a camera page or camera activity that contains th...

Page 34: ...rgy than Sleep mode The device will take longer to come back up than it would in Sleep mode but it will come up faster than after a shutdown The device will also return you to where you were before it...

Page 35: ...e device 1 In NuVoice select the Tools key to open the Tools menu 2 Open the Toolbox 3 Select Maint Menu 4 Select Power Management 5 Select Shutdown 6 A yellow prompt box asks Are you sure Select Yes...

Page 36: ...t of the device or select the Tools key to the right of the text display area 3 Select the Toolbox key from the Tools menu 4 Select Maint Menu from the Toolbox 5 Select Hardware Diagnostics 6 Select N...

Page 37: ...ect the Tools key 3 Select the Toolbox 4 Select Maint Menu 5 Select Software Update Menu 6 Select Internet Update and follow the on screen prompts Updating NuVoice via USB Flash Drive 1 Plug a USB fla...

Page 38: ...ugged in until the batteries are fully charged You can always check the status of the charge by looking at the bar graph next to the battery icon in the status display area If the batteries have gone...

Page 39: ...ng Keyguard Frames Keyguards and TouchGuides All of these accessories can be removed from the case and washed in hot soapy water Dry them thoroughly before putting them back on the device The best pra...

Page 40: ...inside all cracks and crevices You may want to use a toothbrush or similar brush 3 Blow the device off with an air hose or wipe it dry Important Make sure all soil is removed from the device and acce...

Page 41: ...die while the NuVoice software is running The battery charger LED and the charging LED on the front of the device will begin to alternate flashing Plug in the battery charger to continue using the de...

Page 42: ...Device Stops Speaking 1 In NuVoice select the Tools icon and then select the Toolbox key 2 Select Maint Menu 3 Select Power Management 4 Select Shutdown 5 After the device has shut down press the pow...

Reviews: