General Electric AKD-6 Low Voltage Switchgear is a free-standing assembly of metal-enclosed
power circuit breakers. It may also be part of a single-ended or double-ended load center unit
substation. This manual applies to Emax 2 Retrofill circuit breakers to be used in AKD-6
Switchgear & substructures found in GE Switchboards: 800A-2000A, AKR-#A-30/50/T50 .
3200A & 4000A, AKR-#C-75/100 & OEM Substructures/Equipment using
legacy AKR circuit breakers of the following types: AKR-#B-30/50/T50/75/100.
(# is shown in place of a number which designates the trip unit type.)
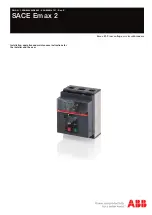
Installation and maintenance guide
Emax 2 Retrofill Circuit Breakers
Direct Replacement of Legacy GE AK 800A - 4000A
Circuit Breakers Used in AKD-6 & Substructures
Ema
x 2 R
etr
of
ill Cir
cuit Br
eak
ers
Ins
talla
tion and ma
in
tenanc
e guide