Aastra 6751i RP, Installation Manual
The Aastra 6751i RP is a feature-rich, high-quality phone designed for professional use. With its user-friendly interface and advanced communication capabilities, this phone is perfect for businesses. Easily access its detailed specifications and user manual for free, exclusively at manualshive.com. Download your manual now and unlock the full potential of this powerful phone.
Share
Download


Reviews:
No comments
Related manuals for 6751i RP

Xda Venn
Brand: O2 Pages: 16
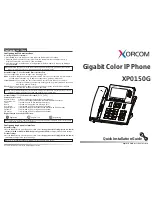
XP0150G
Brand: Xorcom Pages: 2
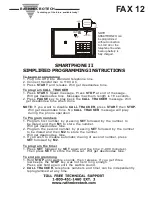
SMARTPHONE II
Brand: RATH MICROTECH Pages: 2

HFB 400
Brand: Caliber Pages: 10

Xperia X10
Brand: Sony Ericsson Pages: 113

myPhone Prime 5
Brand: mPTech Pages: 65

KSF 6 Series
Brand: SSS Siedle Pages: 14

AT-620
Brand: ATCOM Pages: 60

HANDLEPLUS 326I GSM
Brand: Doro Pages: 280

Traveler 137E
Brand: Pharos Pages: 104

808i
Brand: NEO Pages: 61

GO21
Brand: DDM Pages: 24

SM-J320M/DS
Brand: Samsung Pages: 37

Mi 9T
Brand: Xiaomi Pages: 9

SPA921 - Cisco - IP Phone
Brand: Linksys Pages: 5

ES8100
Brand: Huawei Pages: 88

Discovery Elite
Brand: GENERAL MOBILE Pages: 13

AT&T SYNC
Brand: Samsung Pages: 184


