background image

N e t w o r k   Ap p l i a n c e  

F W S - 7 8 1 1


FWS-7811 


  1U Rackmount

Network Appliance  Platform 

2  SATA  6.0 Gb/s,  2  USB3.0 

1 PCI-E[x8] (Optional) 

1 NIM (Optional) 


FWS-7811  Manual  2

nd

  Ed. 

March 12, 2015 


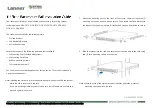
Summary of Contents for FWS-7811

Page 1: ...Network Appliance F W S 7 8 1 1 FWS 7811 1U Rackmount Network Appliance Platform 2 SATA 6 0 Gb s 2 USB3 0 1 PCI E x8 Optional 1 NIM Optional FWS 7811 Manual 2 nd Ed March 12 2015...

Page 2: ...s manual is intended to be accurate and reliable However the original manufacturer assumes no responsibility for its use or for any in fringements upon the rights of third parties that may result from...

Page 3: ...f American Megatrends Inc CompactFlash is a trademark of the Compact Flash Association Intel Core and Xeon Quad Core are trademarks of Intel Corporation Microsoft Windows is a registered trademark of...

Page 4: ...wing materials have been shipped 1 FWS 7811 1 DVD ROM for manual in PDF format and drivers 2 SATA HDD Cable 2 Serial ATA Cable 1 RJ 45 Console Cable 1 CPU Heatsink 1 Ear Bracket Module Black If any of...

Page 5: ...2 4 List of Jumpers 2 6 2 5 List of Connectors 2 6 2 6 Setting Jumpers 2 8 2 7 Clear CMOS CMOS 2 9 2 8 Auto Power Button JP2 2 9 2 9 Front Panel Connector FP1 2 9 2 10 Front Panel Connector FP2 2 9 2...

Page 6: ...atchdog Timer Initial Program A 2 Appendix B I O Information B 1 I O Address Map B 2 B 2 Memory Address Map B 4 B 3 IRQ Mapping Chart B 5 B 4 DMA Channel Assignments B 8 Appendix C Standard LAN Bypass...

Page 7: ...Network Appliance F W S 7 8 1 1 General Information Chapter 1 Chapter 1 General Information 1 1...

Page 8: ...at fits nicely into a space limited environment This compact FWS 7811 is equipped with two SATA6 0 Gb s optional up to 3 SATA ports In addition it offers flexible expansion with network products and f...

Page 9: ...nel ECC non ECC DDR3 1333 1600MHz UDIMM x 4 Up To 32 GB Gigabit Ethernet x 8 with Optional 2 Pair LAN Bypass Function SATA 6 0 Gb s x 2 Optional 3 SATA Ports Internal 3 5 SATA HDD x 1 or 2 5 SATA HDD...

Page 10: ...r Gigabit Ethernet x 8 optional up to 2 pairs LAN bypass function BIOS AMI BIOS ROM Serial ATA SATA 6 0 Gb s x 2 optional 3 SATA ports Expansion Interface Network Interface Module NIM x 1 optional PCI...

Page 11: ...slot x 2 optional PCI E x8 slot x 1 Color Black LCM 16 x 2 characters with 4 keypad control Power Supply Flex ATX 250W Dimension 16 9 x 12 01 x 1 73 430mm x 305mm x 44mm Display VGA Controller Pin he...

Page 12: ...C Operating Humidity 10 80 relative humidity non condensing Storage Humidity 10 80 40 o C non condensing Vibration 0 5 g rms 5 500 Hz operation 2 5 Hard Disk Drive 1 5 g rms 5 500 Hz non operation Sho...

Page 13: ...Network Appliance F W S 7 8 1 1 Chapter 2 Quick Installation Guide 2 1 Quick Installation Guide Chapter 2...

Page 14: ...ng special tool lock and key or other means of security and is controlled by the authority responsible for the location Safety Precautions Always completely disconnect the power cord from your board w...

Page 15: ...Network Appliance F W S 7 8 1 1 Chapter 2 Quick Installation Guide 2 3 2 2 Location of Connectors Board of FWS 7811 Component side...

Page 16: ...Network Appliance F W S 7 8 1 1 Chapter 2 Quick Installation Guide 2 4 Solder Side...

Page 17: ...Network Appliance F W S 7 8 1 1 Chapter 2 Quick Installation Guide 2 5 2 3 Mechanical Drawings of FWS 7811...

Page 18: ...CMOS Clear CMOS 2 5 List of Connectors The board has a number of connectors that allow you to configure your system to suit your application The table below shows the function of each board s connect...

Page 19: ...00 Base TX Ethernet Connector LAN6 10 100 1000 Base TX Ethernet Connector LAN7 10 100 1000 Base TX Ethernet Connector LAN8 10 100 1000 Base TX Ethernet Connector CPU_FAN1 4 Pin Fan Connector SYS_FAN1...

Page 20: ...them To close a jumper you connect the pins with the clip To open a jumper you remove the clip Sometimes a jumper will have three pins labeled 1 2 and 3 In this case you would connect either pins 1 a...

Page 21: ...ault 2 3 Auto Power ON 2 9 Front Panel Connector FP1 Pin Signal Pin Signal 1 External Speaker 2 Key Board Lock 3 NC 4 GND 5 Internal Buzzer 6 I2C Bus SMB Clock 7 External Speaker 8 I2C Bus SMB Data No...

Page 22: ...2 USB3_RX1_DN_C 19 VCC 3 USB3_RX1_DP_C 18 USB3_RX2_DN_C 4 GND 17 USB3_RX2_DP_C 5 USB3_TX1_DN_C 16 GND 6 USB3_TX1_DP_C 15 USB3_TX2_DN_C 7 GND 14 USB3_TX2_DP_C 8 USBP_0N_C 13 GND 9 USBP_0P_C 12 USBP_1N_...

Page 23: ...etwork Appliance F W S 7 8 1 1 Chapter 2 Quick Installation Guide 2 11 2 13 Installing CPU and Heatsink Step 1 Loosen the screws and remove the fan duct Step 2 Release the lock pole of the CPU bracket...

Page 24: ...Network Appliance F W S 7 8 1 1 Chapter 2 Quick Installation Guide 2 12 Step 3 Lift up the CPU bracket Step 4 Lift up the CPU cover...

Page 25: ...Appliance F W S 7 8 1 1 Chapter 2 Quick Installation Guide 2 13 Step 5 Place the CPU to the socket and have the two fillisters locked properly Step 6 Close the CPU bracket and lock the pole to the po...

Page 26: ...F W S 7 8 1 1 Chapter 2 Quick Installation Guide 2 14 Step 7 Cover the Heatsink on the CPU and watch out the direction of the Heatsink that did not against the airflow Step 8 Fasten the four screws to...

Page 27: ...Network Appliance F W S 7 8 1 1 Chapter 2 Quick Installation Guide 2 15 2 14 Installing the Two 2 5 Hard Disk Drives HDD Step 1 Unscrew the upper lid Step 2 Loosen four screws...

Page 28: ...Network Appliance F W S 7 8 1 1 Chapter 2 Quick Installation Guide 2 16 Step 3 put screw into cushion Step 4 put assembled cushions on the upper of HDD bracket...

Page 29: ...Network Appliance F W S 7 8 1 1 Chapter 2 Quick Installation Guide 2 17 Step 5 put assembled cushions on the bottom of HDD bracket Step 6 Lock HDD on the bottom cushions with four screws...

Page 30: ...Network Appliance F W S 7 8 1 1 Chapter 2 Quick Installation Guide 2 18 Step 7 Lock HDD on the upper cushions with four screws Step 8 Lock HDD bracket on the chassis with four screws...

Page 31: ...Network Appliance F W S 7 8 1 1 Chapter 2 Quick Installation Guide 2 19 Step 9 Connect the SATA cable and power cable to the lower HDD Step 10 Connect the SATA cable and power cable to the upper HDD...

Page 32: ...Network Appliance F W S 7 8 1 1 Chapter 2 Quick Installation Guide 2 20 Step 1 Unfasten the screws on the bottom of chassis...

Page 33: ...Network Appliance F W S 7 8 1 1 Chapter 2 Quick Installation Guide 2 21 Step 2 Remove the null Module cover or existing LAN module...

Page 34: ...Network Appliance F W S 7 8 1 1 Chapter 2 Quick Installation Guide 2 22 Step 3 Insert the LAN Module and fasten the screws on the chassis...

Page 35: ...Network Appliance F W S 7 8 1 1 Chapter 2 Quick Installation Guide 2 23...

Page 36: ...etwork Appliance F W S 7 8 1 1 Chapter 2 Quick Installation Guide 2 24 Below Table for China RoHS Requirements AAEON Boxer Industrial System Pb Hg Cd Cr VI PBB PBDE O SJ T 11363 2006 X SJ T 11363 2006...

Page 37: ...Network Appliance F W S 7 8 1 1 Chapter 3 AMI BIOS Setup 3 1 AMI BIOS Setup Chapter 3...

Page 38: ...e current system configuration against the values stored in the CMOS memory If they do not match the program outputs an error message You will then need to run the BIOS setup program to set the config...

Page 39: ...it retains the Setup information when the power is turned off Entering Setup Power on the computer and press Del or F2 immediately This will allow you to enter Setup Main Set the date use tab to switc...

Page 40: ...Network Appliance F W S 7 8 1 1 Chapter 3 AMI BIOS Setup 3 4 Setup Menu Setup submenu Main...

Page 41: ...Network Appliance F W S 7 8 1 1 Chapter 3 AMI BIOS Setup 3 5 Setup submenu Advanced...

Page 42: ...Network Appliance F W S 7 8 1 1 Chapter 3 AMI BIOS Setup 3 6 Super IO Configuration...

Page 43: ...Options summary Serial Port Disabled Enabled Enable or Disable Serial Port COM Serial Port Auto IO 3F8h IRQ 4 IO 3F8h IRQ 3 4 5 6 7 9 10 11 12 IO 2F8h IRQ 3 4 5 6 7 9 10 11 12 IO 3E8h IRQ 3 4 5 6 7 9...

Page 44: ...Options summary Serial Port Disabled Enabled Enable or Disable Serial Port COM Serial Port Auto IO 2F8h IRQ 3 IO 3F8h IRQ 3 4 5 6 7 9 10 11 12 IO 2F8h IRQ 3 4 5 6 7 9 10 11 12 IO 3E8h IRQ 3 4 5 6 7 9...

Page 45: ...abled Enabled Enable or Disable Serial Port COM Change Settings Auto IO 378h IRQ 5 IO 378h IRQ 5 6 7 9 10 11 12 IO 278h IRQ 5 6 7 9 10 11 12 IO 3BCh IRQ 5 6 7 9 10 11 12 Select an optimal setting for...

Page 46: ...Network Appliance F W S 7 8 1 1 Chapter 3 AMI BIOS Setup 3 10 H W Monitor...

Page 47: ...n Mode Select Fan off temperature limit 15 0 127 Fan will of when temperature lower than this limit Fan start temperature limit 45 0 127 Fan will work when temperature higher than this limit Fan start...

Page 48: ...Network Appliance F W S 7 8 1 1 Chapter 3 AMI BIOS Setup 3 12 Serial Port Console Redirection Options summary Console Redirection Disabled COM2 Enabled COM1 Console Redirection Enabled or Disabled...

Page 49: ...ASCII char set VT100 ASCII char set VT100 Extends VT100 to support color function keys etc VT UTF8 Uses UTF8 encoding to map Unicode chars onto 1 or more bytes Bits per second 9600 19200 38400 57600 1...

Page 50: ...p signal can be sent to stop the data flow Once the buffers are empty a start signal can be sent to re start the flow Hardware flow control uses two wires to send start stop signals VT UTF8 Combo Key...

Page 51: ...spend to RAM Select ACPI sleep state the system will enter when the SUSPEND button is pressed Restore AC Power Loss Power Off Power On Last State Select AC power state when power is re applied after a...

Page 52: ...r daily system wake up 1 31 for which day of month that you would like the system to wake up Wake up hour 0 Select 0 23 For example enter 3 for 3am and 15 for 3pm Wake up minute 0 0 59 Wake up second...

Page 53: ...Network Appliance F W S 7 8 1 1 Chapter 3 AMI BIOS Setup 3 17 CPU Configuration...

Page 54: ...ed for Hyper Threading Technology and Disabled for other OS OS not optimized for Hyper Threading Technology When Disabled only on thread per enabled core is enabled Intel Virtualization Technology Dis...

Page 55: ...W S 7 8 1 1 Chapter 3 AMI BIOS Setup 3 19 SATA Configuration IDE Options summary SATA Controller s Disabled Enabled Enable or disable SATA Device SATA Mode Selection IDE AHCI RAID Determines how SATA...

Page 56: ...eed Disabled Enabled Enable or disable SATA Device SATA Mode Selection Default Gen1 Gen2 Gen3 Indicates the maximum speed the SATA controller can support Port Disabled Enabled Enable or Disable SATA P...

Page 57: ...3 21 SATA Device Type Hard Disk Drive Solid State Drive Indentify the SATA port is connected to Solid State Drive or Hard Disk Drive Spin Up Device Disabled Enabled On an edge detect from 0 to 1 the...

Page 58: ...eed Disabled Enabled Enable or disable SATA Device SATA Mode Selection Default Gen1 Gen2 Gen3 Indicates the maximum speed the SATA controller can support Port Disabled Enabled Enable or Disable SATA P...

Page 59: ...3 23 SATA Device Type Hard Disk Drive Solid State Drive Indentify the SATA port is connected to Solid State Drive or Hard Disk Drive Spin Up Device Disabled Enabled On an edge detect from 0 to 1 the...

Page 60: ...etup 3 24 USB Configuration Options summary Legacy USB Support Enabled Disabled Auto Enables Legacy USB support AUTO option disables legacy support if no USB devices are connected DISABLE option will...

Page 61: ...NK GREEN LED ON GREEN LED BLINK GREEN LED FAST BLINK STATUS LED CTRL help LAN kit Power ON Bypass PassTru Setting LAN kit function behavior when power on Bypass Pass Through LAN kit Power Off Bypass P...

Page 62: ...Network Appliance F W S 7 8 1 1 Chapter 3 AMI BIOS Setup 3 26 Setup submenu Chipset...

Page 63: ...Network Appliance F W S 7 8 1 1 Chapter 3 AMI BIOS Setup 3 27 PCH IO Configuration Options summary PCI E LAN Port n Disabled Enabled Control the PCI Express Root Port...

Page 64: ...Network Appliance F W S 7 8 1 1 Chapter 3 AMI BIOS Setup 3 28 System Agent SA Configuration Options summary VT d Disabled Enabled Check to enable VT d function on MCH...

Page 65: ...Network Appliance F W S 7 8 1 1 Chapter 3 AMI BIOS Setup 3 29 Memory Configuration...

Page 66: ...e F W S 7 8 1 1 Chapter 3 AMI BIOS Setup 3 30 Boot Options summary Quite Boot Disabled Enabled Enables or disables Quiet Boot option Launch I211AT PXE Disabled Enabled Enable or Disable Legacy Boot Op...

Page 67: ...t these items and press Enter a dialog box appears which lets you enter a password You can enter no more than six letters or numbers Press Enter after you have typed in the password A second dialog bo...

Page 68: ...Network Appliance F W S 7 8 1 1 Chapter 3 AMI BIOS Setup 3 32 Setup submenu Exit...

Page 69: ...Network Appliance F W S 7 8 1 1 Chapter 4 Driver Installation 4 1 Driver Installation Chapter 4...

Page 70: ...nsert the driver DVD the driver DVD title will auto start and show the installation guide If not please follow the sequence below to install the drivers Follow the sequence below to install the driver...

Page 71: ...hows 3 The system will help you install the driver automatically Step 2 Install VGA Driver 1 Click on the Step2 VGA folder and select the OS folder your system is 2 Double click on the Setup exe file...

Page 72: ...Double click on the exe file located in each OS folder 3 Follow the instructions that the window shows 4 The system will help you install the driver automatically Step 5 Install ME Driver 1 Click on t...

Page 73: ...Network Appliance F W S 7 8 1 1 Appendix A Programming the Watchdog Timer A 1 Programming the Watchdog Timer Appendix A...

Page 74: ...MB PnP Mode Data Register 0x2F or 0x4F Table 2 Watchdog relative register table LDN Register BitNum Value Note Timer Counter 0x07 Note3 0x73 Note4 Note24 Time of watchdog timer 0 255 This register is...

Page 75: ...rVal This parameter is represented from Note24 define byte UnitLDN This parameter is represented from Note5 define byte UnitReg This parameter is represented from Note6 define byte UnitBit This parame...

Page 76: ...mming the Watchdog Timer A 4 VOID Main Procedure AaeonWDTConfig byte Timer Time of WDT timer 0x00 0xFF boolean Unit Select time unit 0 second 1 minute AaeonWDTConfig Procedure AaeonWDTEnable This proc...

Page 77: ...DN EnableReg EnableBit 0 Clear Watchdog Timeout Status WDTClearTimeoutStatus WDT relative parameter setting WDTParameterSetting VOID WDTEnableDisable byte LDN byte Register byte BitNum byte Value SIOB...

Page 78: ...Index 0x01 IOWriteByte SIOIndex 0x55 IOWriteByte SIOIndex 0x55 Break Case 0x4E IOWriteByte SIOIndex 0x87 IOWriteByte SIOIndex 0x01 IOWriteByte SIOIndex 0x55 IOWriteByte SIOIndex 0xAA Break VOID SIOExi...

Page 79: ...Value SIOEnterMBPnPMode SIOSelectLDN byte LDN IOWriteByte SIOIndex Register TmpValue IOReadByte SIOData TmpValue 1 BitNum TmpValue Value BitNum IOWriteByte SIOData TmpValue SIOExitMBPnPMode VOID SIOBy...

Page 80: ...Network Appliance F W S 7 8 1 1 Appendix B I O Information B 1 I O Information Appendix B...

Page 81: ...Network Appliance F W S 7 8 1 1 Appendix B I O Information B 2 B 1 I O Address Map...

Page 82: ...Network Appliance F W S 7 8 1 1 Appendix B I O Information B 3...

Page 83: ...Network Appliance F W S 7 8 1 1 Appendix B I O Information B 4 B 2 Memory Address Map...

Page 84: ...Network Appliance F W S 7 8 1 1 Appendix B I O Information B 5 B 3 IRQ Mapping Chart...

Page 85: ...Network Appliance F W S 7 8 1 1 Appendix B I O Information B 6...

Page 86: ...Network Appliance F W S 7 8 1 1 Appendix B I O Information B 7...

Page 87: ...Network Appliance F W S 7 8 1 1 Appendix B I O Information B 8 B 4 DMA Channel Assignments...

Page 88: ...Network Appliance F W S 7 8 1 1 Appendix C Standard LAN Bypass Platform Setting C 1 Standard LAN Bypass Platform Setting Appendix C...

Page 89: ...atus LED Configuration Table 1 Turth Table of Status LED STA_LED2 STA_LED1 STA_LED0 LED States 0 0 0 LED Off 0 0 1 Red 0 1 0 Red Blinking Slowly 0 1 1 Red Blinking Quickly 1 0 0 Reserved 1 0 1 Green B...

Page 90: ...presented from Note4 define Byte LED1Bit This parameter is represented from Note5 define Byte LED0Bit This parameter is represented from Note6 define Byte UnitVal This parameter is represented from No...

Page 91: ...Configuration Table 1 ID Select table of LAN kit LAN_ID2 LAN_ID1 LAN_ID0 LAN kit selected 0 0 0 LAN Kit 1 Selected 0 0 1 LAN Kit 2 Selected 0 1 0 LAN Kit 3 Selected 0 1 1 LAN Kit 4 Selected 1 0 0 LAN...

Page 92: ...ion behavior to LAN kit when WDT triggered 0 Normal WDT reset Default 1 Force Bypass ACT_EN Use for activating programming of LAN kit It is edge triggering falling edge 1 to 0 and should be set to hig...

Page 93: ...rom Note6 define Byte ACT_EN This parameter is represented from Note7 define Byte LANID2 This parameter is represented from Note8 define Byte LANID1 This parameter is represented from Note9 define Byt...

Page 94: ...IoAddr TmpValue 1 BitNum TmpValue Value BitNum outport IoAddr TmpValue VOID Main Select LAN kit refer to table 1 SET_Value LAN_ID2 LANID2 UnitVal SET_Value LAN_ID1 LANID1 UnitVal SET_Value LAN_ID0 LA...

Page 95: ...Network Appliance F W S 7 8 1 1 Appendix C Standard LAN Bypass Platform Setting C 8 Bypass_Active ACT_EN ACT_EN_R...

Page 96: ...es a LCM LCD Module to display information via standard parallel port User is able to program the LCM to express different status Sample Code void Display_Clear outportb 0x378 0x01 wait outportb 0x37A...

Page 97: ...Setting C 10 void Entry_mode_set outportb 0x378 0x06 wait outportb 0x37A 0xC8 wait outportb 0x37A 0xCA wait void Display_Off outportb 0x378 0x08 wait outportb 0x37A 0xC8 wait outportb 0x37A 0xCA wait...

Page 98: ...Appliance F W S 7 8 1 1 Appendix C Standard LAN Bypass Platform Setting C 11 wait outportb 0x37A 0xCA wait void Display_On_Cursor_On outportb 0x378 0x0E wait outportb 0x37A 0xC8 wait outportb 0x37A 0x...

Page 99: ...ister table Function Description BTN_STS Reading this register returns the pin level status which is normal high active low 0 Pin Level States Low 1 Pin Level States High Table 1 Soft Reset Button reg...

Page 100: ...etwork Appliance F W S 7 8 1 1 Appendix C Standard LAN Bypass Platform Setting C 13 TmpValue inportb IoAddr return TmpValue 1 BitNum VOID Main Byte RstBtn RstBtn GET_Value BTN_STS BTN_STS_R Active Low...

Reviews: