

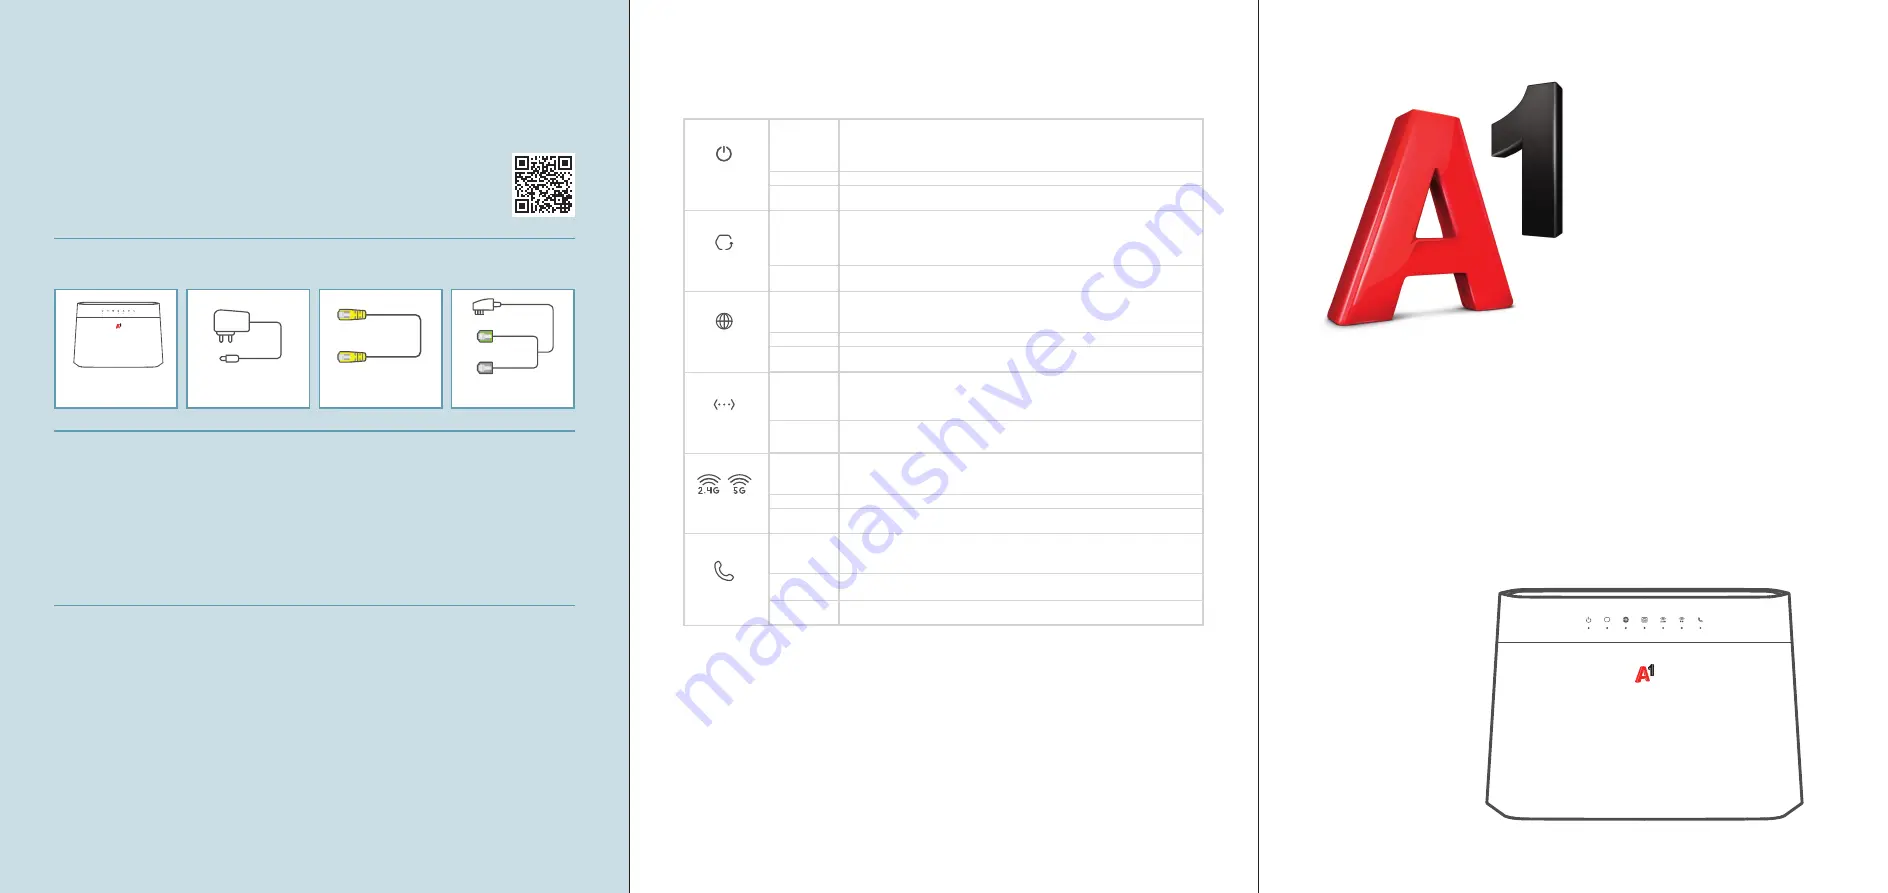
A1 WLAN Box
Ihre A1 WLAN Box funktioniert
nicht und/oder die LEDs auf der
Funktionsanzeige leuchten nicht?
LED Funktionsanzeige
• Überprüfen Sie, ob das Netzgerät mit Strom versorgt wird
und die A1 WLAN Box eingeschaltet ist.
• Überprüfen Sie, ob Ihre A1 WLAN Box richtig verkabelt ist.
• Starten Sie die A1 WLAN Box durch Aus- und Einstecken
des Stromkabels neu.
Schnellstart
1
130.8mm
2
x2
x2
15
3.89~3.98
2.1-2.3
6.8~7.1
Unit: mm
Wall Mount Screw
1
2
3
1
2
3
EN
DE
Drill two holes on the wall at the distance of 130.8mm.
Insert screw anchors and screws (not provided) into the holes.
Place the DX3101-B0 so the wall mount holes line up with the screws. Slide the DX3101-B0
down gently to fix it into place.
Bohren Sie zwei Löcher im Abstand von 130.8mm in die Wand.
Schieben Sie Dübel in die Löcher und schrauben Sie jeweils eine Schraube hinein (nicht im
Lieferumfang enthalten).
Stellen Sie das DX3101-B0 so auf, dass die Bohrungen für die Wandmontage mit den
Schrauben übereinstimmen. Schieben Sie das DX3101-B0 vorsichtig nach unten, um es zu
fixieren.
(Optional)
(Optional)
4
Wall Mounting / Wandbefestigung (Optional)
2/2
Schnellstart-Assistent
Lassen Sie uns starten.
1
Zeitzone
2
Internet
3
WiFi
Benutzername
Passwort
XXXXXXXXXX
admin
Login
Login
10.0.0.138
6
6
DE
Open a web browser and go to http://10.0.0.138. Enter the default
User name (admin)
and
admin Login Password (on the device label), and then click
Login
. The wizard runs. Follow
the wizard prompts to complete the setup.
Öffnen Sie einen Webbrowser, und rufen Sie http://10.0.0.138 auf. Geben Sie den GUI
Benutzernamen (admin)
und das GUI Passwort für admin (auf dem Etikett des Geräts) ein
und klicken Sie anschließend auf
Login
. Ein Assistent wird ausgeführt. Folgen Sie den
Anweisungen des Assistenten.
5-a
5-b
5-c
EN
EN
5-a
5-b
5-c
DE
Use the
SSID
and
Wireless key
on the device label to connect wirelessly to the Zyxel Device.
On your smartphone or notebook, find this
SSID
. Enter the
Wireless key
to connect.
Scan the QR code on the device label then follow the prompts to connect to the WLAN on
your mobile device.
Press the WPS button until the WPS LEDs blinks amber. Press the WPS button on the client.
If the WPS method fails, use the manual method (5-a).
Der
WLAN Name
und der
WLAN-Schlüssel
befinden sich auf dem Etikett am Gerät. Suchen
Sie diesen
WLAN Namen
auf Ihrem Smartphone oder Notebook. Geben Sie den
WLAN-Schlüssel
für die WLAN-Verbindung ein.
Scannen Sie den QR-Code auf dem Geräteetikett und befolgen Sie die Anweisungen, um
eine Verbindung zum WLAN auf Ihrem Mobilgerät herzustellen.
2
WiFi Connection / WLAN-Verbindung
3
Quick Start Wizard / Installationsassistent
WiFi
A1_XXXXXX
Connect
within
2
minutes
More than 1 second
6
WLAN Name
WLAN Passwort
A1_XXXXXX
XXXXXXXXXX
OR
10.0.0.138
3
WLAN Name:
A1_XXXXXX
WLAN Passwort:
XXXXXXXXXX
GUI Login: 10.0.0.138
GUI Benutzername: admin
GUI Passwort: XXXXXXXXXX
Typschild
5-a
5-b
5-c
Drücken Sie auf die WPS-Taste, bis die WPS LED orange blinkt. Drücken Sie die WPS Taste
am Client-Gerät. Wenn die WPS Einrichtung fehlschlägt, benutzen Sie bitte die manuelle
Einrichtung (5-a).
WPS
ON
Willkommen bei Ihrer
A1 WLAN Box!
Paketinhalt
Wichtige Hinweise
A1 WLAN Box
Stromkabel
Netzwerkkabel
Y-Kabel
Vorbehaltlic
h Satz- und Dr
uc
kf
ehler
. S
tand 08/2020
Eine ausführliche Schritt für Schritt Anleitung zur
Installation finden Sie auf
A1.net/Installationsanleitung
• Platzieren Sie die A1 WLAN Box für eine optimale
WLAN-Qualität möglichst freistehend.
• Bitte beachten Sie, dass es nach der Installation bis zu 24 Stunden
dauern kann, bis Sie mit voller Geschwindigkeit surfen können.
Die A1 WLAN Box lassen Sie in dieser Zeit bitte eingeschaltet.
Selbst installieren geht ganz einfach.
1-400-004-382
Status
Anzeige
Aktivität
Package Contents / Inhalt
Power Adapter
Netztteil
Ethernet Cable
Ethernetkabel
Quick Start Guide
Kurzanleitung
DoC
Declaration of
Conformity
Safety Warnings
CE-Erklärung
Sicherheitshinweise
Copyright © 2020 Zyxel Communications Corp. All Rights Reserved.
EU Importer
Zyxel Communications A/S
Gladsaxevej 378, 2. th. 2860 Søborg, Denmark.
https://www.zyxel.com/dk/da/
1-a
1-b
1-a
1-b
OR
1/2
1
Hardware Installation
DX3101-B0
DSL
1-a
WAN
1-b
Connect the DSL port directly to the telephone socket on the wall (1-a) using an
appropriate DSL cable (not included).
OR
Use an Ethernet cable to connect the WAN port to the ONT box on the wall (1-b).
Connect a phone to the phone port using a phone cable (optional).
Connect a computer to the LAN port using the Ethernet cable (optional).
Connect the power cable to the Zyxel Device and press the power button .
Verbinden Sie den DSL-Anschluss über ein entsprechendes DSL-Kabel (nicht im Lieferum-
fang enthalten) direkt mit der Telefondose an der Wand (1-a).
ODER
Verbinden Sie den WAN-Anschluss mit der ONT-Box an der Wand (1-b). Verwenden Sie
dazu ein Ethernet-Kabel.
Schließen Sie ein Telefon mit dem Telefonkabel an den Telefonanschluss an (optional).
Schließen Sie einen Computer mit dem Ethernet-Kabel an den LAN-Port an (optional).
Schließen Sie das Netzkabel an das Modem an und drücken Sie auf die Ein/Aus-Taste.
3
2
4
2
3
4
EN
DE
Quick Start Guide
Kurzanleitung
ENGLISH | DEUTSCH
VDSL2 35b 2+2 11ac Dual Band Concurrent IAD
Zyxel Device
DX3101
Support Information
EU
https://support.zyxel.eu
Copper Connection / Kupferanschluss
Fiber Connection / Glasfaseranschluss
(Optional)
(Optional)
OR
LAN
PHONE1
POWER
ON
POWER
4
2
3
Phone Socket / Telefondose
ONT Box / Glasfasermodem
Power
On
- Internet is connected.
Blinking
- Sending or receiving data through default gateway.
On
- Failed to get IP address.
One Blink
- PPP authentication failed.
Off
- No connection.
Green
Red
---
---
On
- LAN is connected.
Blinking
- Sending or receiving data.
Off
- No connection.
Green
---
On
- WiFi is ready.
Blinking
- Establishing WPS connection.
Blinking
- No connection.
Off
- WiFi is disabled, or link is down.
Green
Amber
---
On
- SIP account is registered and VoIP is ready.
Blinking
- Incoming VoIP call, or phone is off the hook.
Off
- SIP account not working, or no VoIP network connection.
Off
- VoIP disabled, or no SIP account is registered to the phone port .
Green
Amber
---
On
- Device is ready.
Blinking (Slow)
- Starting up.
Blinking (Fast)
-
Upgrading firmware.
Green
Red
On
- Device error.
Off
- Power is off.
On
- DSL or WAN Ethernet port is connected.
Blinking (Slow)
- Detecting DSL carrier signal.
Blinking (Fast)
-
Establishing DSL connection.
Green
Internet
LAN
2.4G/5G
Phone
Off
- DSL port not active or WANoE modem not connected.
WAN
LAN
Power
AN
- Datenübertragung über den ausgewählten Port aktiv.
Blinkend
- Datenübertragung aktiv.
An
- PPP-Authentifizierung fehlgeschlagen.
1 x blinkend
- Authentifizierung fehlgeschlagen.
Aus
- keine Internetverbindung.
Grün
Rot
---
An
- LAN-Port aktiv.
Blinkend
- Datenübertragung aktiv.
Aus
- Kein Gerät am LAN-Port angeschlossen.
Grün
---
An
- Gerät betriebsbereit.
langsam blinkend
- Gerät startet.
Schnell blinkend
-
Firmware wird aktualisiert.
Grün
Rot
An
- Gerätefehler.
Aus
- Keine Stromversorgung vorhanden.
Aus
- DSL Schnittstelle nicht aktiviert bzw. kein WANoE-Modem angeschlossen.
---
An
- DSL- oder WANoE-Verbindung ist hergestellt.
langsam blinkend
- DSL- Synchronisation wird durchgeführt.
Schnell blinkend
-
DSL-Verbindung wird aufgebaut.
Grün
Internet
An
- WLAN ist eingeschaltet.
Blinkend
- Datenübertragung aktiv.
Blinkend
- WPS aktiv, Client kann verbunden werden.
Aus
- WLAN ist ausgeschaltet.
Grün
Orange
---
An
- Alle Telefonnummern angemeldet, Internettelefonie bereit.
Blinkend
- Eingehender Ruf oder Gesprächsaufbau.
An
- Rufnummer-Anmeldung nicht erfolgreich, z.B. falsche Zugangsdaten.
Aus
- Internet-Telefonie nicht aktiviert.
Grün
Orange
---
2.4G/5G
Phone
WAN
Grün
Rot
--
An
- Gerät betriebsbereit.
Langsam blinkend
- Gerät startet.
Schnell blinkend
- Firmware wird aktualisiert.
An
- Gerätefehler.
Aus
- Keine Stromversorgung vorhanden.
Package Contents / Inhalt
Power Adapter
Netztteil
Ethernet Cable
Ethernetkabel
Quick Start Guide
Kurzanleitung
DoC
Declaration of
Conformity
Safety Warnings
CE-Erklärung
Sicherheitshinweise
Copyright © 2020 Zyxel Communications Corp. All Rights Reserved.
EU Importer
Zyxel Communications A/S
Gladsaxevej 378, 2. th. 2860 Søborg, Denmark.
https://www.zyxel.com/dk/da/
1-a
1-b
1-a
1-b
OR
1/2
1
Hardware Installation
DX3101-B0
DSL
1-a
WAN
1-b
Connect the DSL port directly to the telephone socket on the wall (1-a) using an
appropriate DSL cable (not included).
OR
Use an Ethernet cable to connect the WAN port to the ONT box on the wall (1-b).
Connect a phone to the phone port using a phone cable (optional).
Connect a computer to the LAN port using the Ethernet cable (optional).
Connect the power cable to the Zyxel Device and press the power button .
Verbinden Sie den DSL-Anschluss über ein entsprechendes DSL-Kabel (nicht im Lieferum-
fang enthalten) direkt mit der Telefondose an der Wand (1-a).
ODER
Verbinden Sie den WAN-Anschluss mit der ONT-Box an der Wand (1-b). Verwenden Sie
dazu ein Ethernet-Kabel.
Schließen Sie ein Telefon mit dem Telefonkabel an den Telefonanschluss an (optional).
Schließen Sie einen Computer mit dem Ethernet-Kabel an den LAN-Port an (optional).
Schließen Sie das Netzkabel an das Modem an und drücken Sie auf die Ein/Aus-Taste.
3
2
4
2
3
4
EN
DE
Quick Start Guide
Kurzanleitung
ENGLISH | DEUTSCH
VDSL2 35b 2+2 11ac Dual Band Concurrent IAD
Zyxel Device
DX3101
Support Information
EU
https://support.zyxel.eu
Copper Connection / Kupferanschluss
Fiber Connection / Glasfaseranschluss
(Optional)
(Optional)
OR
LAN
PHONE1
POWER
ON
POWER
4
2
3
Phone Socket / Telefondose
ONT Box / Glasfasermodem
Power
On
- Internet is connected.
Blinking
- Sending or receiving data through default gateway.
On
- Failed to get IP address.
One Blink
- PPP authentication failed.
Off
- No connection.
Green
Red
---
---
On
- LAN is connected.
Blinking
- Sending or receiving data.
Off
- No connection.
Green
---
On
- WiFi is ready.
Blinking
- Establishing WPS connection.
Blinking
- No connection.
Off
- WiFi is disabled, or link is down.
Green
Amber
---
On
- SIP account is registered and VoIP is ready.
Blinking
- Incoming VoIP call, or phone is off the hook.
Off
- SIP account not working, or no VoIP network connection.
Off
- VoIP disabled, or no SIP account is registered to the phone port .
Green
Amber
---
On
- Device is ready.
Blinking (Slow)
- Starting up.
Blinking (Fast)
-
Upgrading firmware.
Green
Red
On
- Device error.
Off
- Power is off.
On
- DSL or WAN Ethernet port is connected.
Blinking (Slow)
- Detecting DSL carrier signal.
Blinking (Fast)
-
Establishing DSL connection.
Green
Internet
LAN
2.4G/5G
Phone
Off
- DSL port not active or WANoE modem not connected.
WAN
LAN
Power
AN
- Datenübertragung über den ausgewählten Port aktiv.
Blinkend
- Datenübertragung aktiv.
An
- PPP-Authentifizierung fehlgeschlagen.
1 x blinkend
- Authentifizierung fehlgeschlagen.
Aus
- keine Internetverbindung.
Grün
Rot
---
An
- LAN-Port aktiv.
Blinkend
- Datenübertragung aktiv.
Aus
- Kein Gerät am LAN-Port angeschlossen.
Grün
---
An
- Gerät betriebsbereit.
langsam blinkend
- Gerät startet.
Schnell blinkend
-
Firmware wird aktualisiert.
Grün
Rot
An
- Gerätefehler.
Aus
- Keine Stromversorgung vorhanden.
Aus
- DSL Schnittstelle nicht aktiviert bzw. kein WANoE-Modem angeschlossen.
---
An
- DSL- oder WANoE-Verbindung ist hergestellt.
langsam blinkend
- DSL- Synchronisation wird durchgeführt.
Schnell blinkend
-
DSL-Verbindung wird aufgebaut.
Grün
Internet
An
- WLAN ist eingeschaltet.
Blinkend
- Datenübertragung aktiv.
Blinkend
- WPS aktiv, Client kann verbunden werden.
Aus
- WLAN ist ausgeschaltet.
Grün
Orange
---
An
- Alle Telefonnummern angemeldet, Internettelefonie bereit.
Blinkend
- Eingehender Ruf oder Gesprächsaufbau.
An
- Rufnummer-Anmeldung nicht erfolgreich, z.B. falsche Zugangsdaten.
Aus
- Internet-Telefonie nicht aktiviert.
Grün
Orange
---
2.4G/5G
Phone
WAN
Grün
--
An
- DSL-Verbindung ist hergestellt.
Langsam blinkend
- DSL-Synchronisation wird durchgeführt.
Schnell blinkend
- DSL-Verbindung wird aufgebaut.
Aus
- DSL-Schnittstelle nicht aktiviert.
Package Contents / Inhalt
Power Adapter
Netztteil
Ethernet Cable
Ethernetkabel
Quick Start Guide
Kurzanleitung
DoC
Declaration of
Conformity
Safety Warnings
CE-Erklärung
Sicherheitshinweise
Copyright © 2020 Zyxel Communications Corp. All Rights Reserved.
EU Importer
Zyxel Communications A/S
Gladsaxevej 378, 2. th. 2860 Søborg, Denmark.
https://www.zyxel.com/dk/da/
1-a
1-b
1-a
1-b
OR
1/2
1
Hardware Installation
DX3101-B0
DSL
1-a
WAN
1-b
Connect the DSL port directly to the telephone socket on the wall (1-a) using an
appropriate DSL cable (not included).
OR
Use an Ethernet cable to connect the WAN port to the ONT box on the wall (1-b).
Connect a phone to the phone port using a phone cable (optional).
Connect a computer to the LAN port using the Ethernet cable (optional).
Connect the power cable to the Zyxel Device and press the power button .
Verbinden Sie den DSL-Anschluss über ein entsprechendes DSL-Kabel (nicht im Lieferum-
fang enthalten) direkt mit der Telefondose an der Wand (1-a).
ODER
Verbinden Sie den WAN-Anschluss mit der ONT-Box an der Wand (1-b). Verwenden Sie
dazu ein Ethernet-Kabel.
Schließen Sie ein Telefon mit dem Telefonkabel an den Telefonanschluss an (optional).
Schließen Sie einen Computer mit dem Ethernet-Kabel an den LAN-Port an (optional).
Schließen Sie das Netzkabel an das Modem an und drücken Sie auf die Ein/Aus-Taste.
3
2
4
2
3
4
EN
DE
Quick Start Guide
Kurzanleitung
ENGLISH | DEUTSCH
VDSL2 35b 2+2 11ac Dual Band Concurrent IAD
Zyxel Device
DX3101
Support Information
EU
https://support.zyxel.eu
Copper Connection / Kupferanschluss
Fiber Connection / Glasfaseranschluss
(Optional)
(Optional)
OR
LAN
PHONE1
POWER
ON
POWER
4
2
3
Phone Socket / Telefondose
ONT Box / Glasfasermodem
Power
On
- Internet is connected.
Blinking
- Sending or receiving data through default gateway.
On
- Failed to get IP address.
One Blink
- PPP authentication failed.
Off
- No connection.
Green
Red
---
---
On
- LAN is connected.
Blinking
- Sending or receiving data.
Off
- No connection.
Green
---
On
- WiFi is ready.
Blinking
- Establishing WPS connection.
Blinking
- No connection.
Off
- WiFi is disabled, or link is down.
Green
Amber
---
On
- SIP account is registered and VoIP is ready.
Blinking
- Incoming VoIP call, or phone is off the hook.
Off
- SIP account not working, or no VoIP network connection.
Off
- VoIP disabled, or no SIP account is registered to the phone port .
Green
Amber
---
On
- Device is ready.
Blinking (Slow)
- Starting up.
Blinking (Fast)
-
Upgrading firmware.
Green
Red
On
- Device error.
Off
- Power is off.
On
- DSL or WAN Ethernet port is connected.
Blinking (Slow)
- Detecting DSL carrier signal.
Blinking (Fast)
-
Establishing DSL connection.
Green
Internet
LAN
2.4G/5G
Phone
Off
- DSL port not active or WANoE modem not connected.
WAN
LAN
Power
AN
- Datenübertragung über den ausgewählten Port aktiv.
Blinkend
- Datenübertragung aktiv.
An
- PPP-Authentifizierung fehlgeschlagen.
1 x blinkend
- Authentifizierung fehlgeschlagen.
Aus
- keine Internetverbindung.
Grün
Rot
---
An
- LAN-Port aktiv.
Blinkend
- Datenübertragung aktiv.
Aus
- Kein Gerät am LAN-Port angeschlossen.
Grün
---
An
- Gerät betriebsbereit.
langsam blinkend
- Gerät startet.
Schnell blinkend
-
Firmware wird aktualisiert.
Grün
Rot
An
- Gerätefehler.
Aus
- Keine Stromversorgung vorhanden.
Aus
- DSL Schnittstelle nicht aktiviert bzw. kein WANoE-Modem angeschlossen.
---
An
- DSL- oder WANoE-Verbindung ist hergestellt.
langsam blinkend
- DSL- Synchronisation wird durchgeführt.
Schnell blinkend
-
DSL-Verbindung wird aufgebaut.
Grün
Internet
An
- WLAN ist eingeschaltet.
Blinkend
- Datenübertragung aktiv.
Blinkend
- WPS aktiv, Client kann verbunden werden.
Aus
- WLAN ist ausgeschaltet.
Grün
Orange
---
An
- Alle Telefonnummern angemeldet, Internettelefonie bereit.
Blinkend
- Eingehender Ruf oder Gesprächsaufbau.
An
- Rufnummer-Anmeldung nicht erfolgreich, z.B. falsche Zugangsdaten.
Aus
- Internet-Telefonie nicht aktiviert.
Grün
Orange
---
2.4G/5G
Phone
WAN
Grün
Rot
--
An
- Datenübertragung aktiv.
Blinkend
- Datenübertragung aktiv.
An oder blinkend
– Authentifizierung fehlgeschlagen.
Aus
- Internetverbindung nicht aktiv.
Package Contents / Inhalt
Power Adapter
Netztteil
Ethernet Cable
Ethernetkabel
Quick Start Guide
Kurzanleitung
DoC
Declaration of
Conformity
Safety Warnings
CE-Erklärung
Sicherheitshinweise
Copyright © 2020 Zyxel Communications Corp. All Rights Reserved.
EU Importer
Zyxel Communications A/S
Gladsaxevej 378, 2. th. 2860 Søborg, Denmark.
https://www.zyxel.com/dk/da/
1-a
1-b
1-a
1-b
OR
1/2
1
Hardware Installation
DX3101-B0
DSL
1-a
WAN
1-b
Connect the DSL port directly to the telephone socket on the wall (1-a) using an
appropriate DSL cable (not included).
OR
Use an Ethernet cable to connect the WAN port to the ONT box on the wall (1-b).
Connect a phone to the phone port using a phone cable (optional).
Connect a computer to the LAN port using the Ethernet cable (optional).
Connect the power cable to the Zyxel Device and press the power button .
Verbinden Sie den DSL-Anschluss über ein entsprechendes DSL-Kabel (nicht im Lieferum-
fang enthalten) direkt mit der Telefondose an der Wand (1-a).
ODER
Verbinden Sie den WAN-Anschluss mit der ONT-Box an der Wand (1-b). Verwenden Sie
dazu ein Ethernet-Kabel.
Schließen Sie ein Telefon mit dem Telefonkabel an den Telefonanschluss an (optional).
Schließen Sie einen Computer mit dem Ethernet-Kabel an den LAN-Port an (optional).
Schließen Sie das Netzkabel an das Modem an und drücken Sie auf die Ein/Aus-Taste.
3
2
4
2
3
4
EN
DE
Quick Start Guide
Kurzanleitung
ENGLISH | DEUTSCH
VDSL2 35b 2+2 11ac Dual Band Concurrent IAD
Zyxel Device
DX3101
Support Information
EU
https://support.zyxel.eu
Copper Connection / Kupferanschluss
Fiber Connection / Glasfaseranschluss
(Optional)
(Optional)
OR
LAN
PHONE1
POWER
ON
POWER
4
2
3
Phone Socket / Telefondose
ONT Box / Glasfasermodem
Power
On
- Internet is connected.
Blinking
- Sending or receiving data through default gateway.
On
- Failed to get IP address.
One Blink
- PPP authentication failed.
Off
- No connection.
Green
Red
---
---
On
- LAN is connected.
Blinking
- Sending or receiving data.
Off
- No connection.
Green
---
On
- WiFi is ready.
Blinking
- Establishing WPS connection.
Blinking
- No connection.
Off
- WiFi is disabled, or link is down.
Green
Amber
---
On
- SIP account is registered and VoIP is ready.
Blinking
- Incoming VoIP call, or phone is off the hook.
Off
- SIP account not working, or no VoIP network connection.
Off
- VoIP disabled, or no SIP account is registered to the phone port .
Green
Amber
---
On
- Device is ready.
Blinking (Slow)
- Starting up.
Blinking (Fast)
-
Upgrading firmware.
Green
Red
On
- Device error.
Off
- Power is off.
On
- DSL or WAN Ethernet port is connected.
Blinking (Slow)
- Detecting DSL carrier signal.
Blinking (Fast)
-
Establishing DSL connection.
Green
Internet
LAN
2.4G/5G
Phone
Off
- DSL port not active or WANoE modem not connected.
WAN
LAN
Power
AN
- Datenübertragung über den ausgewählten Port aktiv.
Blinkend
- Datenübertragung aktiv.
An
- PPP-Authentifizierung fehlgeschlagen.
1 x blinkend
- Authentifizierung fehlgeschlagen.
Aus
- keine Internetverbindung.
Grün
Rot
---
An
- LAN-Port aktiv.
Blinkend
- Datenübertragung aktiv.
Aus
- Kein Gerät am LAN-Port angeschlossen.
Grün
---
An
- Gerät betriebsbereit.
langsam blinkend
- Gerät startet.
Schnell blinkend
-
Firmware wird aktualisiert.
Grün
Rot
An
- Gerätefehler.
Aus
- Keine Stromversorgung vorhanden.
Aus
- DSL Schnittstelle nicht aktiviert bzw. kein WANoE-Modem angeschlossen.
---
An
- DSL- oder WANoE-Verbindung ist hergestellt.
langsam blinkend
- DSL- Synchronisation wird durchgeführt.
Schnell blinkend
-
DSL-Verbindung wird aufgebaut.
Grün
Internet
An
- WLAN ist eingeschaltet.
Blinkend
- Datenübertragung aktiv.
Blinkend
- WPS aktiv, Client kann verbunden werden.
Aus
- WLAN ist ausgeschaltet.
Grün
Orange
---
An
- Alle Telefonnummern angemeldet, Internettelefonie bereit.
Blinkend
- Eingehender Ruf oder Gesprächsaufbau.
An
- Rufnummer-Anmeldung nicht erfolgreich, z.B. falsche Zugangsdaten.
Aus
- Internet-Telefonie nicht aktiviert.
Grün
Orange
---
2.4G/5G
Phone
WAN
Grün
--
An
- LAN-Port aktiv.
Blinkend
- Datenübertragung aktiv.
Aus
- Kein Gerät am LAN-Port angeschlossen.
Package Contents / Inhalt
Power Adapter
Netztteil
Ethernet Cable
Ethernetkabel
Quick Start Guide
Kurzanleitung
DoC
Declaration of
Conformity
Safety Warnings
CE-Erklärung
Sicherheitshinweise
Copyright © 2020 Zyxel Communications Corp. All Rights Reserved.
EU Importer
Zyxel Communications A/S
Gladsaxevej 378, 2. th. 2860 Søborg, Denmark.
https://www.zyxel.com/dk/da/
1-a
1-b
1-a
1-b
OR
1/2
1
Hardware Installation
DX3101-B0
DSL
1-a
WAN
1-b
Connect the DSL port directly to the telephone socket on the wall (1-a) using an
appropriate DSL cable (not included).
OR
Use an Ethernet cable to connect the WAN port to the ONT box on the wall (1-b).
Connect a phone to the phone port using a phone cable (optional).
Connect a computer to the LAN port using the Ethernet cable (optional).
Connect the power cable to the Zyxel Device and press the power button .
Verbinden Sie den DSL-Anschluss über ein entsprechendes DSL-Kabel (nicht im Lieferum-
fang enthalten) direkt mit der Telefondose an der Wand (1-a).
ODER
Verbinden Sie den WAN-Anschluss mit der ONT-Box an der Wand (1-b). Verwenden Sie
dazu ein Ethernet-Kabel.
Schließen Sie ein Telefon mit dem Telefonkabel an den Telefonanschluss an (optional).
Schließen Sie einen Computer mit dem Ethernet-Kabel an den LAN-Port an (optional).
Schließen Sie das Netzkabel an das Modem an und drücken Sie auf die Ein/Aus-Taste.
3
2
4
2
3
4
EN
DE
Quick Start Guide
Kurzanleitung
ENGLISH | DEUTSCH
VDSL2 35b 2+2 11ac Dual Band Concurrent IAD
Zyxel Device
DX3101
Support Information
EU
https://support.zyxel.eu
Copper Connection / Kupferanschluss
Fiber Connection / Glasfaseranschluss
(Optional)
(Optional)
OR
LAN
PHONE1
POWER
ON
POWER
4
2
3
Phone Socket / Telefondose
ONT Box / Glasfasermodem
Power
On
- Internet is connected.
Blinking
- Sending or receiving data through default gateway.
On
- Failed to get IP address.
One Blink
- PPP authentication failed.
Off
- No connection.
Green
Red
---
---
On
- LAN is connected.
Blinking
- Sending or receiving data.
Off
- No connection.
Green
---
On
- WiFi is ready.
Blinking
- Establishing WPS connection.
Blinking
- No connection.
Off
- WiFi is disabled, or link is down.
Green
Amber
---
On
- SIP account is registered and VoIP is ready.
Blinking
- Incoming VoIP call, or phone is off the hook.
Off
- SIP account not working, or no VoIP network connection.
Off
- VoIP disabled, or no SIP account is registered to the phone port .
Green
Amber
---
On
- Device is ready.
Blinking (Slow)
- Starting up.
Blinking (Fast)
-
Upgrading firmware.
Green
Red
On
- Device error.
Off
- Power is off.
On
- DSL or WAN Ethernet port is connected.
Blinking (Slow)
- Detecting DSL carrier signal.
Blinking (Fast)
-
Establishing DSL connection.
Green
Internet
LAN
2.4G/5G
Phone
Off
- DSL port not active or WANoE modem not connected.
WAN
LAN
Power
AN
- Datenübertragung über den ausgewählten Port aktiv.
Blinkend
- Datenübertragung aktiv.
An
- PPP-Authentifizierung fehlgeschlagen.
1 x blinkend
- Authentifizierung fehlgeschlagen.
Aus
- keine Internetverbindung.
Grün
Rot
---
An
- LAN-Port aktiv.
Blinkend
- Datenübertragung aktiv.
Aus
- Kein Gerät am LAN-Port angeschlossen.
Grün
---
An
- Gerät betriebsbereit.
langsam blinkend
- Gerät startet.
Schnell blinkend
-
Firmware wird aktualisiert.
Grün
Rot
An
- Gerätefehler.
Aus
- Keine Stromversorgung vorhanden.
Aus
- DSL Schnittstelle nicht aktiviert bzw. kein WANoE-Modem angeschlossen.
---
An
- DSL- oder WANoE-Verbindung ist hergestellt.
langsam blinkend
- DSL- Synchronisation wird durchgeführt.
Schnell blinkend
-
DSL-Verbindung wird aufgebaut.
Grün
Internet
An
- WLAN ist eingeschaltet.
Blinkend
- Datenübertragung aktiv.
Blinkend
- WPS aktiv, Client kann verbunden werden.
Aus
- WLAN ist ausgeschaltet.
Grün
Orange
---
An
- Alle Telefonnummern angemeldet, Internettelefonie bereit.
Blinkend
- Eingehender Ruf oder Gesprächsaufbau.
An
- Rufnummer-Anmeldung nicht erfolgreich, z.B. falsche Zugangsdaten.
Aus
- Internet-Telefonie nicht aktiviert.
Grün
Orange
---
2.4G/5G
Phone
WAN
Grün
Orange
--
An
- WLAN ist eingeschaltet.
Blinkend
- Datenübertragung aktiv.
Blinkend
- WPS aktiv, Client kann verbunden werden.
Aus
- WLAN ist ausgeschaltet.
Package Contents / Inhalt
Power Adapter
Netztteil
Ethernet Cable
Ethernetkabel
Quick Start Guide
Kurzanleitung
DoC
Declaration of
Conformity
Safety Warnings
CE-Erklärung
Sicherheitshinweise
Copyright © 2020 Zyxel Communications Corp. All Rights Reserved.
EU Importer
Zyxel Communications A/S
Gladsaxevej 378, 2. th. 2860 Søborg, Denmark.
https://www.zyxel.com/dk/da/
1-a
1-b
1-a
1-b
OR
1/2
1
Hardware Installation
DX3101-B0
DSL
1-a
WAN
1-b
Connect the DSL port directly to the telephone socket on the wall (1-a) using an
appropriate DSL cable (not included).
OR
Use an Ethernet cable to connect the WAN port to the ONT box on the wall (1-b).
Connect a phone to the phone port using a phone cable (optional).
Connect a computer to the LAN port using the Ethernet cable (optional).
Connect the power cable to the Zyxel Device and press the power button .
Verbinden Sie den DSL-Anschluss über ein entsprechendes DSL-Kabel (nicht im Lieferum-
fang enthalten) direkt mit der Telefondose an der Wand (1-a).
ODER
Verbinden Sie den WAN-Anschluss mit der ONT-Box an der Wand (1-b). Verwenden Sie
dazu ein Ethernet-Kabel.
Schließen Sie ein Telefon mit dem Telefonkabel an den Telefonanschluss an (optional).
Schließen Sie einen Computer mit dem Ethernet-Kabel an den LAN-Port an (optional).
Schließen Sie das Netzkabel an das Modem an und drücken Sie auf die Ein/Aus-Taste.
3
2
4
2
3
4
EN
DE
Quick Start Guide
Kurzanleitung
ENGLISH | DEUTSCH
VDSL2 35b 2+2 11ac Dual Band Concurrent IAD
Zyxel Device
DX3101
Support Information
EU
https://support.zyxel.eu
Copper Connection / Kupferanschluss
Fiber Connection / Glasfaseranschluss
(Optional)
(Optional)
OR
LAN
PHONE1
POWER
ON
POWER
4
2
3
Phone Socket / Telefondose
ONT Box / Glasfasermodem
Power
On
- Internet is connected.
Blinking
- Sending or receiving data through default gateway.
On
- Failed to get IP address.
One Blink
- PPP authentication failed.
Off
- No connection.
Green
Red
---
---
On
- LAN is connected.
Blinking
- Sending or receiving data.
Off
- No connection.
Green
---
On
- WiFi is ready.
Blinking
- Establishing WPS connection.
Blinking
- No connection.
Off
- WiFi is disabled, or link is down.
Green
Amber
---
On
- SIP account is registered and VoIP is ready.
Blinking
- Incoming VoIP call, or phone is off the hook.
Off
- SIP account not working, or no VoIP network connection.
Off
- VoIP disabled, or no SIP account is registered to the phone port .
Green
Amber
---
On
- Device is ready.
Blinking (Slow)
- Starting up.
Blinking (Fast)
-
Upgrading firmware.
Green
Red
On
- Device error.
Off
- Power is off.
On
- DSL or WAN Ethernet port is connected.
Blinking (Slow)
- Detecting DSL carrier signal.
Blinking (Fast)
-
Establishing DSL connection.
Green
Internet
LAN
2.4G/5G
Phone
Off
- DSL port not active or WANoE modem not connected.
WAN
LAN
Power
AN
- Datenübertragung über den ausgewählten Port aktiv.
Blinkend
- Datenübertragung aktiv.
An
- PPP-Authentifizierung fehlgeschlagen.
1 x blinkend
- Authentifizierung fehlgeschlagen.
Aus
- keine Internetverbindung.
Grün
Rot
---
An
- LAN-Port aktiv.
Blinkend
- Datenübertragung aktiv.
Aus
- Kein Gerät am LAN-Port angeschlossen.
Grün
---
An
- Gerät betriebsbereit.
langsam blinkend
- Gerät startet.
Schnell blinkend
-
Firmware wird aktualisiert.
Grün
Rot
An
- Gerätefehler.
Aus
- Keine Stromversorgung vorhanden.
Aus
- DSL Schnittstelle nicht aktiviert bzw. kein WANoE-Modem angeschlossen.
---
An
- DSL- oder WANoE-Verbindung ist hergestellt.
langsam blinkend
- DSL- Synchronisation wird durchgeführt.
Schnell blinkend
-
DSL-Verbindung wird aufgebaut.
Grün
Internet
An
- WLAN ist eingeschaltet.
Blinkend
- Datenübertragung aktiv.
Blinkend
- WPS aktiv, Client kann verbunden werden.
Aus
- WLAN ist ausgeschaltet.
Grün
Orange
---
An
- Alle Telefonnummern angemeldet, Internettelefonie bereit.
Blinkend
- Eingehender Ruf oder Gesprächsaufbau.
An
- Rufnummer-Anmeldung nicht erfolgreich, z.B. falsche Zugangsdaten.
Aus
- Internet-Telefonie nicht aktiviert.
Grün
Orange
---
2.4G/5G
Phone
WAN
Grün
Orange
--
An
- Telefonnummer angemeldet, Telefonie bereit.
Blinkend
- Eingehender Ruf oder Gesprächsaufbau.
An
- Rufnummer-Anmeldung nicht erfolgreich,
z.B. falsche Zugangsdaten.
Aus
- Telefonie nicht aktiviert.
1
130.8mm
2
x2
x2
15
3.89~3.98
2.1-2.3
6.8~7.1
Unit: mm
Wall Mount Screw
1
2
3
1
2
3
EN
DE
Drill two holes on the wall at the distance of 130.8mm.
Insert screw anchors and screws (not provided) into the holes.
Place the DX3101-B0 so the wall mount holes line up with the screws. Slide the DX3101-B0
down gently to fix it into place.
Bohren Sie zwei Löcher im Abstand von 130.8mm in die Wand.
Schieben Sie Dübel in die Löcher und schrauben Sie jeweils eine Schraube hinein (nicht im
Lieferumfang enthalten).
Stellen Sie das DX3101-B0 so auf, dass die Bohrungen für die Wandmontage mit den
Schrauben übereinstimmen. Schieben Sie das DX3101-B0 vorsichtig nach unten, um es zu
fixieren.
(Optional)
(Optional)
4
Wall Mounting / Wandbefestigung (Optional)
2/2
Schnellstart-Assistent
Lassen Sie uns starten.
1
Zeitzone
2
Internet
3
WiFi
Benutzername
Passwort
XXXXXXXXXX
admin
Login
Login
10.0.0.138
6
6
DE
Open a web browser and go to http://10.0.0.138. Enter the default
User name (admin)
and
admin Login Password (on the device label), and then click
Login
. The wizard runs. Follow
the wizard prompts to complete the setup.
Öffnen Sie einen Webbrowser, und rufen Sie http://10.0.0.138 auf. Geben Sie den GUI
Benutzernamen (admin)
und das GUI Passwort für admin (auf dem Etikett des Geräts) ein
und klicken Sie anschließend auf
Login
. Ein Assistent wird ausgeführt. Folgen Sie den
Anweisungen des Assistenten.
5-a
5-b
5-c
EN
EN
5-a
5-b
5-c
DE
Use the
SSID
and
Wireless key
on the device label to connect wirelessly to the Zyxel Device.
On your smartphone or notebook, find this
SSID
. Enter the
Wireless key
to connect.
Scan the QR code on the device label then follow the prompts to connect to the WLAN on
your mobile device.
Press the WPS button until the WPS LEDs blinks amber. Press the WPS button on the client.
If the WPS method fails, use the manual method (5-a).
Der
WLAN Name
und der
WLAN-Schlüssel
befinden sich auf dem Etikett am Gerät. Suchen
Sie diesen
WLAN Namen
auf Ihrem Smartphone oder Notebook. Geben Sie den
WLAN-Schlüssel
für die WLAN-Verbindung ein.
Scannen Sie den QR-Code auf dem Geräteetikett und befolgen Sie die Anweisungen, um
eine Verbindung zum WLAN auf Ihrem Mobilgerät herzustellen.
2
WiFi Connection / WLAN-Verbindung
3
Quick Start Wizard / Installationsassistent
WiFi
A1_XXXXXX
Connect
within
2
minutes
More than 1 second
6
WLAN Name
WLAN Passwort
A1_XXXXXX
XXXXXXXXXX
OR
10.0.0.138
3
WLAN Name:
A1_XXXXXX
WLAN Passwort:
XXXXXXXXXX
GUI Login: 10.0.0.138
GUI Benutzername: admin
GUI Passwort: XXXXXXXXXX
Typschild
5-a
5-b
5-c
Drücken Sie auf die WPS-Taste, bis die WPS LED orange blinkt. Drücken Sie die WPS Taste
am Client-Gerät. Wenn die WPS Einrichtung fehlschlägt, benutzen Sie bitte die manuelle
Einrichtung (5-a).
WPS
ON
Package Contents / Inhalt
Power Adapter
Netztteil
Ethernet Cable
Ethernetkabel
Quick Start Guide
Kurzanleitung
DoC
Declaration of
Conformity
Safety Warnings
CE-Erklärung
Sicherheitshinweise
Copyright © 2020 Zyxel Communications Corp. All Rights Reserved.
EU Importer
Zyxel Communications A/S
Gladsaxevej 378, 2. th. 2860 Søborg, Denmark.
https://www.zyxel.com/dk/da/
1-a
1-b
1-a
1-b
OR
1/2
1
Hardware Installation
DX3101-B0
DSL
1-a
WAN
1-b
Connect the DSL port directly to the telephone socket on the wall (1-a) using an
appropriate DSL cable (not included).
OR
Use an Ethernet cable to connect the WAN port to the ONT box on the wall (1-b).
Connect a phone to the phone port using a phone cable (optional).
Connect a computer to the LAN port using the Ethernet cable (optional).
Connect the power cable to the Zyxel Device and press the power button .
Verbinden Sie den DSL-Anschluss über ein entsprechendes DSL-Kabel (nicht im Lieferum-
fang enthalten) direkt mit der Telefondose an der Wand (1-a).
ODER
Verbinden Sie den WAN-Anschluss mit der ONT-Box an der Wand (1-b). Verwenden Sie
dazu ein Ethernet-Kabel.
Schließen Sie ein Telefon mit dem Telefonkabel an den Telefonanschluss an (optional).
Schließen Sie einen Computer mit dem Ethernet-Kabel an den LAN-Port an (optional).
Schließen Sie das Netzkabel an das Modem an und drücken Sie auf die Ein/Aus-Taste.
3
2
4
2
3
4
EN
DE
Quick Start Guide
Kurzanleitung
ENGLISH | DEUTSCH
VDSL2 35b 2+2 11ac Dual Band Concurrent IAD
Zyxel Device
DX3101
Support Information
EU
https://support.zyxel.eu
Copper Connection / Kupferanschluss
Fiber Connection / Glasfaseranschluss
(Optional)
(Optional)
OR
LAN
PHONE1
POWER
ON
POWER
4
2
3
Phone Socket / Telefondose
ONT Box / Glasfasermodem
Power
On
- Internet is connected.
Blinking
- Sending or receiving data through default gateway.
On
- Failed to get IP address.
One Blink
- PPP authentication failed.
Off
- No connection.
Green
Red
---
---
On
- LAN is connected.
Blinking
- Sending or receiving data.
Off
- No connection.
Green
---
On
- WiFi is ready.
Blinking
- Establishing WPS connection.
Blinking
- No connection.
Off
- WiFi is disabled, or link is down.
Green
Amber
---
On
- SIP account is registered and VoIP is ready.
Blinking
- Incoming VoIP call, or phone is off the hook.
Off
- SIP account not working, or no VoIP network connection.
Off
- VoIP disabled, or no SIP account is registered to the phone port .
Green
Amber
---
On
- Device is ready.
Blinking (Slow)
- Starting up.
Blinking (Fast)
-
Upgrading firmware.
Green
Red
On
- Device error.
Off
- Power is off.
On
- DSL or WAN Ethernet port is connected.
Blinking (Slow)
- Detecting DSL carrier signal.
Blinking (Fast)
-
Establishing DSL connection.
Green
Internet
LAN
2.4G/5G
Phone
Off
- DSL port not active or WANoE modem not connected.
WAN
LAN
Power
AN
- Datenübertragung über den ausgewählten Port aktiv.
Blinkend
- Datenübertragung aktiv.
An
- PPP-Authentifizierung fehlgeschlagen.
1 x blinkend
- Authentifizierung fehlgeschlagen.
Aus
- keine Internetverbindung.
Grün
Rot
---
An
- LAN-Port aktiv.
Blinkend
- Datenübertragung aktiv.
Aus
- Kein Gerät am LAN-Port angeschlossen.
Grün
---
An
- Gerät betriebsbereit.
langsam blinkend
- Gerät startet.
Schnell blinkend
-
Firmware wird aktualisiert.
Grün
Rot
An
- Gerätefehler.
Aus
- Keine Stromversorgung vorhanden.
Aus
- DSL Schnittstelle nicht aktiviert bzw. kein WANoE-Modem angeschlossen.
---
An
- DSL- oder WANoE-Verbindung ist hergestellt.
langsam blinkend
- DSL- Synchronisation wird durchgeführt.
Schnell blinkend
-
DSL-Verbindung wird aufgebaut.
Grün
Internet
An
- WLAN ist eingeschaltet.
Blinkend
- Datenübertragung aktiv.
Blinkend
- WPS aktiv, Client kann verbunden werden.
Aus
- WLAN ist ausgeschaltet.
Grün
Orange
---
An
- Alle Telefonnummern angemeldet, Internettelefonie bereit.
Blinkend
- Eingehender Ruf oder Gesprächsaufbau.
An
- Rufnummer-Anmeldung nicht erfolgreich, z.B. falsche Zugangsdaten.
Aus
- Internet-Telefonie nicht aktiviert.
Grün
Orange
---
2.4G/5G
Phone
WAN


