

Instruction for use - 3Dsimo MultiPro : Multifuctional tool for workshops and households
1. Introduction
2. Package content
3. 3Dsimo MultiPro controls
4. Smartphone App
5. Attachment change
Congratulations on your purchase of 3Dsimo
MultiPro, multifunctional tool, which will help you
transform your creativity into reality. All you need
to do, is power up the 3Dsimo MultiPro using
included adapter, chose attachment, mount the
attachment and finish tutorial displayed on the
device.
Before you start using the device, make sure you
are familiar with this user’s manual and all the
functions, maintanance and risks of using 3Dsimo
MultiPro.
In case of any questions, please visit our website or
contact our customer support:
[email protected]
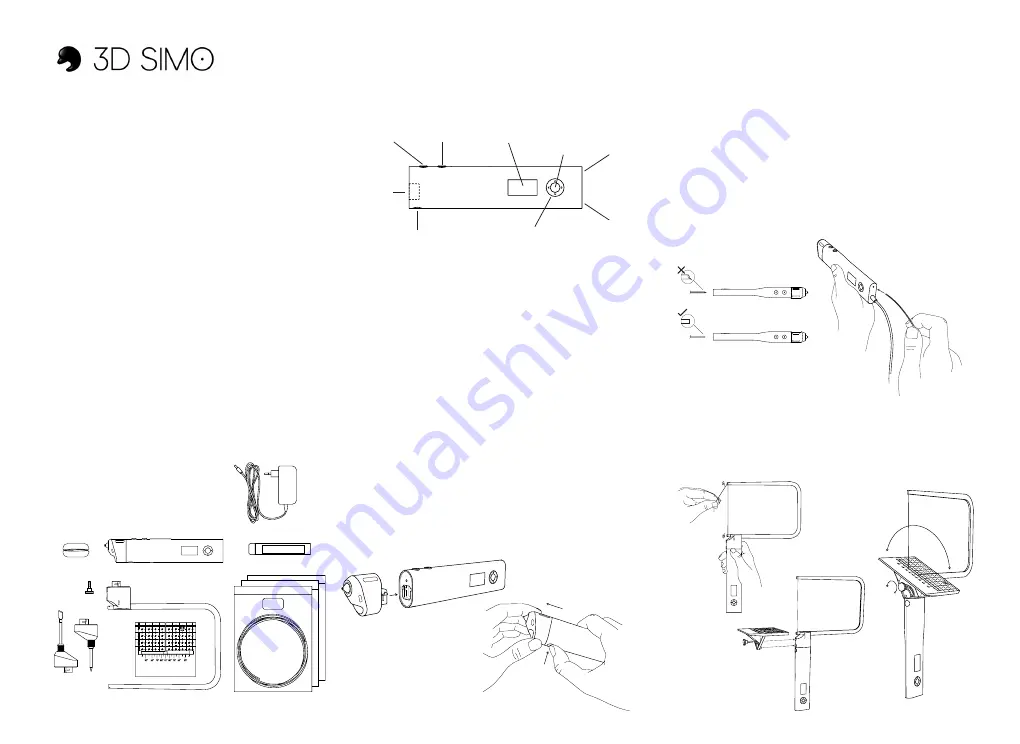
3Dsimo Multipro package includes:
1x 3Dsimo MultiPro with 3D drawing
attachment mounted
1x Soldering attachment
1x Burning attachment
1x Foam cutting attachment
1x Platform for accurate foam cutting
1x Platform bolt
1x Power adapter
1x Spool of resistance wire
1x Package of soldering tin
15 meters of filament
Smartphone app is available for Android and iOS devices.
(3Dsimo App will be available 1.2.2019)
3Dsimo App allows you to update your device for future
attachments, also offers a number of tutorials and ideas on
usage of your 3Dsimo MultiPro.
3Dsimo MultiPro connectivity is available via Bluetooth.
Your 3Dsimo MultiPro comes with the 3D drawing tool
attached.
To dismount the attachment, press Attachment dismount
button, then dismount the attachment away from the
device.
To mount any attachment, insert chosen attachment into
attachment slot. The attachment will be automaticaly
recognised by the device.
If the attachment was inserted for the first time, tutorial for
the specific attachment will appear on the device display.
front button
back button
4way navigation button
main
button
display
power
input
filament
slot
attachment
slot
attachment dismount button
3D drawing attachment
After mounting the 3D drawing attachment and
successful completion of tutorial, choose correct
filament type. Material profile can be changed with
navigation cross, using left and right buttons. Also you
can choose different feeding speeds using up and down
buttons. When READY is shown on the display, insert
filament. When filament is inserted, it is necessary to
push the filament in, while holding front button. After
about 5 seconds, filament will start to come out from tip
of the nozzle.
Foam cutting attachment
First, you have to tighten the cutting wire between
both ends of the attachment (see picture), mount the
attachment to the 3Dsimo MultiPro, choose desired
temperature of the tip (0-100%) and activate heating of
the attachment by pressing front button.


