Chapter 5 Wireless LAN
P-2302HWUDL-P1 Series User’s Guide
89
The following table describes the labels in this screen.
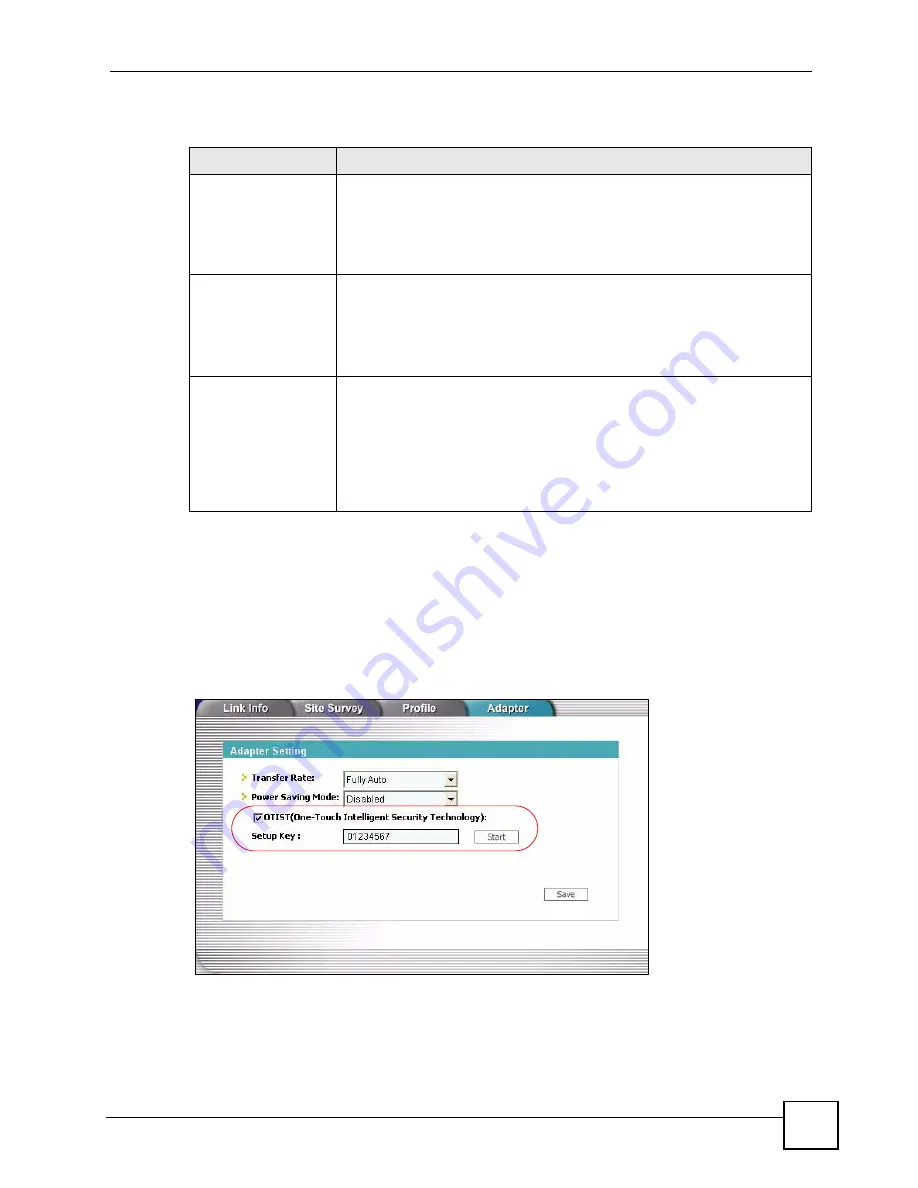
Before you click
Start
, you should enable OTIST on all the OTIST-enabled devices in the
wireless network. For most devices, follow these steps.
1
Start the ZyXEL utility
2
Click the
Adapter
tab.
3
Select the
OTIST
check box, and enter the same
Setup Key
as the ZyXEL Device.
4
Click
Save
.
Figure 43
Example: Wireless Client OTIST Screen
To start OTIST in the device, click
Start
in this screen.
Table 35
Network > Wireless LAN > OTIST
LABEL
DESCRIPTION
Setup Key
Type a key (password) 8 ASCII characters long.
Note: If you change the OTIST setup key in the ZyXEL
Device, you must change it on the wireless devices
too.
Yes!
Select this if you want the ZyXEL Device to automatically generate a pre-
shared key for the wireless network. Before you do this, click
Network >
Wireless LAN > General
and set the
Security Mode
to
No Security
.
Clear this if you want the ZyXEL Device to use a pre-shared key that you
enter. Before you do this, click
Network > Wireless LAN > General
, set the
Security Mode
to
WPA-PSK
, and enter the
Pre-Shared Key
.
Start
Click
Start
to activate OTIST and transfer settings. The process takes three
minutes to complete.
Note: You must click Start in the ZyXEL Device and in the
wireless device(s) within three minutes of each other.
You can start OTIST in the wireless devices and the
ZyXEL Device in any order.
Summary of Contents for Network Device P-2302
Page 2: ......
Page 8: ...Safety Warnings P 2302HWUDL P1 Series User s Guide 8 ...
Page 10: ...Contents Overview P 2302HWUDL P1 Series User s Guide 10 Appendices and Index 285 ...
Page 32: ...32 ...
Page 46: ...Chapter 2 Introducing the Web Configurator P 2302HWUDL P1 Series User s Guide 46 ...
Page 66: ...Chapter 3 Wizard Setup P 2302HWUDL P1 Series User s Guide 66 ...
Page 77: ...77 PART II Network Wireless LAN 79 WAN 95 LAN 105 NAT 117 ...
Page 78: ...78 ...
Page 94: ...Chapter 5 Wireless LAN P 2302HWUDL P1 Series User s Guide 94 ...
Page 116: ...Chapter 7 LAN P 2302HWUDL P1 Series User s Guide 116 ...
Page 125: ...125 PART III VoIP SIP 127 Phone 141 Phone Book 155 PSTN Line 159 VoIP Trunking 161 ...
Page 126: ...126 ...
Page 136: ...Chapter 9 SIP P 2302HWUDL P1 Series User s Guide 136 Figure 74 VoIP SIP SIP Settings Advanced ...
Page 154: ...Chapter 10 Phone P 2302HWUDL P1 Series User s Guide 154 ...
Page 176: ...Chapter 13 VoIP Trunking P 2302HWUDL P1 Series User s Guide 176 ...
Page 177: ...177 PART IV Security Firewall 179 Content Filter 187 ...
Page 178: ...178 ...
Page 186: ...Chapter 14 Firewall P 2302HWUDL P1 Series User s Guide 186 ...
Page 190: ...Chapter 15 Content Filter P 2302HWUDL P1 Series User s Guide 190 ...
Page 192: ...192 ...
Page 196: ...Chapter 16 Static Route P 2302HWUDL P1 Series User s Guide 196 ...
Page 228: ...Chapter 19 UPnP P 2302HWUDL P1 Series User s Guide 228 ...
Page 250: ...Chapter 21 File Sharing P 2302HWUDL P1 Series User s Guide 250 ...
Page 251: ...251 PART VI Maintanence and Troubleshooting System 253 Logs 261 Tools 273 Troubleshooting 279 ...
Page 252: ...252 ...
Page 260: ...Chapter 22 System P 2302HWUDL P1 Series User s Guide 260 ...
Page 272: ...Chapter 23 Logs P 2302HWUDL P1 Series User s Guide 272 ...
Page 278: ...Chapter 24 Tools P 2302HWUDL P1 Series User s Guide 278 ...
Page 286: ...286 ...
Page 292: ...Appendix A Product Specifications P 2302HWUDL P1 Series User s Guide 292 ...
Page 322: ...Appendix E SIP Passthrough P 2302HWUDL P1 Series User s Guide 322 ...
Page 346: ...Appendix H Legal Information P 2302HWUDL P1 Series User s Guide 346 ...


