


Chapter 20 The UPnP Screen
User’s Guide
245
The following table describes the labels in this screen.
20.3 Technical Reference
The following section contains additional technical information about the WiMAX
Device features described in this chapter.
20.3.1 Installing UPnP in Windows XP
Follow the steps below to install the UPnP in Windows XP.
1
Click Start > Control Panel.
2
Double-click Network Connections.
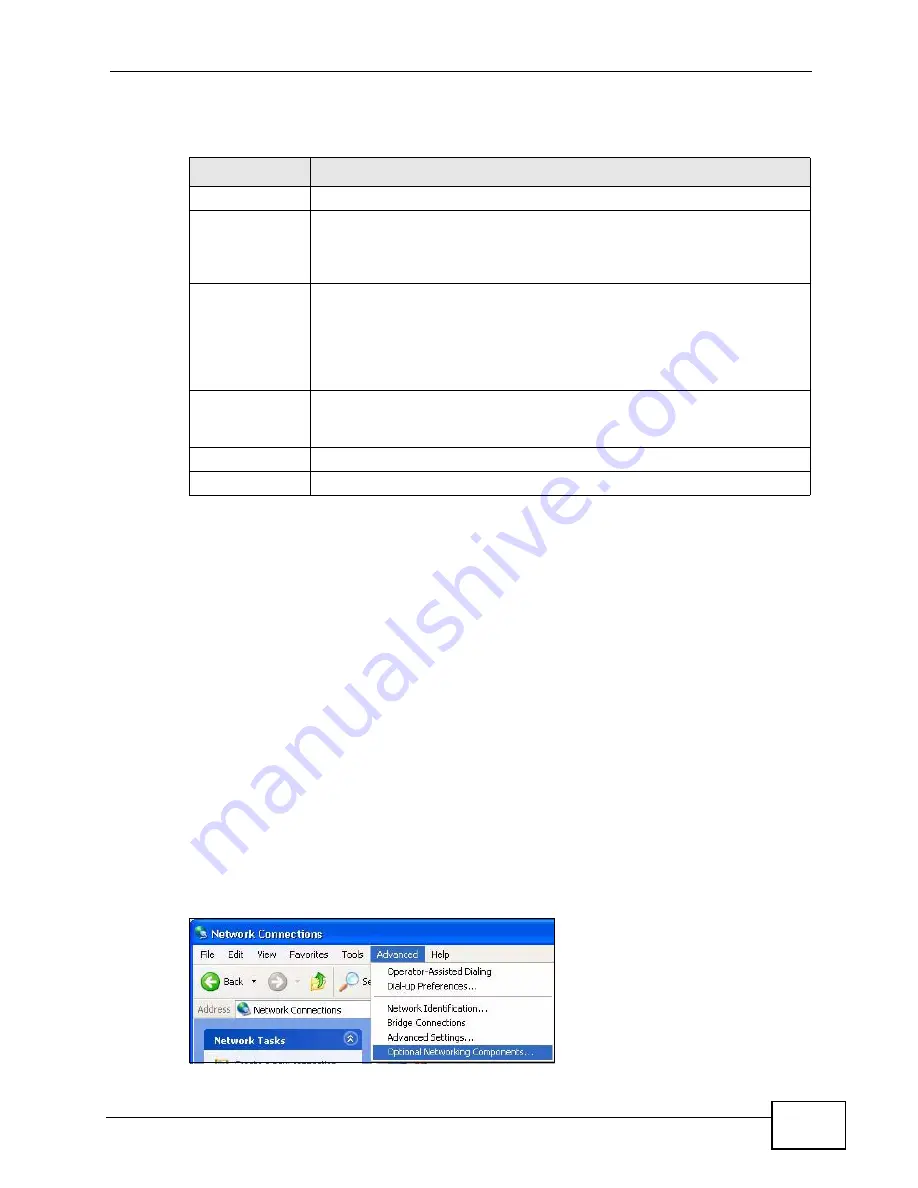
3
In the Network Connections window, click Advanced in the main menu and
select Optional Networking Components ….
Figure 110
Network Connections
Table 112
TOOLS > UPnP
LABEL
DESCRIPTION
Device Name
This field identifies your device in UPnP applications.
Enable the
Universal Plug
and Play (UPnP)
Feature
Select this to activate UPnP. Be aware that anyone could use a UPnP
application to open the web configurator's login screen without entering
the WiMAX Device's IP address. You still have to enter the password,
however.
Allow users to
make
configuration
changes
through UPnP
Select this to allow UPnP-enabled applications to automatically
configure the WiMAX Device so that they can communicate through the
WiMAX Device. For example, using NAT traversal, UPnP applications
automatically reserve a NAT forwarding port in order to communicate
with another UPnP enabled device; this eliminates the need to manually
configure port forwarding for the UPnP enabled application.
Allow UPnP to
pass through
Firewall
Select this to allow traffic from UPnP-enabled applications to bypass the
firewall. Clear this if you want the firewall to check UPnP application
packets (for example, MSN packets).
Apply
Click to save your changes.
Reset
Click to restore your previously saved settings.
Summary of Contents for MAX-306
Page 2: ......
Page 8: ...Safety Warnings User s Guide 8...
Page 10: ...Contents Overview User s Guide 10...
Page 30: ...30...
Page 36: ...Chapter 1 Getting Started User s Guide 36...
Page 46: ...Chapter 2 Introducing the Web Configurator User s Guide 46...
Page 64: ...Chapter 4 VoIP Connection Wizard User s Guide 64...
Page 65: ...65 PART II Basic Screens The Main Screen 40 The Setup Screens 67...
Page 66: ...66...
Page 74: ...74...
Page 88: ...Chapter 6 The LAN Configuration Screens User s Guide 88...
Page 112: ...Chapter 8 The Wi Fi Configuration Screens User s Guide 112...
Page 134: ...Chapter 10 The NAT Configuration Screens User s Guide 134...
Page 146: ...146...
Page 164: ...Chapter 12 The Service Configuration Screens User s Guide 164...
Page 180: ...Chapter 14 The Phone Book Screens User s Guide 180...
Page 182: ...182...
Page 202: ...Chapter 15 The Certificates Screens User s Guide 202...
Page 212: ...Chapter 16 The Firewall Screens User s Guide 212...
Page 226: ...Chapter 18 The Remote Management Screens User s Guide 226...
Page 242: ...Chapter 19 The Logs Screens User s Guide 242...
Page 252: ...Chapter 20 The UPnP Screen User s Guide 252...
Page 265: ...265 PART VI Troubleshooting and Specifications Troubleshooting 267 Product Specifications 275...
Page 266: ...266...
Page 274: ...Chapter 22 Troubleshooting User s Guide 274...
Page 278: ...278...
Page 310: ...Appendix B Setting Up Your Computer s IP Address User s Guide 310...
Page 336: ...Appendix D Pop up Windows JavaScripts and Java Permissions User s Guide 336...
Page 380: ...Appendix F Importing Certificates User s Guide 380...
Page 382: ...Appendix G SIP Passthrough User s Guide 382...
Page 398: ...Appendix J Customer Support User s Guide 398...
Page 405: ...Index User s Guide 405...