GS-4012F User’s Guide
152
Chapter 24 OSPF
24.5 Configuring OSPF Interfaces
To configure an OSPF interface, first create an IP routing domain in the
IP Setup
screen (see
for more information). Once you create an IP routing domain, an OSPF
interface entry is automatically created.
In the
OSPF Configuration
screen, click
Interface
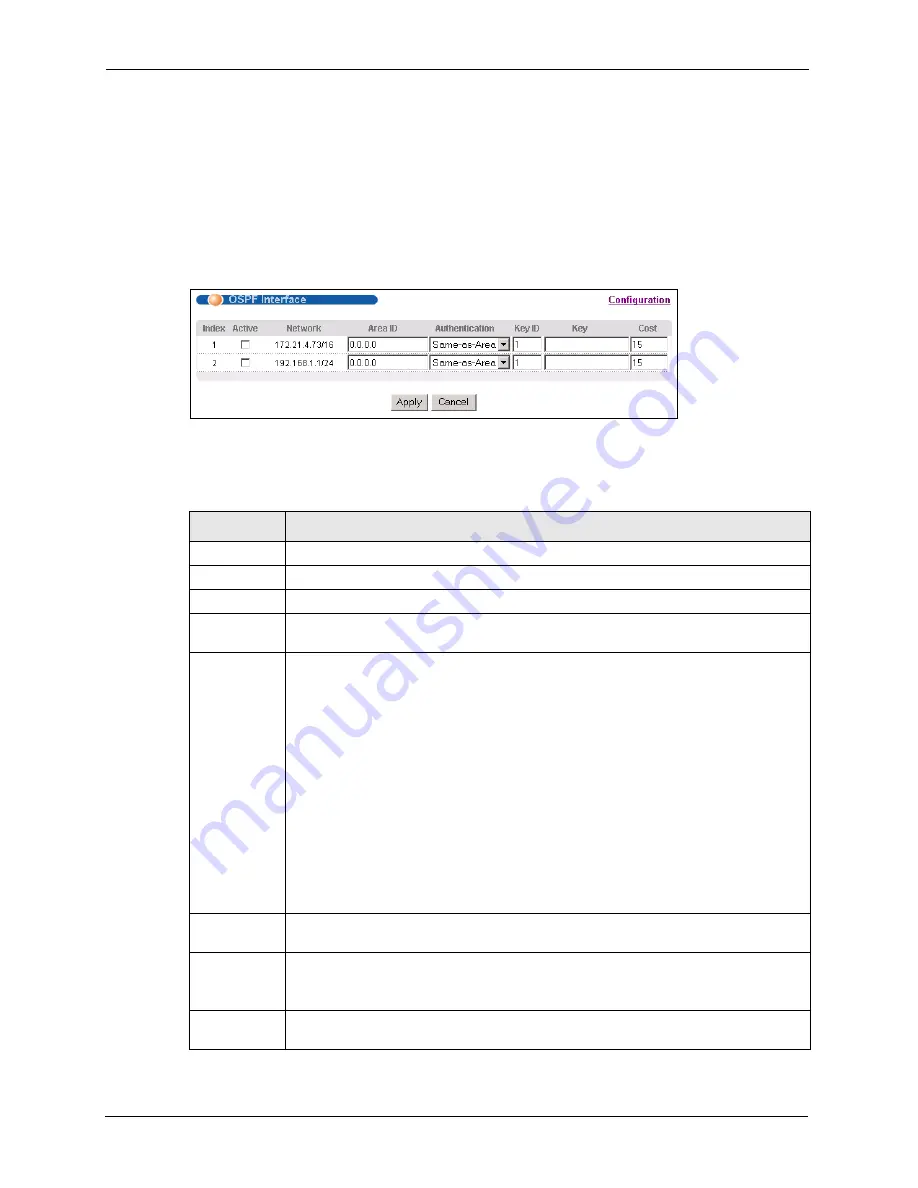
to display the
OSPF Interface
screen.
Figure 67
OSPF Interface
The following table describes the labels in this screen.
Table 55
OSPF Interface
LABEL
DESCRIPTION
Index
This field displays the index number for an interface.
Active
Select this option to enable an interface.
Network
This field displays the IP interface information.
Area-ID
Enter the area ID (that uses the format of an IP address in dotted decimal notation) of
an area to associate the interface to that area.
Authentication
Note:
OSPF Interface(s) must use the same authentication method
within the same area.
Select an authentication method. Choices are
Same-as-Area
,
None
(default),
Simple
and
MD5
.
To participate in an OSPF network, you must set the authentication method and/or
password the same as the associated area.
Select
Same-as-Area
to use the same authentication method within the area and set
the related fields when necessary.
Select
None
to disable authentication. This is the default setting.
Select
Simple
and set the
Key
field to authenticate OSPF packets transmitted through
this interface using simple password authentication.
Select
MD5
and set the
Key ID
and
Key
fields to authenticate OSPF packets
transmitted through this interface using MD5 authentication.
Key ID
When you select
MD5
in the
Authentication
field, specify the identification number of
the authentication you want to use.
Key
When you select
Simple
in the
Authentication
field, enter a password eight-character
long. Characters after the eighth character will be ignored.
When you select
MD5
in the
Authentication
field, enter a password 16-character long.
Cost
The interface cost is used for calculating the routing table. Enter a number between 0
and 65535.
Summary of Contents for GS-4012F
Page 1: ...GS 4012F Ethernet Switch User s Guide Version 3 60 4 2005...
Page 19: ...GS 4012F User s Guide 18 Table of Contents...
Page 25: ...GS 4012F User s Guide 24 List of Figures...
Page 29: ...GS 4012F User s Guide 28 List of Tables...
Page 39: ...GS 4012F User s Guide 38 Chapter 1 Getting to Know Your Switch...
Page 43: ...GS 4012F User s Guide 42 Chapter 2 Hardware Installation and Connection...
Page 49: ...GS 4012F User s Guide 48 Chapter 3 Hardware Overview...
Page 63: ...GS 4012F User s Guide 62 Chapter 5 Initial Setup Example...
Page 69: ...GS 4012F User s Guide 68 Chapter 6 System Status and Port Statistics...
Page 101: ...GS 4012F User s Guide 100 Chapter 11 Spanning Tree Protocol...
Page 113: ...GS 4012F User s Guide 112 Chapter 15 Link Aggregation...
Page 117: ...GS 4012F User s Guide 116 Chapter 16 Port Authentication...
Page 125: ...GS 4012F User s Guide 124 Chapter 18 Classifier Figure 53 Classifier Example...
Page 131: ...GS 4012F User s Guide 130 Chapter 19 Policy Rule Figure 56 Policy Example...
Page 135: ...GS 4012F User s Guide 134 Chapter 20 Queuing Method...
Page 141: ...GS 4012F User s Guide 140 Chapter 21 VLAN Stacking...
Page 183: ...GS 4012F User s Guide 182 Chapter 30 VRRP...
Page 203: ...GS 4012F User s Guide 202 Chapter 32 Access Control...
Page 205: ...GS 4012F User s Guide 204 Chapter 33 Diagnostic...
Page 219: ...GS 4012F User s Guide 218 Chapter 38 Routing Table...
Page 267: ...GS 4012F User s Guide 266 Chapter 40 Command Examples...
Page 277: ...GS 4012F User s Guide 276 Chapter 41 IEEE 802 1Q Tagged VLAN Commands...
Page 287: ...GS 4012F User s Guide 286 Chapter 42 Troubleshooting...
Page 291: ...GS 4012F User s Guide 290 Product Specifications...


