


ES-2024A User’s Guide
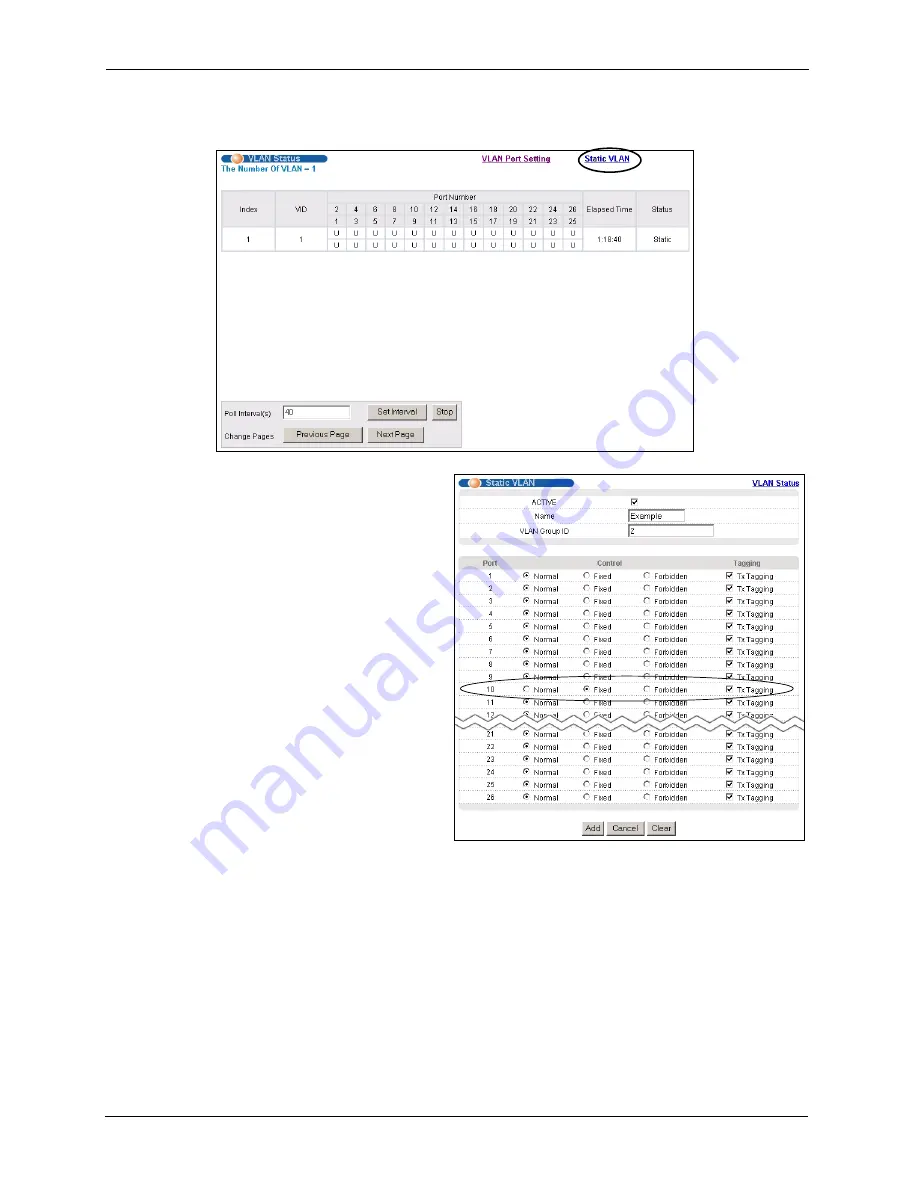
48
Chapter 5 Initial Setup Example
1
Click
Advanced Application
and
VLAN
in the navigation panel and click the
Static
VLAN
link.
2
In the
Static VLAN
screen,
select
ACTIVE
, enter a
descriptive name in the
Name
field and enter 2 in the
VLAN
Group ID
field for the
VLAN2
network.
Note:
The
VLAN Group ID
field in
this screen and the
VID
field
in the
IP Setup
screen refer
to the same VLAN ID.
3
Since the
VLAN2
network is
connected to port 10 on the
switch, select
Fixed
to configure
port 10 to be a permanent
member of the VLAN only.
4
To ensure that VLAN-unaware
devices (such as computers and
hubs) can receive frames
properly, clear the
TX Tagging
check box to set the switch to remove VLAN tags before
sending.
5
Click
Add
to save the settings.
5.1.2 Setting Port VID
Use PVID to add a tag to incoming untagged frames received on that port so that the frames
are forwarded to the VLAN group that the tag defines.
Summary of Contents for ES-2024A
Page 1: ...ES 2024A Ethernet Switch User s Guide Version 3 60 6 2005...
Page 33: ...ES 2024A User s Guide 32 Chapter 2 Hardware Installation and Connection...
Page 39: ...ES 2024A User s Guide 38 Chapter 3 Hardware Overview...
Page 74: ...ES 2024A User s Guide Chapter 8 VLAN 73 Figure 35 Port Based VLAN Setup All Connected...
Page 77: ...ES 2024A User s Guide 76 Chapter 8 VLAN...
Page 87: ...ES 2024A User s Guide 86 Chapter 11 Spanning Tree Protocol...
Page 99: ...ES 2024A User s Guide 98 Chapter 15 Link Aggregation...
Page 103: ...ES 2024A User s Guide 102 Chapter 16 Port Authentication...
Page 135: ...ES 2024A User s Guide 134 Chapter 23 Diagnostic...
Page 167: ...ES 2024A User s Guide 166 Chapter 27 Introducing the Commands...
Page 183: ...ES 2024A User s Guide 182 Chapter 28 Command Examples...
Page 193: ...ES 2024A User s Guide 192 Chapter 29 IEEE 802 1Q Tagged VLAN Commands...
Page 203: ...ES 2024A User s Guide 202 Chapter 30 Troubleshooting...
Page 207: ...ES 2024A User s Guide 206 Product Specifications...


