background image

Chapter 7 Report

ENC User’s Guide

178

Each field is described in the following table.

7.2  Customized Reports Screen

Click Report > Reports > Customized Reports to view and manage (add, edit, delete) a list of 
configured reports.

Note: The ENC allows a maximum size of 300 MB for a scheduled report. When the ENC 

server’s disk space is not enough, the ENC sends out an alert e-mail to 

administrators. Remove unused reports to free up some disk space.

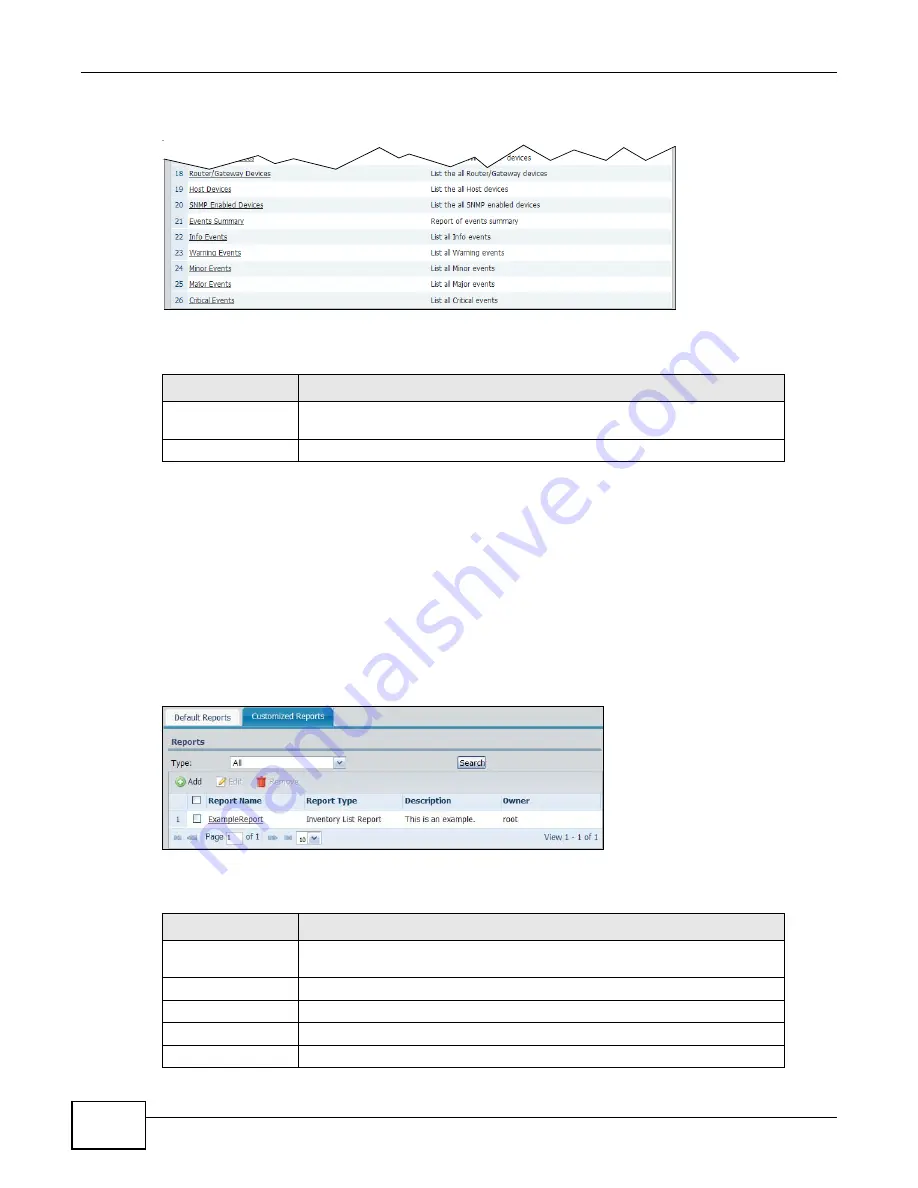
Figure 129   

Report > Reports > Customized Reports

Each field is described in the following table.

Table 76   

Report > Reports > Default Reports

LABEL

 DESCRIPTION

Report Name

This field displays the descriptive name of a default report. Click this to 
generate and view the report.

Description

This field displays more information about the report.

Table 77   

Report > Reports > Customized Reports

LABEL

 DESCRIPTION

Type

Select the type of reports you want to display in this screen and click 
Retrieve. You have to add at least a report by clicking Add to use this filter.

Search

Click this to perform the filter.

Add

Click this to create a report.

Edit

Select a report and click this to configure it.

Remove

Click this to delete the selected report(s).

Summary of Contents for ENTERPRISE NETWORK CENTER

Page 1: ...el com www zyxel com Enterprise Network Center Network Management System Copyright 2011 ZyXEL Communications Corporation Software Version 1 2 Edition 1 3 2011 DEFAULT LOGIN DETAILS User Name root Password root ...

Page 2: ......

Page 3: ...o www zyxel com for additional support documentation and product certifications User Guide Feedback Help us help you Send all User Guide related comments questions or suggestions for improvement to the following address or use e mail instead Thank you The Technical Writing Team ZyXEL Communications Corp 6 Innovation Road II Science Based Industrial Park Hsinchu 30099 Taiwan Need More Help More hel...

Page 4: ...not contact your vendor then contact a ZyXEL office for the region in which you bought the device See http www zyxel com web contact_us php for contact information Please have the following information ready when you contact an office Product model and serial number Warranty Information Date that you received your device Brief description of the problem and the steps you took to solve it Disclaime...

Page 5: ...or return key on your keyboard Enter means for you to type one or more characters and then press the ENTER key Select or choose means for you to use one of the predefined choices A right angle bracket within a screen name denotes a mouse click For example Maintenance Log Log Setting means you first click Maintenance in the navigation panel then the Log sub menu and finally the Log Setting tab to g...

Page 6: ...Document Conventions ENC User s Guide 6 Server DSLAM Firewall Switch Router ...

Page 7: ...ENC User s Guide 7 Contents Overview User s Guide 15 Web Configurator 17 Tutorials 47 Technical Reference 83 Dashboard 85 Configuration 93 Event 123 Tool 135 Report 177 Application 189 Maintenance 243 Troubleshooting 263 ...

Page 8: ...Contents Overview ENC User s Guide 8 ...

Page 9: ...mmon Icons 43 1 3 7 Working with Tables 44 Chapter 2 Tutorials 47 2 1 Acknowledge Device Events 47 2 2 Firmware Upgrade for Multiple Devices 48 2 3 Configuration Backup for Multiple Devices 53 2 4 Configuration Restore to a Device 55 2 5 Script Distribution to Multiple Devices 58 2 6 ENC Backup and Performing a Complete Auto Discovery with Filters 60 2 7 Event Actions Triggered By Received Events ...

Page 10: ...Script Distribution 106 4 3 1 Script Distribution Add 107 4 4 Configuration File Update Backup 111 4 4 1 Configuration File List 111 4 4 2 Uploading Configuration Files to the ENC 112 4 4 3 Backup Schedule List 114 4 4 4 Creating or Editing a Backup Schedule List 115 4 4 5 Update Schedule List 116 4 4 6 Creating or Editing an Update Schedule List 117 4 5 Default Performance Monitor Library 120 4 5...

Page 11: ...6 3 Inventory of Networks 154 6 3 1 Inventory Network Details 155 6 4 Device Group 156 6 5 Device Group Add Edit 157 6 6 PING Trace Route 158 6 7 MIB Loader 159 6 7 1 User Loaded MIBs 159 6 7 2 Default MIBs 160 6 8 Performance Monitoring 161 6 8 1 Device Monitor 161 6 8 2 Example Displaying Selected Performance Monitors 162 6 8 3 Example Removing Selected Performance Monitors 163 6 8 4 Monitor Man...

Page 12: ...199 8 5 Event Alarm 201 8 5 1 Configuring an Event 203 8 5 2 View Alarm Logs 205 8 5 3 Alarm Parameters 206 8 5 4 Configuring an Alarm 206 8 6 VLAN Management 208 8 6 1 VLAN Management Configuration Examples 210 8 6 2 Edit a VLAN Group 214 8 6 3 Port Setting 217 8 7 Port Basic Settings 219 8 7 1 View Port Status 221 8 8 Bandwidth Control Overview 222 8 8 1 CIR and PIR 222 8 8 2 Bandwidth Control S...

Page 13: ...9 5 Customize Device Models 248 9 5 1 Device Model Add Edit 249 9 6 Customize Images 251 9 6 1 Images Add Edit 253 9 7 Backup Restore 255 9 7 1 Backup 257 9 8 Data Export 258 9 9 Registration 258 9 9 1 Registration Screen 259 9 10 Log 260 9 11 About 261 Chapter 10 Troubleshooting 263 10 1 Installation Problem 263 10 2 Problem Accessing the ENC 263 10 3 Problem Finding a Device 264 10 4 Map Problem...

Page 14: ...ents ENC User s Guide 14 Appendix B IP Addresses and Subnetting 271 Appendix C Pop up Windows JavaScript and Java Permissions 281 Appendix D Open Software Announcements 291 Appendix E Legal Information 301 Index 303 ...

Page 15: ...15 PART I User s Guide ...

Page 16: ...16 ...

Page 17: ...and fields vary depending on the managed device s model and firmware version 1 1 Web Configurator Requirements In order to use the Web Configurator you must Use Firefox 3 0 or later or Internet Explorer 7 or later Allow pop up windows blocked by default in Windows XP Service Pack 2 Enable JavaScript enabled by default Enable Java permissions enabled by default Enable cookies The recommended screen...

Page 18: ...e ENC service on the ENC server itself open a web browser and type http localhost midas Otherwise type https ENC server s IP address midas The login screen displays Figure 1 Login Screen 2 Type the user name and password see the cover page of this guide to get the default login information ...

Page 19: ...ls on the dashboard Figure 2 Web Configurator Dashboard The Web Configurator automatically refreshes itself every 3 minutes Note If there is no activity for more than 15 minutes the Web Configurator automatically logs you out If this happens to you simply log back into the Web Configurator again 1 3 Web Configurator Screens Overview The Web Configurator screen is divided into these parts as illust...

Page 20: ...isplay the logs the ENC generates while you are logged in Figure 4 Message Center Table 1 Title Bar LABEL DESCRIPTION Logout Click this to log out of the Web Configurator Message Center Click this to display the logs the ENC generates while you are logged in Help Click this to open the help page for the current screen If you have selected a node in the OTV tree see Section 1 3 3 on page 24 you can...

Page 21: ...pload firmware files to managed devices Script Distribution Create and maintain batch files of commands that you can apply to managed devices Update Backup Configuration File List Maintain a list of device configuration files that the ENC can upload to devices You can upload configuration files from your computer or devices Backup Schedule List Create schedules for backing up device configuration ...

Page 22: ... export raw data or reports Schedule Report Set a schedule to automatically generate device performance monitor reports and send them out by e mail Syslog View Log Viewer Displays clears and exports the syslogs received from managed network devices Log Statistic Displays statistics based on the syslogs received from managed network devices Settings Set the ENC to receive and store syslogs You can ...

Page 23: ...wireless AP and view its basic settings AP Monitor View all managed wireless APs Note At the time of writings this AP Manager function only supports ZyXEL NWA1300 N Series Maintenance User Account Manage ENC user accounts Server Configure the ENC s IP address or domain login lockout and mail relay settings Customize Device Create and manage a list of devices and set their representative icons Imag...

Page 24: ...tworks and their status A B D C Table 3 Device and Network Icon Colors ICON COLOR DESCRIPTION Device green The device is online and working normally red The device is offline white The device is temporarily not managed by the ENC Status polling for the device is disabled in the Tool Inventory Device screen Network green All devices except the devices that are temporarily not managed by the ENC in ...

Page 25: ...fied Device folder See Section 1 3 6 on page 43 for more information about icons Note Click the Plus Sign next to an icon in the OTV Device View or Group View to go to the next layer down Click this Minus Sign to hide the next layer objects Note Some function menus are hidden until you select a device in the OTV Device View or Group View such as MIB Browser RMON Performance Monitoring and Port Man...

Page 26: ...lick the title bar to hide Device View and expand Group View Click Device View again to hide Group View By default no group is available You can configure device groups in the Tool Device Group screen see Section 6 4 on page 156 In Group View click the icon for a single device to open the device s properties screen Click the icon of a group folder to display all associated devices in the main scre...

Page 27: ... associate different devices with different maps for Operators and Users See Section 2 11 on page 80 for an example Administrators can also draw links on a map to show connections between devices and or networks See Section 1 3 3 9 on page 32 The following table describes the labels and submenus in the Map screen A in Figure 9 Table 4 Map LABEL DESCRIPTION Map of This field displays the name of th...

Page 28: ...this to create a connection between them The Add Link screen appears See Section 1 3 3 9 on page 32 You can also right click the nodes and click Add Link to open the Add Link screen Delete Click this to remove the selected item s Fit Size Click this to resize the Map to fit this window Actual Size Click this to display the actual size of the Map Locate Click this to quickly find a device that you ...

Page 29: ...ap 16 by 16 pixels or 48 by 48 pixels Background image Select which image you want to display with the Map s root subnet Preview This field displays the image preview Access Devices This field displays the number of devices that have been associated with this Map Click Select Devices to add or remove devices from a device list Description Type additional information for this Map Access Setting Sel...

Page 30: ...describes the labels in this screen 1 3 3 7 Manage Maps This screen lists a summary table of existing Maps To open this screen click the Map icon on the left of the main window and then click Map Manager Figure 13 Map Manager Table 6 Map Open LABEL DESCRIPTION Maps Select the Map you want to open The image preview appears Cancel Click this to discard the changes and exit this screen Ok Click this ...

Page 31: ...ck this to modify the settings for a selected Map See Section 1 3 3 5 on page 29 for similar description Remove Select one or multiple Map s and click this to delete them check box Select the check box of an entry and click Duplicate Edit or Remove to take the action for the entry respectively Select or clear the check box at the table heading line to select or clear all check boxes in this column...

Page 32: ...nd image Select whether to change the background image to an existing image or a new image Select Image Select which image to which you want to change Preview This field displays the selected image s preview Image Name Enter up to 32 characters for the name of the image You can use alphanumeric characters 0 9 a z A Z underscores _ and hyphens Spaces are not allowed Upload Click the text box or Bro...

Page 33: ... Map Background LABEL DESCRIPTION Link Label Name Enter up to 32 characters for the link s name for identification purposes You can use alphanumeric characters 0 9 a z A Z arrow brackets underscores _ hyphen dot and spaces Link Endpoint 1 This field displays the first node s IP address that you selected Link Endpoint 2 This field displays the second node s IP address that you selected Interface In...

Page 34: ...17 Right click OTV Select a Network Figure 18 Right click OTV Select a Device The following table describes the right click menus Table 10 Right click Menus LABEL DESCRIPTION Add Network Click this to create a new network node Add User defined Folder Click this to add a new folder which helps you to organize devices Add Device Click this to register a new device ...

Page 35: ...are Upgrade function from the right click menu the main screen shows the related setting for the device only MIB Browser Click this to view and configure MIB settings about this device See Section 4 1 1 on page 94 Script Distribution Click this to manage add edit delete execute scripts on this device See Section 4 3 on page 106 Configuration Backup Click this to back up configuration for this devi...

Page 36: ...Name Enter up to 32 characters for the name of a network You can use alphanumeric characters 0 9 a z A Z underscores _ hyphens and or dots Network Address Enter the IP address of the network Subnet Mask Enter the subnet mask of the network Network Type Select the type of the network The available options are General Bus Star Ring and Tree Each type associates an icon for your differentiation Descr...

Page 37: ... Add User defined Folder The following table describes the labels in this screen Table 12 Right click Menus Add User defined Folder LABEL DESCRIPTION Folder Name Type up to 32 characters for the folder s name You can use alphanumeric 0 9 a z A Z underscores _ hyphens and dot Spaces are not allowed Description Type additional information for this folder Cancel Click this to exit this screen and go ...

Page 38: ... the ENC To open this screen right click the Root Subnet or a network and select Add Device Figure 21 Right click Menus Add Device Step 1 Figure 22 Right click Menus Add Device Step 2 Note At the time of writing the step 2 s screen for adding an NWA1300 N Series device is different than adding any other device ...

Page 39: ...ce Model This field displays the model name and the associated icon you just selected MAC Address Enter the MAC address of the device Device Name Enter up to 32 characters for the name of the device You can use alphanumeric characters 0 9 a z A Z underscores _ hyphens and or dots Mapped Room No Enter the number of the room where the device is located IP Address Enter the IP address of the device L...

Page 40: ...ield is available if you selected MD5 or SHA1 in the Authentication field Enter the authentication key which depends on the authentication algorithm you selected MD5 a key 16 20 characters long SHA1 a key 20 characters long You can use any alphanumeric characters or _ If you want to enter the key in hexadecimal type 0x at the beginning of the key For example 0x0123456789ABCDEF is in hexadecimal fo...

Page 41: ...igurator ENC User s Guide 41 Figure 24 Right click Menus Batch Add Devices Step 1 Figure 25 Right click Menus Batch Add Devices Step 2 Figure 26 Right click Menus Batch Add Devices Step 3 E x a m p l e Exam ple Exam ple ...

Page 42: ...Click this to exit this screen and go back to the previous screen Next Click this to proceed to the next screen Batch Add Devices Step 2 Device s ready to import This section displays the list of devices that are ready to be imported Device Name This field displays the name of a device Device Type This field displays the device type you just selected Device Model This field displays the model name...

Page 43: ...he event details An event is a log entry generated when an associated alarm occurs on a device Use an event icon as a reminder that notifies you a to do list To clear the icon in the OTV you have to acknowledge all the events on the device see Section 2 1 on page 47 A Major event occurred on the device and it has not been acknowledged Click this to view the event details A Minor event occurred on ...

Page 44: ...or tables Table 16 Common Fields in Tables LABEL DESCRIPTION I This indicates the index number of each entry in the table Click this to display the first page Click this to display the previous page Page X of X This displays the page number and total number of pages Click this to display the next page Click this to display the last page Select the maximum number of entries to display in one page V...

Page 45: ...hat column s criteria Click it again to sort the table s entries in descending reverse alphabetical order Figure 29 Sorting Table Entries by a Column s Criteria Ascending Figure 30 Sorting Table Entries by a Column s Criteria Descending 2 Select a column heading cell s right border and drag to re size the column Figure 31 Resizing a Table Column ...

Page 46: ...Chapter 1 Web Configurator ENC User s Guide 46 ...

Page 47: ...s access point function 8 2 RMON Introduction Similar to SNMP RMON Remote Network Monitor allows you to gather and monitor network traffic Both SNMP and RMON use an agent known as a probe which are software processes running on network devices to collect information about network traffic and store it in a local MIB Management Information Base With SNMP a network manager has to constantly poll the ...

Page 48: ...Application RMON Statistics screen Table 82 RMON Statistics LABEL DESCRIPTION Add Click this to create an entry Note At the time of writing this function is only available for ZyXEL Ethernet Switches using 3 90 firmware version Edit Select an entry in the table and click this to modify it Remove Select an entry in the table and click this to delete it Table View Select one or more ports or interfa...

Page 49: ...ace s as a table After selecting the data source s you wish to display click Table View on the Application RMON Statistics screen to open this screen Figure 142 RMON Statistics Table View Table 83 RMON Statistics Add Edit LABEL DESCRIPTION Port Number Enter the number of one port or interface to add to the ENC for viewing network statistics This field displays the port s number and is read only wh...

Page 50: ...he total number of good unicast packets received transmitted on the port s Undersize Packets This is display the number of packets dropped by the port s because they were less than 64 octets long and contained a valid FCS Fragments This is display the number of packets received transmitted on the port s because they were less than 64 octets long and contained an invalid FCS including non integral ...

Page 51: ...C User s Guide 51 10 Select the device model ES 2024A and click Next 11 The Select Firmware screen appears Select the file for firmware upgrade and click Next 12 Click Add in the Device Information section in the next screen ...

Page 52: ...from the Group field and click Search Select the device s you want to upgrade from the Available List click to make them appear in the Selected List Click Ok 14 Select Upgrade Now and click OK to start firmware upgrade immediately Do not turn off the devices while firmware upgrade is in process ...

Page 53: ... remote devices according to a schedule This tutorial shows you an example including the following create a new backup schedule perform configuration backup check the result The following shows how to configure step by step 1 Click Configuration Update Backup Backup Schedule List click Add 2 Enter the file name to which you want to save the device s configuration SwitchWeeklyBackup in this example...

Page 54: ... of the same model 4 Select Scheduled Time and click the text box to select a perferred date Select a time using the drop list box and then click OK Do not turn off the devices while configuration backup is in process 5 After the backup is completed you should see Success in the Status field ...

Page 55: ...ltiple devices with the same model according to a schedule This tutorial shows you an example including the following prepare a configuration file on the ENC through device backup or file upload create a new schedule for uploading the file to specified device s perform configuration upload check the result The following shows how to configure step by step 1 Click Configuration Update Backup Config...

Page 56: ... screen select device s from which you want to get a configuration example Click OK 4 Click OK again in the next screen 5 Click Search to update this screen or go to another screen and then back If the file appears in the configuration file list you have successfully backed up the configuration file from the device 6 Click the Update Schedule List tab and then Add icon ...

Page 57: ...elect the configuration file you just uploaded and then click Next 9 Click Add 10 In the Select Device screen select the device s to which you want to apply the configuration file Click OK 11 Select Update Now and then click OK to start configuration update 12 After the configuration file is successfully uploaded you should see Success in the Status field ...

Page 58: ...ake sure the ENC can access the devices via telnet before using this function This includes enabling the Telnet service on the devices and configuring any firewall devices between the ENC and the devices to allow telnet access The following shows how to configure step by step 1 Click Tool Device Group Enter a name and the description for the group and then click Add 2 In the Select Devices screen ...

Page 59: ...he device s to which you want to apply the script Click OK 8 Type CLI commands in the Commands section You can use a pound sign to write a note in the script Configure a schedule select Send Now in this example Click Ok 9 Wait a while until the script is successfully applied to the devices Success Fail or Partial Success displays in the Status field Select the script and then click View Log 10 The...

Page 60: ...w to configure seed settings how to configure discovery filter rules how to start auto discovery how to update the OTV Table 17 IP Settings in this Example LABEL DESCRIPTION IP ADDRESS E This is the ENC server 1 1 1 250 Network A A network where the ENC is located 1 1 1 0 24 Network B A network directly connected to the ENC 2 2 2 0 24 R1 This router connects networks A and B v 1 1 1 254 w 2 2 2 25...

Page 61: ...ngs Figure 38 Configure the Backup Location 2 Click the BackUp icon the BackUp screen appears Select BackUp Database and enter a name for the backup file for example 20100412ENCbackup Click Ok Figure 39 Back Up the ENC Database 3 The ENC generates the file Figure 40 Back Up the ENC Database 4 Click Tool Auto Discovery and select Enable Ping to use ping to detect ZyXEL firewall devices Leave other ...

Page 62: ...ure 43 Seed Settings 7 Select v1 and v2c and enter a most commonly used community on the firewall devices in the Read Community field Figure 44 Seed Settings Note The SNMP version selection depends on which SNMP versions your devices can support Note The ENC will fail to get a device s information if the device uses a different read community 8 Select the default discovery filter rule and click Ed...

Page 63: ...t event action enable email notification and configure the mail subject and content associate the action to the Device Down event The following shows you how to configure step by step 1 Click Maintenance Server configure the mail relay settings as shown next Click Apply Figure 47 Mail Relay Settings 2 Click Events Event Action and then Add Each default event in Events Configuration Default associa...

Page 64: ...oxes For example type A A event B occurred at C where you click Category of the alarm for first variable A Severity of the alarm for second variable B and Time when alarm was generated for third variable C Click Test Action to make a test 4 If you see Send notification successfully you should receive a mail as shown See Section 10 6 on page 266 if you get an error message 5 Click Events Configurat...

Page 65: ...ote If you cannot find a particular event in this Default screen click Events Configuration Customize and Add to customize an event 6 The Edit Events Configuration screen appears Select the NotifyByMail action in the Action field Click OK 1 2 ...

Page 66: ...e monitor libraries temperlates or you need to customize one configure a new performance monitor associate devices with the monitor configure the view to display statistics as a graph specify instances you wish to see in the graph monitor the changes over time The following shows you how to configure step by step 1 Click the device that you want to monitor the interface performance in the OTV pane...

Page 67: ...his monitor and configure its name InterfaceTxRxStatistics and library Interface Traffic Select the instances you want to use this example selects all and click to move them to the Selected Instance list Click Ok 5 You will see the monitor has been created in the Monitor Manager screen Select it and click View Report ...

Page 68: ...an example You can select up to 5 interfaces in the Tx and Rx tables at the bottom of the screen to display them in the graphics 7 If you do not want to see the detailed report for each interface on the device you can go to Tool Performance Monitoring Device Monitors Click Add Content ...

Page 69: ...Chapter 2 Tutorials ENC User s Guide 69 8 Select the monitor you just created Click Ok 9 Then you can see the monitor as the example below ...

Page 70: ... a Performance Monitor 2 9 Configure VLAN Settings The ENC provides the VLAN management feature to help you easily configure VLAN settings on switches This tutorial shows you how to configure VLAN settings ports 1 4 VLAN 100 ports 5 8 VLAN 200 on switch 1F Switch A including the following create VLAN groups add the device to the VLAN groups configure port VLAN settings configure additional VLAN se...

Page 71: ...s as shown in Figure 50 Click VLAN Group and then Add VLAN Group in the VLAN Group panel Figure 50 VLAN Management 2 Create a VLAN 100 Click Ok Figure 51 Add a VLAN Group 3 Repeat to create another VLAN 200 The created VLAN groups display in the VLAN Group panel Figure 52 Two VLAN Groups Created ...

Page 72: ...er Release it when you see a mark at the beginning of the VLAN100 folder name The ENC also configures a VLAN 100 on the switch Figure 53 The Device is Easily Added to the VLAN Group 5 Select VLAN100 in the VLAN Group folder to display 1F Switch A s VLAN settings on the right hand of the screen Click Edit Figure 54 Port VLAN Management 1 2 ...

Page 73: ... 6 The Edit VLAN screen appears Select Join and Tag on ports 1 to 4 Click Ok Figure 55 Port VLAN Settings 7 Repeat steps 4 6 to configure VLAN 200 on 1F Switch A The only difference is to add ports 5 8 to VLAN200 Figure 56 Port VLAN Settings ...

Page 74: ...ing methods according to your condition Table 18 Methods of Registering NWA1300 N Series to the ENC METHOD DESCRIPTION ADDITIONAL REQUIREMENTS 1 Devices use a dynamic IP address with DHCP option 224 and register to the ENC actively See Section 2 10 1 on page 75 A DHCP Server which supports DHCP option 224 A mapping list between the device MAC addresses and room numbers 2 Devices use a static IP ad...

Page 75: ... to you the ENC administrator Then you can do 1 Prepare the mapping list and save it as a text file list txt in this example for later upload Follow the exact format as shown Only use a comma to seperate the MAC address and room number without leaving any spaces in between 2 In the ENC right click the Root node in the OTV tree and select Batch Add Devices 3 Click Browse to locate the text file and...

Page 76: ... all devices are added in the OTV tree If you have prepared an appropriate Map image move the device icons on the Map to the right places which helps you check the location of each device You have finished the registation You can then click the Edit AP Profile icon in the OTV tree to configure each device s wireless AP profile settings ...

Page 77: ... address subnet mask gateway IP address and the ENC s IP address See the device User s Guide for how to do these After the installation and turning the devices on the ENC will add the devices passively after receiving their traps Then you can do 1 Click each device under the Unspecified Devices folder in the OTV tree and configure the room number Click Ok to save the change 2 Move the devices from...

Page 78: ... wireless AP profile settings 2 10 3 Method 3 If you have a DHCP server in the network but it does not support DHCP option 224 You can use this method After your NWA1300 N Series APs are turned on and obtain an IP address from the DHCP server you can use the Auto Discovery function to add them to the ENC Do the following 1 In the ENC click Tool Auto Discovery 2 Select Enable Ping and Root subnet I...

Page 79: ...MP version selection depends on which SNMP versions your devices can support Note The ENC will fail to get a device s information if the device uses a different read community 5 Select the default discovery filter rule and click Edit the Edit Discovery Filter screen appears Select NWA1300 N Series in the Values field Then click Ok The ENC will only adds NWA1300 N Series to the OTV through auto dis...

Page 80: ...erent map views with different devices associated for different users with Operator and or User types Note By default the default map is associated with all managed devices and is not editable or removable Each map can be associated with only one background image Here is an example You have registered 8 devices in the ENC You want to use 5 maps to differentiate the device locations and show differ...

Page 81: ...age Add screen You will need to upload 5 image files for this example 2 Create user accounts in the Maintenance User Account Add screen You will need to create 4 accounts Operator1 User1 User2 Operator2 Leave the Allowed Map Access list empty since you have not created the other Maps yet except the default one ...

Page 82: ...torials ENC User s Guide 82 3 Create Maps and associate them with background images devices and user accounts Log into the ENC using Operator1 Operator2 User1 and or User2 you should see the corresponding map views ...

Page 83: ...83 PART II Technical Reference ...

Page 84: ...84 ...

Page 85: ...en The Dashboard screen displays when you log into the ENC or click Dashboard in the navigation panel The dashboard displays general device information system status system resource usage licensed service status and interface status in widgets that you can re arrange to suit your needs You can also collapse refresh and close individual widgets ...

Page 86: ...Chapter 3 Dashboard ENC User s Guide 86 Figure 58 Dashboard B C D E A ...

Page 87: ...to update the widget s information immediately Close Widget E Click this to close the widget Use Widget Setting to re open it System Status Software Version This field displays the version of the ENC Release Date This field displays the date the ENC software version is released System Uptime This field displays how long the ENC has been running since it last restarted or was turned on Free Disk Sp...

Page 88: ...displays in brackets They are All Switch Router Gateway Firewall Wireless AP Host or Others Device This field displays the name of a device that generated most events Events This field displays the number of events the device has generated Map This widget displays the managed networks and devices that you are allowed to view and or manage as well as a Map image as the background the default is bla...

Page 89: ...ss AP Host or Others Device This field displays the name of a device that uses the most highest bandwidth Interface This field displays the name of an interface on the device swp means a switch port In This field displays what percentage of incoming traffic out of total incoming traffic amount the device has received Out This field displays what percentage of outgoing traffic out of total outgoing...

Page 90: ... AP Host Others Top N Select how many top number of entries about events or traffic amount to display in the widget Polling Interval Select how often you want the ENC to update the widget information it displays Select none to have the ENC stop updating the widget information Period Select the length of time interval you want to use to look at the statistics These values are updated based on the P...

Page 91: ...Select this to display all devices Segment Select this and a specific network segment to only display devices in the segment Cancel Click this to discard the changes and close this screen OK Click this to save the changes and close this screen Table 21 Edit a Widget continued LABEL DESCRIPTION ...

Page 92: ...Chapter 3 Dashboard ENC User s Guide 92 ...

Page 93: ...nts and a manager An agent is a management software module that resides in a managed switch your Ethernet switch An agent translates the local management information from the managed switch into a form compatible with SNMP The manager is the console through which network administrators perform network management functions It executes applications that control and monitor managed devices The manage...

Page 94: ...en to do the following SNMP operations Retrieving Data Get GetNext GetBulk Altering Variables Set Note Click the Plus Sign next to a MIB object in the SNMP MIB tree to go to the next layer down Figure 62 Configuration MIB Browser Table 22 SNMP Commands COMMAND DESCRIPTION Get Allows the manager to retrieve an object variable from the agent GetNext Allows the manager to retrieve the next object var...

Page 95: ... a folder in the MIB tree on the left and type the rest of a leaf object s ID Enter a leaf object s ID or Object identifier Data is formatted in MIB dot format optionally with a leading text identifier for example sysObjectID 0 or 1 3 6 1 2 1 1 2 0 Get Click Get to retrieve the latest recorded value or setting for the selected object Object Type This field identifies what kind of value the object ...

Page 96: ...B object Object Type Select an appropriate type for the MIB object Cancel Click this to discard the changes and exit this screen OK Click this to save the changes and exit this screen Clear Click this to remove the information displayed in the table Name OID This is the object s name or object ID Value This is the object ID s setting For some objects you can set this For other objects you can only...

Page 97: ...wser Custom Table LABEL DESCRIPTION Add Click this to open a screen where you can create a new custom table Edit Select a custom table and click this to modify it Remove Select a custom table and click this to delete it check box Select the check box of an entry and click Edit or Remove to take the action for the entry respectively Select or clear the check box at the table heading line to select ...

Page 98: ...B Browser Custom Table Add LABEL DESCRIPTION Table Name Enter up to 20 characters to identify the custom table You can only edit this when adding a custom table it is read only when editing a custom table Available Items Select the objects leaf nodes under the same parent in the MIB tree to include in this table and use the arrow to move them to the Selected Items list Selected Items This section ...

Page 99: ... 5 to 3600 in seconds the ENC should query the monitored device for the value of the object Start Polling Click this to have the ENC start querying the monitored device for the value of the object Stop Polling Click this to have the ENC halt querying the monitored device for the value of the object Switch to Graph View Click this to view the results for the object as a graph Switch to graph view c...

Page 100: ...ew LABEL DESCRIPTION Polling Interval Set how often 5 to 3600 in seconds the ENC should query the monitored device for the value of the object Start Polling Click this to have the ENC start querying the monitored device for the value of the object Stop Polling Click this to have the ENC halt querying the monitored device for the value of the object Export to CSV Click this to save the results as a...

Page 101: ... select the model here and click Retrieve Firmware Version To only display firmware of a specific version select the model in the Device Model field and then select the firmware version and click Search Add Click this to upload a firmware file to the ENC Remove Select one or more entries and click this to delete them check box Select the check box of an entry and click Remove to delete it Select o...

Page 102: ...need to use the Configuration Firmware Upgrade Firmware List screen to upload the firmware to the ENC see Section 4 2 2 on page 102 Figure 70 Configuration Firmware Upgrade Schedule List Table 29 Configuration Firmware Upgrade Add LABEL DESCRIPTION Firmware File Path and Name Type the path and file name of the firmware file you wish to upload to the ENC in the text box or click Browse to locate it...

Page 103: ...this to edit the entry s update time Remove Select an entry that has a status of Waiting Success Fail or Partial Success and click this to delete it check box Select the check box of an entry and click Edit or Remove to take the action for the entry respectively Select or clear the check box at the table heading line to select or clear all check boxes in this column Status This shows the status of...

Page 104: ...Chapter 4 Configuration ENC User s Guide 104 2 Select the firmware version to use to upgrade the managed devices and click Next 3 Under Device Information click Add ...

Page 105: ...vidual managed devices that you want to upgrade with the selected firmware Click OK You can also use the By OTV screen to choose the devices for firmware upgrade 5 Set a time for the ENC to perform the upgrade or leave Upgrade Now selected to do it right away You can also optionally add a descriptive note Click OK ...

Page 106: ...Distribution Use script files to apply commands that you specify Use the ENC to create the script files Click Configuration Script Distribution to open the Script screen Use the Script screens to create and manage script distribution entries Use script distribution entries to create store name and run script files You can store multiple script files on the ENC at the same time Figure 71 Configurat...

Page 107: ...tus of Running View Log Select an entry and click this to display a log of the script s distribution history check box Select the check box of an entry and click Edit Remove or View Log to take the action for the entry respectively Select or clear the check box at the table heading line to select or clear all check boxes in this column Status This shows whether the script distribution is Running w...

Page 108: ...iguration Script Distribution Add LABEL DESCRIPTION Protocol Select the protocol Telnet or SSH which the ENC uses to connect to the specified device s and execute this script Name Enter up to 32 characters to specify a name for the script distribution entry Interval Specify how long the ENC is to wait in seconds between sending two commands to the entry s listed devices Note You can put commands t...

Page 109: ...ess This field displays the corresponding IP address of each listed managed device Model Name This field displays the name of the device model for each listed managed device Commands Use this section to list the commands you want to run on the selected managed devices Use a pound sign in the beginning of a line for a note Use a pipe character followed by keywords that identify whether the script h...

Page 110: ...is Save Command screen are described as following File Name Enter up to 32 characters for the name of the command list file You can use alphanumeric characters 0 9 a z A Z underscores _ and hyphen Description Type additional information for the file in this field Cancel Click this to discard the changes and exit this screen Ok Click this to save the changes and exit this screen Clear Click this ic...

Page 111: ...p Time Select a time period to limit up to how long ago the configuration files were saved to the ENC and click Search Add Click this to upload a configuration file to the ENC Remove Select an entry and click this to delete it Export Select an entry and click this to view the configuration file or save it to the computer you are using to access the ENC check box Select the check box of an entry an...

Page 112: ...k Configuration Update Backup Add to upload configuration files to the ENC You can get the configuration files from managed devices or from your computer if you have them stored there Figure 77 Configuration Update Backup Add Backup From Device Figure 78 Configuration Update Backup Add Upload File ...

Page 113: ...able devices by search or by the OTV view In the By Search sreen enter the criteria such as device model and group and click Search to filter the available devices Select one or more devices from which you want to back up the configuration files Click or to move them to the Selected List Click OK In the By OTV screen select device s from the OTV list and then click OK Device Name This field displa...

Page 114: ...to delete it check box Select the check box of an entry and click Edit or Remove to take the action for the entry respectively Select or clear the check box at the table heading line to select or clear all check boxes in this column Status This shows whether the scheduled configuration download is Running waiting to start Waiting has failed Fail has all completed Success or has partially completed...

Page 115: ...cribes the labels in this screen Table 36 Configuration Update Backup Backup Schedule List Add LABEL DESCRIPTION File Name Enter up to 20 characters to specify a name for the configuration file You can use letters numbers underscores and dashes Description List any special information that you want to record about the configuration file Device List If you will backup configuration files from manag...

Page 116: ...vailable devices by search or by the OTV view In the By Search sreen enter the criteria such as device model and group and click Search to filter the available devices Select one or more devices from which you want to back up the configuration files Click or to move them to the Selected List Click OK In the By OTV screen select device s from the OTV list and then click OK Device Name This field di...

Page 117: ... that is not running and click this to delete it check box Select the check box of an entry and click Edit or Remove to take the action for the entry respectively Select or clear the check box at the table heading line to select or clear all check boxes in this column Status This shows whether the scheduled configuration upload is Running waiting to start Waiting has failed Fail has all completed ...

Page 118: ...Chapter 4 Configuration ENC User s Guide 118 2 Select the configuration file to upload to the managed devices and click Next 3 Under Device List click Add ...

Page 119: ... file You can display the list of available devices by OTV device view or group view Click OK 5 Set a date and time for the ENC to perform the update or leave Update Now selected to do it right away Click OK Make sure the ENC and the managed devices do NOT get turned off during the update process as it may leave the managed device unusable ...

Page 120: ...n Performance Monitor Library Customized Monitor Library Each field is described in the following table Table 38 Configuration Performance Monitor Library Default Monitor Library LABEL DESCRIPTION Name This field displays the name of a performance monitor MIB Node This field displays the MIB node s this monitor uses Description This field displays additional information for the monitor Table 39 Co...

Page 121: ...Library Customized Monitor Library Add Each field is described in the following table MIB Node This field displays the MIB node this monitor uses Description This field displays additional information for the monitor Table 39 Configuration Performance Monitor Library Customized Monitor Library continued LABEL DESCRIPTION Table 40 Configuration Performance Monitor Library Customized Monitor Library...

Page 122: ...screen Choose the MIB node this monitor will use and click Ok This field will then display the object ID of the selected MIB node Description Type additional information for the monitor in this field Table 40 Configuration Performance Monitor Library Customized Monitor Library Add LABEL DESCRIPTION ...

Page 123: ...he labels in this screen Table 41 Event Viewer LABEL DESCRIPTION Show Search Hide Search Click Show Search to display further fields for you to search specific event logs stored in the ENC Click Hide Search to hide those fields Time All logs have a time stamp The time stamp depends on the time configured on the device Specify the time since how many hours or days ago to display the event logs Sele...

Page 124: ... log messages PDF Click this to export the table to a PDF file on the computer you are using to access the ENC CSV Click this to export the table to a CSV file on the computer you are using to access the ENC check box Select the check box of an entry and click Acknowledge to take the action for the entry Select or clear the check box at the table heading line to select or clear all check boxes in ...

Page 125: ...device s polls through EGP The device will then assume that the neighbor is down and remove the neighbor s routes from its database Exterior Gateway Protocol EGP is a routing protocol used for exchanging routing information with gateways in other autonomous systems Computers communicating via EGP are called EGP neighbors EGP uses Hello and I Heard You I H U message exchanges to monitor neighbors r...

Page 126: ...pecify the number of days you wish to store event logs in ENC before removing them Events Configuration Activate Select one or more disabled events and click this button to enable them Deactivate Select one or more enabled events and click this button to disable them Edit Select an event and click this to modify the settings Status This field displays whether the event is currently enabled or disa...

Page 127: ... from low to high are Info Warning Minor Major and Critical Message Type the information you wish to display for the event in the ENC You can use the variables defined on the right hand of the screen For example use 2 to display the device name that generates this event Action Select the action profile to apply to this event The ENC takes the action when it receives this event Select None to not a...

Page 128: ... the default one from this field Cancel Click this to discard the changes and close this screen OK Click this to save the changes and close this screen Table 44 Event Configuration Default Edit continued LABEL DESCRIPTION Table 45 Events Configuration Customize LABEL DESCRIPTION Add Click this to create an event Edit Click this to modify a selected event Remove Click this to delete the selected ev...

Page 129: ...t Name Type a descriptive name up to 32 characters for this event for identification purposes You can use alphanumeric characters 0 9 a z A Z hyphen and underscore _ Spaces are allowed This field is read only if you are editing an existing event Category This field displays the category to which the event belongs SNMP Trap Version Select the version of the SNMP trap messages Select SNMP version 1 ...

Page 130: ...ish to display for the event in the ENC You can select variables from the drop down list box to include in the message The available variables are System Name System OID System Description and SNMP Varbinds SNMP Varbinds This is variable bindings Each variable binding associates a particular MIB object s instance with its current value Action Select the action profile to apply to this event The EN...

Page 131: ...ON Add Click this to create a new event action Edit Select an entry from the table in this screen and click this to modify it Remove Select one or multiple entries from the table and click this to remove them check box Select the check box of an entry and click Edit or Remove to take the action for the entry respectively Select or clear the check box at the table heading line to select or clear al...

Page 132: ...Action Use this screen to configure an event action The actions include sending an e mail SMS forwarding the received syslogs or excuting a file on the ENC To open this screen click Add or Edit in the Events Event Action screen Figure 91 Event Action Add Edit ...

Page 133: ... it An HTTP POST request sends additional data to the web server The additional data is specified after the URL Server URL Enter the domain name or IP address of the web server to which the EMS will forward the matched events Post Data Enter the additional data you wish to send to the web server Syslog Forward Enable Select this to have the ENC forward devices system logs to the specified IP addre...

Page 134: ...Guide 134 Test Action Click this to perform the action s you have enabled and configured in this screen for a test OK Click this to save the changes and close this screen Table 48 Event Action Add Edit continued LABEL DESCRIPTION ...

Page 135: ... the latest status of managed devices and the list of different services managed devices provide The ENC adds all subnets and then devices according to your seed IP range settings The ENC stops an auto discovery process if it has reached the maximum number of devices it can supports according to the license the ENC is using The ENC uses the SNMP GET method to differentiate a device s type Host Swi...

Page 136: ... Discovery The following table describes the labels in this screen Table 49 Tool Auto Discovery LABEL DESCRIPTION General Enable Ping Click this to enable ping from the ENC in order to find devices You may also need to disable anti probing on devices Clear this to disable this feature Enable resolve hostname domain Click this to have the ENC automatically resolve device names from their IP address...

Page 137: ... seed host is located Add Click this to add a seed for auto discovery If you selected IP Range in the Discover Type field the following screen appears Enter the starting and ending IP addresses for the ENC to find devices in this IP range You have to also enter the subnet mask You can use use the subnet mask to specify an IP range across subnets For example an IP range starting from 172 17 1 1 to ...

Page 138: ...t None if no authentication is required Auth Password This field is available if you selected MD5 or SHA1 in the Authentication field Enter the authentication key which depends on the authentication algorithm you selected MD5 a key 16 20 characters long SHA1 a key 20 characters long You can use any alphanumeric characters or _ If you want to enter the key in hexadecimal type 0x at the beginning of...

Page 139: ...only find devices that you specified in the table See Section 2 6 on page 60 for a configuration example Note Make sure you have configured correct SNMP settings versions and community to use device type see Table 51 on page 142 for all available device types as the filters in this screen Add Click this to add a filter rule Note Each rule is independent The ENC finds devices according to the order...

Page 140: ...le options are Device Type Model Name Host Name IP Address and sysOid sysOid means the SNMP object identifier of a MIB object Note Make sure you have configured correct SNMP settings versions and community to use device type see Table 51 on page 142 for all available device types as the filters Operator Select the comparison operator for the rule The available options vary depending on the Propert...

Page 141: ...Chapter 6 Tool ENC User s Guide 141 To open this screen click Tool Inventory Input the search criteria and click Search Figure 96 Tool Inventory Device Figure 97 Tool Inventory Device NWA1300 N Series ...

Page 142: ...rmware Enter a partial or full firmware version of the device for the search criteria Leave this field blank to not specify the criteria Device Model Select the device model name for the search criteria Device Group Select a device group configured in the Tool Device Group screen or All device groups for the search criteria Enable Status Polling Select whether status polling is enabled true or not...

Page 143: ...ox at the table heading line to select or clear all check boxes in this column Status This field displays whether the device is Online Offline Un register or Un monitored Name This field displays the name of the device Click the name to view the device s detailed settings and information IP Address This field displays the IP address of the device Device Type This field displays the type of the dev...

Page 144: ...he device s information in this screen was last updated IP Address This field displays the IP address of the device Enter another IP address if you want to change it without re scanning the device using auto discovery Then the ENC will use the updated IP address to communicate with the device Note Changing the IP address here will not change the device s IP address Firmware Version This field disp...

Page 145: ...em Name This field displays the changeable system name of the device Location This field displays the device location that you configured when you added this device to the ENC Service This field displays MIB object identifier of sysServices for this device The ENC uses this ID to differentiate what services the device provides Apply Click this to save the changes Default Tcp Ports This field displ...

Page 146: ...e device User Name Enter the user name of the administrator account on the device Context Name Enter the context name configured on the device This setting should be the same on both the ENC and device in order to communicate with each other Authentication Select which hash algorithm None MD5 or SHA1 to use to authenticate SNMP packets transmitted between the ENC and the device SHA1 is generally c...

Page 147: ...90 1 6 1 1 1 0 sysCPUUsage 98 means the device is running normally when the CPU usage is less than 98 If the CPU usage goes to 98 or above the device is overloaded You can also click the magnifier icon and find the object to have the ENC automatically display the object ID in this field Status OK Exp Select the comparison expression for the threshold The available options are greater than equal to...

Page 148: ...nding information and statistics are generated These tables display basic port information and incoming outgoing traffic statistics Refresh Click this in each table to update the table information respectively Index This field displays the index number of an entry in each table Description This field displays the name of a port or an interface on the device swp means a switch port Type This field ...

Page 149: ...field displays the total packet receiving and transmission rate in bits per second on this port InUtil This field displays the bandwidth utilization as a percentage of incoming packets received on this port OutUtil This field displays the bandwidth utilization as a percentage of outgoing packets transmitted on this port ErrorsPercent This field displays the bandwidth utilization as a percentage of...

Page 150: ...ic is not used NextHop This field displays the IP address of the gateway The gateway is an immediate neighbor of the device that will forward the packets to the destination Type This field displays the type of route the device supports See ipRouteType in RFC1213 for more information Proto This field displays local if the route is added to the table manually Otherwise the field displays a particula...

Page 151: ...x This field displays the index number of a port or an interface on the device via which the device can access the host shown in the NetAddress field of this entry IP Address This is the IP address of a device connected to a port on the device MAC Address This is the MAC address of the device Type This shows whether the MAC address is dynamic learned by the device or static manually configured on ...

Page 152: ...device State This field displays the connection status between the local and remote ports listen displays if the local port is listening to a connection request established displays if the connection has been successfully established Address This field displays the IP address of the device Port This field displays the number of a UDP port the device uses to send UDP packets Back Click this to exit...

Page 153: ...s current status type etc Search Click this button to search the matched entries from the selected device s MAC table Refresh Click this to update the MAC table Port This field displays the number of a port the MAC entry is related MAC Address This field displays a MAC address which indicates you can access the host through the port Status This field displays how this MAC entry was added Table 58 ...

Page 154: ...find Online all managed devices in the network are reachable Partial Online some of the managed devices in the network are not reachable Offline all managed devices in the network are not reachable Un monitored no device is found in the network This might be caused by a NAT device that exists between the network and the ENC All select this to include all the status above for the criteria Search Cl...

Page 155: ...IP address of the network Type This field displays the type of the network Last Update This field displays the date and time this entry s information was last updated Table 60 Tool Inventory Network continued LABEL DESCRIPTION Table 61 Tool Inventory Network Details LABEL DESCRIPTION Display Name This field displays the descriptive name of the network Enter a new name up to 32 printable character ...

Page 156: ...on in this screen was last updated Apply Click this to save the changes Back Click this to exit this screen and go back to the previous screen Table 61 Tool Inventory Network Details continued LABEL DESCRIPTION Table 62 Tool Device Group LABEL DESCRIPTION Add Click this to create a device group Edit Click this to modify a selected device group Remove Click this to remove selected device group s ch...

Page 157: ...ace Route function additionally tests how Table 63 Tool Device Group Add Edit LABEL DESCRIPTION Group Name Type up to 20 alphanumeric characters 0 9 a z A Z underscores _ and or hyphens for the name of the group Spaces are not allowed Description Type up to 80 printable characters for additional information about this group Add Click this to add device s to this group Device Name This field displa...

Page 158: ...reen 6 7 1 User Loaded MIBs You may need to upload a device s private MIBs to the ENC if you want the ENC to support a specific function for your device Use this screen to upload a MIB file to the ENC Table 64 Tool PING Trace Route LABEL DESCRIPTION Ping Select this and enter the IP address of a device in the IP field to which you want to test the connection from the ENC Enter the IP address of th...

Page 159: ...the MIB file you want to upload to the computer that you are using to access the ENC first Then specify the full path of the MIB file for example c Download example mib in the MIB File field or click Browse to locate the file Click OK to start the upload Otherwise click Cancel to exit this screen Unload Select an existing MIB file in the table and click this to delete it from the ENC database chec...

Page 160: ...vice You must select a device first before using this menu 6 8 1 Device Monitor Use this screen to view the performance statistics in graphs for the selected device Before using this screen make sure that you configure at least a performance monitor in the Monitor Manager screen for the device first Table 66 Tool MIB Loader Default MIBs LABEL DESCRIPTION File Name This field displays the name of t...

Page 161: ...ding on the monitor s you selected to display Figure 115 Tool Performance Monitoring Device Monitors 6 8 2 Example Displaying Selected Performance Monitors To add performance monitor s 1 Click Add Content on the top right corner 2 Select the monitor s to display Click OK 3 The selected performance monitor s appear ...

Page 162: ...reen if you want to view default performance monitor templates or customize more performance monitor templates Activate Click this to activate the selected performance monitor s Inactivate Click this to deactivate the selected performance monitor s Add Click this to create a new performance monitor for the selected device Edit Select a performance monitor and click this to configure it Remove Clic...

Page 163: ...e of the performance monitor template this monitor uses Stored Days This field displays the number of days the ENC keeps the monitor data before removing it from the ENC Polling Interval This field displays how often in seconds the ENC retrieves the monitor data from the device Table 67 Tool Performance Monitoring Monitor Manager continued LABEL DESCRIPTION Table 68 Tool Performance Monitoring Mon...

Page 164: ...te a new threshold rule Edit Select a threshold rule and click this to configure it Remove Click this to delete the selected threshold rule s check box Select this check box and click Edit or Remove to take the action respectively Select or clear the check box at the table heading line to select or clear all check boxes in this column Instance This field displays the MIB object to which this thres...

Page 165: ... for this threshold The instance numbers vary depending on the MIB object you specified You can set a different threshold for each instance in this screen Is Delta Value Select whether to use the delta or absolute method to obtain the sample values Delta means the value is from the data sampled in each configured time interval Absolute means the sampling value is accumulated since it started Condi...

Page 166: ...evice s name Print Click this to print this report out PDF Click this to export the report to a PDF file on the computer you are using to access the ENC CSV Click this to export the report to a CSV file on the computer you are using to access the ENC Period Select how long ago the monitor s data that you are looking for was added to the ENC Variable Select whether to show statistics about outgoing...

Page 167: ...le 70 Tool Performance Monitoring Monitor Manager View Report continued LABEL DESCRIPTION Table 71 Tool Performance Monitoring Schedule Report LABEL DESCRIPTION Add Click this to create a daily weekly or monthly report in a time interval Edit Click this to modify an existing scheduled report Remove Click this to delete the selected scheduled report check box Select the check box and click Edit to ...

Page 168: ...hes generating it The report generation time depends on the amount of information in the report Having the ENC generate too many reports at the same time can affect performance It is recommended that you vary the times for your reports For a daily report select the time hour minute to generate the report For a weekly report select which week day Sunday Saturday and time hour minute to generate the...

Page 169: ... complete feature in this field As you type you can see a list of values for this field in other scheduled reports next to the mouse You can click on one to avoid typing the rest of the value Export File Formats Select the format s of the report s that you see The available options are CSV PDF and HTML The ENC will send you an e mail with a URL Uniform Resource Locator Click the URL to see the rep...

Page 170: ...cation local0 local7 from the drop down list box The log facility allows you to display the logs in different files in the syslog server of the ENC Select All to display all messages in all the files on the ENC Severity Select which severity level of log entries you want to see You can also select All Severity ranking follows RFC 3164 of the SYSLOG protocol and is defined as follows Emergency Syst...

Page 171: ...this screen Click Cancel to exit this screen without saving any changes Select More Info to view an on line help page about downloading files Remove Select one or more log entries in the table and click this to delete them Time This field displays the date and time the ENC received the log entry not the time the log entry was generated Facility This field displays the name of the location where th...

Page 172: ...han the starting date Statistic By Select this to display the log statistics shown by Date the date the ENC received the log entries Source the source IP address that generated the log entries Severity the severity level of the log entries The fields of the table below vary depending on the option you select in this field Search Click this to display the log entries based on the current search cri...

Page 173: ... this to store the archive to a local folder in the computer where the ENC is installed This is the default storage setting for the ENC FTP Site Select this to store the archive to an FTP site Additional fields appear when you choose this option Storage Server Select this to store the archive to a storage server such as a Network Attached Storage NAS server Additional fields appear when you choose...

Page 174: ...ere you want to store the archive Authentication This field is available if you selected Storage Server in the Location field Select this if authentication is required to use the specified directory Click Authentication if your server prompts for identification before allowing access User Name This field is available if you selected Storage Server in the Location field Enter the user name that has...

Page 175: ...y e mail you have to enter the SMTP mail server settings in the Maintenance Server screen See Section 9 4 on page 247 for more information The ENC server backs up all scheduled reports in the ENC_home ENC data report schedule_report_name folder The file name includes the schedule report name and the date and time the report is generated for example WeeklyPerfReport_20100121014001 zip 7 1 Default R...

Page 176: ...s Each field is described in the following table Table 76 Report Reports Default Reports LABEL DESCRIPTION Report Name This field displays the descriptive name of a default report Click this to generate and view the report Description This field displays more information about the report Table 77 Report Reports Customized Reports LABEL DESCRIPTION Type Select the type of reports you want to displa...

Page 177: ...ort Select or clear the check box at the table heading line to select or clear all check boxes in this column Report Name This field displays the descriptive name of the report Click this to generate and view the report Report Type This field displays the type of the report Either Inventory Events or Performance related and either a list view summary or TopN report Description This field displays ...

Page 178: ...apter 7 Report ENC User s Guide 180 Figure 131 Report Reports Add Inventory Summary Report Figure 132 Report Reports Add Events List Report Figure 133 Report Reports Add Events Summary Report 2 3 2 3 2 3 ...

Page 179: ...t you want to display the related information in the report The options include Host Switch Firewall Wireless AP Router Gateway Wireless Controller IP PBX IP Phone Peripheral All means all types mentioned Others means all types not mentioned Device Model Select a specific model if you want to display the related information only in the report Otherwise leave it as the default All The available opt...

Page 180: ...ork topology change detected by the ENC SNMP Traps This is about SNMP traps sent from Devices All This means all categories above Ack Unack This field is available if you selected an Events related report Select whether the events that you want to display have been Acknowledged or not Unacknowledged All means both Severity Select the severity of events should be equal to greater or equal to less o...

Page 181: ...d Columns or Selected Attributes for Group By list Selected Columns or Selected Attributes for Group By This field is available if you selected Inventory or Events related report This section lists the columns or attributes included in this report Select an item and click the arrow if you want to remove it from the report Select one or multiple items and then use Move Up or Move Down to adjust the...

Page 182: ...screen select a report and click Edit in the Report Reports Customized Reports screen Figure 137 Report Reports Edit 7 2 3 A Report Example You can view a report by clicking the report name in the Report Reports screen This section shows you an example about top 5 CPU utilization report Figure 138 A Report Example A B C D E F ...

Page 183: ...port Schedule Report LABEL DESCRIPTION Add Click this to create a daily weekly or monthly reportin a time interval Edit Click this to modify an existing scheduled reportin a time interval Remove Click this to delete the selected scheduled report check box Select the check box and click Edit to modify the settings or Remove to delete the scheduled report Select or clear the check box at the table h...

Page 184: ...y generated or not later in the Maintenance Log screen Figure 140 Report Schedule Report Summary Add Each field is described in the following table Table 80 Report Schedule Report Add LABEL DESCRIPTION Name Enter the name of the schedule report Only numbers 0 9 letters a z A Z hyphen and the underscore _ are allowed Spaces are not allowed Type Select how often daily weekly or monthly to generate t...

Page 185: ...heduled reports next to the mouse You can click on one to avoid typing the rest of the value Subject Enter the subject line in the e mail message the ENC sends Only numbers 0 9 letters a z A Z characters _ carriage returns n line breaks r and spaces are allowed The ENC provides an auto complete feature in this field As you type you can see a list of values for this field in other scheduled reports...

Page 186: ...Chapter 7 Report ENC User s Guide 188 ...

Page 187: ...s access point function 8 2 RMON Introduction Similar to SNMP RMON Remote Network Monitor allows you to gather and monitor network traffic Both SNMP and RMON use an agent known as a probe which are software processes running on network devices to collect information about network traffic and store it in a local MIB Management Information Base With SNMP a network manager has to constantly poll the ...

Page 188: ...Application RMON Statistics screen Table 82 RMON Statistics LABEL DESCRIPTION Add Click this to create an entry Note At the time of writing this function is only available for ZyXEL Ethernet Switches using 3 90 firmware version Edit Select an entry in the table and click this to modify it Remove Select an entry in the table and click this to delete it Table View Select one or more ports or interfa...

Page 189: ...ace s as a table After selecting the data source s you wish to display click Table View on the Application RMON Statistics screen to open this screen Figure 142 RMON Statistics Table View Table 83 RMON Statistics Add Edit LABEL DESCRIPTION Port Number Enter the number of one port or interface to add to the ENC for viewing network statistics This field displays the port s number and is read only wh...

Page 190: ...he total number of good unicast packets received transmitted on the port s Undersize Packets This is display the number of packets dropped by the port s because they were less than 64 octets long and contained a valid FCS Fragments This is display the number of packets received transmitted on the port s because they were less than 64 octets long and contained an invalid FCS including non integral ...

Page 191: ...gn Error This is the number of frames received transmitted on the port s because they were 64 to 1518 non VLAN or 1522 VLAN octets long but contained an invalid FCS and a non integral number of octets Collisions This is the number of packets for which transmission failed due to collisions Excessive collision is defined as the number of maximum collisions before the retransmission count is reset Dr...

Page 192: ... Figure 143 RMON Statistics Graph View The following table describes the labels in this screen Table 85 RMON Statistics Graph View LABEL DESCRIPTION Device IP This field displays the IP address of the selected device Port Number This field displays the number of the selected port or interface ...

Page 193: ...umber of packets received transmitted on the port s because they were less than 64 octets long and contained an invalid FCS including non integral and integral lengths Oversize Packets Select this to display the number of packets dropped by the port s because they were longer than 1518 octets and contained an invalid FCS including alignment errors in the graph of this section Jabbers Select this t...

Page 194: ...ets received that were 1522 octets in size in the graph of this section Close Click Close to exit the screen Table 85 RMON Statistics Graph View LABEL DESCRIPTION Table 86 RMON History LABEL DESCRIPTION Add Click this to add an entry Edit Select an entry in the table and click this to modify it Remove Select an entry in the table and click this to delete it Table View Select one port or interface ...

Page 195: ...the number of data samplings the network manager requests the probe to store Bucket Granted This field displays the number of data samplings the probe allows to store Interval sec This field displays the time between data samplings Owner This field displays the application that created this entry Table 86 RMON History continued LABEL DESCRIPTION Table 87 RMON History Add Edit LABEL DESCRIPTION Por...

Page 196: ... that were dropped by the port or interface since the last sample time Octets This is the total number of octets received transmitted on the port or interface since the last sample time Total Packets This is the total number of all good packets received transmitted on the port or interface since the last sample time Broadcast Packets This is the total number of good broadcast packets received tran...

Page 197: ...and integral lengths since the last sample time Jabbers This is the number of packets received transmitted on the port or interface because they were longer than 1518 octets non VLAN or 1522 octets VLAN and contained an invalid FCS including alignment errors since the last sample time Collisions This is the number of packets for which transmission failed due to collisions since the last sample tim...

Page 198: ... screen Table 89 RMON History Graph View LABEL DESCRIPTION Device IP This field displays the IP address of the device selected in the previous screen Port Number This field displays the number of the selected port or interface Graph Type Select whether to display the traffic statistics as a Line Bar or Pie graph Get Refresh Click this to update the statistics in this screen ...

Page 199: ...ted on the port Unicast Packets Select this to display the total number of good unicast packets received transmitted on the port Undersize Packets Select this to display the number of packets dropped by the port because they were less than 64 octets long and contained a valid FCS Fragments Select this to display the number of packets received transmitted on the port because they were less than 64 ...

Page 200: ...box Select the check box of an entry and click Edit or Remove to take the action for the entry respectively Select or clear the check box at the table heading line to select or clear all check boxes in this column Type This field displays the alarm type NONE LOG TRAP or LOG TRAP LOG The device generates a log when an associated alarm occurs TRAP The device sends a trap when an associated alarm occ...

Page 201: ...d displays how often in seconds the ENC checks whether the parameter s value is within the set thresholds or not Sample Type This field displays the method of obtaining the sample value Absolute or Delta Startup Alarm This field displays the alarm type Rising Falling Rising Falling Alarm that can be sent when this alarm is first activated Port Number This field displays the number of a port or an ...

Page 202: ...ame of the application that creates this entry You can use 1 31 printable ASCII characters Spaces are allowed Cancel Click this to save the settings and close this screen Ok Click this to discard all changes and close the screen Table 91 RMON Event Alarm Event List Add Edit continued LABEL DESCRIPTION Table 92 RMON Event Alarm View Log LABEL DESCRIPTION Event Index This field displays the associat...

Page 203: ...the action s the device took when this alarm occurs for examle log and trap Back Click this to close this screen and go back to the previous screen Table 92 RMON Event Alarm View Log continued LABEL DESCRIPTION Table 93 RMON Event Alarm Parameter LABEL DESCRIPTION Condition This field displays whether this is about the Rising or Falling threshold Threshold This field displays the threshold s value...

Page 204: ...a samplings Sample Type Select the method of obtaining the sample value Absolute means the sampling value is accumulated since it started Delta means the value is from the data sampled in each configured time interval Startup Alarm Select the startup alarm type Rising Alarm means the probe triggers an alarm when the value is greater or equal to the rising threshold Falling Alarm means the probe tr...

Page 205: ... Switches See Appendix A on page 269 for the supported ZyXEL device list Threshold Specify a rising threshold between 0 and 2147483647 When a value is greater or equal to this threshold the probe triggers an alarm Event Index Select an index number of a rising event Falling Condition Threshold Specify the falling threshold between 0 and 2147483647 When a value is less than or equal to this thresho...

Page 206: ...ment Selecting a Device The following table describes the labels in this screen Table 95 VLAN Management VLAN Management LABEL DESCRIPTION Device panel A This panel displays devices by groups Each folder group also displays the number of devices that are included in the folder VLAN Group panel B This panel displays devices by VLAN groups You can see the VLAN name ID group and the number of devices...

Page 207: ...e this VLAN on the device or clear this to disable it Join Select this on a port to add the port to this VLAN group Otherwise clear this Tag Select this on a port to add the VLAN ID to the port s outgoing traffic Otherwise clear this Cancel Select this to discard the changes and exit this screen Ok Click this to save the changes and exit this screen D If you select a device in Device or VLAN Group...

Page 208: ...he VLAN group s name and ID Click Ok 4 The VLAN group is then created Figure 156 Creating a VLAN Group To add a device to a VLAN 1 Select and hold a device from the Device panel 172 17 17 118 in this example 2 Drag it to a VLAN group in the VLAN Group panel until you see a plus mark shown in the beginning of the VLAN group name 3 Release your mouse ...

Page 209: ...in this example Figure 157 Adding a Device to a VLAN Group Note After you drag and drop a device to a VLAN group the ENC automatically creates the VLAN on the device To remove a device from a VLAN 1 Right click the device in the VLAN Group panel 2 Select Delete From VLAN Group 3 Confirm the action ...

Page 210: ...Chapter 8 Application ENC User s Guide 212 4 The device is then removed from the VLAN group Figure 158 Removing a Device from the VLAN Group ...

Page 211: ...ble the VLAN or clear this to disable it Name Enter a descriptive name for the VLAN for identification purposes Group ID This field displays the VLAN identifier Port in VLAN Group Add Click this to add a port and configure the VLAN settings Edit Select a port in the table and click this to modify the port s VLAN settings Remove Click this to delete the selected VLAN s check box Select the check bo...

Page 212: ...ailable for some ZyXEL Ethernet Switches Select the check box to block other ports from communicating with this port Cancel Click this to discard all changes and close the screen OK Click this to save the settings and close the screen The ENC configures the port VLAN settings on the device automatically Table 96 VLAN Management VLAN Management Edit continued LABEL DESCRIPTION Table 97 VLAN Managem...

Page 213: ... Select this to have the device discard incoming frames for VLANs that do not have this port as a member GVRP GVRP GARP VLAN Registration Protocol is a registration protocol that defines a way for switches to register necessary VLAN members on ports across the network Select this check box to allow GVRP on this port Acceptable Frame Type Specify the type of frames allowed on the port Select All fr...

Page 214: ...each other All incoming ports are selected while only the CPU outgoing port is selected This option is the most limiting but also the most secure Select this to allows this port to communicate only with the CPU management port and the ports on which the isolation feature is not enabled Copy Click this to copy the selected port s settings to other port s The screen appears as shown next Figure 163 ...

Page 215: ...s check box to allow GVRP on this port Acceptable Frame Type Specify the type of frames allowed on a port The available options vary depending on device models Select All from the drop down list box to accept all untagged or tagged frames on this port This is the default setting Select Tag Only to accept only tagged frames on this port All untagged frames will be dropped VLAN Trunking Enable VLAN ...

Page 216: ...ection is only available for devices that support Power over Ethernet PoE Total Power W This is the total power in Watts the PWR model can provide over the Ethernet Consuming Power W This field displays the amount of power the device is currently supplying to the connected PoE enabled devices Remaining Power W This field displays the amount of power the device can still provide for PoE The device ...

Page 217: ...the peer automatically to determine the connection speed and duplex mode If the peer port does not support auto negotiation or turns off this feature the device determines the connection speed by detecting the signal on the cable and using half duplex mode When the device s auto negotiation is turned off a port uses the pre configured speed and duplex mode when making a connection thus requiring y...

Page 218: ...Ethernet on this port Clear the check box to disable it on the port Class This field is only available for ZyXEL s Ethernet Switch PWR models This field displays the DSCP DiffServ Code Point number between 0 and 63 for the port PD Priority This field is only available for ZyXEL s Ethernet Switch PWR models When the total power requested exceeds the total PoE power budget the PoE device can provide...

Page 219: ...rt is disconnected State If STP Spanning Tree Protocol is enabled this field displays the STP state of the port see Section 8 7 1 1 on page 221 for more information If STP is disabled this field displays Forwarding if the link is up otherwise it displays STOP TxPkts This field shows the number of transmitted frames on this port RxPkts This field shows the number of received frames on this port Err...

Page 220: ...roup View panel and click Application Port Management Bandwidth Control Note The table columns may vary depending on different device models Figure 167 Port Management Bandwidth Control The following table describes the labels in this screen Table 103 Port Management Bandwidth Control LABEL DESCRIPTION Activate Bandwidth Control Select this check box to enable bandwidth control on the device Copy ...

Page 221: ...e Select this check box to activate commit rate limits on this port Ingress Commit Rate Specify the guaranteed bandwidth in kilobits per second Kbps for the incoming traffic flow on a port The commit rate should be less than the peak rate The sum of commit rates cannot be greater than or equal to the uplink bandwidth Peak Rate Active Select this check box to activate peak rate limits on this port ...

Page 222: ...apply the changes to the Port Management Broadcast Storm Control screen Otherwise click Cancel to discard the change and close this screen Port This field displays a port number Broadcast Active Select this option to enable the limit for the number of broadcast packets the device receives per second on the port Broadcast pkt s Specify how many broadcast packets the port can receive per second Mult...

Page 223: ... access the device 8 10 2 MAC Address Learning This feature allows only packets with dynamically learned MAC addresses and or configured static MAC addresses to pass through a port on ZyXEL Ethernet Switches For maximum port security enable this feature disable MAC address learning and configure static MAC address es for a port It is not recommended you disable port security together with MAC addr...

Page 224: ...a selected static MAC address rule Remove Click this to delete the selected static MAC address rule s from the table check box Select the check box of an entry and click Edit or Remove to take the action for the entry respectively Select or clear the check box at the table heading line to select or clear all check boxes in this column Status This field displays whether this static MAC address forw...

Page 225: ...e device forwards all packets on this port Address Learning Activate MAC address learning reduces outgoing broadcast traffic For MAC address learning to occur on a port the port itself must be active with address learning enabled Limited Number of Learned MAC Addresses Use this field to limit the number of dynamic MAC addresses that may be learned on a port For example if you set this field to 5 o...

Page 226: ...unts configured on the device itself The device can also use an external authentication server to authenticate a large number of users Table 106 Port Management Security Static MAC Forwarding Add LABEL DESCRIPTION Rule Activate Select this to activate your rule You may temporarily deactivate a rule without deleting it by clearing this check box MAC Address Enter the MAC address in valid MAC addres...

Page 227: ...ice user database that is limited to the memory capacity of the device In essence RADIUS and TACACS authentication both allow you to validate an unlimited number of users from a central location The following table describes some key differences between RADIUS and TACACS 8 11 3 802 1x Authentication Overview The following figure illustrates how a client connecting to a IEEE 802 1x authentication e...

Page 228: ...Setup Use this screen to configure your RADIUS server settings To open this screen select a device which supports this feature from the OTV Device View or Group View panel and click Application Port Management Authentication Radius Authentication Figure 176 Port Management Authentication Radius Authentication New Connection Authentication Request Authentication Reply 1 4 5 Login Credentials Login ...

Page 229: ...ponse from the RADIUS server If you are using index priority for your authentication and you are using two RADIUS servers then the timeout value is divided between the two RADIUS servers For example if you set the timeout value to 30 seconds then the device waits for a response from the first RADIUS server for 15 seconds and then tries the second RADIUS server The first column displays a read only...

Page 230: ... the TACACS server If you are using index priority for your authentication and you are using two TACACS servers then the timeout value is divided between the two TACACS servers For example if you set the timeout value to 30 seconds then the device waits for a response from the first TACACS server for 15 seconds and then tries the second TACACS server The first column displays a read only number re...

Page 231: ...s check box to permit 802 1x authentication on the device Note You must first enable 802 1x authentication on the device before configuring it on each port Copy Click this to copy the selected port s settings to another port The screen appears as shown next Figure 179 Copy Specify the port number to which you want to copy the selected port s settings Click OK to apply the changes to the Port Manag...

Page 232: ...11 AP Manger AP Profile LABEL DESCRIPTION Add Click this to create an entry Edit Select an entry in the table and click this to modify it Remove Select an entry in the table and click this to delete it check box Select the check box of an entry and click Edit or Remove to take the action for the entry respectively Select or clear the check box at the table heading line to select or clear all check...

Page 233: ... hh mm ss this wireless AP profile was last time updated Table 111 AP Manger AP Profile continued LABEL DESCRIPTION Table 112 AP Manager AP Profile Add Edit LABEL DESCRIPTION Profile Name Enter up to 32 characters for the name of wireless AP profile You can use alphanumeric 0 9 a z A Z underscores _ and hyphens Spaces are not allowed SSID Enter a descriptive name up to 32 printable SCII characters...

Page 234: ...11 AP Manger AP Profile LABEL DESCRIPTION Add Click this to create an entry Edit Select an entry in the table and click this to modify it Remove Select an entry in the table and click this to delete it check box Select the check box of an entry and click Edit or Remove to take the action for the entry respectively Select or clear the check box at the table heading line to select or clear all check...

Page 235: ...e this wireless AP profile uses Last Update This field displays the date and time yyyy mm dd hh mm ss this wireless AP profile was last time updated Table 111 AP Manger AP Profile continued LABEL DESCRIPTION Table 112 AP Manager AP Profile Add Edit LABEL DESCRIPTION Profile Name Enter up to 32 characters for the name of wireless AP profile You can use alphanumeric 0 9 a z A Z underscores _ and hyp...

Page 236: ...imer Enter the rate at which the wireless AP or the RADIUS server sends a new group key out to all clients Use WPA with Pre shared Key Select this option if you do not have a RADIUS server in your network and want to use a pre shared key WPA or WPA2 Pre shared Key The encryption mechanisms used for WPA 2 and WPA 2 PSK are the same The only difference between the two is that WPA 2 PSK uses a simple...

Page 237: ...or each key You must configure all four keys Only one key can be activated at any one time Select a default key to use for data encryption Authenticati on Method Select Open System Shared Key or Both This field specifies whether the wireless clients have to provide the WEP key to login to the wireless network Keep this setting at Both or Open System unless you want to force a key verification befo...

Page 238: ...ield displays the AP s display name IP Address This field displays the AP s IP address MAC Address This field displays the AP s MAC address AP Profile This field displays the AP profile name the AP is using N A displays if you have not applied any wireless AP profile to the AP Configuration Status This field displays the status of the applied AP profile to the AP The possible values are N A There ...

Page 239: ...d version or increase the number of devices the ENC supports Monitor the number of logs received by time or by device Manage system logs Get basic information about the ENC The Operator and User accounts can use the Maintenance screens to View a list of users who can access the ENC Get basic information about the ENC 9 1 User Account Overview An account is a user with permissions inherited from th...

Page 240: ...or accounts can be deleted and logged out by the root and other Administrators Device management For example manage devices and their configurations firmware upgrade backup and restore configuration files events and alarms management log file management and so on ENC system management and setup For example configuration backup and restore database table export server Map log settings and so on Use...

Page 241: ... user s after you confirm the action check box Select the check box of an entry and click Edit Remove or Revoke to take the action for the entry respectively Select or clear the check box at the table heading line to select or clear all check boxes in this column Status This field displays if this user is currently logged in or not Name This field displays the name of the user Account Type This fi...

Page 242: ...246 9 3 1 User Account Add Use this screen to create or edit a user o open this screen click Add or Edit in the Maintenance User Account screen Figure 186 User Account Add Edit Administrator Figure 187 User Account Add Edit Operator and User ...

Page 243: ...e not allowed Password Type up to 32 characters for the corresponding password of the user account Verify Password Type the same password again here to make sure that the one you typed above was typed as intended Email Address Type a valid e mail address for this user Description Type extra information about this user Map Access This section configures the Map s that are allowed the user to access...

Page 244: ...er account information before the ENC locks the user out Lock Period Enter the number of minutes for the lockout period A user cannot log into the ENC during the lockout period even if he she enters correct account information User Change Password Period Enter the maximum number of days within which a user must change his password for the ENC login If the user does not change his her password with...

Page 245: ...iew the full size device icon for a selected device model Figure 190 Icon Preview check box Select the check box of an entry and click Edit Remove or Preview to take the action for the entry respectively Select or clear the check box at the table heading line to select or clear all check boxes in this column Preview This field displays the thumbnail size icon for a device model in the ENC Model Na...

Page 246: ...e Device Add Edit LABEL DESCRIPTION Name Type up to 32 alphanumeric characters 0 9 a z A Z underscores _ and or hyphens for the name of a device model SysObjectID Enter the MIB object ID of the device model F W Version OID Enter the MIB object ID of the firmware version for which this device model s settings will apply CPU OID Enter the MIB object ID of the device model s CPU This field is optiona...

Page 247: ...to open the following screen Figure 192 Select Icon Select an appropriate icon for this device model and click Ok Otherwise click Cancel to exit this Select Icon screen Note If you cannot find an appropriate icon here you can upload a new icon through the Maintenance Customize Image screen Cancel Click this to discard the changes and exist this screen Ok Click this to save the changes and exist th...

Page 248: ...for the entry respectively Select or clear the check box at the table heading line to select or clear all check boxes in this column Preview This field displays the thumbnail size image of the device icon or Map image Image Name This field displays the name of the device icon or Map image Image Type This field displays whether this image is a Device Icon or Map image Background Image Size This fie...

Page 249: ...o upload a device icon or Map image to the ENC To open this screen click Add or Edit in the Maintenance Customize Image screen Figure 194 Customize Image Add Image Type Object Figure 195 Customize Image Add Image Type Background Image Figure 196 Customize Image Edit Image Type Object ...

Page 250: ...s are not allowed Device Type Select the category of the device icon you want to upload if you selected Object as the image type This field displays Background Image if you selected Background Image as the image type Size Enter the size of the background image in pixels that you want to display in the MAP Image Click the text box or Browse to select the image file you want to upload to the ENC It ...

Page 251: ... Fields in this section are different depending on the option you select in the Location field Location Select whether to back up the ENC s system settings to a local folder in the computer where the ENC is installed Local Host an FTP Site or a Storage Server such as a Network Attached Storage NAS server Archive Location This field is available if you select Local Host as the backup location Type ...

Page 252: ...store the file to the ENC after you double confirm the action If you want to restore a file that does not exist on the ENC you have to upload the file to the ENC first You can upload a file through the Maintenance Backup Restore Backup screen by selecting Upload BackUp File Remove Select one or more backup files in the list and click this to remove the file from the list Name This displays the nam...

Page 253: ...if you want to upload a backup file from the computer you are using to access the ENC and then you can restore File Name This field is available if you selected BackUp Database in the BackUp Type field Enter the file name to which you want to back up the ENC configuration File Path This field is available if you selected UploadBackUp File in the BackUp Type field Enter the full path of a SQL file ...

Page 254: ...ION Available Tables Select the table s about which you want to export the data and use the arrow to move them to the Selected Tables list See Table 127 on page 258 for more information about the available database tables Selected Tables This section lists the tables about which you want to export the data Select one or more table s and click the arrow if you need to remove them from the Selected ...

Page 255: ...Account If you want to use an existing myZyXEL com account you need your myZyXEL com user name myZyXEL com password Table 129 Information for Upgrading the Version or Number of Devices If you want to upgrade to the standard version or increase the number of devices support you need your license key iCard for the upgrade or increase Table 130 Registration LABEL DESCRIPTION License Status License Ve...

Page 256: ...e the standard version from trial or extend the number of devices the ENC can support If you reach the maximum number of devices the ENC can support and you want to extend the number you need to buy a new iCard specific to the ENC Enter the new PIN number in this screen to increase the number Upgrade Click Upgrade to apply a license to the ENC Table 130 Registration LABEL DESCRIPTION Table 131 Log...

Page 257: ...irm the action check box Select the check box of an entry and click Export or Remove to take the action for the entry respectively Select or clear the check box at the table heading line to select or clear all check boxes in this column Time This field displays the date and time the log entry was generated Severity This field displays the severity level of the log entry Category This field display...

Page 258: ...Chapter 9 Maintenance ENC User s Guide 262 ...

Page 259: ...n how to do this 4 Stop PostgreSQL before the ENC installation if it has been installed in the same computer 5 Re install the ENC 6 If the problem still persists contact your vendor You may need to provide the following information all LOG files under the ENC_install_path ENC ENC lib configuration directory and install_path pgsql installPG log and ENC_HOME bin midas log files the operating system ...

Page 260: ...anged it contact your local vendor I can see the Login screen but I cannot log in to the ENC Make sure you have entered the user name and password correctly The user name and password are case sensitive so make sure Caps Lock is not on If this does not work contact the network administrator or local vendor 10 3 Problem Finding a Device In the OTV panel I cannot find my device 1 By default auto dis...

Page 261: ...ot respond to ping disable any anti probe related function on the device 4f Click the Refresh icon to update the device list in the OTV 10 4 Map Problems I cannot see the Map image that I have uploaded Make sure your web browser and the version of it support the image display See Section 1 1 on page 17 for the browser requirements I received Discover is only allowed on default map when I perform A...

Page 262: ...ted switch models listed in the release note 10 8 Lose Connection Problems The ENC begins to respond extremely slowly You may have lost the connection with the ENC due to one of the following reasons The network is busy Try to do your operation again later The ENC server is busy or disconnected Try to do your operation again later An administrator disconnected your session Try to log in to the ENC...

Page 263: ...es between the device and the ENC blocks the traffic 10 10 Configuration Backup Problems I see backup configuration failed download the file from FTP failed 1 The ENC uses the device s login username and password settings configured in the Tool Inventory Device screen to connect to the device through FTP and then backs up the configuration file Make sure you have configured the correct user name a...

Page 264: ...ck Trusted sites and then the Sites button 3 Type about blank in the Add this website to the zone field Do NOT Require server verification https for all sites in this zone Then click Add 4 Click Close and then OK Then your problem should be resolved 1 2 3 ...

Page 265: ...orted within 45 days Standard the number of devices supported depending on iCard node license you bought Environment Specification 2002 95 EC RoHS Restriction of Hazardous Substances Directive 2002 96 EC WEEE WEEE Waste Electrical and Electronic Equipment Directive European Parliament and Council Directive 94 62 EC of 20 December 1994 on packaging and packaging waste Supported ZyXEL Devices Ethern...

Page 266: ...Appendix A Product Specifications ENC User s Guide 270 ...

Page 267: ...nd the other part is the host ID In the same way that houses on a street share a common street name the hosts on a network share a common network number Similarly as each house has its own house number each host on the network has its own unique identifying number the host ID Routers use the network number to send packets to the correct network while the host ID determines to which host on the net...

Page 268: ...it in the subnet mask is 0 then the corresponding bit in the IP address is part of the host ID The following example shows a subnet mask identifying the network number in bold text and host ID of an IP address 192 168 1 2 in decimal By convention subnet masks always consist of a continuous sequence of ones beginning from the leftmost bit of the mask followed by a continuous sequence of zeros for a...

Page 269: ...mber of zeros for the remainder of the 32 bit mask you can simply specify the number of ones instead of writing the value of each octet This is usually specified by writing a followed by the number of bits in the mask after the address For example 192 1 1 0 25 is equivalent to saying 192 1 1 0 with subnet mask 255 255 255 128 The following table shows some possible subnet masks using both notation...

Page 270: ...g a maximum of 28 2 or 254 possible hosts The following figure shows the company network before subnetting Figure 207 Subnetting Example Before Subnetting You can borrow one of the host ID bits to divide the network 192 168 1 0 into two separate sub networks The subnet mask is now 25 bits 255 255 255 128 or 25 The borrowed host ID bit can have a value of either 0 or 1 allowing two subnets 192 168 ...

Page 271: ... 1 1 and the highest is 192 168 1 126 Similarly the host ID range for subnet B is 192 168 1 129 to 192 168 1 254 Example Four Subnets The previous example illustrated using a 25 bit subnet mask to divide a 24 bit address into two subnets Similarly to divide a 24 bit address into four subnets you need to borrow two host ID bits to give four possible combinations 00 01 10 and 11 The subnet mask is 2...

Page 272: ...168 1 127 Highest Host ID 192 168 1 126 Table 141 Subnet 3 IP SUBNET MASK NETWORK NUMBER LAST OCTET BIT VALUE IP Address 192 168 1 128 IP Address Binary 11000000 10101000 00000001 10000000 Subnet Mask Binary 11111111 11111111 11111111 11000000 Subnet Address 192 168 1 128 Lowest Host ID 192 168 1 129 Broadcast Address 192 168 1 191 Highest Host ID 192 168 1 190 Table 142 Subnet 4 IP SUBNET MASK NE...

Page 273: ...54 255 Table 144 24 bit Network Number Subnet Planning NO BORROWED HOST BITS SUBNET MASK NO SUBNETS NO HOSTS PER SUBNET 1 255 255 255 128 25 2 126 2 255 255 255 192 26 4 62 3 255 255 255 224 27 8 30 4 255 255 255 240 28 16 14 5 255 255 255 248 29 32 6 6 255 255 255 252 30 64 2 7 255 255 255 254 31 128 1 Table 145 16 bit Network Number Subnet Planning NO BORROWED HOST BITS SUBNET MASK NO SUBNETS NO...

Page 274: ...change the subnet mask computed by the ENC unless you are instructed to do otherwise Private IP Addresses Every machine on the Internet must have a unique address If your networks are isolated from the Internet running only between two branch offices for example you can assign any IP addresses to the hosts without problems However the Internet Assigned Numbers Authority IANA has reserved the follo...

Page 275: ...omputer B which is a DHCP client Neither can access the Internet This problem can be solved by assigning a different static IP address to computer A or setting computer A to obtain an IP address automatically Figure 209 Conflicting Computer IP Addresses Example Conflicting Router IP Addresses Example Since a router connects different networks it must have interfaces using different network numbers...

Page 276: ... not use the same IP address In the following example the computer and the router s LAN port both use 192 168 1 1 as the IP address The computer cannot access the Internet This problem can be solved by assigning a different IP address to the computer or the router s LAN port Figure 211 Conflicting Computer and Router IP Addresses Example ...

Page 277: ...et Explorer Pop up Blockers You may have to disable pop up blocking to log into your device Either disable pop up blocking enabled by default in Windows XP SP Service Pack 2 or allow pop up blocking and create an exception for your device s IP address Disable Pop up Blockers 1 In Internet Explorer select Tools Pop up Blocker and then select Turn Off Pop up Blocker Figure 212 Pop up Blocker You can...

Page 278: ...e screen This disables any web pop up blockers you may have enabled Figure 213 Internet Options Privacy 3 Click Apply to save this setting Enable Pop up Blockers with Exceptions Alternatively if you only want to allow pop up windows from your device see the following steps 1 In Internet Explorer select Tools Internet Options and then the Privacy tab ...

Page 279: ...s ENC User s Guide 283 2 Select Settings to open the Pop up Blocker Settings screen Figure 214 Internet Options Privacy 3 Type the IP address of your device the web page that you do not want to have blocked with the prefix http For example http 192 168 167 1 ...

Page 280: ... to move the IP address to the list of Allowed sites Figure 215 Pop up Blocker Settings 5 Click Close to return to the Privacy screen 6 Click Apply to save this setting JavaScript If pages of the web configurator do not display properly in Internet Explorer check that JavaScript are allowed ...

Page 281: ... click Tools Internet Options and then the Security tab Figure 216 Internet Options Security 2 Click the Custom Level button 3 Scroll down to Scripting 4 Under Active scripting make sure that Enable is selected the default 5 Under Scripting of Java applets make sure that Enable is selected the default ...

Page 282: ... to close the window Figure 217 Security Settings Java Scripting Java Permissions 1 From Internet Explorer click Tools Internet Options and then the Security tab 2 Click the Custom Level button 3 Scroll down to Microsoft VM 4 Under Java permissions make sure that a safety level is selected ...

Page 283: ...rmissions ENC User s Guide 287 5 Click OK to close the window Figure 218 Security Settings Java JAVA Sun 1 From Internet Explorer click Tools Internet Options and then the Advanced tab 2 Make sure that Use Java 2 for applet under Java Sun is selected ...

Page 284: ... to close the window Figure 219 Java Sun Mozilla Firefox Mozilla Firefox 2 0 screens are used here Screens for other versions may vary You can enable Java Javascript and pop ups in one screen Click Tools then click Options in the screen that appears Figure 220 Mozilla Firefox Tools Options ...

Page 285: ... C Pop up Windows JavaScript and Java Permissions ENC User s Guide 289 Click Content to show the screen below Select the check boxes as shown in the following screen Figure 221 Mozilla Firefox Content Security ...

Page 286: ...Appendix C Pop up Windows JavaScript and Java Permissions ENC User s Guide 290 ...

Page 287: ... is distributed the Software including any documentation files accompanying the Software Documentation for internal business use only for up to the number of users specified in sales order and invoice You have the right to make one backup copy of the Software and Documentation solely for archival back up or disaster recovery purposes You shall not exceed the scope of the license granted hereunder ...

Page 288: ...tains third party software ZyXEL has no express or implied obligation to provide any technical or other support for such software Please contact the appropriate software vendor or manufacturer directly for technical support and customer service related to its software and products 5 Confidentiality You acknowledge that the Software contains proprietary trade secrets of ZyXEL and you hereby agree t...

Page 289: ...t at any time by destroying or returning to ZyXEL all copies of the Software and Documentation in your possession or under your control ZyXEL may terminate this License Agreement for any reason including but not limited to if ZyXEL finds that you have violated any of the terms of this License Agreement Upon notification of termination you agree to destroy or return to ZyXEL all copies of the Softw...

Page 290: ...License applies to most of the Free Software Foundation s software and to any other program whose authors commit to using it Some other Free Software Foundation software is covered by the GNU Library General Public License instead You can apply it to your programs too When we speak of free software we are referring to freedom not price Our General Public Licenses are designed to make sure that you...

Page 291: ... You may copy and distribute verbatim copies of the Program s source code as you receive it in any medium provided that you conspicuously and appropriately publish on each copy an appropriate copyright notice and disclaimer of warranty keep intact all the notices that refer to this License and to the absence of any warranty and give any other recipients of the Program a copy of this License along ...

Page 292: ...ode or executable form with such an offer in accord with Subsection b above The source code for a work means the preferred form of the work for making modifications to it For an executable work complete source code means all the source code for all modules it contains plus any associated interface definition files plus the scripts used to control compilation and installation of the executable Howe...

Page 293: ...f the distribution and or use of the Program is restricted in certain countries either by patents or by copyrighted interfaces the original copyright holder who places the Program under this License may add an explicit geographical distribution limitation excluding those countries so that distribution is permitted only in or among countries not thus excluded In such case this License incorporates ...

Page 294: ... also free to use a jQuery project under that license You don t have to do anything special to choose one license or the other and you donít have to notify anyone which license you are using You are free to use a jQuery project in commercial projects as long as the copyright header is left intact The GPL License is on the above The MIT License Copyright c year copyright holders Permission is hereb...

Page 295: ...s an email at support fusioncharts com with the above information We would also appreciate a link back from your product website to our website www fusioncharts com free WARRANTY InfoSoft Global expressly disclaims any warranty for the software THE SOFTWARE AND ANY RELATED DOCUMENTATION IS PROVIDED AS IS WITHOUT WARRANTY OF ANY KIND EITHER EXPRESS OR IMPLIED INCLUDING WITHOUT LIMITATION THE IMPLIE...

Page 296: ...Appendix D Open Software Announcements ENC User s Guide 300 ...

Page 297: ...anship and or materials ZyXEL will at its discretion repair or replace the defective products or components without charge for either parts or labor and to whatever extent it shall deem necessary to restore the product or components to proper operating condition Any replacement will consist of a new or re manufactured functionally equivalent product of equal or higher value and will be solely at t...

Page 298: ...rranty gives you specific legal rights and you may also have other rights that vary from country to country Registration Register your product online to receive e mail notices of firmware upgrades and information at www zyxel com for global products or at www us zyxel com for North American products ...

Page 299: ...or of device icons 24 color of network icons 24 command scripts editing 107 managing 106 note of write commands 108 Committed Information Rate see CIR 222 common tables fields 44 Compiling MIB databases 159 cookies 17 copy device Map 43 copyright 301 creating a VLAN group 210 D daily reports 169 185 dashboard 19 85 delta 207 DES 40 destination lookup failure see DLF 224 Device Discovery automatic ...

Page 300: ...n 234 IEEE 802 3x flow control 220 Info event icon 43 Internet Assigned Numbers Authority See IANA 278 Internet Explorer 17 J Java permissions 17 JavaScript 17 L license key 259 limit MAC address learning 228 link of Map 27 82 login 18 login account types 243 administrator 244 operator 244 user 244 logout Web Configurator 20 logs event 123 126 127 128 129 131 logs of Web Configurator operations 20...

Page 301: ...ce Map 43 Peak Information Rate see PIR 222 ping test 158 PIR 222 pop up windows 17 port isolation 217 port security 226 address learning 228 port based VLAN port isolation 217 product registration 302 R RADIUS 230 advantages 230 and authentication 230 Network example 230 server 230 read community 40 registration iCard 259 license key 259 product 302 related documentation 3 Remote Network Monitor ...

Page 302: ... test 158 troubleshooting access the ENC 263 auto discovery 264 configuration backup 267 connection lost 266 event action 266 installation 263 Map 265 script 265 syslog 267 VLAN port management 266 tutorial auto discovery with filters 60 tutorials 47 U unassociate a device 42 upgrade license version 258 uploading command scripts 107 user account type 244 user profiles 230 V version license upgrade...

Reviews: