The NodeGrid Serial Console provides
extensive access to the devices
attached to this equipment. As a result,
care must be taken to avoid
compromising your security policies.
From the factory, this equipment is
shipped with the following settings:
• DHCP, SSHv2, HTTPS – ENABLED
• All Serial ports – DISABLED
• Ethernet, USB and Serial Console
Ports – ENABLED
• Two default users with passwords:
–
root
–
root
–
admin
–
admin
Note: root access to shell enabled
on the console port only.
ZPE enforces password changes upon
first login for root/admin users. ZPE
recommends carefully configuring
security settings immediately after
initial setup.
Please consult the
NSC User Guide
for
more information on security settings.
Quick Start Guide for T Series NodeGrid Serial Console
Security Warning
For manual downloads, visit:
www.zpesystems.com/docs
The following instructions will help you
install your NSC.
For further assistance please contact ZPE
Technical Support.
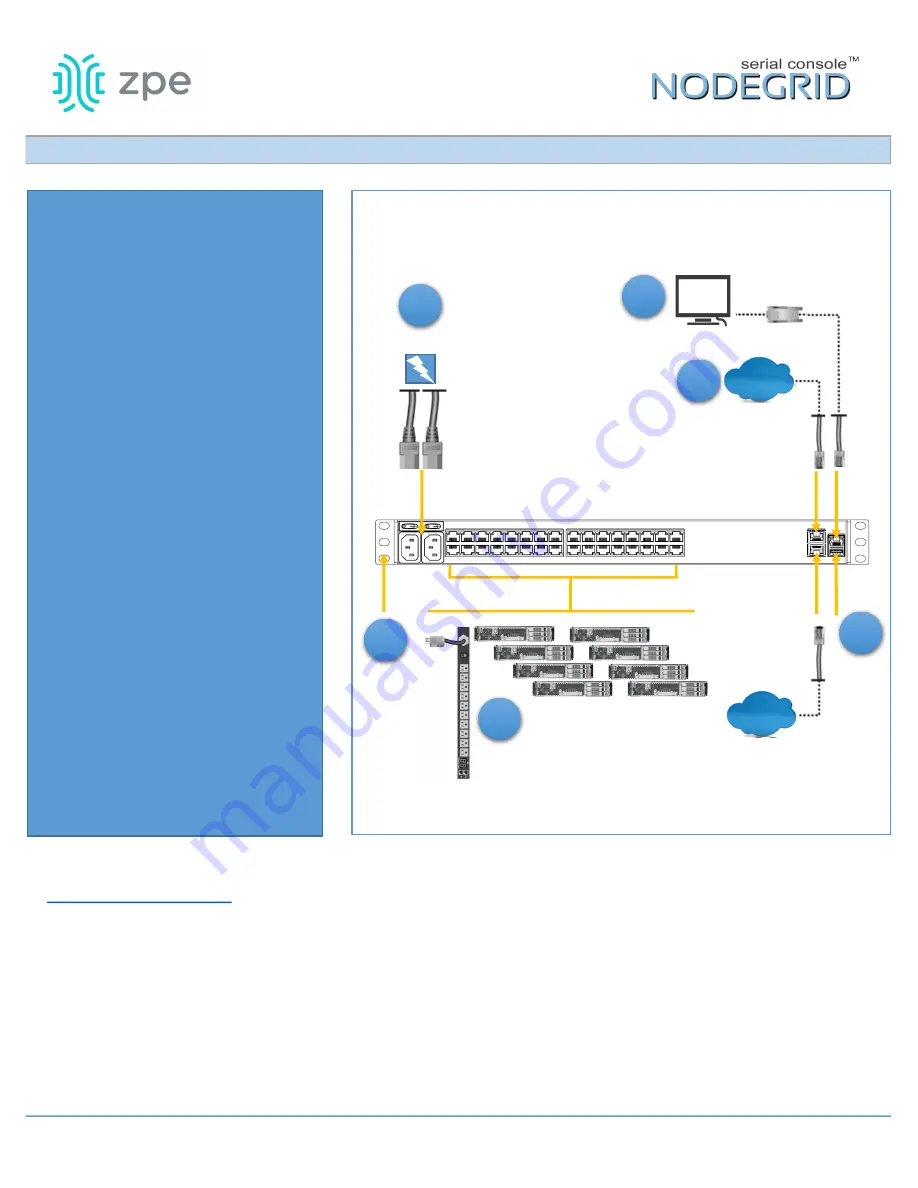
1
Rack mount your NSC appliance
For detailed rack mounting
instructions, see the
NSC User Guide.
2
Connect to your network
Connect a ZPE-recommended
CAT 5e or CAT 6 cable from the
10/100/1000BaseT port to your
network. You may connect to either
or both network ports for
redundancy.
3
Connect serial devices
Using CAT 5e or CAT 6 cables and DB9
or DB25 console adaptors, connect
the appropriate serial devices to the
serial ports on the NSC.
4
Connect USB devices
Connect a supported USB device to
the appropriate ports located on the
front of the serial console.
Single/Dual
AC power
5
NSC T32 serial console shown
3
Serial Devices
6
Console User
2
Network
Ethernet
Ethernet
1
Rack
Mounting
4
USB
By installing, copying, or otherwise using this device, you agree to be bound by the terms of the licensing, maintenance and sale agreements set forth on
www.zpesystems.com/docs/legal. if you do not agree to the terms of those agreements, do not install or use the Hardware and/or Software Product(s).
RJ45-DB9
console adaptor


