Chapter 3: Configuration and commissioning
70
ZP2 Series Installation Manual
To update the firmware:
1. Select Panel setup from the Main menu, and then select System update.
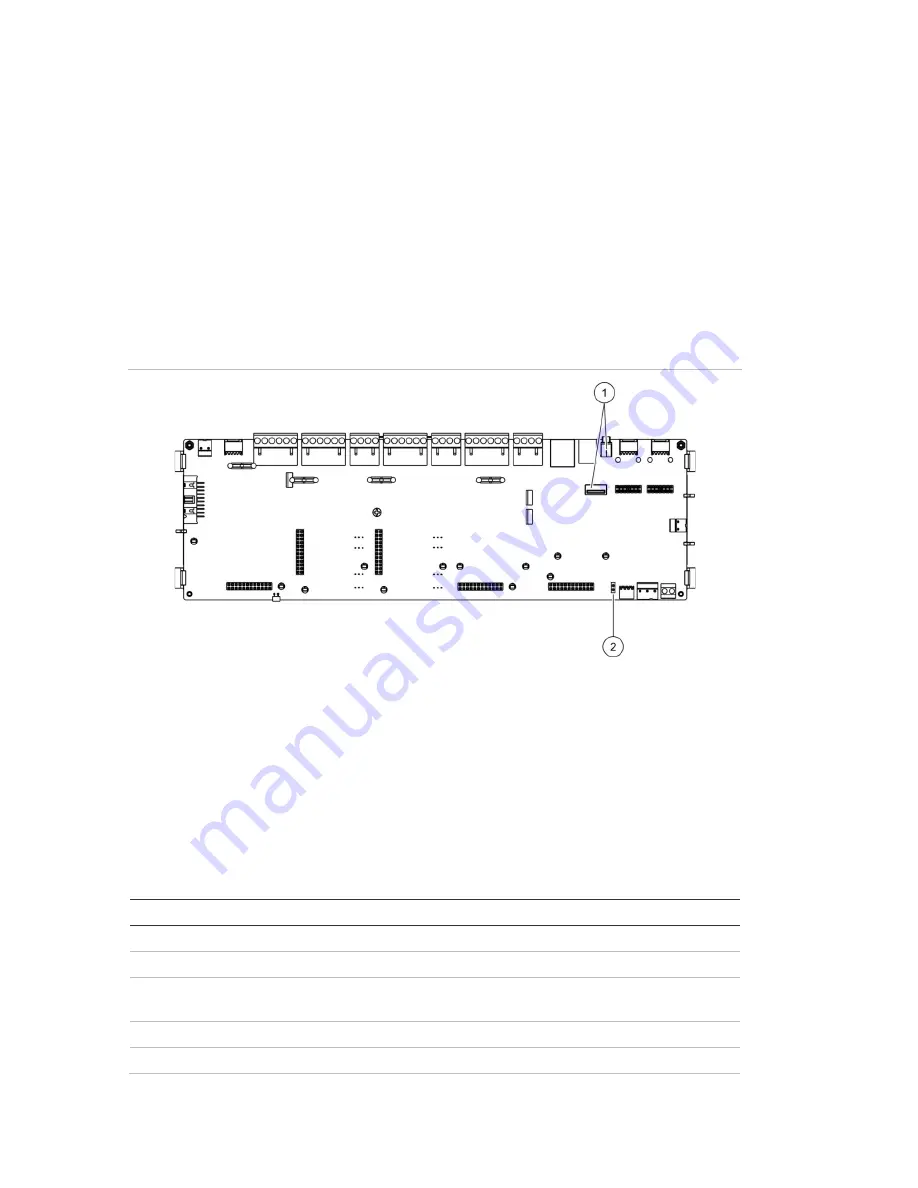
2. When prompted, open the control panel door and install a jumper onto JP4 on
the control panel PCB (see Figure 23 below), and then press F3 (Reboot).
The control panel reboots. Follow the on-screen instructions.
3. When prompted, insert the USB flash drive with the firmware update into
either of the USB type A connectors, and then press F3 (Continue).
4. When prompted, remove the USB flash drive as described in “Removing a
USB device” on page 44.
Figure 23: USB and JP4 connectors on the control panel PCB
1. USB connectors
2. JP4
Printer configuration
Select Printer configuration to configure internal, external, or terminal printers,
where available. Configuration options are shown in the table below. By default,
all printer configuration options are disabled.
Table 29: Printer configuration options
Option
Description
Used
Configures the printer status (used or not used)
RportMd [1]
Configures the external printer for report printing
NWEvent [2]
Configures the printing of system events for all control panels in the
network
Alarm [2]
Configures the printing of alarm events
Fault [2]
Configures the printing of fault events
Summary of Contents for ZP2 Series
Page 1: ...ZP2 Series Installation Manual P N 00 3251 501 0003 04 ISS 04MAY15...
Page 6: ...iv ZP2 Series Installation Manual...
Page 20: ...Chapter 1 Introduction 14 ZP2 Series Installation Manual...
Page 114: ...Chapter 3 Configuration and commissioning 108 ZP2 Series Installation Manual...
Page 128: ...Chapter 5 Technical specifications 122 ZP2 Series Installation Manual...
Page 142: ...Appendix C Menu maps 136 ZP2 Series Installation Manual...
Page 148: ......


