background image

MAINTENANCE 

ZIPPER MASCHINEN GmbH     www.Zipper-Maschinen.at



31   

ZI-RMTR40V-AKKU 

14


MAINTENANCE 


A T T E N T I O N  


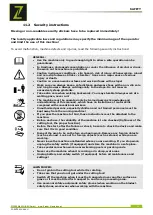
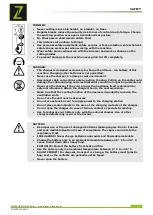
Unplug  battery  and  safety  switch  (if  equipped)  before  all 

maintenance and settings! 
Serious injury due to unintentional or automatic activation of the 

machine! 


The machine does not require extensive maintenance. If malfunctions and defects occur, let it be 

serviced by trained persons only. 


N O T I C E  

Clean your  machine regularly after every usage  – it prolongs the machines lifespan and is a pre-

requisite for a safe working environment. 

Repair jobs shall be performed by respectively trained professionals only! 


Check regularly the condition of the security stickers. Replace them if required. 
Check regularly the condition of the machine.  
 
Store the machine in a closed, dry location 

14.1


Changing cutting tool 

N O T I C E  

Always wear protective gloves while working on the cutting tool! 

14.1.1


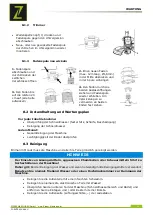
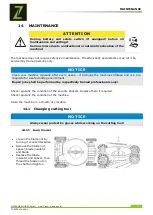
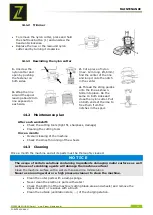
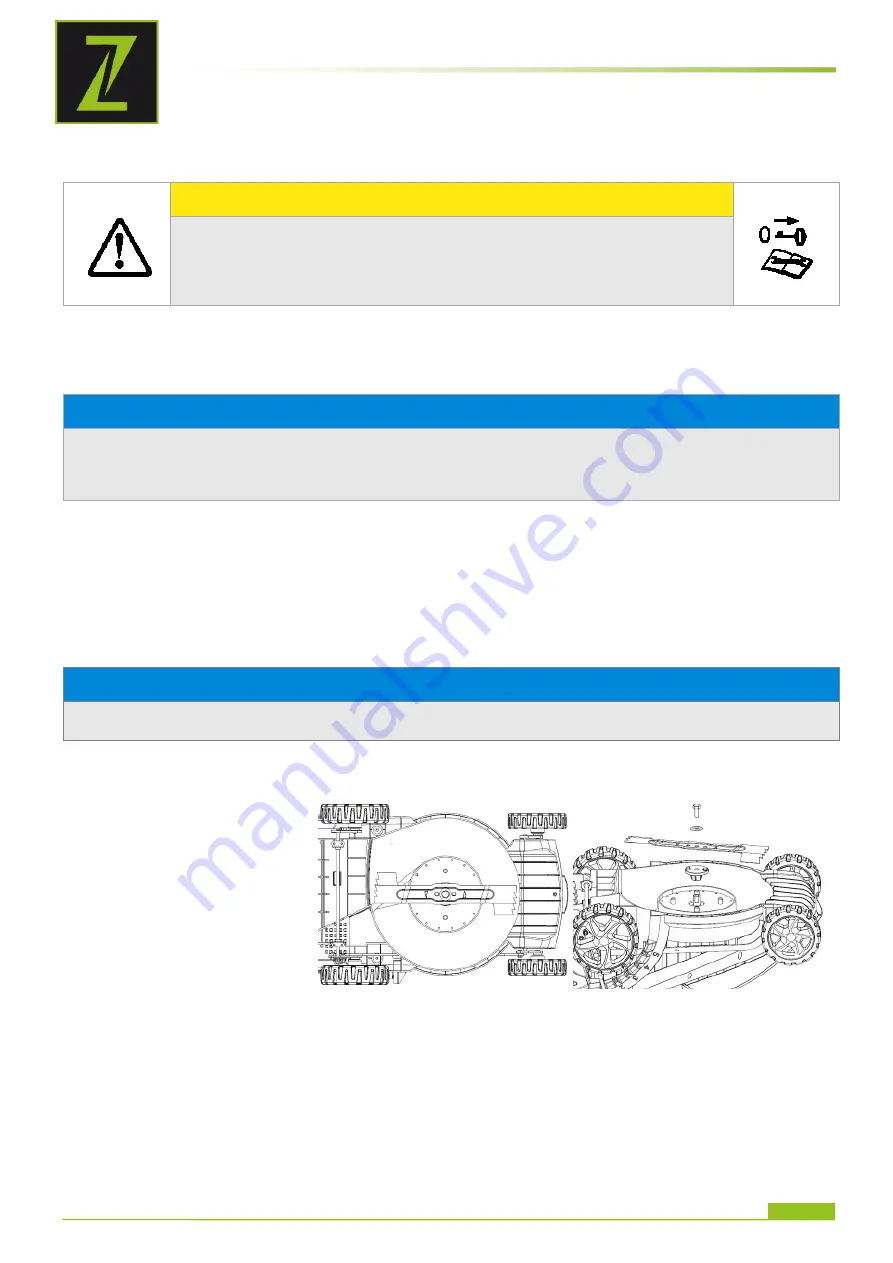
Lawn mower 


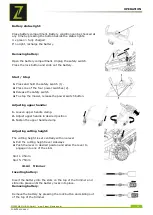
Loosen the blade nut by 

turning it counterclockwise 


Remove the blade nut, 

spacer, blade insulator 

and blade 


Replace the blade 

insulator and spacer, then 

thread the blade nut on 

the shaft and tighten 


Summary of Contents for ZI-RMTR40V-AKKU

Page 1: ...on 15 02 2016 Revision 00 CEC DE EN Originalfassung DE BETRIEBSANLEITUNG RASENMÄHER TRIMMER 40VOLT AKKU Übersetzung Translation EN USER MANUAL LAWN MOWER TRIMMER 40VOLT AKKU ZI RMTR40V AKKU EAN 9120039232317 ...

Page 2: ... Bestimmungsmäßige Verwendung 8 5 2 Sicherheitshinweise 9 5 3 Restrisiken 11 6 MONTAGE 12 6 1 Zusammenbau 12 6 1 1 Mäher 12 6 1 2 Trimmer 12 7 BETRIEB 13 7 1 Betriebshinweise 13 7 2 Bedienung 13 7 2 1 Mäher 13 7 2 2 Trimmer 14 7 3 Ladegerät 16 8 WARTUNG 17 8 1 Schneidwerkzeug wechseln 17 8 1 1 Mäher 17 8 1 2 Trimmer 18 8 1 3 Fadenspule neu wickeln 18 8 2 Instandhaltung und Wartungsplan 18 8 3 Rein...

Page 3: ...ration 27 13 2 1 Lawn mower 27 13 2 2 Trimmer 28 13 3 Charger 30 14 MAINTENANCE 31 14 1 Changing cutting tool 31 14 1 1 Lawn mower 31 14 1 2 Trimmer 32 14 1 3 Rewinding the nylon cutter 32 14 2 Maintenance plan 32 14 3 Cleaning 32 14 4 Storage 33 14 4 1 Lawn mower 33 14 5 Disposal 33 15 TROUBLE SHOOTING 34 16 ERSATZTEILE SPARE PARTS 35 16 1 Ersatzteilbestellung spare parts order 35 17 EG KONFORMIT...

Page 4: ... use the machine correctly and to avoid injuries and machine defects DE WARNUNG Beachten Sie die Sicherheitssymbole Die Nichtbeachtung der Vorschriften und Hinweise zum Einsatz der Maschine kann zu schweren Personenschäden und tödliche Gefahren mit sich bringen EN ATTENTION Ignoring the safety signs and warnings applied on the machine as well as ignoring the security and operating instructions can...

Page 5: ...stange trimmer shaft 4 Griffklemmung oben upper handle clamp 15 Handgriff handle 5 Griffklemmung unten lower handle clamp 16 Längenverstellung length adjustment 6 Schnitthöhenhebel cutting height lever 17 Winkelverstellung angle adjustment 7 Akkufach battery compartment 18 Wellensperrknopf spindle lock button 8 Akku battery 19 Rad wheel 9 Sicherheitsschlüssel safety key 20 Fadenspule nylon cutter ...

Page 6: ...annung rated voltage 40V DC Akkukapazität battery capacity 4 Ah Akkulaufzeit battery worktime 50 min Schnittkreisdurchmesser cutting diameter Ø 300 mm Leerlaufdrehzahl no load speed 7500 min 1 Fadendurchmesser cutting line diameter 1 6 mm Schallleistungspegel LWA sound power level LWA 96 dB A Schalldruckpegel LPA sound pressure level LPA 77 dB A k 3dB A Vibration ah vibration ah 2 0 m s k 1 5 m s ...

Page 7: ...durch Der sachgemäße Umgang wird Ihnen dadurch erleichtert Missverständnissen und etwaigen Schäden wird vorgebeugt Halten Sie sich an die Warn und Sicherheitshinweise Missachtung kann zu ernsten Verletzungen führen Durch die ständige Weiterentwicklung unserer Produkte können Abbildungen und Inhalte geringfügig abweichen Sollten Sie Fehler feststellen informieren Sie uns bitte Technische Änderungen...

Page 8: ...einern im Sinne von Kompostieren verwendet werden Verwenden Sie nur für die Maschine zulässige Schneidwerkzeuge Verwenden Sie nie schadhafte Schneidwerkzeuge Benutzen Sie die Maschine niemals mit defekten oder ohne montierte trennende Schutzeinrichtung Die Entfernung bzw Änderung der Sicherheitskomponenten können zu Schäden am Gerät und schweren Verletzungen führen HÖCHSTE VERLETZUNGSGEFAHR Arbeit...

Page 9: ...motorischen Fähigkeiten verglichen mit üblichen ArbeitnehmerInnen aufweisen bedient werden Unbefugte insbesondere Kinder und nicht eingeschulte Personen sind von der laufenden Maschine fern zu halten Wenn Sie die Maschine an Dritte weitergeben ist diese Anleitung der Maschine zwingend beizulegen Vor jeder Verwendung ist die Betriebssicherheit der Maschine zu prüfen fester Sitz des Schneidwerkzeuge...

Page 10: ...degerät wenn Kabel Stecker oder das Gerät selbst durch äußerliche Einwirkung beschädigt sind Bringen Sie das Ladegerät dann zur nächsten Fachwerkstatt Verhindern Sie dass die Kühlfunktion des Gerätes durch Verdecken der Kühlschlitze behindert wird Betreiben Sie das Gerät nicht in der Nähe von Wärmequellen Verwenden Sie kein Verlängerungskabel um das Netzteil der Ladestation anzustecken Legen Sie k...

Page 11: ...zen kann es zu Schädigungen von Blutgefäßen und oder Nervensystem kommen Folgende Symptome können durch Vibrationen an Fingern Händen oder Handgelenken auftreten Einschlafen von Körperteilen Taubheit Kribbeln Schmerz Stechen Veränderung von Hautfarbe oder Haut Falls eines dieser Symptome auftritt suchen Sie einen Arzt auf Um das Risiko der Weißfingerkrankheit zu verringern halten Sie Ihre Hände wä...

Page 12: ...ammenstecken und mit den 2 Schrauben am unteren Boden fixieren 2 Den unteren Teil des Griffes hochklappen und mit der unteren Griffklemmung fixieren 3 Die obere Griffklemmung montieren Die Klemmung per Hand locker zudrehen und danach Hebel zum Spannen zuklappen 4 Den oberen Teil des Griffes mit der oberen Griffklemmung fixieren Achten Sie beim Hochklappen darauf dass keine Kabel abgeknickt oder be...

Page 13: ...el nur zum Arbeiten einsetzen Verwenden Sie den Mäher nur mit Grasauffangkorb 7 2 Bedienung 7 2 1 Mäher Grasfangkorb einhängen Die hintere Klappe öffnen und den Grasfangkorb mit den Haken in die Halterung einsetzen Bei korrektem Sitz des Grasfangkorbes muss die Klappe beim Schließen genau in die Aussparung des Grasfangkorbes passen Grasfangkorbfüllstandanzeige Bei leerem Grasfangkorb öffnet sich b...

Page 14: ...en 2 Einen der 4 Startschalter 2 drücken 3 Danach Sicherheitsschalter loslassen 4 Zum Stoppen der Maschine Startschalter loslassen Griff einstellen 1 Oberer Griffklemmung lösen 2 Griff in die gewünschte Position bringen 3 Obere Griffklemmung wieder fixieren 1 Schnitthöhe einstellen Die Schnitthöhe wird zentral mit einem Hebel eingestellt 1 Schnitthöhenhebel zur Seite drücken 2 Hebel in gewünschte ...

Page 15: ... wird mit dem Fadenmesser auf die richtige Länge abgeschnitten Handgriff einstellen 1 Klemmhebel lösen 2 Griff in gewünschte Position schieben 3 Klemmhebel wieder fixieren Trimmerkopf einstellen 1 Winkelverstellknopf drücken 2 Trimmerkopf in gewünschte Position bringen 3 Winkelverstellknopf wieder loslassen und der Trimmerkopf rastet ein 5 Positionen möglich Stangenlänge einstellen 1 Längenverstel...

Page 16: ...tet 3 Akku laden 4 Wenn Akku vollständig geladen ist Fixierknopf drücken und Akku herausziehen 5 Der Li Ion Akku hat keinen Memory Effekt Es schadet dem Akku nicht wenn er vor vollständiger Ladung entnommen wird LED Anzeige 2 LED leuchtet Rot Ladegerät an Stromversorgung angeschlossen Kein Akku eingesetzt LED blinkt Grün Akku wird geladen LED leuchtet Grün Akku vollständig geladen und muss entnomm...

Page 17: ...tzungen führen Reparaturen die spezielle Fachkenntnisse erfordern sollten nur von autorisierten Service Centern durchgeführt werden Unsachgemäßer Eingriff kann das Gerät beschädigen oder Ihre Sicherheit gefährden Prüfen Sie regelmäßig ob die Warn und Sicherheitshinweise an der Maschine vorhanden und in einwandfrei leserlichem Zustand sind Prüfen Sie vor jedem Betrieb den einwandfreien Zustand der ...

Page 18: ... Inbetriebnahme Überprüfung der Schneidmesser fester Sitz Schärfe Beschädigung Reinigung der Schneidmesser Jedem Monat Gesamtreinigung der Maschine Leichtgängigkeit der Räder überprüfen 8 3 Reinigung Einmal im Monat muss die Maschine und alle ihre Teile gründlich gereinigt werden HINWEIS Der Einsatz von Lösungsmitteln aggressiven Chemikalien oder Scheuermitteln führt zu Sachschäden an der Maschine...

Page 19: ... Maschine lagern 8 4 1 Mäher Die obere und untere Griffklemmung lösen und die Griffe wie rechts abgebildet zusammenfalten Achten Sie darauf dass keine Kabel abgeknickt oder beschädigt werden 8 5 Entsorgung Entsorgen Sie Ihre Maschine und den Akku nicht im Restmüll Kontaktieren Sie Ihre lokalen Behörden für Informationen bzgl der verfügbaren Entsorgungsmöglichkeiten Wenn Sie bei Ihrem Fachhändler e...

Page 20: ...Vibrationen Schneidwerkzeug locker Schneidwerkzeug anziehen Fremdkörper am Schneidwerkzeug Fremdkörper entfernen Schneidwerkzeug beschädigt Schneidwerkzeug wechseln Schlechte Grasaufnahme Falsche Schnitthöhe Schnitthöhe anpassen Grasfangkorb ist voll Grasfangkorb ausleeren Schlechtes Schnittergebnis Stumpfes Schneidwerkzeug Schneidwerkzeug wechseln oder schärfen Zu langes Gras Schnitthöhe anpassen...

Page 21: ... the manual to the machine Please follow the security instructions Please read the entire manual to prevent misunderstandings machine damage or even injuries Due to continuous development of our products illustrations pictures might differ slightly If you however find errors in this manual please inform us Technical changes excepted Copyright law 2016 This manual is protected by copyright law all ...

Page 22: ...tting and pruning of climbers or grass on roofs The trimmer must not be used for hedge trimming or for shredding for composting Use only cutting tools allowable for this machine Never use a damaged cutting tools Never use the machine with defective or without mounted guard The removal or modification of the safety components may result in damage to equipment and serious injury HIGHEST RISK OF INJU...

Page 23: ...ch have no limitations of motor skills compared with conventional workers Unauthorized persons especially children and not trained personnel must be kept away from the running machine If you pass the machine to third these instructions must be attached to the machine Before each use the reliability of the machine is to be checked tightness of the cutting tool the proper function Before the start a...

Page 24: ...the cord plug or the appliance itself is damaged by external influences Attach the charger then to the next workshop Make sure that the cooling function of the device is impeded by covering the ventilation slots Do not use the unit near heat sources Do not use extension cord to supply power to the charging station Do not place metal objects in the area of the charging contacts of the charger Do no...

Page 25: ... to pick up and roll up Wires and cords can be detected by the cutting tool and can damage the machine and can cause injuries Unplug battery and safety switch if equipped before removing the deposits Risk of injury due to vibration The declared vibration emission value has been for a standardized test is measured and can be used to compare one tool with another electric are The declared vibration ...

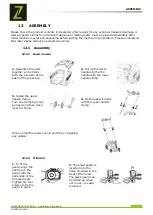
Page 26: ...e the parts together an fix them with the 2 screws at the base of the grass box 2 Pull up the lower handle and fix the handle with the lower handle clamp 3 Install the upper handle clamp Turn the clamping loose by hand and then close lever for fixing 4 Fix the upper handle with the upper handle clamp When unfold the mower avoid pinching or trapping any cables 12 1 2 Trimmer 1 To fit the guard alig...

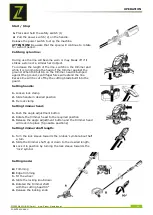
Page 27: ...1 Lawn mower Installing grass box Open the rear discharge door Lift the grass box by its handle and place under the rear door so that the hooks on the grass box frame are seated into the slots provided in the handle bracket Release the rear door When installed correctly the grass box will fit snugly against the rear of the mower and the rear discharge door will fit into the recess in the top of th...

Page 28: ...lease the safety switch 4 To stop the mower release the power switch button Adjusting upper handle 1 Loosen upper handle clamp 2 Adjust upper handle in desired position 3 Fasten the upper handle clamp 1 Adjusting cutting height The cutting height is set centrally with one lever 1 Pull the cutting height lever sideways 2 Push the lever in desired positon and allow the lever to engage into one of th...

Page 29: ...d centrifugal force will extend the line Excess line will be cut off by the cutting blade built into the guard Setting handle 1 Loosen lock clamp 2 Slide handle in desired position 3 Fix lock clamp Setting trimmer head 1 Push the angle adjustment button 2 Rotate the trimmer head to the required position 3 Release the angle adjustment button and the trimmer head will lock into place 5 possible posi...

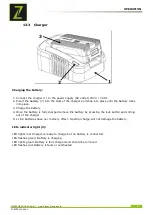
Page 30: ... into place 3 Charge the battery 4 Once the battery is fully charged remove the battery by pressing the lock button and sliding out of the charger 5 Li Ion batteries have nor memory effect A partial charge will not damage the battery LED indicator light 2 LED lights red Charger is ready to charge but no battery is connected LED flashes green Battery is charging LED lights green Battery is fully ch...

Page 31: ...it prolongs the machines lifespan and is a pre requisite for a safe working environment Repair jobs shall be performed by respectively trained professionals only Check regularly the condition of the security stickers Replace them if required Check regularly the condition of the machine Store the machine in a closed dry location 14 1 Changing cutting tool NOTICE Always wear protective gloves while ...

Page 32: ...s of the line to free them from the notches in the spool 14 2 Maintenance plan After each workshift Check the cutting tools tight fit sharpness damage Cleaning the cutting tools Once a month Overall cleaning of the machine Check the smooth running of the wheels 14 3 Cleaning Once a month the machine and all its parts must be thoroughly cleaned NOTICE The usage of certain solutions containing ingre...

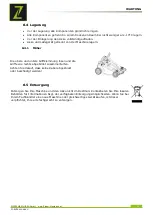
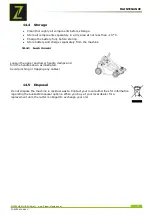
Page 33: ...ing Store battery and charger separately from the machine 14 4 1 Lawn mower Loosen the upper and lower handle clamps and fold the handles down as illustrated Avoid pinching or trapping any cables 14 5 Disposal Do not dispose the machine in residual waste Contact your local authorities for information regarding the available disposal options When you buy at your local dealer for a replacement unit ...

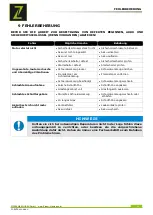
Page 34: ...ck safety switch Unusual loud noises and excessive vibrations Loosen cutting tool Tighten cutting tool Debris on the cutting tool Remove derbies Cutting tool damaged Change cutting tool Poor pickup of the grass Wrong cutting height Set to correct cutting height Full grass box Empty grass box Poor cutting result Blunt cutting tool Sharpen or change cutting tool To high grass Set to correct cutting ...

Page 35: ...ichnung an Um Missverständnissen vorzubeugen empfehlen wir mit der Ersatzteilbestellung eine Kopie der Ersatzteilzeichnung beizulegen auf der die benötigten Ersatzteile eindeutig markiert sind Bestelladresse sehen Sie unter Kundendienstadressen im Vorwort dieser Dokumentation With original ZIPPER spare parts you use parts that are attuned to each other shorten the installation time and elongate yo...

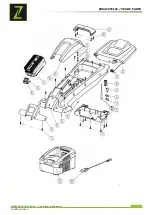
Page 36: ...ERSATZTEILE SPARE PARTS ZIPPER MASCHINEN GmbH www Zipper Maschinen at 36 ZI RMTR40V AKKU ...

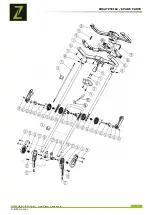
Page 37: ...ERSATZTEILE SPARE PARTS ZIPPER MASCHINEN GmbH www Zipper Maschinen at 37 ZI RMTR40V AKKU ...

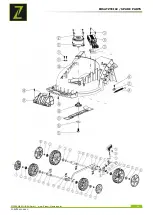
Page 38: ...ERSATZTEILE SPARE PARTS ZIPPER MASCHINEN GmbH www Zipper Maschinen at 38 ZI RMTR40V AKKU ...

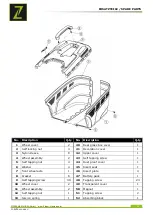
Page 39: ... 3 Nylon sleeve 8 42 Upper cover 1 4 Wheel assembly 2 43 Self tapping screw 1 5 Self tapping nut 4 44 Dust proof cover 1 6 Washer 4 45 Insert seat 1 7 front wheel axle 1 46 Insert plate 4 8 bracket 6 47 Battery pack 1 9 Self tapping screw 39 48 Tapping screw 23 10 Wheel cover 2 49 Transparent cover 1 11 Wheel assembly 2 50 Magnet 1 12 Self tapping nut 1 51 Tapping screw 2 13 torsion spring 1 52 Ab...

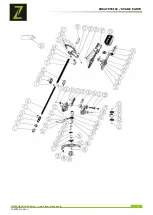
Page 40: ...ing kettle 1 68 Upper Handrail 2 30 Deck 1 69 Inner tooth 2 31 Electrical motor 1 70 Nut 2 32 Tapping screw 4 71 Nut 2 33 Rubber washer 2 72 Rear Cover of dash board 1 34 controller 1 73 Trigger Switch 1 35 Rear cover 1 74 Fastener 2 36 plate pinch 1 75 Cable 1 37 micro switch 1 76 Lower Cover of Board Board 1 38 Isolator key 1 77 Right Landscape Button 1 39 torsion spring 1 78 Right Portrait Butt...

Page 41: ...ERSATZTEILE SPARE PARTS ZIPPER MASCHINEN GmbH www Zipper Maschinen at 41 ZI RMTR40V AKKU ...

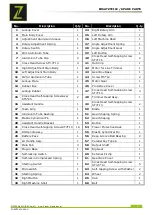
Page 42: ...ckup Rubber 1 47 Cross Head Self tapping Screw ST4 14 4 15 Cross Head Self tapping Screw Assy ST5 25 2 48 Trimmer Head Assy 1 16 Assistant Handle 1 49 Cross Head Self tapping Screw ST4 10 2 17 Foam Grip 1 50 Blade 1 18 Aluminium Tube Bushing 1 51 Gear Shaping Spring 1 19 Elastic Cylindrical Pin 1 52 Gear Shaping 1 20 Assistant Handle Bracket 1 53 Button 1 21 Cross Head Self tapping Screw ST4 19 18...

Page 43: ...8 EN 50636 2 91 2014 EN 55014 1 2006 A1 2009 A2 2011 EN 55014 2 1997 A1 2001 A2 2008 EN ISO 3744 1995 Hiermit erklären wir dass die oben genannten Maschinen aufgrund ihrer Bauart in der von uns in Verkehr gebrachten Version den grundlegenden Sicherheits und Gesundheitsanforderungen der angeführten EG Richtlinien entsprechen Diese Erklärung verliert ihre Gültigkeit wenn Veränderungen an der Maschin...

Page 44: ...hem Treibstoffen Frostschäden in Wasserbehältern Treibstoff über Winter im Benzintank des Gerätes c Ausgeschlossen sind Defekte an Verschleißteilen wie Kohlebürsten Fangsäcke Messer Walzen Schneideplatten Schneideeinrichtungen Führungen Kupplungen Dichtungen Laufräder Sageblätter Spaltkreuze Spaltkeile Spaltkeilverlängerungen Hydrauliköle Öl Luft u Benzinfilter Ketten Zündkerzen Gleitbacken usw d ...

Page 45: ... water tanks leaving fuel in the tank during the winter etc c Defects on wear parts are excluded e g carbon brushes collection bags knives cylinders cutting blades clutches sealings wheels saw blades splitting crosses riving knives riving knife extensions hydraulic oils oil air fuel filters chains spark plugs sliding blocks etc d Also excluded are damages on the machine caused by incorrect or inap...

Page 46: ...ed products in the frame of a Quality Management policy Um einen ständigen Verbesserungsprozess gewährleisten zu können sind wir von Ihnen und Ihren Eindrücken beim Umgang mit unseren Produkten abhängig Your opinion is essential for further product development and product choice Please let us know about your Probleme die beim Gebrauch des Produktes auftreten Impressions and suggestions for improve...

Page 47: ...PRODUKTBEOBACHTUNG ZIPPER MASCHINEN GmbH www Zipper Maschinen at 47 ZI RMTR40V AKKU ...

Reviews: