Zetta Z86 Security Camera Quick Start Guide
Overview
Congratulations on your purchase of Zetta Z86 security camera!
Zetta Z86 is an intelligent security camera with low power motion detection function, work
being glass. The camera comes with a built-in rechargeable battery which can record up to 9
hours continuous video and audio during typical use and standby for more than 25 days
when motion triggering (in max battery mode) is enabled. By plugging in a 5V DC adapter
(not included), it can achieve max 156 hours circular recording for surveillance on a 256GB
microSD card.*
* Actual life and performance may vary depending on usage and settings; battery not replaceable
Features
Circular recording
Time stamp
– put time stamp on video
Motion-triggered recording
– select to record only when motion is detected, 25 days
standby (in max battery mode), work through windows
Clouding push notification
– can config to connect to the cloud server
and get push notification when an image is uploaded
Full HD 1080p resolution
Configurable video quality
– high / medium / low
Support max 256GB microSD(TF) card
(for better performance, use card larger than
8GB, class 4 or above, and before use, format the card to FAT32 format only)
Package Contents
Please unpack your intelligent security camera and check that the following are included:
Zetta Z86 security camera
USB 2.0 Cable
Quick Start Guide
Note: The PC configuration tool “Camera Widget” is not included in the package,
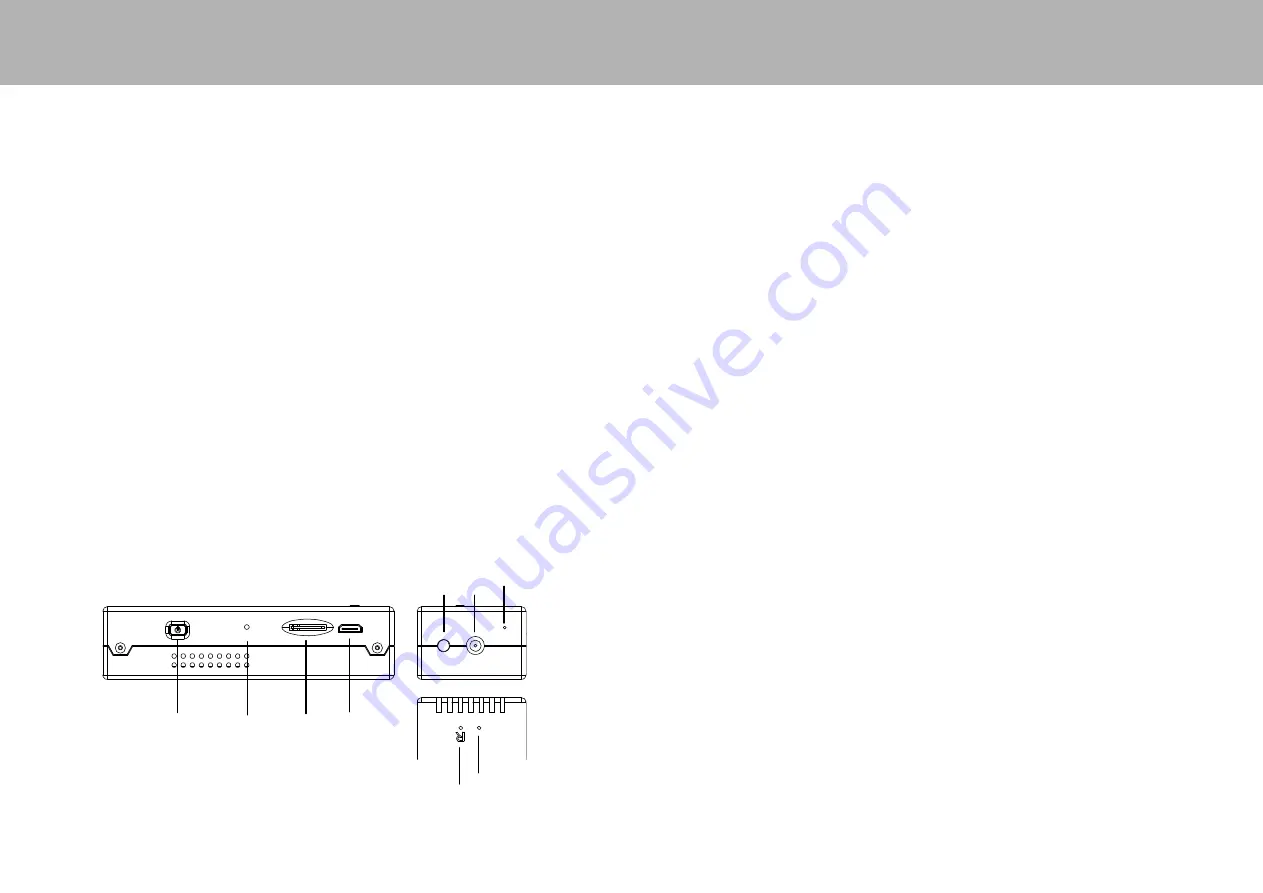
Z86 drawing
Charging
The camera comes with an internal rechargeable battery. To use the camera for the first
time or not using the camera for a long time, please fully charge the battery for at least 8
hours and resync the time by using the Camera Widget (see section “PC Configuration Tool”).
You can charge your camera through the USB port of your computer, or a portable power
bank, or a 5V DC adapter or car charger.
To charge the battery through USB port, connect the USB cable to the USB port of the
computer and the camera. For details, please see the status below. The camera will
function as a mass storage device, you will not be able to record video at this moment.
To charge the battery through power bank, DC adapter or car charger, connect the charger
to the camera. For details, please see the status below. You will be able to record video
while charging, depending on the mode you set.
Recording
The power key is located by the side of the camera. It can turn the camera on or off.
Start Recording
Insert a FAT32-formatted microSD card (please see “Format Card” on how to format the
card). Press and hold the Power key until the green LED is on (approximately 3 seconds),
and then release the key. When you see the green LED flashing, the camera is recording.
Otherwise, please see the status below.
Stop Recording
Press and hold the Power key until the orange LED is off (for approximately 3 seconds).
WARNING: Turn off the camera before removing the microSD card!
If the camera hangs, please use a pin to press the RESET key for 1 second to reset
it. The time will be lost. Please use the Camera Widget to sync the time again.
Status
Without external charger
Green LED on: camera is booting up
Green LED flashing: normal recording
Green / Red LED intermittent flashing: battery low and recording
Red LED on: no card, card fail, battery low or card full (not in circular recording)
Red LED flashing: cannot connect to router (when configured to connect to cloud server)
Connecting to an external charger
Orange LED on: charging but no recording
Green LED on: charging completed but no recording
Green LED flashing: charging completed and recording
Green / Orange LED intermittent flashing: charging and recording
Red LED on: no card, card fail or card full (not in circular recording)
Red LED flashing: cannot connect to router (when configured to connect to cloud server)
Connecting to computer
Orange LED on: charging
Green LED on: charging completed
power LED microSD USB
motion main
sensor camera mic
reset format /
upgrade
–
loop
back
recording
once
memory
card
is
full


