8 • Installation & Operation
INSTALLATION & OPERATION
Lineup Assembly
Zero Zone display cases have been designed for continuous display so that multiple cases may be joined together to create a lineup of any
desired length. The cases will be ready for assembly after removing the packaging material. However, do not remove the protective coating on
the hand rail, canopy, and honeycomb holder at this time.
A case lineup must be properly aligned, which starts with properly leveling the case (
). It is crucial to use a laser
level to measure the high points in the floor and properly shim each base location.
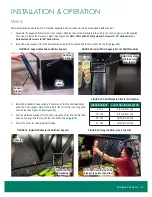
Before joining cases, remove all shipping blocks inside the bases and the steel support braces under the end panels. There are bolts that go up
through the support plates into the underside of the foamed floor.
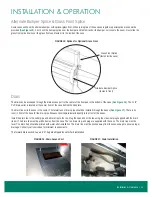
A case must be prepared with Butyl caulk before setting the next case in the lineup. Case caulking instructions and caulk are shipped with every
case (
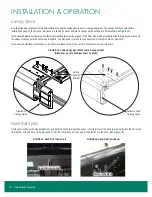
Move the next case into position and bolt it to the first case using the 4 joining bolts that are provided. Begin tightening the bolts at the top
rear, working down the back of the case and to the bottom front, making sure that the case seams are flush. To align cases, use a drift pin or
screwdriver on the alignment holes in the end frames, located 7" in from the joining holes.
Do not pull cases together using joining bolts.
). Do
not allow Butyl sealant and NSF-approved caulk to contact one another as this may affect adhesion or color of each.
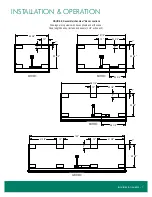
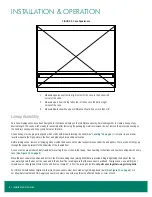
FIGURE 9: Case Squareness
1. Measure squareness from top right corner of the case to the bottom left
corner of the case.
2. Measure again from the top left corner of the case to the bottom right
corner of the case.
3. Measurements should be equal. Difference should be no more than 1/8".


