


26
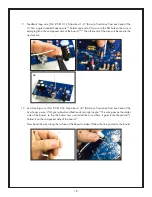
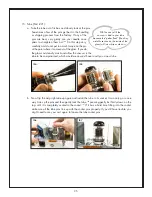
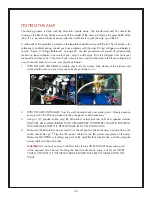
5. Label (Part # PL11): Clean the front of the chassis with a clean rag moistened with isopropyl
alcohol, denatured alcohol, or rubbing alcohol.
68
Clean it thoroughly, and allow any liquid to dry
completely. Be careful NOT TO TOUCH the face AT ALL after
cleaning. The oil on your fingertips will leave prints that will
interfere with the bond of the label. Test fit the label, then
peel off the back and carefully set it in place.
69
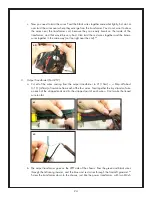
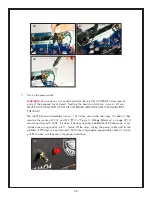
GET IT
RIGHT THE FIRST TIME! YOU WILL NOT BE ABLE TO
RE-POSITION THIS LABEL! Line up the bottom edge of
the label with the bottom edge of the chassis; then align
some of the chassis holes, drop it in place, and rub it
down firmly over the entire surface.
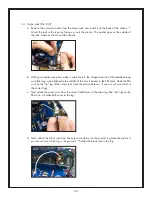
6. LED bezel (Part # SK05): Install the plastic LED bezel into its hole on the front of the chassis
(through the label).
70
It goes in the hole to the right of the ZDL logo. It should easily snap into
place.
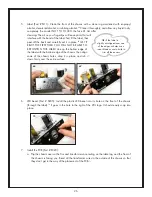
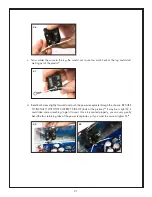
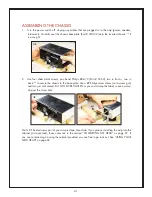
7. Install the PCB (Part # PC23):
a. Flip the chassis over so the fins and transformers are resting on the table top, and the front of
the chassis is facing you. Bend all the transformer wires to the outside of the chassis so that
they don’t get in the way of the placement of the PCB.
71
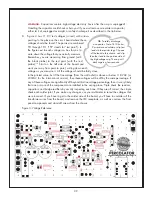
TIP:
If the label is
slightly misaligned over one
of the edges or holes use a
razor blade or xacto knife to
trim off the excess.
70
71
68
69