background image

Page 4 of 28 

802253NZ - HT BC Residential Instructions 10.18 v3.00

Before Installation:

A. 

Read the instructions and check if there is adequate space to mount all of the components.

B. 

Note: Not all fittings are supplied with the appliance kit. Isolation valves are not supplied.

C. 

Check the mains water pressure is between 150 - 700kPa and 200 - 700kPa when a booster  


and /or filter softener is fitted

D. 

Check the water quality to determine if extra filtration will be required.


NOTE: 

This product must be fitted to a potable water supply

E. 

Check the appliance rating plate and ensure correct power is available for the appliance.

F. 

Check the under counter cupboard supporting the appliance is adequate for the total weight


of the appliance, when full of water. 

Before Commissioning:

1. 

Check the unit has been installed correctly.

2. 

Check all plumbing fittings have been tightened.

3. 

Ensure the outlet and vent pipes are positioned to drain correctly.

4.  

Ensure there is adequate ventilation.

5.  

Check all tubes from the undersink unit to the tap, have a constant rise and there are no    


sags or kinks in the hoses.

6. 

Check all electrical connections are correct and there are no loose wires. 

Commission: (see section 5)

7. 

Flush the supply line before connecting.

8. 

Turn on the water and check for leaks.

9. 

Flush the filter(s).

10.  

Where applicable, program the unit to suit the customer’s requirements.

      Installation Checklist

Summary of Contents for HydroTap G4

Page 1: ...802253NZ HT BC Residential Instructions 10 18 v3 00 Page 1 of 28 Affix Model Number Label Here 802253NZ Zenith HydroTap G4 Installation and Operating Instructions BC Residential...

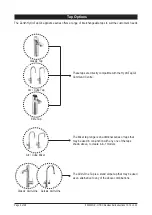
Page 2: ...Classic Tap Elite Tap Arc Cube Mixer Classic All In One Celsius All In One These taps are directly compatible with the HydroTap G4 Command Centre The All In One Tap is a stand alone tap that may be us...

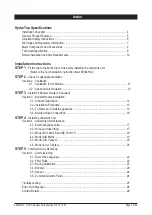
Page 3: ...or All Models 11 2 2 Cupboard Air Ciculation 12 STEP 3 Install the Booster Heater if required Section 3 Booster Heater Installation 3 1 Product Description 14 3 2 Installation Procedure 15 3 3 To Remo...

Page 4: ...ble for the appliance F Check the under counter cupboard supporting the appliance is adequate for the total weight of the appliance when full of water Before Commissioning 1 Check the unit has been in...

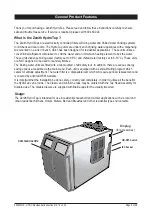
Page 5: ...designed to be used for sanitary fixtures The Boiling water units are fitted with a tap mounted child safety lock In addition there are various energy saving options accessible via the main menu Each...

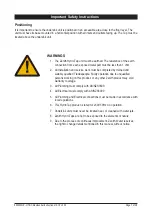
Page 6: ...be carried out by a suitably qualified tradesperson The power cable and power outlet must be in a safe visible position for connection Venting Sometimes steam and or condensed droplets may discharge...

Page 7: ...n and service work must be completed by trained and suitably qualified Tradespeople Faulty operation due to unqualified persons working on this product or any other Zenith product may void warranty co...

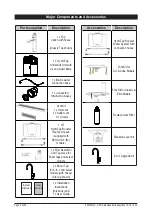
Page 8: ...ription 1 x Tap option with hoses Classic Tap shown 1 x HydroTap Undersink Unit with air and water filters 1 x Mains water connection hose 1 x Connector Strainer Sub assy Vent Kit 1 x Inlet vent 1 x O...

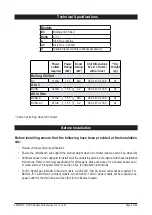
Page 9: ...lation Before installing ensure that the following have been provided at the Installation site Review all the technical specifications Ensure the underbench can support the product weight when full of...

Page 10: ...working pressure of 150kPa 200kPa when a booster and or filter softener is fitted and a maximum working pressure of 700kPa connected via an isolation valve The appliance must be placed with its base...

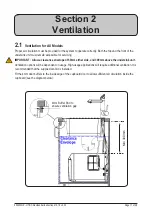
Page 11: ...NT Allow a clearance envelope of 50mm either side and 300mm above the undersink unit Ventilation options will be dependent on usage High usage applications will require additional ventilation It is re...

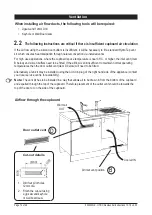
Page 12: ...pplications where the cupboard space temperature is near 35 C or higher the inlet vent Item B below and silicon buffers need to be fitted If the airflow is still insufficient to maintain normal operat...

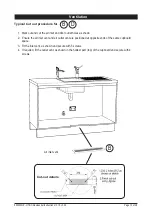
Page 13: ...t 1 Mark out and cut the air inlet and door outlet holes as shown 2 Ensure the air inlet vent and air outlet vent are positioned at opposite ends of the same cupboard space 3 Fit the inlet vent as sho...

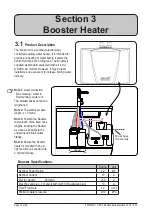
Page 14: ...water delivery 280mm Booster Specifications Rating Unit Nominal Power Rating 2 2 kW Nominal Current 10 A Electric Supply 50Hz AC 230 V Elect flex and plug 1 meter length with 90 Australian plug 10 A F...

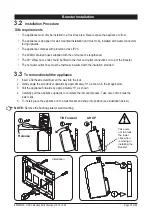
Page 15: ...ctions on top of the Booster The hot water outlet hose must be thermally insulated with the insulation provided Tilt Forward Lift UP Release NOTE Remove the backing plate for wall mounting 3 3 To remo...

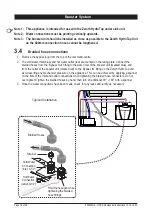
Page 16: ...hose connections 1 Remove the bypass loop from the top of the command centre 2 The cold water inlet blue and hot water outlet red are marked on the rating plate Connect the braided hoses from the Bypa...

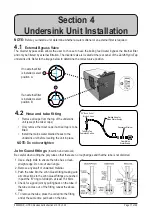
Page 17: ...ps Only remove the mixer caps if a mixer tap is to be fitted Install the mains water braided hoses to the undersink unit before locating the unit in place NOTE Do not overtighten John Guest fittings I...

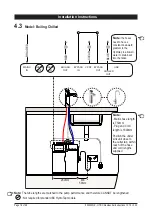
Page 18: ...BOILING OUT BYPASS IN VENT BYPASS OUT CHILLED OUT Note The tube lengths are matched to the pump performance and therefore CANNOT be lengthened Note the hoses need to have a constant downward gradient...

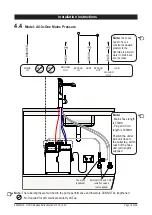
Page 19: ...BYPASS IN VENT BYPASS OUT CHILLED OUT Not required for AIO mains pressure HydroTap Note The tube lengths are matched to the pump performance and therefore CANNOT be lengthened Note the hoses need to...

Page 20: ...Vented Tee piece and Flow Restrictor supplied to Mixer RED CLEAR BLUE BRAIDED USB MAINS IN MIXER OUT MIXER IN BOILING OUT BYPASS IN VENT BYPASS OUT CHILLED OUT Booster HT Mixer connections BRAIDED BRA...

Page 21: ...In One Vented Note The tube lengths are matched to the pump performance and therefore CANNOT be lengthened Note the hoses need to have a constant downward gradient to the Hydrotap to allow all water...

Page 22: ...res of water to flush through the filter 4 Once the filter flush is finished Turn the stop cock OFF then press Stop to end filter flush mode Have a 10L bucket or similar container not supplied at the...

Page 23: ...ng to make the correct selection for the Booster will affect product performance NOTE Depending on your location you may need to re set the internal clock See section G of the user guide to check and...

Page 24: ...ormed at the time of the installation All direct natural sun light must be shaded from the HydroTap during the calibration This can be achieved by closing any nearby curtains blinds or by shielding th...

Page 25: ...Service Condenser sensor Open Internal fault Check ventilation Call Zenith service Heater fuse driver fault Internal fault Call Zenith Service Heater driver fault No hot water Call Zenith Service Com...

Page 26: ...T BC Residential Instructions 10 18 v3 00 End of Life Disposal In order to help preserve our environment we ask that you dispose of this product correctly Please contact your local city council for co...

Page 27: ...802253NZ HT BC Residential Instructions 10 18 v3 00 Page 27 of 28 Notes...

Page 28: ...800 558 055 As Zenith policy is one of continuous product improvement changes to specifications may be made without prior notice Images in this booklet have been modified and may not be true represent...

Reviews: