background image

INTR

ODUCTION

5

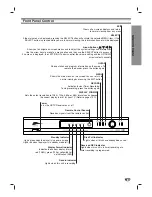
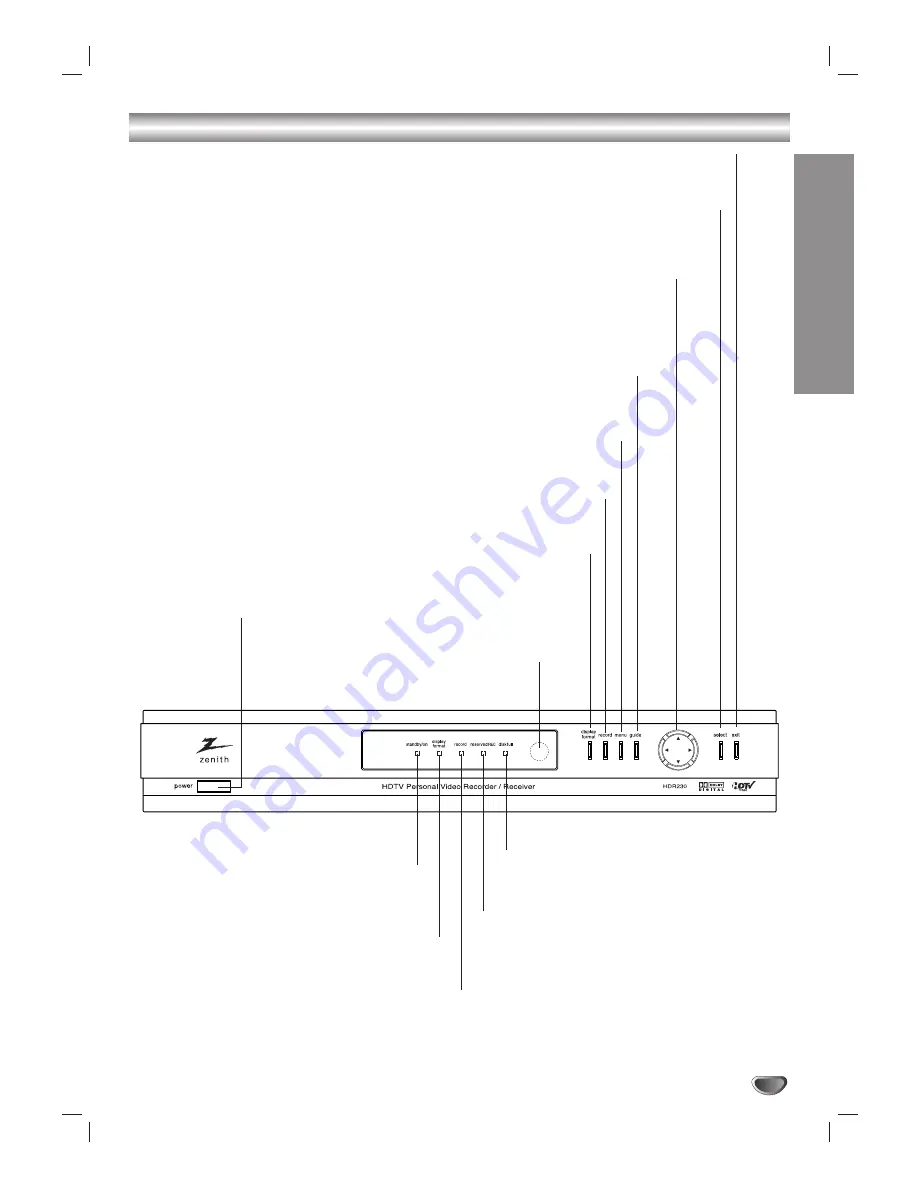
Front Panel Control

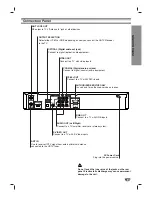
Remote Control Sensor

Receives signals from the remote control.

Standby Indicator

Lights green when the player is in power on mode.

Lights red when the player is in standby mode (off).

Display Format Indicator

Indicates the current display format;

red (1080i), green (720p), yellow(480p), 

no indication (480i)  

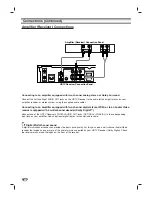
Record Indicator

Lights when this unit is recording.

Disk Full Indicator

Lights when all disk have already been used.

Reserved REC Indicator

Lights when this unit is in timer recording or a
timer recording is programmed.

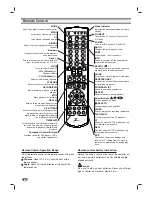
EXIT

Clears all on-screen displays and returns

to normal viewing from any menu.

SELECT

If the main menu is displayed, pressing the SELECT button will activate the selected MENU item. If the

SELECT button is pressed while you are in normal viewing, the information banner will be displayed.

Arrow Buttons (

3

3

4

4

1

1

2

2

)

Allow you to navigate on-screen menus and to adjust the system settings and preferences.

Use the arrow keys to move to a menu option and then use the SELECT button to access it.

If no menu is displayed, the LEFT/RIGHT arrows control the volume setting and the UP/DOWN

arrows select channels.

MENU

Shows the main menu on the screen. You can return to

normal viewing by pressing the EXIT button.

GUIDE

Shows station and program information on the screen. To

remove the banner, press the button again.

RECORD

Activates Instant Timer Recording.

To stop recording, press the button again.

DISPLAY FORMAT

Sets the output resolution to 1080i, 720p, 480p, or 480i formats and chooses

the correct display format for your TV. (Refer to pages 10-12)

Power

Turns the HDTV Receiver on or off.

Summary of Contents for HDR230

Page 1: ...Copyright 2003 Zenith Electronics Corporation Installation and Operating Guide Warranty Model Number HDR230 High Definition Television Receiver...

Page 2: ...ion which can be determined by turning the product off and on the user is encouraged to try to correct the interference by one or more of the following measures Reorient or relocate the receiving ante...

Page 3: ...grounding type plug has two blades and a third grounding prong The wide blade or the third prong are pro vided for your safety If the provided plug does not fit into your outlet consult an electricia...

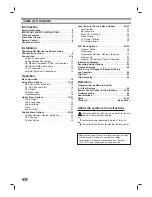
Page 4: ...ock System 24 Set Password 24 Block Ch Channel 25 Movie Rating 25 TV Rating Children 26 TV Rating General 27 PVR Menu Options 28 30 Program Guide 28 Reservation 29 Reservation Settings General Operati...

Page 5: ...ected MENU item If the SELECT button is pressed while you are in normal viewing the information banner will be displayed Arrow Buttons 3 3 4 4 1 1 2 2 Allow you to navigate on screen menus and to adju...

Page 6: ...OFF RATIO Changes the picture aspect ratio SURF Tunes to your 10 surf channels INFO Shows the current station and program information on the screen SELECT Completes the channel number input and promp...

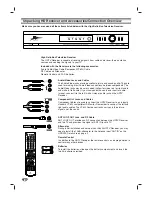
Page 7: ...OPTICAL Digital audio out jack Connect to digital optical audio equipment COAXIAL Digital audio out jack Connect to digital coaxial audio equipment VIDEO OUT Connect to a TV with video inputs YPbPr O...

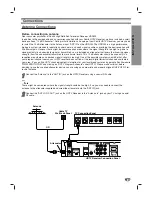
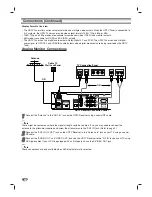
Page 8: ...rovides an RF connection between the HDTV Receiver and the TV and provides the signal of ANT IN jack to TV Attenuator During initial installation and setup of your Zenith HDTV Receiver you may need to...

Page 9: ...eption area where an undesired signal strength is too high One of the possible symptoms would be that after your program channel search your HDTV receiver does not find all the local digital terrestri...

Page 10: ...e Antenna to the ANT IN jack on the HDTV Receiver using a coaxial RF cable ote There might be some areas where the signal strength could be too high If so you may need to connect the antenna to the at...

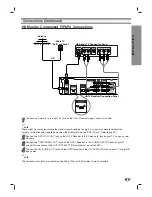
Page 11: ...TV Receiver to the Antenna In jack on your TV using a coaxial RF cable 3 3 Connect the COMPONENT OUT jacks on the HDTV Receiver to the COMPONENT IN jacks of your TV using RCA type cables The OUTPUT SE...

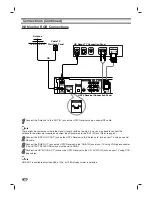
Page 12: ...e HDTV Receiver to the Antenna In jack on your TV using a coaxial RF cable 3 3 Connect the RGB OUT jack on the HDTV Receiver to the RGB IN jack of your TV using VGA type connector The OUTPUT SELECTION...

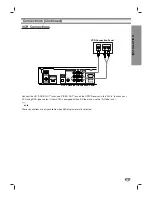
Page 13: ...k on the HDTV Receiver to the A V in jacks on your VCR using RCA type cables If your VCR is equipped with an S Video jack use the S Video jack ote These connections are only available when 480i displa...

Page 14: ...i channel decoder Dolby Digital Connect one of the HDTV Receiver s DIGITAL AUDIO OUT jacks OPTICAL or COAXIAL to the corresponding input jack on your amplifier Use an optional digital optical or coaxi...

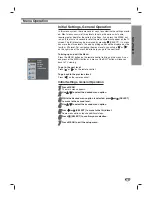
Page 15: ...e menu label to help you go to the next level To bring up and exit the Menu Press the MENU button on the remote control to bring up the menu A sec ond press of the MENU button or a press of the EXIT b...

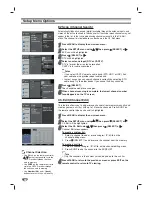
Page 16: ...on the TV screen Ch Edit Channel Edit This feature allows you to add or erase channels from memory manually and creates your own surf list with up to 10 favorite channels Press SURF on the remote con...

Page 17: ...so able to add the logo of a channel to the Surf channel list by pressing the SELECT button on the remote A dialog box will ask what you want to do with the highlighted logo area you can replace the h...

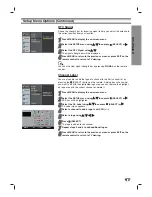
Page 18: ...not work properly There is a bad sector on the HDD Settings status S W version Function Use 3 3 4 4 to select desired option Automatically finds all channels digital available through the antenna inp...

Page 19: ...us screen or press EXIT on the remote control to return to TV viewing Audio Language The audio language choices are English French or Spanish in the language menu If the selected language is not avail...

Page 20: ...time and date the Auto Clock Feature or manually Auto Clock Set 1 1 Press MENU to display the on screen menu 2 2 Select the OPTION menu using 3 3 4 4 then press SELECT or 2 2 3 3 Use 3 3 4 4 to selec...

Page 21: ...level 5 5 Use 3 3 4 4 to select an option then press SELECT to confirm your selection 6 6 Press MENU to return to the previous screen or press EXIT on the remote control to return to TV viewing ip Yo...

Page 22: ...use Live TV Playback Timeshift record icon or progress Bar display appears on the TV screen Press EXIT to disappear the icon or progress Bar display Caption Settings General Operation 1 1 Press MENU T...

Page 23: ...t is translucent Transparent The text is transparent In this case whatever the color is the color does not affect the caption display BG Background Color Selects the background color for Closed Captio...

Page 24: ...personal 4 digit security password When you have already entered a password Enter a 4 digit password using the numbered buttons to confirm the per sonal 4 digit security password then press SELECT 3 3...

Page 25: ...with the ratings above a specified level Keep in mind that the movie ratings apply only to movies shown on TV not TV programs such as soap operas 1 1 Follow Steps 1 2 as shown for the Lock System on p...

Page 26: ...ELECT to move to the third level 4 4 Use 3 3 4 4 to select the Age or Fantasy Violence option then press 2 2 or SELECT Age Selection applies regardless of content category of rating Fantasy Violence S...

Page 27: ...ograms have rating for Violence 5 5 Use 3 3 4 4 to select a rating then press SELECT to confirm your selection All Block All programs with rating are blocked TV Y All Children This program is designed...

Page 28: ...idden from the screen using the arrow buttons 1 1 2 2 3 3 4 4 Move horizontally to reach other time slots and move vertically to reach other channels 5 5 Use 1 1 2 2 3 3 4 4 to select a program then p...

Page 29: ...hannel Selects the channel to record Date Selects recording date Time Selects recording start time Duration Selects recording duration Repeat Selects recording repeat option ONCE The receiver is to re...

Page 30: ...to confirm your selection the pop up dialogue box will be displayed as shown to the left Play1 Begin Plays back the selected program from the start position Play2 Cont Plays back the selected program...

Page 31: ...button on the remote control while viewing a program 1 1 Press INFO while watching a program Program Information appears on the TV screen You can change the audio signal with 3 4 if available 2 2 Pre...

Page 32: ...an check if the program is added in the Program List by pressing Program List 4 4 Press GUIDE or EXIT to remove the Program Guide screen ote If the disk space available is insufficient while recording...

Page 33: ...he speed increases as indicated above Still Picture and Frame by Frame Advance 1 Press PAUSE during playback The receiver will go into PAUSE mode 2 You can advance the picture frame by frame by pressi...

Page 34: ...sufficient during a Pause Live TV Playback Timeshift operation the oldest Pause Live TV Playback Timeshift section will be deleted To save disk space a program that has no signal can t be stored A blo...

Page 35: ...iting press the STOP button If you press POWER to stop Clip editing the program may not be recorded Clip edits cannot be made for sections lasting less than 10 seconds Clip Record You can edit during...

Page 36: ...quires program ming 2 2 Turn on the device to be programmed Then select the correspon ding mode VCR AUX TV DVD or STB by pressing MODE on the remote control 3 3 Press the POWER button and the MUTE but...

Page 37: ...n 116 131 143 058 171 004 173 Quasar 034 092 056 Radio Shack 019 043 047 116 127 143 RCA 160 161 165 065 156 144 006 004 023 024 056 074 152 Realistic 007 019 043 047 Runco 168 169 Sampo 058 116 004 0...

Page 38: ...12 Video Concepts 012 046 034 Videonsonic 040 Wards 013 024 031 034 040 053 054 003 017 033 131 Yamaha 012 043 034 039 Zenith 001 072 080 056 048 034 101 058 012 013 020 106 114 123 DVD Codes Brands C...

Page 39: ...If HDTV Receiver is connected to your monitor or TV via the RGB port on the back panel the OUTPUT SELECTION switch must be set to the RGB position Otherwise you may not be able to see a picture Selec...

Page 40: ...t Audio Out 2 Fixed Output Level or Variable Output Level Authorized Service Port 9 pin Serial Port 1 Hard Disk Drive 80G Bytes Recording Time About 9 hours HD format about 27 hours SD format Dimensio...

Page 41: ...Notes 41...

Page 42: ...Notes 42...

Page 43: ...Notes 43...

Page 44: ...R NUMBERS FOR WARRANTY SERVICE You must call 1 800 984 9349 Monday Friday 7 AM to 7 PM CT and select appropriate option from the menu to confirm the product is defective and to obtain Return Authoriza...

Reviews: