Z3Cam-LX User Instructions
DOC-USR-0155-05
___________________________________________________________________________________________
Z3 Technology, LLC
♦
100 N 8
th
ST, STE 250
♦
Lincoln, NE 68508-1369 USA
♦
+1.402.323.0702
49
(16)
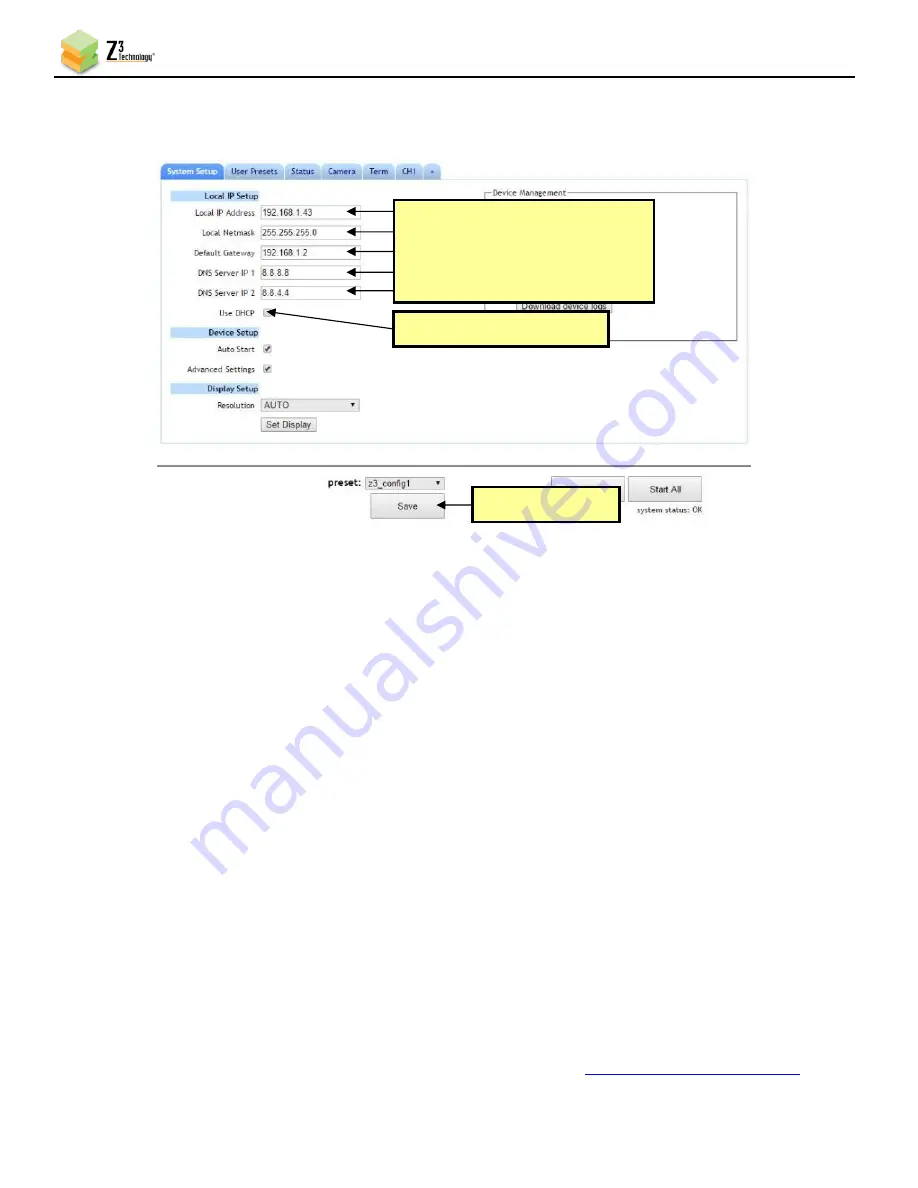
Now that DHCP is no longer set in this configuration and your network settings have been
entered, click on the
Save
button.
(17)
A pop-up window appears with a reminder that changes to network settings require a reboot in
order to take effect. Click
OK
to reboot the unit. Wait 45-60 seconds for the unit to boot up.
(18)
You can return to the use of DHCP by checking
Use DHCP
in the System Setup tab and saving that
to the preset.
8.3.3
Open the User Interface Using ZFinder
(19)
Run the ZFinder PC Utility on your Windows PC. The ZFinder window appears. ZFinder does a
scan of the network and lists the location of all Z3 systems connected to the network. The Z3Cam-
LX appears with your manually entered IP address.
(20)
Select the Z3Cam-LX.
(21)
Click
Open Device
to reach the user interface.
8.3.4
Open the User Interface Manually
(22)
You can also access the user interface by manually typing your unit’s static IP address into a web
browser on any computer connected to the same network as the unit.
8.4
Upgrade Firmware
Firmware upgrades for the Z3Cam-LX are available for download
(3) Click “Save”
(1) Un-check “Use DHCP”
Figure 50 Saving Updated Network Settings
(2) Enter New IP Address
and desired network settings


