


6-4
IM WT18O1E-02EN
6.3 Changing the Displayed Items on the 4 Items, 8
Items, and 16 Items Displays
This section explains the following settings for the displayed items on the 4 Items, 8 Items, and 16
Items displays:
• Item number
• Measurement function
• Element and wiring unit
• Harmonic order
• Resetting the displayed items
• Turning the display frame on and off
To change the displayed items, you can:
• Set the items on the Numeric (4), Numeric (8), or Numeric (16) menu.
• Set items directly by pressing the function select keys and ELEMENT.
►
“4-, 8-, and 16-Value Displays (4 Items/8 Items/16 Items)” in the features guide
1.
Follow the procedure in section 6.1 to set the numeric data display format to the 4 Items, 8
Items, or 16 Items display.
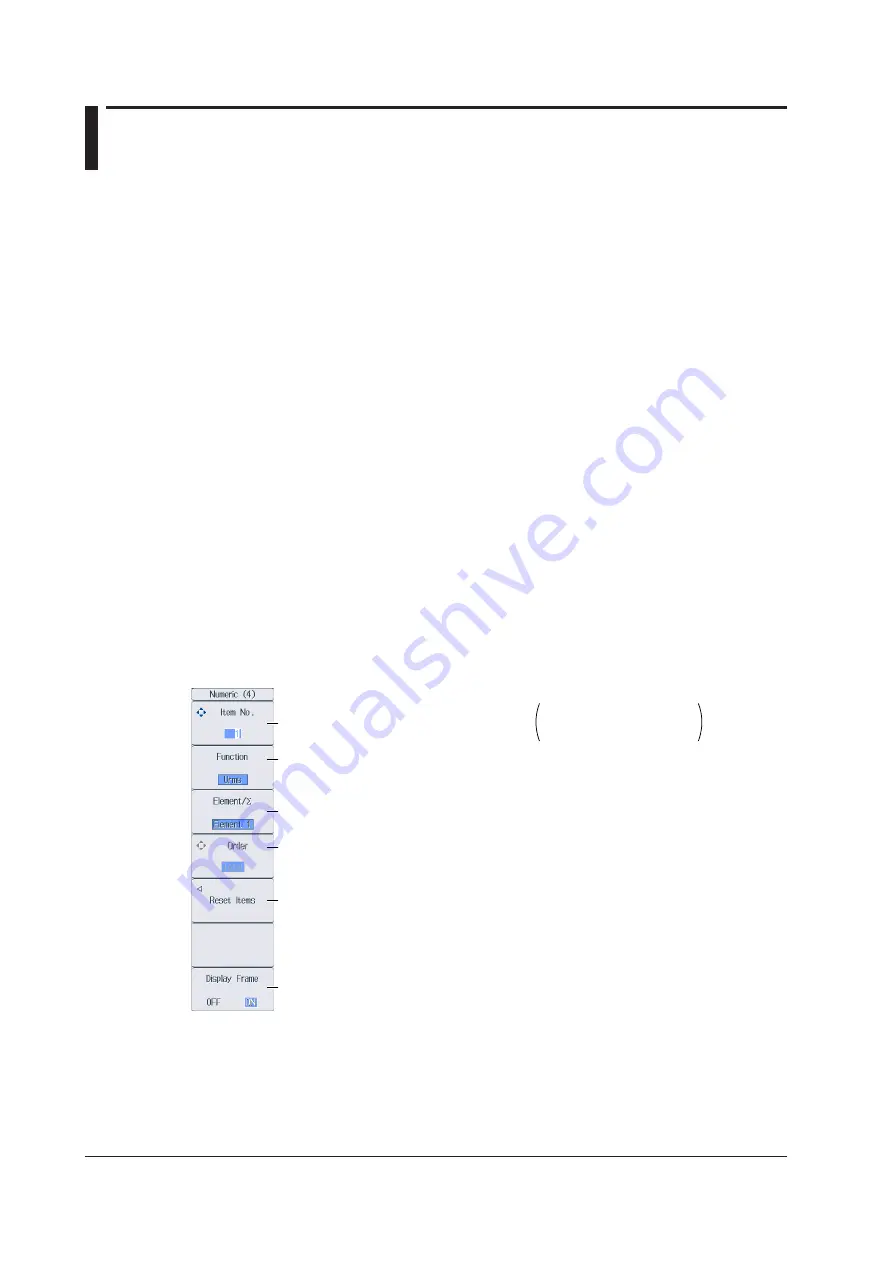
Numeric (4), Numeric (8), and Numeric (16) Menus
2.
Press
ITEM
to display the following menu.
If the setup parameter list is being displayed (the INPUT INFO key is illuminated), the Info Items menu may
be displayed. If this happens, press
ITEM
again.
In step 1, you can also display the Numeric (4), Numeric (8), or Numeric (16) menu by pressing
NUMERIC
,
ITEM
, and then repeatedly pressing
NUMERIC
.
Example of the Numeric (4) Menu
Select the item number that you want to set.
Set the resetting of displayed items.
Turns the display frame on and off
Set the measurement function (None, other functions—for details on the various
measurement functions, see “Items That This Instrument Can Measure” in the features
guide).
Set the element and wiring unit (Element 1 to Element 6, ΣA to ΣC).
Set the harmonic order (Total, 0 to 500; /G5 or /G6 option).
You can set this setting only when you have selected a measurement function that includes a
harmonic order.
4 Items display: 1 to 48
8 Items display: 1 to 96
16 Items display: 1 to 192
Switching the Page
To set items on pages that aren’t currently displayed, switch to these pages. For details on how to
switch pages, see section 6.2.