


IM 04P01B01-01E
6-6
6.5 Setting the Partial Expanded Recording
This section explains the details of expanding a section of the recording range.
If you change the input range, set the partial expanded recording again.
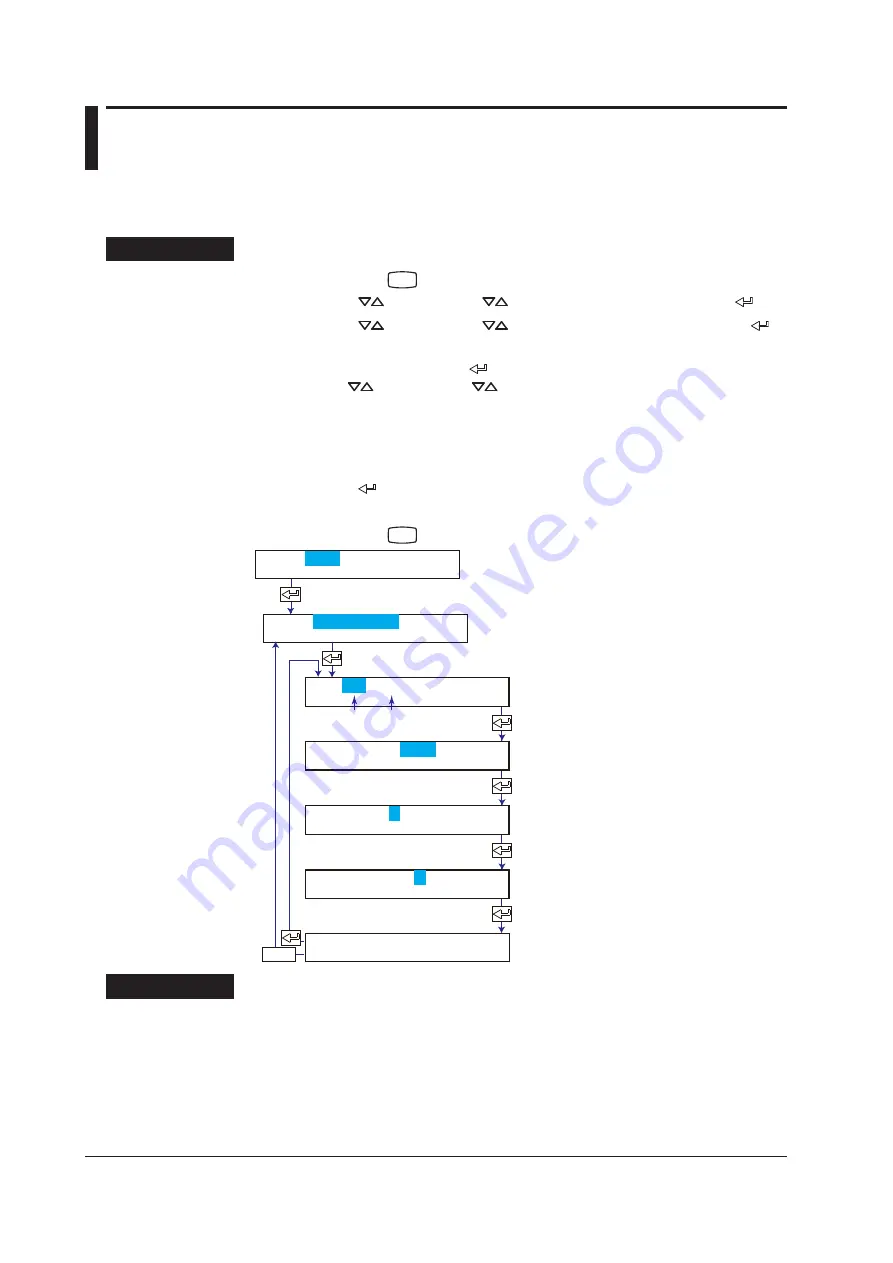
Procedure
1.
Hold down the
MENU
key for 3 seconds to enter Setting mode.
2.
Press the
key or
SHIFT
+
key to select
Aux
and then press the key.
3.
Press the
key or
SHIFT
+
key to select
Partial
and then press the
key.
4.
Set each item and press the key.
Use the
key or
SHIFT
+
key to select values.
For the procedure on how to enter values or characters, see section 4.2.
If you press the
ESC
key in the middle of the operation, the settings entered up to
then are cancelled, and the display returns to a higher level menu.
5.
When the
Setting complete
screen appears, do either of the following:
Press the key to set other channels.
If you are done, press the
ESC
key.
6.
Hold down the
MENU
key for 3 seconds to return to Operation mode.
Set the channel range.
Select On to use the partial expanded
recording function.
Set the boundary position as a
percentage where the recording span
is assumed to be 100%.
Set the boundary value within the
recording span.
The new setting takes effect.
ESC/?
First channel Last channel
Set=Aux
Aux=Partial
CH=01-01
Partial=Off
Expand=50
Boundary= 0.000
01-01 Channel
Setting complete
Explanation
Expand
Set a value between 1 and 99%. One percent corresponds to 1 mm, because the record
width is 100 mm.
Example: To record 0 to 8 V in the 0 to 50% position and 8 to 10 V in the 50% to 100%
position with a span of 0 to 10 V, set the boundary position to 50% and the
boundary value to 8.00 V.
<Related Topics>
Enabling the partial expanded recording function: Section 7.13
Summary of Contents for mR10000 436101
Page 2: ......
Page 14: ...Blank ...
Page 18: ...Blank ...
Page 58: ...Blank ...
Page 72: ...Blank ...
Page 92: ...Blank ...
Page 220: ...Blank ...
Page 268: ...Blank ...


