YG48Q-5AMaintenance Manual
Lubrication system
24
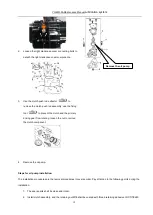
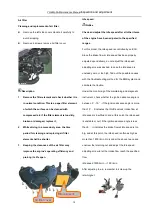
tightening torque:114N.m -126N.m
;
3
、
Install clutch push rod assembly
;
4
、
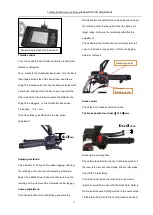
After the right crankcase cover is mounted in place, the angle and position of the clutch operating lever may
possibly change; readjustment shall be carried out to accommodate the adjustment of clutch control line
;
5
、
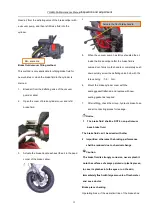
The seal washer at the bolt under the oil pump, shall be replaced with new ones.
;
6
、
Remember to refill engine oil after all these are completed.
。
CAUTION
The clutch retaining nut must be screwed up to the specified tightening torque,must be applied to prevent the nut
from getting loose.
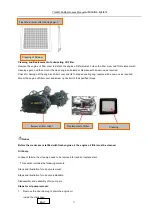
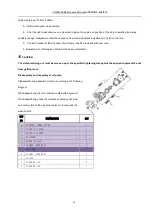
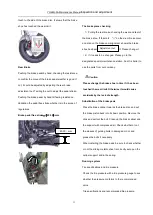
Disassembly and assembly of oil pump
Disassemble and assemble oil pump according to the following
diagram.
While assembling, the rotor shall be coated with engine oil.
While assembling, check the clearances between the inner
and outer rotors of the oil pump; replace it if it exceeds the
wearing limit.
REF
NO
DESCRIPTION
QTY
a
ROTATOR, IMNER.
OUTER
1
b
COVER, OIL PUMP
1
c
SHAFT, OIL PUMP
1
d
OIL PUMP
1
e
SCREW M5×10
3
f
GASKET, PUMP BODY
1
1
OIL PUMP
1
2
GASKET, PUMP BODY
1
3
COLLAR
1
4
SCREW M6×16
2
5
SCREW M6×22
1
Summary of Contents for YG48Q-5A
Page 38: ...YG48Q 5AMaintenance ManualFuel system 41 4 Fuel system...
Page 92: ...YG48Q 5AMaintenance ManualFrame and exhaust system 105 10 Frame and exhaust system...
Page 123: ...YG48Q 5A Maintenance ManualIllumination signal system 136 Circuit schematic drawing...
Page 126: ...YG48Q 5A Maintenance ManualIllumination signal system 139...
Page 133: ...YG48Q 5A Maintenance ManualEngine management system 146 Major parts and components...
Page 134: ...YG48Q 5A Maintenance ManualEngine management system 147...
Page 144: ...YG48Q 5A Maintenance ManualElectrical System Diagram 157 19 Electrical System Diagram...

