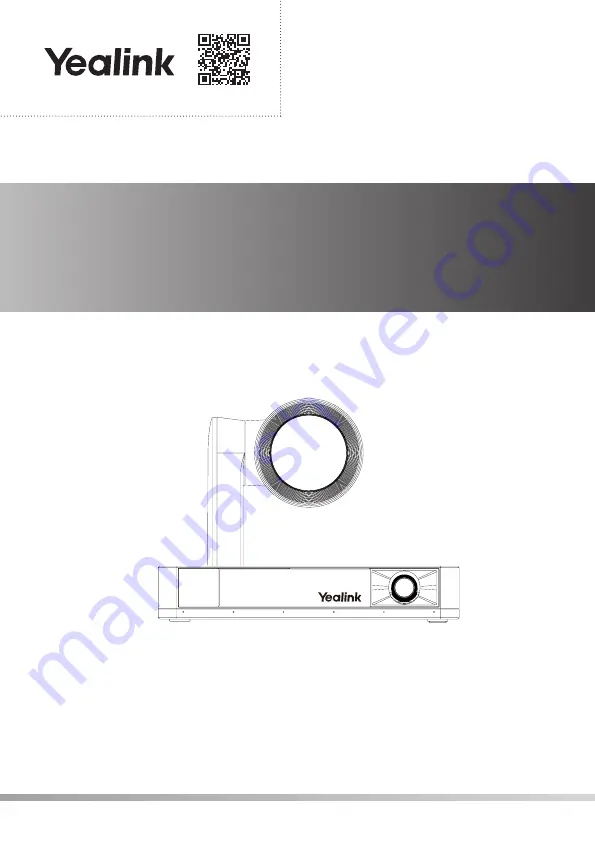
Video Conferencing Camera
UVC86
Quick Start Guide (V1.0)
English |
简体中文
| Deutsch | Français | Español
Yealink Documentation
support.yealink.com
Page 1: ...Video Conferencing Camera UVC86 Quick Start Guide V1 0 English 简体中文 Deutsch Français Español Yealink Documentation support yealink com ...
Page 2: ... lens calibration 2 We recommend that you use the accessories provided or approved by Yealink The use of unapproved third party accessories may result in poor performance UVC86 Installation Mount on top of a display Choose the following installation method when the thickness of the TV is between 0mm and 50mm Pay attention to the direction of the bracket Put on a Flat Surface You can put the UVC86 ...
Page 3: ...meter 6mm Screw specification T4 30 Screw specification 1 4 20 UNC 3M Velcro Choose the following installation method when the thickness of the TV is between 50mm and 150mm The recommended height is 1 55m 1 85m above the ground Expansion screw E N G L I S H ...
Page 4: ...ount2 Screw specification T4 30 You need to purchase a TV Mount2 separately 180 Screw specification M3 8 Screw specification 1 4 20 UNC Screw specification 1 4 20 UNC Screw specification 1 4 20 UNC Screw specification 1 4 20 UNC E N G L I S H ...
Page 5: ...e 800 2 DC48V Connect to the power adapter 3 PC Port Connect to a PC as video output 4 HDMI out In video conference system connect for sharing content or camera image 5 Line in Connect to an audio input device using an audio cable 3 5mm 6 Reset Reset the UVC86 to factory defaults 7 Security slot Connect a universal security cable to the UVC86 so that you can lock the UVC86 down E N G L I S H ...
Page 6: ...LED Status Description Off The UVC86 is powered off Solid green The UVC86 is active Solid red The UVC86 is in sleep mode Flashing orange The UVC86 is upgrading firmware Flashing red The UVC86 is in recovery mode Connect to the video conference system MeetingEye 800 UVC86 Connection USB cable Cat5e Connect to PC Internet IEEE 802 3af compliant PoE Switch E N G L I S H ...
Page 7: ... add update the preset position Short press the number key to apply the preset position 6 Volume Key Adjust the volume Use Yealink Room Connect USB Connect software to upgarde the firmware after connecting to the PC In MVC system The UVC86 can be automatically upgraded via windows update by default Otherwise you should enable automatically windows update or upgrade the devices manually In video co...
Page 8: ... 束线带 5 魔术贴 已粘在挂架上 支架配件 快速入门指南 1 UVC86 单品包材中标配的 USB 线为 7 米 在组合包中为 2 5 米 2 开始使用之前 请使用亿联 Room Connect 进行镜头校准 3 我们推荐使用由亿联提供或经亿联认可的配件 使用未经认可的第三方配件可能会导致性能的下降 安装 UVC86 挂装 当电视厚度范围为 0 50mm 时 进行以下步骤 注意支架方向 平放安装 将终端摆放在水平桌面 如果桌面略有倾斜 请保证倾斜角小于 5 以保证终端的摄像机云台正常运转 X 4 X 4 X 5 简 体 中 文 ...
Page 9: ...8 66mm 100mm 墙装 打孔深度 30mm 打孔直径 6mm 螺丝规格 T4 30 螺丝规格 1 4 20UNC 魔术贴 当电视厚度范围为 50 150mm 时 进行以下步骤 建议安装高度为距地面 1 55m 1 85m 膨胀螺丝 简 体 中 文 ...
Page 10: ...9 吊装 安装至电视挂架 螺丝规格 T4 30 用户可以自行选购电视架 180 螺丝规格 M3 8 螺丝规格 1 4 20UNC 螺丝规格 1 4 20UNC 螺丝规格 1 4 20UNC 螺丝规格 1 4 20UNC 简 体 中 文 ...
Page 11: ... 1 VCH 口 在 MVC 会议室系统中 连接音频设备 例如 VCM34 在视频会议系统中 连接终端 例如 MeetingEye 800 2 电源接口 连接电源适配器 3 PC 口 连接电脑作为视频输出 4 HDMI 输出 在视频会议系统中 连接显示器进行辅流或投屏摄像机画面 5 音频线性输 入 连接 3 5mm 音频接头 将 UVC86 作为音频输出设备 6 重置 重置设备到出厂设置 7 安全锁孔 将主机锁在固定位置 简 体 中 文 ...
Page 12: ...n Line out Video in UVC86 UVC86 UVC86 UVC86 指示灯介绍 UVC86 指示灯介绍如下 指示灯状态 功能说明 灭 UVC86 没有正确连接到 PC 上或未处于正常工作状态 绿色常亮 UVC86 处于正常工作状态 红色常亮 UVC86 处于休眠状态 橙色闪烁 UVC86 固件更新中 红色闪烁 UVC86 处于恢复模式 连接会议电视终端 MeetingEye 800 UVC86 连接 USB 线 Cat5e 连接电脑 网口 支持 IEEE 802 3af ac 协议 PoE Switch 简 体 中 文 ...
Page 13: ...像机的取景范围 4 滚轮 向上滑动放 摄像机画 向下滑动放 摄像机画 5 预置位 按数字键 新增 更新预设置位 短按数字键 应 预设置位 6 音量调节键 调节音量 1 将 UVC86 连接至电脑后 使用亿联 Room Connect USB Connect 软件升级固件 2 在 MVC 系统中 UVC86 在默认情况下可以通过 windows 动更新升级 如果设备 软件没有自动升级 你可以启用自动 windows 自动更新或手动升级设备 3 在视频会议系统中 将 UVC86 通过 VCH 口与终端连接后 在终端的网页界面中升 级 UVC86 的固件 更多关于如何升级固件的信息 请参考升级文档 简 体 中 文 ...
Page 14: ...rwendung von Zubehör das von Yealink entweder geliefert oder empfohlen wird Die Verwendung von nicht zugelassenem Zubehör von Drittanbietern kann zu Leistungseinbußen führen UVC86 Installation Montage auf einem Display Wählen Sie die folgende Installationsmethode wenn der Fernseher zwischen 0 mm und 50 mm dick ist Achten Sie auf die Richtung der Halterung Aufstellung auf einer flachen Oberfläche S...
Page 15: ...mm Lochdurchmesser 6mm Schraube T4 30 Schraube 1 4 20 UNC 3M Velcro Wählen Sie die folgende Installationsmethode wenn der Fernseher zwischen 50mm und 150mm dick ist Es wird eine Höhe von 1 55m 1 85m über dem Boden empfohlen Dehnschraube D E U T S C H ...
Page 16: ...ge an Decke Montage auf einem TV Mount2 Schraube T4 30 Sie müssen einen TV Mount2 separat erwerben 180 Schraube M3 8 Schraube 1 4 20 UNC Schraube 1 4 20 UNC Schraube 1 4 20 UNC Schraube 1 4 20 UNC D E U T S C H ...
Page 17: ...etzteil 3 PC Port Verbindung mit einem PC als Video Ausgang 4 HDMI out Im Videokonferenzsystem verbunden für Inhaltsfreigabe oder Kamerabildern 5 Line in Anschluss eines 3 5 mm Audiosteckers zur Verwendung des UVC86 als Audio Ausgabegerät 6 Reset Rücksetzen des UVC86 auf Werkseinstelllungen 7 Sicherheits steckplatz Schließen Sie ein universelles Sicherheitskabel an den UVC86 an damit Sie den UVC86...
Page 18: ...ng Aus Die UVC86 ist ausgeschaltet Dauerhaft grün Die UVC86 ist aktiv Dauerhaft rot Die UVC86 ist im Sleep Modus Blinkt orange Der UVC86 aktualisiert die Firmware Blinkt rot Der UVC86 ist im Recovery Modus Mit dem Videokonferenzsystem verbinden MeetingEye 800 Verbinden des UVC86 USB Kabel Cat5e Verbinden mit PC Internet PoE Switch entspricht IEEE 802 3af D E U T S C H ...
Page 19: ...e lange auf die Zifferntasten um die voreingestellte Position hinzuzufügen zu aktualisieren Drücken Sie kurz auf die Zifferntasten um die voreingestellte Position zu übernehmen 6 Lautstärketaste Stellen Sie die Lautstärke ein Verwenden Sie die Software Yealink Room Connect USB Connect um die Firmware nach dem Anschließen an den PC zu aktualisieren Im MVC System Das UVC86 kann über ein Windows Upda...
Page 20: ...objectif 3 Nous vous recommandons d utiliser les accessoires fournis et approuvés par Yealink L utilisation d accessoires tiers est susceptible de réduire les performances de l appareil Installation de l UVC86 Montage sur le dessus d un écran Choisissez la méthode d installation suivante lorsque l épaisseur du téléviseur se situe entre 0 et 50 mm Faites attention au sens du support Placement sur u...
Page 21: ...0mm Diamètre du trou 6mm Vis T4 30 Vis 1 4 20 UNC Velcro 3M Choisissez la méthode d installation suivante lorsque l épaisseur du téléviseur se situe entre 0 et 150mm La hauteur recommandée est de 1 55m 1 85m au dessus du sol Vis d expansion F R A N Ç A I S ...
Page 22: ...on the Ceiling Montage sur un support télé Mount2 Vis T4 30 Vous devez acheter un support de téléviseur Mount2 séparément 180 Vis M3 8 Vis 1 4 20 UNC Vis 1 4 20 UNC Vis 1 4 20 UNC Vis 1 4 20 UNC F R A N Ç A I S ...
Page 23: ...ez à l adaptateur secteur 3 PC Port branchez à un PC comme sortie vidéo 4 HDMI out Dans le système de vidéoconférence se connecter pour partager du contenu ou l image de la caméra 5 Line in branchez un connecteur audio 3 5 mm pour utiliser l UVC86 comme un appareil de sortie audio 6 Reset réinitialisez l UVC86 aux réglages par défaut 7 Emplacement de sécurité connectez un câble de sécurité univers...
Page 24: ...sactivé L UVC86 est éteint Vert fixe L UVC86 est actif Rouge fixe L UVC86 est en mode veille Orange clignotant Le micrologiciel de l UVC86 est en cours de mise à niveau Rouge clignotant L UVC86 est en mode récupération Connectez vous au système de vidéoconférence MeetingEye 800 Connexion UVC86 Câble USB Cat5e Connexion à un PC l Internet Commutateur IEEE 802 3af compatible PoE F R A N Ç A I S ...
Page 25: ...jouter ou mettre à jour la position de préréglage Appuyer brièvement sur la touche nombre pour appliquer une position de préréglage 6 Touche de volume Ajuster le volume Utilisez le logiciel Yealink Room Connect USB Connect pour mettre à niveau le micrologiciel après l avoir connecté au PC Dans le système MVC L UVC86 peut être mis à niveau automatiquement via la mise à jour de Windows par défaut Si...
Page 26: ...a calibración de la lente 3 Utilice siempre accesorios proporcionados o aprobados por Yealink El uso de accesorios de terceros no aprobados puede afectar al funcionamiento Instalación UVC86 Montar encima de una pantalla Elija el siguiente método de instalación cuando el grosor del televisor esté entre 0 mm y 50 mm Preste atención a la dirección del soporte Poner en superficie plana Puede colocar l...
Page 27: ...m Diámetro del agujero 6mm Tornillos T4 30 Tornillos 1 4 20 UNC Velcro 3M Elija el siguiente método de instalación cuando el grosor del televisor esté entre 50mm y 150mm La altura recomendada es de 1 55m 1 85m sobre el suelo Tornillo de expansión E S P A Ñ O L ...
Page 28: ...ontar en un soporte de TV TV Mount2 Tornillos T4 30 Necesita comprar un soporte de TV TV Mount2 por separado 180 Tornillos M3 8 Tornillos 1 4 20 UNC Tornillos 1 4 20 UNC Tornillos 1 4 20 UNC Tornillos 1 4 20 UNC E S P A Ñ O L ...
Page 29: ...or de corriente 3 PC Port conéctese a un PC como salida de vídeo 4 HDMI out En el sistema de videoconferencia Conéctese para compartir contenido o imagen de la cámara 5 Line in conecte un conector de audio de 3 5 mm para usar el UVC86 como dispositivo de salida de audio 6 Reset restablece el UVC86 a los valores predeterminados de fábrica 7 Ranura de seguridad conecte un cable de seguridad universa...
Page 30: ... Descripción Apagado UVC86 está apagado Verde fijo UVC86 está activo Rojo fijo El UVC86 está en modo suspensión Naranja intermitente El UVC86 está actualizando el firmware Rojo intermitente El UVC86 está en modo de recuperación Conectar al sistema de videoconferencia MeetingEye 800 Conexión UVC86 Cable USB Cat5e Conectar al PC Internet Switch PoE compatible con IEEE 802 3af E S P A Ñ O L ...
Page 31: ... la tecla numérica para añadir actualizar la posición del preset Presione brevemente la tecla numérica para aplicar la posición del preset 6 Tecla de volumen Ajustar el volumen Utilice el software Yealink Room Connect USB Connect para actualizar el firmware después de conectarse al PC En el sistema MVC el UVC86 puede ser actualizado automáticamente a través de la actualización de Windows de forma ...
Page 32: ...roduct complies with the following standards Safety IEC 62368 1 2018 EN IEC 62368 1 2020 A11 2020 EMC EN 55032 2015 A11 2020 EN 55035 2017 EN IEC 61000 3 2 2019 EN 61000 3 3 2013 A1 2019 Radio ETSI EN 301 489 1 V2 2 3 ETSI EN 301 489 17 V3 2 4 ETSI EN 300 328 V2 2 2 ETSI EN 301 893 V2 1 1 EN 300 440 V2 2 1 Health EN 50663 2017 EN 62479 2010 EN 50665 2017 EN 62311 2008 Directive 2011 65 EU and EU 2...
Page 33: ...device shall meet the requirements of the input voltage of the device Pleaseusethe provided surge protection power socket only Before plugging or unplugging any cable make sure that your hands are completely dry Do not spill liquid of any kind on the product or use the equipment near water for example near a bathtub washbowl kitchen sink wet basement or near a swimming pool Do not tread on pull or...
Page 34: ...prechen Bitte verwenden Sie ausschließlich den bereitgestellten Überspannungsschutz an der Steckdose Achten Sie vor dem Anschließen oder Abziehen des Kabels darauf dass Ihre Hände vollständig trocken sind Verschütten Sie keine Flüssigkeiten auf das Gerät und verwenden Sie es nicht in der Nähe von Wasser beispielsweise in der Nähe einer Badewanne Waschschüssel einem Spülbecken in einem feuchten Kel...
Page 35: ...de la tension d entrée de l appareil Veuillez uniquement utiliser la prise protégée contre les surtensions fournie Avant de brancher ou de débrancher tout câble assurez vous que vos mains sont complètement sèches Ne renversez aucun liquide sur le produit et n utilisez pas l équipement près de l eau par exemple près d une baignoire d un lavabo d un évier dans sous sol humide ou près d une piscine V...
Page 36: ...a umida o vicino a una piscina Non tirare strappare o piegare eccessivamente i cavi in caso di malfunzionamento del dispositivo In caso di temporale smettere di usare il dispositivo e scollegarlo dall alimentazione Scollegare la presa di corrente e il doppino della linea ADSL il cavo di frequenza radio per evitare fulmini Se non si usa il dispositivo per un periodo di tempo prolungato scollegarlo ...