background image

User Guide for the SIP-T46S IP Phone 

88 


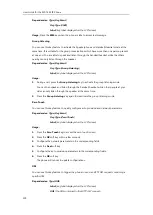
The default device name is “Yealink T46S”. 


3.


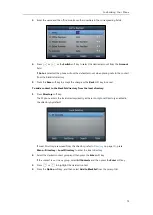
Press the 

Save 

soft key to accept the change or the 

Back

 soft key to cancel. 

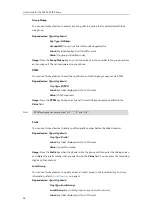
The preconfigured Bluetooth device name will display in scanning list of other devices. 

Disconnecting the Bluetooth Headset 

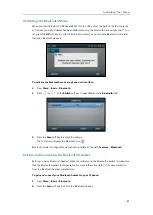
You can disconnect the Bluetooth headset from your phone. After you disconnect the Bluetooth 
headset, it will still remain paired and be displayed in the 

Paired Bluetooth Device

 list. So you 

can easily connect it to your IP phone again.


To disconnect your Bluetooth headset from your phone: 

1.


Press 

Menu

->

Basic

->

Bluetooth

->

Paired Bluetooth Device

2.


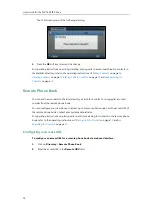
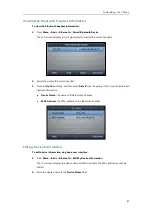
Select the connected Bluetooth headset. 

3.


Press the 

Disconnect 

soft key. 

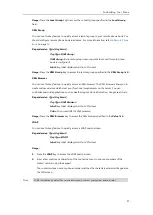
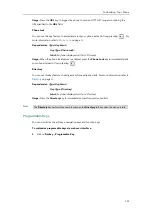
The Bluetooth headset is disconnected. To connect it to your IP phone again, press the 

Connect

 soft key. 

Deleting the Paired Bluetooth Headset 

You can delete your Bluetooth headset from your phone. When you delete the Bluetooth 
headset, it disappears from the 

Paired Bluetooth Device

 list. To connect it to your IP phone 

again, you need to scan and connect it again. 

To delete your Bluetooth headset from your phone: 

1.


Press 

Menu

->

Basic

->

Bluetooth

->

Paired Bluetooth Device

2.


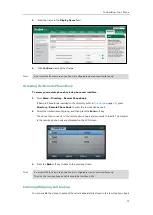
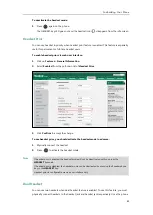
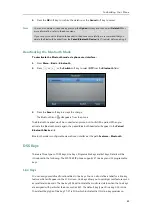
Select the Bluetooth headset you want to delete.


3.


Press the 

Option

 soft key, and then select 

Delete

 from the prompt list.


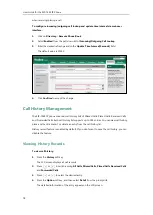
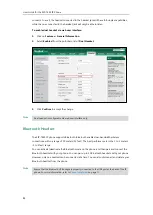
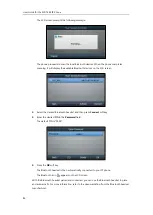
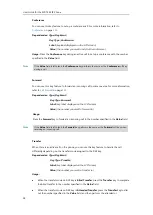
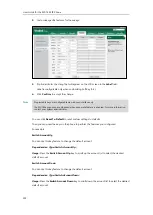
The LCD screen prompts the following warning “Delete selected item?”. 


Summary of Contents for SIP-T46S

Page 1: ...aji...

Page 2: ...URATE AND PRESENTED WITHOUT WARRANTY OF ANY KIND EXPRESS OR IMPLIED USERS MUST TAKE FULL RESPONSIBILITY FOR THEIR APPLICATION OF PRODUCTS YEALINK XIAMEN NETWORK TECHNOLOGY CO LTD MAKES NO WARRANTY OF...

Page 3: ...interference to radio or television reception which can be determined by turning the equipment off and on the user is encouraged to try to correct the interference by one or more of the following meas...

Page 4: ...uses software under the specific terms of the GPL Please refer to the GPL for the exact terms and conditions of the license The original GPL license source code of components licensed under GPL and u...

Page 5: ...Topics provided in this guide include Chapter 1 Overview Chapter 2 Getting Started Chapter 3 Customizing Your Phone Chapter 4 Basic Call Features Chapter 5 Advanced Phone Features Summary of Changes...

Page 6: ...on page 148 Configuring Visual and Audio Alert for BLF Pickup on page 162 Receiving RTP Stream on page 188 BLF Ring Type is moved to Configuring Visual and Audio Alert for BLF Pickup on page 162 Chan...

Page 7: ...nterfaces 11 Phone User Interface 12 Web User Interface 12 Documentations 15 Getting Started 17 Packaging Contents 17 Optional Accessories 18 Phone Installation 20 Network Connection 23 Connecting to...

Page 8: ...Audio Settings 55 Volume 55 Ring Tones 56 Key Tone 58 Contact Management 59 Directory 59 Local Directory 61 Blacklist 74 Remote Phone Book 76 Call History Management 78 Viewing History Records 78 Plac...

Page 9: ...amic Forwarding 141 Call Transfer 141 Blind Transfer 142 Semi attended Transfer 143 Attended Transfer 144 Call Waiting 144 Conference 145 Local Conference 145 Network Conference 147 Call Park Retrieve...

Page 10: ...tion ACD 192 Shared Call Appearance SCA 194 Configuring SCA Feature on the IP Phone 195 Using SCA Feature on the IP Phone 201 Bridged Lines Appearance BLA 207 Configuring BLA Feature on the IP Phone 2...

Page 11: ...nent Instructions Icon Instructions LED Instructions User Interfaces Documentations If you require additional information or assistance with your new phone contact your system administrator Hardware C...

Page 12: ...ses voice messages HOLD Key Places a call on hold or resumes a held call REDIAL Key Redials a previously dialed number TRANSFER Key Transfers a call to another party Speakerphone Key Toggles and indic...

Page 13: ...connects from the line Icon Instructions Feature Status Icons Icons appearing on the status bar are described in the following table Icons Description Network is unavailable Hands free speakerphone mo...

Page 14: ...h headset is both paired and connected Wi Fi connection is successful Wi Fi connection failed Line Key Icons Icon indicator associated with line key features Icons Description Hold Public Hold Private...

Page 15: ...ock Directory Speed Dial Icon indicator associated with line Icons Description The private line registers successfully The shared bridged line registers successfully Registering Register failed DND is...

Page 16: ...ACD status is available The ACD state is Wrap up The ACD status is unavailable Log out of the ACD system Icon indicator associated with intercom Icons Description Intercom idle state Intercom ringing...

Page 17: ...ription The shared line is idle for monitoring SCA phone The shared line is seized The shared line receives an incoming call The shared line is dialing The shared line is in conversation The shared li...

Page 18: ...bridged line receives an incoming call The bridged line is dialing The bridged line is in conversation The bridged line conversation is placed on hold Other Icons Icon indicator associated with call...

Page 19: ...g Fast flashing red 300ms The phone is ringing Slow flashing red 1s The phone receives a voice mail or text message Off The phone is powered off The phone is idle The phone is busy The call is placed...

Page 20: ...key of the non current page Off The line keys are idle Line key LED associated with a shared line The local SCA phone indicates the phone is involved in an SCA call while the monitoring SCA phone ind...

Page 21: ...r SIP T46S IP phone The user interface on the IP phone The user interface in a web browser on your PC The hardware components keypad and LCD screen constitute the phone user interface which allows the...

Page 22: ...the phone is idle Enter the IP address e g http 192 168 0 10 or 192 168 0 10 for IPv4 http 2005 1 1 1 215 65ff fe64 6e0a or 2005 1 1 1 215 65ff fe64 6e0a for IPv6 in the address bar of a web browser o...

Page 23: ...ment Search Source List in Dialing x Headset Use Bluetooth Headset DSS Keys Account Registration Dial Plan x Emergency Number x Live Dialpad x Hotline Basic Call Features Recent Call In Dialing x Auto...

Page 24: ...hared Call Appearance SCA x Bridged Lines Appearance BLA x Messages SIP Account User Options Activation Label Display Name Register Name User Name Password Server Options SIP Server 1 2 Register Port...

Page 25: ...T46S IP phone Name Contents Where found Language Quick Start Guide Basic call features and phone customizations In the package English On the website English Chinese User Guide Phone Web user interfac...

Page 26: ...User Guide for the SIP T46S IP Phone 16...

Page 27: ...g Contents Phone Installation Network Connection Phone Initialization Phone Status Basic Network Settings Wireless Network Settings Registration Idle Screen Entering Data and Editing Fields If you req...

Page 28: ...Cable 2m CAT5E UTP cable Quick Start Guide Check the list before installation If you find anything missing contact your system administrator Optional Accessories The following items are optional acces...

Page 29: ...Getting Started 19 Power Adapter 5 5mm DC plug Wall Mount Bracket Headset YHS32 YHS33 Wireless Headset Adapter EHS36 Bluetooth USB Dongle BT40...

Page 30: ...tall the phone 1 Attach the stand or the optional wall mount bracket 2 Connect the handset and optional headset 3 Connect the optional USB flash drive 4 Connect the power 1 Attach the stand or the opt...

Page 31: ...40 For more information on how to use EHS36 and EXP40 refer to Yealink EHS36 User Guide and Yealink EXP40 User Guide The hookswitch tab has a lip which allows the handset to stay on hook when the IP p...

Page 32: ...ower adapter into an electrical power outlet Note The IP phone should be used with Yealink original power adapter 5V 2A only The use of the third party power adapter may cause the damage to the phone...

Page 33: ...rt on the in line power switch hub Note Network Connection You have two options for network connection You can select one of them according to the current office environment Connecting to the wired ne...

Page 34: ...he PC port is unavailable when using wireless network For more information on how to connect to a wireless network refer to Wireless Network Settings on page 28 Phone Initialization After your phone i...

Page 35: ...otocol to meet the increased demands for unique IP addresses using a 128 bit address Phone status product name hardware version firmware version product ID MAC address and device certificate status Ac...

Page 36: ...ver for any reason you need to configure network settings manually The IP phone can support either or both IPv4 and IPv6 addresses To configure the IP mode via phone user interface 1 Press Menu Advanc...

Page 37: ...igure a static IPv4 address via phone user interface 1 Press Menu Advanced default password admin Network WAN Port 2 Press or to select IPv4 and then press the Enter soft key 3 Press or or the Switch...

Page 38: ...he change or the Back soft key to cancel Note Wireless Network Settings Wi Fi is a popular wireless networking technology that uses radio waves to provide wireless high speed Internet and network conn...

Page 39: ...directly and scan Wi Fi devices automatically To activate the Wi Fi mode via phone user interface 1 Press Menu Basic Wi Fi 2 Press or or the Switch soft key to select On from the Wi Fi field 3 Press t...

Page 40: ...number of available networks and then press the Enter soft key If there is no available wireless network press the Scan soft key to search for the wireless network again 3 Press or to select the desi...

Page 41: ...randomly by the IP phone on the gateway router to connect Push Button Configuration PBC To connect to the wireless network using PBC method 1 Press Menu Basic Wi Fi 2 Press the WPS soft key and then...

Page 42: ...following a If you select None or WEP from the pull down list of Security Mode Enter the profile name SSID and WPA shared key in the corresponding fields b If you select WPA PSK or WPA2 PSK from the p...

Page 43: ...lly connected to the wireless network which has the highest priority the top one Up to 5 wireless network profiles can be saved in Known network list If you want to add a new one when the IP phone has...

Page 44: ...elect the connected wireless network and then press the Disconnect soft key The wireless network is disconnected You can press the Connect soft key to connect again Deactivating the Wi Fi Mode To deac...

Page 45: ...default account Contact your system administrator for more information 3 Icons Icons are displayed in the middle of the status bar For more information refer to Icon Instructions on page 3 4 Time and...

Page 46: ...ad repeatedly to view the character or number options and stop to select When the character or number you want to enter displays in the field wait for one second and enter the next character or number...

Page 47: ...t key input modes For example if the input mode is ABC To enter A press once To enter B press twice quickly To enter C press three times quickly To enter 2 press more than three times quickly Note Whe...

Page 48: ...lowercase abc soft key uppercase and lowercase Abc soft key or alphanumeric 2aB soft key input mode it will provide the following special characters _ If it is in the numeric 123 soft key input mode...

Page 49: ...dio Settings Contact Management Call History Management Search Source List in Dialing System Customizations If you require additional information or assistance with your new phone contact your system...

Page 50: ...allpaper by clicking Del when selecting the desired custom wallpaper in the Wallpaper field Note To change the wallpaper via phone user interface 1 Press Menu Basic Display Wallpaper 2 Press or or the...

Page 51: ...e the screen saver will start again The time date and certain feature status icons e g a new text message auto answer DND will also display on the screen saver For more information on the icons refer...

Page 52: ...clicking Del when the desired custom picture is selected in the Screensaver field Note Configuring the Screen Saver To configure the screen saver via phone user interface 1 Press Menu Basic Display Sc...

Page 53: ...screen to conserve energy The IP phone enters power saving mode after it has been idle for a certain period of time The IP phone will exit power saving mode if one of the following phone events occurs...

Page 54: ...ce 1 Click on Settings Power Saving 2 Select Enabled from the pull down list of Power Saving 3 Click Confirm to accept the change Configuring the Office Hour Office Hour specifies the starting time an...

Page 55: ...a key on the phone or pick up hang up the handset By default the Office Hours Idle Timeout is much longer than the Off Hours Idle TimeOut If you use the IP phone the idle timeout that applies User In...

Page 56: ...e The delay time to change the intensity of the LCD screen when the phone is inactive You can select a desired time to change the intensity or turn on the backlight permanently Always On Backlight is...

Page 57: ...hone Ensure that the expansion module has been connected to the phone before configuration The intensity of contrast ranges from 1 to 10 and the highest intensity is 10 To configure the contrast via p...

Page 58: ...elect the desired language from the pull down list at the top right corner of web user interface Text displayed on the web user interface will change to the selected language Time Date The time and da...

Page 59: ...is selected to Automatic The default time zone name is China Beijing 6 Press the Save soft key to accept the change or the Back soft key to cancel Note To configure the time and date manually via phon...

Page 60: ...ay and MMM represents the first three letters of the month The date formats available Date Format Example 2016 09 02 WWW MMM DD Fri Sep 02 DD MMM YY 02 Sep 16 YYYY MM DD 2016 09 02 DD MM YYYY 02 09 20...

Page 61: ...key to cancel Administrator password is configurable via web user interface at the path Security Password Key As Send You can set the key or key to perform as a send key while dialing To configure key...

Page 62: ...the handset pressing the Speakerphone key the HEADSET key the OK key or Answer soft key and end the call by hanging up the handset pressing the Speakerphone key End Call soft key or X key Note To act...

Page 63: ...accept the change When the phone is locked the LCD screen prompts Phone locked and displays the icon To change the phone unlock PIN via phone user interface 1 Press Menu Basic Change PIN 2 Enter the d...

Page 64: ...n Note To deactivate the phone lock via phone user interface 1 Press Menu Basic Phone Lock 2 Enter the desired PIN default PIN 123 in the Unlock PIN field and then press the OK soft key 3 Press or or...

Page 65: ...dset speakerphone or headset when the phone is in use To adjust the ringer volume when the phone is idle 1 Press to adjust the ringer volume To adjust the ringer volume when the phone is ringing 1 Pre...

Page 66: ...are used to indicate incoming calls You can select different ring tones to distinguish different accounts registered on your phone or to distinguish your phone from your neighbor s To select a ring to...

Page 67: ...press the Enter soft key 3 Press or to select the desired ring tone If Common is selected this account will use the ring tone selected for the phone 4 Optional Press to adjust the ringer volume 5 Pres...

Page 68: ...the custom ring tone by clicking Del when selecting the desired custom ring tone in the Ring Type field Note Key Tone If you enable key tone the phone will produce a sound when you press the keypad T...

Page 69: ...rectory Local Directory Blacklist Remote Phone Book Directory Directory provides easy access to frequently used lists The lists may contain Local Directory History Remote Phone Book and LDAP You can c...

Page 70: ...irectory soft key when the phone is idle The LCD screen displays the enabled list s in the directory If there is only one list in the directory press the Directory soft key to enter this list directly...

Page 71: ...ctory 1 Press the Directory soft key The IP phone enters the local directory directly as there is only Local Directory enabled in the directory by default If Local Directory is removed from the direct...

Page 72: ...iority Contact ring tone refer to Adding Contacts Group ring tone 5 Press the Save soft key to accept the change or the Back soft key to cancel Editing Groups To edit a group in the local directory 1...

Page 73: ...ups To delete a group from the local directory 1 Press the Directory soft key The IP phone enters the local directory directly as there is only Local Directory enabled in the directory by default If L...

Page 74: ...rom a remote phone book Adding Contacts Manually To add a contact to the local directory manually 1 Press the Directory soft key The IP phone enters the local directory directly as there is only Local...

Page 75: ...priority Group ring tone refer to Adding Groups Account ring tone refer to Ring Tones Phone ring tone refer to Ring Tones 7 Press or or the Switch soft key to select the desired group from the Group...

Page 76: ...y Remote Phone Book to enter the remote phone book 2 Select the desired remote group and then press the Enter soft key 3 Press or to highlight the desired entry 4 Press the Option soft key and then se...

Page 77: ...the desired contact group and then press the Enter soft key If the contact is not in any group select All Contacts and then press the Enter soft key 3 Press or to highlight the desired contact 4 Press...

Page 78: ...ll Contacts and then press the Enter soft key 3 Press or to highlight the desired contact 4 Press the Option soft key and then select Delete from the prompt list The LCD screen prompts the following w...

Page 79: ...custom photo for the contact via web user interface 1 Click on Directory Local Directory 2 Click to select the desired entry which you want to edit 3 Select the desired photo from the pull down list...

Page 80: ...it to accept the change When you place a call to the contact or receive a call from the contact the LCD screen will show the contact photo Placing Calls to Contacts To place a call to a contact from t...

Page 81: ...e desired contact 4 Do one of the following If only one number for the contact is stored in the local directory press the Send soft key to dial out the number If multiple numbers for the contact are s...

Page 82: ...r phone number matches the characters entered will appear on the LCD screen You can dial from the result list Importing Exporting Contact Lists You can manage your phone s local directory via phone us...

Page 83: ...ntact list file the file format must be csv from your local system 3 Optional Check the Show Title checkbox It will prevent importing the title of the contact information which is located in the first...

Page 84: ...your local system Note Blacklist The built in phone directory can store names and phone numbers for a blacklist You can store up to 30 contacts add edit delete or search for a contact in the blacklist...

Page 85: ...blacklist directory from the local directory 1 Press Directory soft key The IP phone enters the local directory directly as there is only Local Directory enabled in the directory by default If Local...

Page 86: ...tacts to the local directory search for a contact or simply dial a contact number from the remote phone book You can configure your new phone to access up to 5 remote phone books For the access URL of...

Page 87: ...remote group and then press the Enter soft key The phone then connects to the remote phone book and proceeds to load it The contacts in the remote phone book are displayed on the LCD screen 3 Press t...

Page 88: ...ls Placed Calls Received Calls and Forwarded Calls Each call history list supports up to 100 entries You can view call history place a call add a contact or delete an entry from the call history list...

Page 89: ...oft key and then select Add to Contact or Add to Blacklist from the prompt list 5 Enter the desired values in the corresponding fields 6 Press the Save soft key For more information on local directory...

Page 90: ...ecord field 3 Press the Save soft key to accept the change or the Back soft key to cancel Search Source List in Dialing You can search for a contact from the desired lists when the phone is on the dia...

Page 91: ...esired list and click or The LCD screen will display search results in the adjusted order 6 Click Confirm to accept the change Note To search for an entry in the enabled search source lists 1 Pick up...

Page 92: ...a Bluetooth headset refer to Bluetooth Headset on page 84 This section provides an introduction to wired headset use Note Headset Mode Activation Deactivation To activate the headset mode 1 Press on t...

Page 93: ...rior 3 Click Confirm to accept the change To use headset prior you should activate the headset mode in advance 1 Physically connect the headset 2 Press to activate the headset mode Note Dual Headset Y...

Page 94: ...es low bandwidth wireless connections within a range of 10 meters 32 feet The best performance is in the 1 to 2 meters 3 to 6 feet range You can activate deactivate the Bluetooth mode on the phone and...

Page 95: ...r the Switch soft key to select On from the Bluetooth field 3 Press the Save soft key to accept the change The LCD screen displays the Bluetooth icon Bluetooth mode is configurable via web user interf...

Page 96: ...ed Bluetooth headset and then press Connect soft key 4 Enter the desired PIN in the Password field The default PIN is 0000 5 Press the OK soft key The Bluetooth headset is then automatically connected...

Page 97: ...ss the Option soft key and then select Detail from the prompt list to view the Bluetooth headset information Device Name the name of the Bluetooth headset MAC Address the MAC address of the Bluetooth...

Page 98: ...ess Menu Basic Bluetooth Paired Bluetooth Device 2 Select the connected Bluetooth headset 3 Press the Disconnect soft key The Bluetooth headset is disconnected To connect it to your IP phone again pre...

Page 99: ...eys and Ext Keys Details will be introduced in the following The SIP T46S IP phone supports 27 line keys and 13 programable keys Line Keys You can assign predefined functionalities to line keys You ca...

Page 100: ...D screen in the Label field 7 Optional Enter the corresponding value in the Value field 8 Optional Enter the corresponding value in the Extension field 9 Press the Save soft key to accept the change o...

Page 101: ...e of line keys Indicates the non current page of line keys Page Tips You can use page tips feature to enable the page icon and page switch key LED to indicate different statuses This feature is disabl...

Page 102: ...ou can specify labels for some key features which will be displayed on the idle LCD screen If the length of the label exceeds the maximum display length the phone will only display the first few chara...

Page 103: ...wing figure shows an example of label display when the label length feature is set to Default To configure the label length via web user interface 1 Click on Dsskey Line Key 2 Select Extended from the...

Page 104: ...features not listed above refer to Basic Call Features on page 115 and Advanced Phone Features on page 161 For more information contact your system administrator Line You can use this key feature to a...

Page 105: ...ial out Usage Press the Speed Dial key to dial out the number specified in the Value field using the account selected from the Account ID field Voice Mail You can use this key feature to quickly conne...

Page 106: ...ce Usage Press the DTMF key during an active call to send the key sequence specified in the Value field Note Prefix You can use this key feature to add a specified prefix number before the dialed numb...

Page 107: ...tom services which meet your functional requirements on the server You can customize practical applications such as weather report stock information Google search etc Dependencies Type Key Event Key T...

Page 108: ...o forward an incoming call to the number specified in the Value field Note Transfer When there is an active call on the phone you can use this key feature to handle the call differently depending on t...

Page 109: ...ncies Type Key Event Key Type DND Label key label displayed on the LCD screen Usage When DND is in phone mode 1 Press the DND key to activate DND 2 Press the DND key again to deactivate DND When DND i...

Page 110: ...through the handset headset while other people at your side can only listen through the speaker at the same time 2 Press the Group Listening key again to deactivate the group listening mode Zero Touc...

Page 111: ...the Phone Lock key to immediately lock your phone instead of long pressing Directory You can use this key feature to easily access frequently used lists For more information refer to Directory on page...

Page 112: ...itch Account Up You can use this key feature to change the default account Dependencies Type Switch Account Up Usage Press the Switch Account Up key to scroll up the account list to select the desired...

Page 113: ...associate with an account Account Registration To register an account via phone user interface 1 Press Menu Advanced default password admin Accounts 2 Select the desired account and then press the Ent...

Page 114: ...he desired account and then press the Enter soft key 3 Select Disabled from the Activation field 4 Press the Save soft key to accept the change or the Back soft key to cancel Registering an account is...

Page 115: ...Back soft key to cancel Default account can be set by pressing or on the idle screen It has priority when placing a call Note Multiple Line Keys per Account You can configure multiple line keys to as...

Page 116: ...al plan features Replace Rule Dial Now Area Code Block Out The basic expression syntax you need to know The dot can be used as a placeholder or multiple placeholders for any character Example 12 would...

Page 117: ...ng that matches the pattern will be replaced This feature is convenient for you to dial out a long number For example a replace rule is configured as Prefix 1 and Replace 1234567 when you try to dial...

Page 118: ...Dial Now You can configure one or more dial now rules up to 100 on your phone When the dialed number matches the dial now string the number will be dialed out automatically For example a dial now rule...

Page 119: ...234 automatically without the pressing of any key Note Time Out for Dial Now Rule You can configure the delay time for dial now rules That is you can configure your phone to automatically dial out the...

Page 120: ...when dialing a phone number outside the code area For example an area code is configured as Code 0592 Min Length 1 Max Length 15 When you dial out the number 56789 the length of the number is between...

Page 121: ...dialing will fail and the LCD screen will prompt Forbidden Number To add a block out number via web user interface 1 Click on Settings Dial Plan Block Out 2 Enter the desired value in the BlockOut Nu...

Page 122: ...ency services in an emergency situation You can dial these numbers when the phone is locked For more information on phone lock refer to Phone Lock on page 52 Note To specify emergency numbers via web...

Page 123: ...the pull down list of Live Dialpad 3 Enter the desired delay time in the Inter Digit Time 1 14s field The default delay time is 4s 4 Click Confirm to accept the change Note Hotline You can dial a hotl...

Page 124: ...in the Hotline Delay field The valid values range from 0 to 10 seconds and the default value is 4 4 Press the Save soft key to accept the change or the Back soft key to cancel Hotline is configurable...

Page 125: ...hone Topics include Placing Calls Answering Calls Ending Calls Redialing Numbers Recent Call In Dialing Auto Answer Auto Redial Call Completion ReCall Call Mute Call Hold Resume Do Not Disturb DND Cal...

Page 126: ...r 1026 has lasted 15 seconds To place a call using the handset 1 Pick up the handset 2 Enter the desired number using the keypad 3 Press or the Send soft key The key is configured as a send key by def...

Page 127: ...The SIP T46S IP phone can handle a maximum of 50 calls at one time To place multiple calls You can have more than one call on your SIP T46S IP phone To place a new call during an active call do one o...

Page 128: ...LED indicator To answer a call using the headset Do one of the following Press With the headset mode activated press the Answer soft key With the headset mode activated press the line key with the fas...

Page 129: ...ing Numbers To redial the last dialed number from your phone 1 Press twice A call to your last dialed number is attempted To redial a previously dialed number from your phone 1 Press when the phone is...

Page 130: ...from the pull down list of Recent Call In Dialing 3 Click Confirm to accept the change Note To view placed calls list when the phone is on the dialing screen 1 Pick up the handset press the Speakerph...

Page 131: ...Auto answer is configurable on a per line basis You can choose to mute the local microphone when an incoming call is answered automatically For more information refer to Keep Mute on page 125 To confi...

Page 132: ...r interface 1 Press Menu Features Others Auto Redial 2 Press or or the Switch soft key to select Enabled from the Auto Redial field 3 Enter the desired time in seconds in the Redial Interval field The...

Page 133: ...ear on the LCD screen of the phone 1 Press the OK soft key to activate auto redial The following prompt will appear on the LCD screen of the phone 2 Wait for the designated period of time or press the...

Page 134: ...ccept the change or the Back soft key to cancel Call completion is configurable via web user interface at the path Features General Information To use call completion When the called party is busy the...

Page 135: ...n mute the microphone of the active audio device during an active call so that the other party cannot hear you You can also mute the microphone while dialing so that the other party cannot hear you wh...

Page 136: ...nd the icon appears on the status bar Muting a Call To mute a call 1 Press during an active call The mute key LED illuminates solid red The LCD screen indicates that the call is now muted To un mute a...

Page 137: ...me a held call 1 Press or the Resume soft key Multiple Calls on Hold If multiple calls are placed on hold do one of the following Press or to switch between the calls and then press the Resume soft ke...

Page 138: ...the idle screen For more information contact your system administrator You can activate deactivate DND for the phone system or you can customize DND for each or all accounts There are two DND modes P...

Page 139: ...DND in phone mode 1 Press the DND soft key when the phone is idle The icon appears on the status bar Note DND mode is configurable via web user interface only When DND and busy forward are activated...

Page 140: ...tus field 4 Optional Enter the DND on code or off code respectively in the On Code or Off Code field If the on code or off code is configured the IP phone will send the corresponding code to activate...

Page 141: ...authorized numbers when DND is activated To configure the DND authorized numbers via web user interface 1 Click on Features Forward DND 2 Select Enabled from the pull down list of DND Emergency 3 Ente...

Page 142: ...tivate DND in custom mode 1 Press the DND soft key when the phone is idle 2 Press or to select the desired account and then press the Enter soft key 3 Press or or the Switch soft key to select Disable...

Page 143: ...me You can activate deactivate call forward for the phone system or you can customize call forward for each or all accounts There are two call forward modes Phone default Call forward is effective for...

Page 144: ...d forwarding type and then press the Enter soft key 3 Depending on your selection a If you select Always Forward 1 Press or or the Switch soft key to select Enabled from the Always Forward field 2 Ent...

Page 145: ...Enabled from the No Answer Forward field 2 Enter the destination number you want to forward unanswered incoming calls to in the Forward to field 3 Press or or the Switch soft key to select the ring t...

Page 146: ...activate it for a specific account 1 Press or or the Switch soft key to select Enabled from the Always Forward field 2 Enter the destination number you want to forward all incoming calls to in the Fo...

Page 147: ...to select Enabled from the Busy Forward field 2 Enter the destination number you want to forward incoming calls to when the phone is busy in the Forward to field 3 Optional Enter the busy forward on c...

Page 148: ...r the Switch soft key to select the ring time to wait before forwarding from the After Ring Time field The default ring time is 12 seconds 4 Optional Enter the no answer forward on code or off code re...

Page 149: ...ge to and the icon will appear on the status bar If the forward on code or off code is configured the IP phone sends the corresponding code to the server when a certain action takes place For example...

Page 150: ...n the phone the phone cannot forward incoming calls from the numbers specified in the Forward Authorized Numbers field Note To deactivate call forward in phone mode Do one of the following Press when...

Page 151: ...ard If you want to deactivate call forward for all accounts press the All Lines soft key 5 Press the Save soft key to accept the change Dynamic Forwarding You can manually forward a call to another nu...

Page 152: ...ct Local Directory Select the desired group and search for the contact Directory should be configured in advance Refer to Directory on page 59 for more information Press or the Send soft key to comple...

Page 153: ...ry soft key and then select Local Directory Select the desired group and search for the contact Directory should be configured in advance Refer to Directory on page 59 for more information Press or th...

Page 154: ...tion Press or the Send soft key to dial out Press the Directory soft key and then select Remote Phone Book Select the desired group and search for the contact Directory should be configured in advance...

Page 155: ...one s local conference You can create a conference between an active call and a call on hold by pressing the Conference soft key The SIP T46S also supports network conference Note Local Conference The...

Page 156: ...he call on account 1 3 Press the Conference soft key to join the two calls in the conference on the selected account During the conference call you can do the following actions Press or the Hold soft...

Page 157: ...rence URI in advance To configure network conference via web user interface 1 Click on Account Advanced 2 Select the desired account from the pull down list of Account 3 Select Network Conference from...

Page 158: ...call is parked successfully there is a voice prompt confirming that the call was parked You can retrieve the parked call by pressing the Retrieve soft key or the retrieve park key if configured If the...

Page 159: ...ancel If the park retrieve code is already configured for the Retrieve soft key you don t need to configure it when configuring a retrieve park key Call park key and retrieve park key are configurable...

Page 160: ...a call press the Park soft key You may need to press the More soft key to see the Park soft key or the call park key if configured If the call park code is not configured you need to enter the call pa...

Page 161: ...want to park the call 2 Press or If the call is parked successfully you will hear a voice prompt confirming that the call is parked The call is parked against the extension you entered To retrieve a p...

Page 162: ...call park code in the Call Park Code field It is configured for the Park soft key This call park code will also apply to the call park key 5 Optional Enter the park retrieve code in the Park Retrieve...

Page 163: ...If the park retrieve code is configured press the Retrieve soft key on the dialing screen or retrieve park key if configured on the IP phone The phone will retrieve the parked call from the shared par...

Page 164: ...basis via web user interface 1 Click on Features Call Pickup 2 Select Enabled from the pull down list of Directed Call Pickup 3 Enter the directed call pickup code in the Directed Call Pickup Code fi...

Page 165: ...The DPickup soft key appears on the LCD screen 2 Press the DPickup soft key on your phone when the target phone receives an incoming call 3 Enter the phone number which is receiving an incoming call 4...

Page 166: ...ick on Features Call Pickup 2 Select Enabled from the pull down list of Group Call Pickup 3 Enter the group call pickup code in the Group Call Pickup Code field 4 Click Confirm to accept the change To...

Page 167: ...nfirm to accept the change To pick up a call in the group 1 Pick up the handset press the Speakerphone key or press the line key The GPickup soft key appears on the LCD screen 2 Press the GPickup soft...

Page 168: ...via phone user interface 1 Press Menu Features Anonymous 2 Select the desired line and then press the Enter soft key 3 Press or or the Switch soft key to select Enabled from the Local Anonymous field...

Page 169: ...eing displayed Anonymous call rejection is configurable on a per line basis You can also configure the phone to send anonymous call rejection on off code to the server to activate deactivate anonymous...

Page 170: ...anonymous call rejection on code and off code respectively in the On Code and Off Code field 7 Press the Save soft key to accept the change or the Back soft key to cancel Anonymous call rejection is...

Page 171: ...use BLF to monitor a specific line for status changes on the phone For example you can configure a BLF key on the phone to monitor the status of a friend s line busy or idle The BLF key LED illuminate...

Page 172: ...change or the Back soft key to cancel BLF key is configurable via web user interface at the path Dsskey Line Key Configuring Visual and Audio Alert for BLF Pickup You can enable visual alert feature f...

Page 173: ...Press to adjust the ringer volume 4 Press the Save soft key to accept the change or the Back soft key to cancel BLF ring type is configurable via web user interface at the path Features Call Pickup Wh...

Page 174: ...gure the directed call pickup code on a global or per line basis via web user interface If you enable visual alert feature you can also pick up the monitored user s incoming call by pressing DPickup s...

Page 175: ...p code in the Directed Call Pickup Code field 3 Click Confirm to accept the change To configure the directed call pickup code on a per line basis via web user interface 1 Click on Account Advanced 2 S...

Page 176: ...monitored phone number and then perform an attended or a semi attended transfer If you select New Call press the BLF key to place a new call to the monitored user The original call is placed on hold...

Page 177: ...of the monitored user which you want to transfer this call to The phone will dial the number of the monitored user 2 Press the BLF key of the monitored user again or the Transfer soft key to complete...

Page 178: ...fined by your system administrator For example your system administrator enables BLF List and creates a BLF List URI e g BLFList example com including a list of user1 user2 on the server The BLF List...

Page 179: ...will place a call to the monitored user instead of barging in an active call of the monitored user when you press the BLF List key When a call is being parked against the monitored phone press the BL...

Page 180: ...ur phone The recordings are saved as wav files on your USB flash drive You can also record active calls by pressing a record key on the phone refer to Recording Using a Record Key The recordings are s...

Page 181: ...D screen will prompt USB device has been connected successfully Available Recording Time XX XX XX For more information on the available recording time refer to Viewing the Storage Space on page 176 Th...

Page 182: ...recording you can do the following Press the More soft key and then press the Pause REC soft key Then appears on the LCD screen and the duration stops counting The Resume REC soft key appears on the L...

Page 183: ...s screen If there is insufficient free space 10 minutes left on the USB flash drive during recording the LCD screen prompts the following Press the Cancel soft key to return to the previous screen If...

Page 184: ...sfully recorded on USB device the recording icon and recording duration disappear and the phone returns to the idle screen Note Playing Back Recorded Calls You can play back recorded calls on your pho...

Page 185: ...ft key to continue the playback Press the Fast Forward soft key to skip forward the playback Press once to skip forward 8 seconds Press the Fast Rewind soft key to rewind the playback Press once to re...

Page 186: ...g 4 Press the OK soft key to confirm the deletion or the Cancel soft key to cancel Viewing the Storage Space You can view the storage space e g total space used space free space of the USB flash drive...

Page 187: ...nnected calls on your phone You place a new call Configuring a Record Key To configure a record key via phone user interface 1 Press Menu Features DSS Keys 2 Select the desired DSS key 3 Press or or t...

Page 188: ...path Dsskey Line Key Recording a Call To record a call 1 Press the record key or URL record key during a call If the recording starts successfully the recording icon will appear on the LCD screen and...

Page 189: ...w account As a result many users can share the phone resource at different times To use this feature you need to configure a hot desking key in advance Note To configure a hot desking key via phone us...

Page 190: ...ve soft key to login or the Back soft key to cancel Intercom Intercom is a useful feature in an office environment to quickly connect with the operator or the secretary You can press the intercom key...

Page 191: ...administrator for more information 8 Press the Save soft key to accept the change or the Back soft key to cancel Intercom key is configurable via web user interface at the path Dsskey Line Key Incomin...

Page 192: ...ercom Mute is disabled by default Intercom Tone You can enable or disable the phone to play a warning tone when receiving an intercom call If Intercom Tone is enabled the phone will play a warning ton...

Page 193: ...ension plays a warning tone and automatically answers the call in the hands free speakerphone mode by default 2 To end the intercom call press the intercom key again or the End Call soft key Picking u...

Page 194: ...g old firmware version old paging mechanism can be regarded as listening to channel 0 It is the default channel 1 to 25 You can broadcast audio to a specific channel We recommend that you specify thes...

Page 195: ...Features DSS Keys 2 Select the desired DSS key 3 Press or or the Switch soft key to select Key Event from the Type field 4 Press or or the Switch soft key to select Paging List from the Key Type fiel...

Page 196: ...5 255 5 Enter the group name in the Label field 6 Enter the desired channel in the Channel field The valid channel ranges from 0 to 30 7 Press the Save soft key to accept the change 8 Repeat steps 2 t...

Page 197: ...e all paging groups you can press the Delete All soft key You can also configure the phone to use a default codec for sending multicast RTP stream via web user interface To configure a default codec f...

Page 198: ...ority of multicast listening address from which the phone can receive an RTP stream when DND is activated If a priority is selected from the pull down list of Ignore DND the phone will ignore incoming...

Page 199: ...IP 2 Select the desired value from the pull down list of Paging Barge 3 Select the desired value from the pull down list of Ignore DND 4 Select the desired value from the pull down list of Paging Prio...

Page 200: ...hone places the multicast RTP session on hold and receiver s phone releases the session To resume the held multicast RTP session press the Resume soft key The multicast RTP session is established agai...

Page 201: ...nd a SIP INVITE message to the Music on Hold Server account The Music on Hold Server account automatically answers the SIP INVITE messages and immediately plays audio from some source located anywhere...

Page 202: ...on indicators refer to Icon Instructions on page 3 Note To configure an ACD key via phone user interface 1 Press Menu Features DSS Keys 2 Select the desired DSS key 3 Press or or the Switch soft key t...

Page 203: ...tatus ACD user status synchronizes on both IP phone and ACD system When you set the ACD user status to be available the ACD key LED illuminates solid green and then the server begins distributing call...

Page 204: ...ing call to this extension will cause both phones to ring simultaneously The incoming call can be answered on either phone but not both This feature is very useful in the boss and secretary scenario F...

Page 205: ...the phone If auto linekeys feature is enabled For example party A party B share the account 4603 phone A registers the primary account 4603 and assigns line key 1 and line key 2 for the account 4603 p...

Page 206: ...can automatically assign multiple DSS keys with Line type for a registered shared line on the phone 3 Click Confirm to accept the change To configure the shared line settings and the number of line k...

Page 207: ...uto Linekeys is enabled The default value is 1 In this example the value is set to 2 4 Click Confirm to accept the change The phone A will automatically configure the line keys from the first unused D...

Page 208: ...ter Name field 2 Click on Advanced select Shared Call Appearance from the pull down list of Shared Line 3 Enter the desired number in the Number of line key field This field appears only if Auto Linek...

Page 209: ...isplayed on the LCD screen You need to configure either the private hold soft key or a private hold key before you place the call on private hold To configure the private hold soft key via web user in...

Page 210: ...feature Call pull feature allows users to retrieve an existing call from another shared phone that is in active or public hold status To configure the call pull feature access code via web user interf...

Page 211: ...number using the keypad when the phone is idle Press or the Send soft key The phone will dial the entered number using the first line key Press the line key when the phone is idle to enter the dialin...

Page 212: ...the line key 1 on phone A will illuminate solid green and phone B will illuminate solid Red Press the line key 1 or the Answer soft key on phone B The LED indicators of the line key 1 on phone A will...

Page 213: ...2 Phone A stops ringing Press or the Answer soft key Phone A stops ringing The LED indicators of the line key 2 on phone A will illuminate solid red and phone B will illuminate solid green indicating...

Page 214: ...d Call To retrieve a call placed on public hold You can retrieve the public held call on either phone A or phone B To retrieve the call on phone A 1 Press the line key with the slow flashing green LED...

Page 215: ...Pull New Call and Barge In soft keys appear on the LCD screen of phone B 2 Press the Barge In soft key to interrupt the active call of phone A Party B will set up a conference call with the other par...

Page 216: ...oft key two way voice can be heard between the remaining parties If party A or party B presses the End Call soft key the remaining parties are still connected If the other party not the shared line pa...

Page 217: ...esired line key on phone B The Cancel Call Pull New Call and Retrieve soft keys appear on the LCD screen of phone B 2 Press the Call Pull soft key The held call has been retrieved from the phone A suc...

Page 218: ...to multiple phones in the group simultaneously The incoming call can be answered on any IP phone of the group but not all Configuring BLA Feature on the IP Phone You can share a BLA number on two or m...

Page 219: ...igure BLA feature on phone A via web user interface 1 Register the account 14019833020 2 Click on Advanced and then select Draft BLA from the pull down list of Shared Line 3 Enter the desired number i...

Page 220: ...d configure BLA feature on phone B via web user interface 1 Register the account 10462190020 2 Click on Advanced and then select Draft BLA from the pull down list of Shared Line 3 Enter the desired nu...

Page 221: ...en the phone is idle Press or the Send soft key The phone will dial the entered number Press the line key when the phone is idle to enter the dialing screen Enter the desired number using the keypad a...

Page 222: ...he line key on the phone B will illuminate solid green At the meanwhile the LED indicator of the line key on the phone A will illuminate solid red indicating that there is an active call on the phone...

Page 223: ...essage s and an icon Note You can store text messages in your phone s Inbox Sentbox Outbox or Draftbox Each of the boxes can store up to 100 text messages If the number of the text messages in one box...

Page 224: ...you want to send the message to in the To field 6 Press the Send soft key to send the message or the Back soft key to cancel Sending a text message is configurable via web user interface at the path...

Page 225: ...ges by pressing the Option soft key and then select Delete All For more information refer to the above steps Note Voice Mail You can leave voice mails for someone else using the SIP T46S IP phone You...

Page 226: ...o select the proper input mode and then enter the voice mail access code e g 4 4 Press the Save soft key to accept the change or the Back soft key to cancel Note To listen to voice mails 1 When the LC...

Page 227: ...l receive a message waiting indicator MWI will be indicated in three ways a warning tone an indicator message including a voice mail icon on the LCD screen and the power indicator LED slowly flashes r...

Page 228: ...e you should also configure the voice mail number Note To configure subscribe for MWI via web user interface 1 Click on Account Advanced 2 Select the desired account from the pull down list of Account...

Page 229: ...nabled from the pull down list of Subscribe for MWI 4 Select Enabled from the pull down list of Subscribe MWI To Voice Mail 5 Enter the desired voice mail number in the Voice Mail field 6 Click Confir...

Page 230: ...User Guide for the SIP T46S IP Phone 220...

Page 231: ...e safety instructions before use The following basic safety precautions should always be followed to reduce the risk of fire electrical shock and other personal injury General Requirements Before you...

Page 232: ...on the product or use the equipment near water for example near a bathtub washbowl kitchen sink wet basement or near a swimming pool Do not tread on pull or over bend any cable in case of malfunction...

Page 233: ...roe Islands Torshavn GMT Greenland Ireland Dublin Morocco Portugal Lisboa Porto Funchal Spain Canary Islands Las Palmas United Kingdom London 1 Albania Tirane Austria Vienna Belgium Brussels Caicos Ch...

Page 234: ...arwin 10 Australia Brisbane Australia Hobart Australia Sydney Melboume Canberra Russia Vladivostok 10 30 Australia Lord Howe Islands 11 New Caledonia Noumea Russia Srednekolymsk Time 11 30 Norfolk Isl...

Page 235: ...Appendix 225 Appendix B Menu Structure...

Page 236: ...User Guide for the SIP T46S IP Phone 226...

Page 237: ...erence 145 Configuring a Record Key 177 Configuring a URL Record Key 178 Configuring an Access URL 76 Configuring an Intercom Key 181 Configuring BLA Feature on the IP Phone 208 Configuring SCA Featur...

Page 238: ...allation 20 Phone Lock 52 Phone Status 25 Phone User Interface 12 Picking up an Incoming Call of the Target Extension 183 Placing a Call from History Records 79 Placing an Intercom Call to the Target...

Page 239: ...ndex 229 Viewing the Wireless Network Information 32 Voice Mail 215 Volume 55 W Warranty vi Wallpaper 39 Web User Interface 12 WEEE Warning vii Wi Fi Protected Setup WPS 31 Wireless Network Settings 2...

Reviews: