Administrator’s Guide for SIP-T2 Series/T19(P) E2/T4 Series/T5 Series/CP860/CP920 IP Phones
182
2.
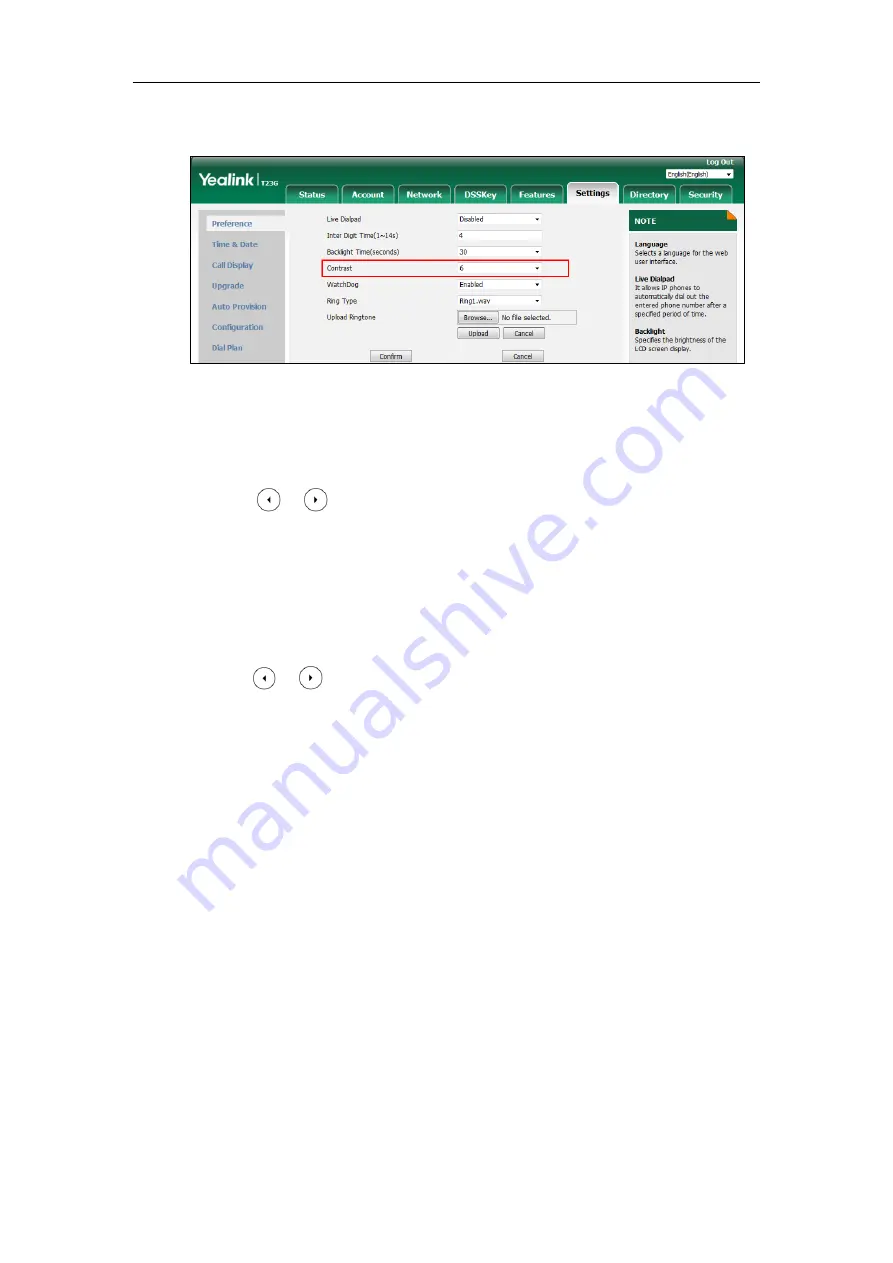
Select the desired value from the pull-down list of
Contrast
.
3.
Click
Confirm
to accept the change.
To configure contrast via phone user interface (take SIP-T23G IP phones for example):
1.
Press
Menu
->
Settings
->
Basic Settings
->
Display
->
Contrast
.
2.
Press or , or the
Switch
soft key to increase or decrease the intensity of
contrast.
3.
Press the
Save
soft key to accept the change.
To configure the contrast via phone user interface:
1.
Press
Menu
->
Basic
->
Display
->
Contrast
.
If EXP40 is not connected to the phone, the Contrast Setting screen displays "No EXP".
2.
Press or , or the
Switch
soft key to increase or decrease the intensity of contrast.
3.
Press the
Save
soft key to accept the change or the
Back
soft key to cancel.
Wallpaper
Wallpaper is an image used as the background of the IP phone and EXP50 (if connected). Users
can select an image from IP phone’s built-in background or customize wallpaper from personal
pictures. To set the custom wallpaper as the IP phone/EXP50 background, you need to upload
the custom wallpaper to the IP phone in advance. The wallpaper is only applicable to SIP-T54S,
SIP-T52S, SIP-T48G/S, SIP-T46G/S, SIP-T29G IP phones and EXP50 (connected to the SIP-
T54S/T52S IP phones) expansion module.
For SIP-T54S/T52S IP phones, you can also set a custom picture stored in your USB flash drive
as the wallpaper. In order to do this, make sure the USB flash drive containing pictures is
connected to your phone. For more information, refer to
Yealink phone-specific user guide
You can set the wallpaper for the SIP-T54S/T52S/T48G/T48S/T46G/T46S/T29G IP phones idle
screen (for T48G/S, the DSS key list is folded) and EXP50 (connected to the SIP-T54S/T52S IP
phones) expansion module.
You can also separately set the wallpaper for the SIP-T48G/S IP phones when the DSS key list is
unfolded, avoiding the display of the line key labels to be blocked by the background image.
Summary of Contents for CP860 SERIES
Page 1: ...63 ...
Page 51: ...Getting Started 25 For SIP T46G S Desk Mount Method Wall Mount Method Optional ...
Page 53: ...Getting Started 27 For SIP T42S T41S Desk Mount Method Wall Mount Method Optional ...
Page 55: ...Getting Started 29 For SIP T23P T23G Desk Mount Method Wall Mount Method Optional ...
Page 70: ...Administrator s Guide for SIP T2 Series T19 P E2 T4 Series T5 Series CP860 CP920 IP Phones 44 ...


