background image

B-18

183574-1CD

183574-1CD

Appendix B

B.1 Glossary

ArcWorld 50/50S/52/52S

Playback Operation

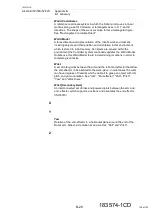
Playback is the operation by which the taught job is played back. This 

function is used to decide where to resume the playback on the start 

operation after suspending the playback and moving the cursor or 

selecting other jobs. 0: Starts operation where the cursor is located in the 

job displayed at the moment. 1: The playback continuation window 

appears. Select “YES” and the playback resumes where the cursor has 

been located when the playback suspended. If “NO” is selected, the 

playback resumes where the cursor is located in the job displayed at the 

moment. Mode switch on the Programming Pendant: PLAY – job is 

started up by [START] on the Programming Pendant and remote job is 

started by a peripheral device (external start input).

Point-to-Point

Robot motion in which a limited number of points along a projected path of 

motion is specified. The Robot moves from point to point rather than a 

continuous smooth path.

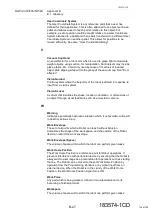
Pose

Alternative term for robot configuration, which describes the linear and 

angular position. The linear position includes the azimuth, elevation and 

range of the object. The angular position includes the roll, pitch and yaw of 

the object. See 

"Roll"

"Pitch"

 and 

"Yaw"

.

Position

The definition of an object's location in 3D space, usually defined by a 3D 

coordinate system using X, Y and Z coordinates.

Position Level

The position level is the degree of approximation of the Robot to a taught 

position. The position level can be added to move instructions MOVJ (joint 

interpolation) and MOVL (linear interpolation). If the position level is not 

set, the precision depends on the operation speed. Setting an appropriate 

level moves the Robot in a path suitable to circumferential conditions and 

the workpiece.

Position Variables

Position Variables are used in a robot program (JOB) to define a location 

in 3D space, usually defined by a 3D coordinate system using X, Y and Z 

coordinates. As it is a variable, the value can change depending on 

conditions or on information passed to the JOB.

Power and Force Limiting (PFL)

Collaborative feature that allows both the operator and robot to work in 

proximity to one another by ensuring the robot will slow down and stop 

before a contact situation occurs. In order for this feature to be safely 

implemented, functional safety and additional detection hardware must be 

used. A risk assessment shall be used determine if any additional 

safeguarding is necessary to mitigate risks within the robot system.

Presence-sensing Safeguarding Device

A device designed, constructed and installed to create a sensing field to 

detect an intrusion into such field by people, robots or objects. See 

"Sensor"

.

115 of 126

Summary of Contents for ArcWorld 50

Page 1: ...Number 183574 1CD Revision 0 ArcWorld 50 50S and 52 52S SYSTEM MANUAL Upon receipt of the product and prior to initial operation read these instructions thoroughly and retain for future reference 1 of...

Page 2: ...is copyrighted property of YASKAWA and may not be sold or redistributed in any way You are welcome to copy this document to your computer or mobile device for easy access but you may not copy the PDF...

Page 3: ...Enforcement of the Industrial Safety and Health Law Industrial Safety and Health Regulations Technical Standards for Electrical Facilities Other related laws and regulations are Occupational Safety an...

Page 4: ...ment has been tested and found to comply with the limits for a Class A digital device pursuant to part 15 of the FCC rules These limits are designed to provide reasonable protection against harmful in...

Page 5: ...ry Check all safety equipment frequently for proper operation Repair or replace any non functioning safety equipment immediately If safety equipment does not operate properly death or serious injury c...

Page 6: ...avoided WILL result in death or serious injury WARNING Indicates a potentially hazardous situation which if not avoided MAY result in death or serious injury CAUTION Indicates a hazardous situation wh...

Page 7: ...abels The following labels are attached to the ArcWorld Always follow these safety labels Fig ArcWorld Label Locations Collaborative Motion Label Collaboration is a special type of operation between a...

Page 8: ...ation for details Power Supply Labels Refer to Manufacturer s Power Supply Documentation for details Fuse Use Label This label advises to replace fuses with the same type and rating Manipulator and Co...

Page 9: ...rcWorld 50 50S and 52 52S Securely Lock Door Latches This label is supplied to remind users to have doors securely latched before applying power High Voltage Lockout Tagout Use a device to ensure that...

Page 10: ...may result in death or serious injury from unexpected motion of the Robot s arm Any person who programs teaches operates maintains or repairs the included system MUST be trained and demonstrates compe...

Page 11: ...h points Do not make unauthorized modifications Unauthorized modifications can result in injury or equipment damage and will void the warranty Inspect For problems with movement Damages to external wi...

Page 12: ...ger that will cause death or severe injury Make sure to clearly indicate when the Robot is in operation Use a pilot lamp and or an audible alert or The Robot stops operation if the operator comes clos...

Page 13: ...ry do to fire electric shock caused by contact with the Robot or other equipment Strictly observe the following precautions about clothing Always wear approved work clothes no loose fitting clothes To...

Page 14: ...the cell of all items which could interfere with the operation before releasing the EMERGENCY STOP button Death or serious injury may result from unintentional or unexpected motion Fig Release of EME...

Page 15: ...n 1910 147 29CFR Part 1910 Occupational Safety and Health Standards for General Industry OSHA Only trained personnel familiar with the operation of this equipment the operator s manuals the system equ...

Page 16: ...bot only within the specifications described in the manuals for the Robot Failure to observe this instruction may result in personal injury and or equipment damage Observe the following precautions wh...

Page 17: ...ode If operation of the Robot cannot be stopped in an emergency personal injury and or equipment damage may result Make sure that all safety protection devices are activated before starting a job in t...

Page 18: ...OP button immediately if there are problems Observe the following when performing teaching operation within the operating range Lockout by putting a lockout device on the safety fence when going into...

Page 19: ...afeguards and mode selection required for collaborative operation CAUTION Do not operate the Robot when a COOLING FAN2 ERROR appears on the Programming Pendant If operation continues with a warning me...

Page 20: ...tware for maximum performance All modifications made to the software will change the way the equipment operates and may cause death or serious injury as well as damage parts of the system Make sure al...

Page 21: ...roper connections can damage the equipment DANGER When relocating transferring or selling the Robot make sure that the Robot is always accompanied by its manuals so that all users have access to neces...

Page 22: ...ble Positioner Positioner Equipment Manual Designation Programming Pendant Character Keys Symbol Keys The keys which have characters or symbols printed on them are denoted with e g ENTER Axis Keys Num...

Page 23: ...ucts are trademarks registered trademarks or bland names for each company or corporation The indications of and TM are omitted E M ERGENCY ST O P Numeric keys Axis keys Enter key Mode switch Start but...

Page 24: ...Controller Failure to observe this instruction can cause fire mechanical failure or malfunction which may result in personal injury and or equipment damage NOTICE When disposing of or recycling the Ro...

Page 25: ...2 1 13 1 4 3 3 One Operator Station per Workstation 1 13 1 4 4 Safety Logic Implementation all cells 1 14 1 4 4 1 TEACH PLAY mode 1 14 1 4 4 2 TEACH mode 1 14 1 4 4 3 PLAY mode 1 15 1 5 Reference Doc...

Page 26: ...Door 2 9 3 Installation 3 1 3 1 Required Materials 3 1 3 1 1 Customer supplied Items 3 1 3 1 2 Recommended List of Hand Tools and Equipment 3 2 3 2 Site Preparation 3 3 3 3 Removal of System Componen...

Page 27: ...nd Errors 4 5 4 3 1 1 Error Messages 4 5 4 3 1 2 Minor Alarms 4 5 4 3 1 3 Major Alarms 4 5 4 3 2 E STOP Recovery 4 6 4 3 3 Shock Sensor Recovery 4 6 5 Maintenance 5 1 6 Alarms and Messages 6 1 6 1 Ala...

Page 28: ...pter 1 Introduction This section provides general information about the ArcWorld a list of reference documents and customer support contact information Chapter 2 Equipment Description This section pro...

Page 29: ...ArcWorld 50 50S 52 52S Chapter 7 Spare Parts This section gives a list of recommended spare parts Appendix A This Appendix includes a checklist for start up and after maintenance Appendix B This Appe...

Page 30: ...2S Controller YRC1000 YRC1000 YRC1000 YRC1000 Robot AR1440 AR1440 AR1440 AR1440 Work Stations one one two two Positioner none MH 185 none MH 185 Stationary Tables Optional not available Optional not a...

Page 31: ...ent process determines needed safeguards and interlocks While the system design safeguards the support staff it does not protect against misuse Misuse of the system includes but is not limited to clim...

Page 32: ...viding a safety zone that prevents the Robot from entering an open occupied station Fig 1 1 Robot Cell Assembly The Robot cell assembly includes the following major components see Fig 1 1 for location...

Page 33: ...1 2 Controller Base Assembly Top Hat and Interface FSU Relay Board Power Distribution Terminals Eight port Ethernet Switch Machine Safety Board External Axis Connection s Master Fuse Module Control En...

Page 34: ...not the same the Robot will correct its path in a direction required to make the current the same Digital Gas Flow Gauge Provides a readout and diagnostic for the shielding gas to confirm if flow is p...

Page 35: ...y system when there is no wire present Exhaust Hood Ideal solution for capturing fumes before they can spread throughout a facility and ensuring regulatory compliance YASKAWA has worked with RoboVent...

Page 36: ...s an interlocked door to allow access for teaching and adjustments when it is not in operation Each of the work stations includes a physical barrier with a dual channel interlock to determine when the...

Page 37: ...ding the Enable Device on the Programming Pendant 3 Set the mode switch to PLAY when done with teaching WARNING Review the Risk Assessment prior to any interactions with the Work Cell Failure to obser...

Page 38: ...ully closed the dual channel safety switch in the barrier door reports this condition to the FSU which puts the system into Standstill Monitoring mode This prevents the headstock at the corresponding...

Page 39: ...ion the Cycle Start Latched light will illuminate green It will turn off once the cycle begins Assuming there are no faults or issues during the production of the part the Robot will return to a safe...

Page 40: ...closed Station 2 valid allowed barrier door 1 not closed Allowed in only rear of cell barrier door 1 and 2 not closed If AW50S or AW52S the FSU manages when the external axes in the system are in Sta...

Page 41: ...ndition Putting the system in TEACH mode is often a first step to bypass or recover from many of the FSU s monitoring functions The next thing to do is to move the Robot or barrier door into a conditi...

Page 42: ...n is closed This Robot motion restriction is enforced by the Robot Range Limit function Also in PLAY mode the Controller monitors that the Safety Gate is closed ensuring that someone is not accessing...

Page 43: ...erview and Variations ArcWorld 50 50S 52 52S Robot Range Settings Zone 1 Teach access allowed Door position does not matter Access doors can be open Positioner can be rotated Zone 2 Access Allowed whe...

Page 44: ...n 1 4 System Overview and Variations ArcWorld 50 50S 52 52S Zone 3 Station 1 Access Allowed when Station 2 barrier door is open Station 1 closed Zone 4 Station 2 Access Allowed when Station 1 barrier...

Page 45: ...ations ArcWorld 50 50S 52 52S Zone 5 Access allowed when Station 1 and 2 are closed Axis Speed Monitor Stop Monitor Files ArcWorld 52S only Axis Speed Monitor Files Used aka Standstill Monitoring Alwa...

Page 46: ...52 52S Station 1 Stopped Headstock in Station 1 has motion monitored to 0 2 degrees of motion allows some variance when installing parts fixture Station 2 Stopped Headstock in Station 2 has motion mon...

Page 47: ...is configured with logic to control tooling power at Station 1 and Station 2 The tooling power outputs will be energized in these conditions Any EMERGENCY STOP button is NOT pressed Corresponding barr...

Page 48: ...1 21 183574 1CD 183574 1CD 1 Introduction 1 4 System Overview and Variations ArcWorld 50 50S 52 52S Safety Logic Circuit Signal Display Setup 48 of 126...

Page 49: ...ents P N 179526 1CD YRC1000 Controller Instructions P N 178642 1CD YRC1000 General Operator s Manual P N 178645 1CD YRC1000 Maintenance Manual P N 178643 1CD YRC1000 Alarm Codes Manual P N 178644 1CD...

Page 50: ...Manipulator Chap 3 Space Needed for Maintenance ArcWorld Chap 3 Connecting Power ArcWorld Chap 3 Waste Removal Controller Chap 1 Protective Measures by Users Throughout Manuals Initial Checks ArcWorl...

Page 51: ...ughout Manuals Test and Examination After Changing Components ArcWorld Chap 3 4 Instructions for Disconnecting Pendants Controller Chap 4 Instructions for Fault and Emergency Recovery ArcWorld Chap 4...

Page 52: ...for Range of Motion ArcWorld Chap 2 Relevant Standards Included Outside Manuals Instruction on Synchronized Motion ArcWorld Chap 2 Programmed Limits Controller Chap 11 Robot Suitable for Integration D...

Page 53: ...approximately 24 to 36 hours for a response to an inquiry Please have the following information ready before calling techsupport motoman com NOTICE Use e mail for routine inquiries only If there is an...

Page 54: ...ORT CELL TO WORKSPACE INSTALLING THE SYSTEM COMPONENTS CONNECT PRIMARY POWER GROUND CONNECT PROGRAMMING PENDANT TO CONTROLLER ATTACH ROBOT POSITIONER CABLES IF EQUIPPED ATTACH AIR LINES IF USED PHASE...

Page 55: ...ASE 7 TEST OPERATION OF THE CELL STEP THROUGH PROVIDED MASTER JOB CREATE NEW JOB TEACH POINTS TEST CHECK STEPS PLAYBACK JOB STOP JOB RUN MASTER JOB PHASE 7 Complete Controller Operator s Manual Sec 1...

Page 56: ...se For more information refer to the Robot Manual that came with the ArcWorld documentation package see section 1 5 2 2 Controller The Controller shown in Fig 2 1 features a Windows CE Programming Pen...

Page 57: ...ion perform programming editing maintenance and diagnostic functions and enable or disable Operator Station control of the ArcWorld For more detailed information on the pendant s programming keys prog...

Page 58: ...rogramming Pendant s LCD display goes dark after a few minutes of inactivity Press any key to restore the screen Placing the Programming Pendant s mode switch to REMOTE transfers control of the ArcWor...

Page 59: ...a job cycle when the robot is in HOME position If the CYCLE START CYCLE LATCHED button is pressed while the robot is outside HOME position the Cycle Start command does not execute until the robot ret...

Page 60: ...t 2 3 3 Operator Station POSITIONER AUTO MANUAL The POSITIONER AUTO MANUAL selector switch is used to select automatic or manual mode for the Positioner When the selector switch is in the AUTO positio...

Page 61: ...on utilizes an AC servo motor a high ratio gear reducer with integral output bearing faceplate and a cast iron housing Each Headstock also includes one weld ground brush rated at 400 amps An optional...

Page 62: ...d post flow Interchangeable feed rolls are used to accommodate different wire gauges and types For additional information on how the wire feeder is mounted to the Robot s upper arm including allowable...

Page 63: ...nnel who are nearby 2 6 2 Safety Fencing Standard The heavy gauge welded wire safety fencing that is provided with the ArcWorld encloses the entire work cell It forms a physical barrier that prevents...

Page 64: ...Fig 2 2 When pressed in this switch allows the operator to enable servo power Should the operator release the switch or grasp it too tightly however servo power is immediately disabled thus preventin...

Page 65: ...the welding torches Local electrical service Earth ground wires for the Robot and the Controller assembly Earth ground rods and or buried copper sheeting quantity and placement depth as required to ac...

Page 66: ...Safety glasses Face shield Gloves heavy duty leather recommended Levels short and long Ratchet handle with 3 4 inch hex socket Adjustable wrenches large and small Hammer drill with appropriate concre...

Page 67: ...f the work cell to provide the clearances needed for installation 2 Gather all customer supplied items and required tools refer to section 3 1 Fig 3 1 a Plan View Overhead View AW50 and AW50S WARNING...

Page 68: ...ion 3 2 Site Preparation ArcWorld 50 50S 52 52S Fig 3 1 b Plan View Front View AW50 and AW50S Fig 3 1 c Plan View P Point Envelope AW50 and AW50S 900 13 4 OPT TABLE 1149 OPENING 2584 1836 5 OPENING 38...

Page 69: ...2 Site Preparation ArcWorld 50 50S 52 52S Fig 3 1 d Plan View Positioner AW50S Fig 3 2 a Plan View Overhead View AW52 and AW52S 929 3 815 4X M12 X 1 75 X 18 0 200 0 O 700 TOOLING DIA 2190 ROBOT ENVEL...

Page 70: ...183574 1CD 3 Installation 3 2 Site Preparation ArcWorld 50 50S 52 52S Fig 3 2 b Plan View Front View AW52 and AW52S Fig 3 2 c Plan View P Point Envelope AW52 and AW52S 2965 3 2583 4 ROBOT ENVELOPE P P...

Page 71: ...3 2 Site Preparation ArcWorld 50 50S 52 52S Fig 3 2 d Plan View Positioner AW52S Fig 3 3 ArcWorld Tables 929 3 815 4X M12 X 1 75 X 18 0 200 0 O 700 TOOLING DIA ARCWORLD 50 ARCWORLD 52 ARCWORLD 50S ARC...

Page 72: ...a 3 4 inch hex socket see Fig 3 4 Figure 3 4 Typical Stabilizing Screw and Removal of A Shipping Lag Bolt 2 Discard or recycle the shipping skids and other shipping materials NOTICE If there is any eq...

Page 73: ...m 4 Once components are correctly installed anchor each component securely in place refer to the Motoman Lagging Supplement for suggestions WARNING Make sure handling equipment can lift 340 kg 750 lbs...

Page 74: ...spanner bit is provided to loosen and adjust the location of the latch assembly Shims can also be placed beneath the fence posts to make gross adjustments See Fig 3 6 for latch adjustments Fig 3 6 Do...

Page 75: ...pping and cardboard from Controller and welder 3 Inspect for any shipping damage 4 Using a forklift lift the Controller and remove from shipping skid 5 Using the system drawings place the Controller a...

Page 76: ...hen measured directly between grounded equipment and the earth ground system Be advised that specialized measuring equipment is usually required to get an accurate resistance to ground reading Consult...

Page 77: ...5 2 1 and section 3 5 2 2 A A Bolt M8 For grounding Delivered with the manipulator View A WARNING Local electrical service connection to the ArcWorld must be performed by a qualified licensed electri...

Page 78: ...he Controller refer to the Controller Manual and ArcWorld drawings and schematics that are included with the system documentation package see section 1 5 3 5 2 2 Welding Power Source Refer to the weld...

Page 79: ...5 Cable Connections 7 Rotate the Controller main power switch to ON see Fig 2 1 8 Check for correct operation of all EMERGENCY STOP buttons refer to section 2 6 3 9 Check for correct operation of the...

Page 80: ...ersonnel who are familiar with the ArcWorld operation and setup After installation of the tooling and fixtures test the Positioner for correct operation Refer to the Positioner manual for instructions...

Page 81: ...ming dependent The following operating instructions are based on one possible configuration of this system The system configuration and job structure may differ slightly from that presented here howev...

Page 82: ...the work cell access doors are closed and operating properly and the door safety interlocks are engaged 5 Make sure that all EMERGENCY STOP buttons are released EMERGENCY STOP buttons are installed a...

Page 83: ...tch The ArcWorld work cell is now ready for operation 4 2 4 Operation Cycle The following is the typical sequence of operation for the ArcWorld two station work cell after start up 1 The operator load...

Page 84: ...normal shutdown of the ArcWorld 1 Make sure that the robot is in HOME position 2 Turn off the system servo power by pressing the EMERGENCY STOP button at the Operator Station or Programming Pendant 3...

Page 85: ...l specific alarms are available in chapter 6 Alarms and Messages 4 3 1 1 Error Messages Error messages are usually the result of simple easily cleared operation errors One example of this type of erro...

Page 86: ...unt protects the torch from damage in case of an impact collision A slight deflection of the torch activates a SHOCK SENSOR signal that triggers an E STOP condition To clear the E STOP condition overr...

Page 87: ...4 7 183574 1CD 183574 1CD 4 Operation 4 3 System Recovery ArcWorld 50 50S 52 52S 6 Move the robot clear of the impact position The ArcWorld is now ready to continue operation 87 of 126...

Page 88: ...m uses a water cooled torch Do not use automotive antifreeze It typically contains additives that can clog the small cooling ports in the torch and damage sealing gaskets in the water circulator pump...

Page 89: ...The total door cycle time is expected to be under 3 0 seconds Check for mechanical failure of the door or failures in Raised or Lower switches ST1 Door Raised Not On Door was moving up longer than 5...

Page 90: ...ion which is a TEACH PLAY mode input In PLAY mode with Station 1 barrier door closed and Station 2 barrier door open Robot Range Limit File 3 swill be active if someone changed the logic or other sett...

Page 91: ...e active if someone changed the logic or other setting this alarm could occur Under normal operation this file is activated by the safety proximity signals from each barrier door If the safety proximi...

Page 92: ...parts in stock for quick replacement YASKAWA recommends the parts in the following sections be kept on hand 7 1 Robot Spare Parts Reference the supplied Robot Manual for spare part recommendations Se...

Page 93: ...mmended Spare Parts for the Electrical Interface Component YASKAWA Part Number Recommended Quantity 10 Amp Fuse 24VDC 149593 1 2 2 Amp Fuse 24VDC 703039 1 2 1 6 Amp Fuse 24VDC 703039 8 2 1 Amp Fuse 24...

Page 94: ...anuals Check Power Refer to Connections Controller Manual Check Ground Refer to Grounding in all Manuals Check Water Refer to Operation and Vendor Manuals Check Air Refer to Robot and Vendor Manuals C...

Page 95: ...ower Disconnect Refer to Turning OFF The Power Supply Controller Manual Check TEACH Mode Refer to TEACH Mode Controller Manual Check Playback Mode Refer to PLAY Mode Controller Manual Check Environmen...

Page 96: ...onized Motion More than one piece of moving synchronized equipment Programmed Limits Collaborative Operation Declaration Robot is suitable for integration that includes requirements met and types of o...

Page 97: ...2S MARKINGS INCLUDED ON EQUIPMENT Business Name Address Info Machinery Designation and Type Year Built Explosive Proof Order Number Serial Number Other Markings on Equipment Vendor Machine Designation...

Page 98: ...acteristic and the attained characteristic R15 05 2 or the precision with which a computed or calculated robot position can be attained Accuracy is normally worse than the arm s repeatability Accuracy...

Page 99: ...Robot A Robot with an arm that is broken into sections links by one or more joints Each of the joints represents a degree of freedom in the Robot system and allows translation and rotary motion Articu...

Page 100: ...g geometric shapes This system also allows the designer to test a simulated part under different stresses loads etc Carousel A rotating platform that delivers objects to a robot and serves as an objec...

Page 101: ...e the robot must exert an opposing torque at the joint of rotation Circular Motion Type A calculated path that the robot executes and is circular in shape Clamp An end effector which serves as a pneum...

Page 102: ...cular set of joint positions on the robot Note that there may be several configurations resulting in the same endpoint position Contact Sensor A device that detects the presence of an object or measur...

Page 103: ...orithms logic analysis and various other processing activities which enable it to perform See Robot Coordinate System or Frame A Coordinate System or Frame defines a reference position and orientation...

Page 104: ...Joint actuation including no transmission elements i e the link is bolted onto the output of the motor Downtime A period of time in which a robot or production line is shut down due to malfunction or...

Page 105: ...xes Each axis contributes its own range of motion EOAT See Gripper or End effector End effector An accessory device or tool specifically designed for attachment to the robot wrist or tool mounting pla...

Page 106: ...rd Kinematic Solution The calculation required to find the endpoint position given the joint positions For most robot topologies this is easier than finding the inverse kinematic solution Forward Kine...

Page 107: ...en its fingers or may use magnetization or vacuum to hold the object etc See End effector H Hand A clamp or gripper used as an end effector to grasp objects See End effector and Gripper Hand Guiding C...

Page 108: ...movement instructions INFORM The robot programming language for YASKAWA robots INFORM language allows the robot user to instruct the robot to use its basic capabilities to fulfill a defined set of exp...

Page 109: ...tic devices Safety requirements for industrial robots Part 1 Robots A robot specific safety specification that addresses manufacturer requirements functionality required safety performance hazards pro...

Page 110: ...Joint Space as each axis being at 0 degrees b The set of joint positions Joints The parts of the robot arm which actually bend or move K Kinematics The relationship between the motion of the endpoint...

Page 111: ...es the complete time to unload the last work piece and load the next one M Magnetic Detectors Robot sensors that can sense the presence of ferromagnetic material Solid state detectors with appropriate...

Page 112: ...be easily joined to or arranged with other parts or units Module Self contained component of a package This component may contain sub components known as sub modules Motion Axis The line defining the...

Page 113: ...e observing the motion of the Robot and without stopping the Robot Positions can be adjusted in both TEACH mode and PLAY mode Parallel Shift Function parallel shift function Parallel Shift refers to t...

Page 114: ...llation maintenance and protection against environmental factors also apply Pick and Place Cycle The amount of time it takes for a Robot to pick up an object and place it in a desired location then re...

Page 115: ...aw Position The definition of an object s location in 3D space usually defined by a 3D coordinate system using X Y and Z coordinates Position Level The position level is the degree of approximation of...

Page 116: ...n the most favorable position to observe control and record the desired movements in the robot s memory Proximity Sensor A non contact sensing device used to sense when objects are a short distance aw...

Page 117: ...he shape of the work envelope forms a rectangular figure See Work Envelope Reliability The probability or percentage of time that a device will function without failure over a specified time period or...

Page 118: ...obot Coordinate System will be relative to the base of the robot Note that by default the Base Coordinate System and Robot Coordinate System are the same Robot Integrator See Integrator Robot Programm...

Page 119: ...accordance with a category 2 stop in accordance with ISO 10218 1 2011 5 4 A risk assessment shall be used to determine if any additional safeguarding is necessary to mitigate risks within the robot sy...

Page 120: ...power that is in a sine wave form to a Pulse Width Modulated PWM square form delivered to the motors for motor control speed direction acceleration deceleration and braking control Servo controlled Ro...

Page 121: ...ting Function is a function to set the axis travel limit range of the Robot motion in software Speed and Separation Monitoring Collaborative feature that allows both the operator and robot to work in...

Page 122: ...rface screen on the Programming Pendant This window contains the JOB CONTENT window and teaching is conducted within this window The JOB CONTENT window contains the following items line numbers cursor...

Page 123: ...tive to the base frame Touch Sensor Sensing device sometimes used with the robot s hand or gripper which senses physical contact with an object thus giving the robot an artificial sense of touch The s...

Page 124: ...Sensor A sensor that identifies the shape location orientation or dimensions of an object through visual feedback such as a television camera W Warning Indicates a potentially hazardous situation whi...

Page 125: ...r system continually updates the World Model Robots use this World Model to aid in determining its actions in order to complete given tasks Wrist A set of rotary joints between the arm and the robot e...

Page 126: ...00076 China Phone 86 10 6788 2858 Fax 86 10 6788 2878 http www ysr motoman cn YASKAWA ELECTRIC KOREA CORPORATION 35F Three IFC 10 Gukjegeumyung ro Yeongdeungpo gu Seoul 07326 Korea Phone 82 2 784 7844...

Reviews: