–7–
EBA00047
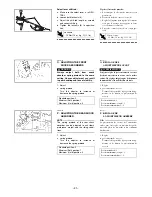
1. BATTERY
A: Before installing the battery,
charge the battery.
NOTE:
_
Refer to “ADJUSTMENTS AND
PREDELIVERY SERVICE”.
B: First, connect the positive lead
(red color lead) to the positive
terminal.
C: Connect the negative lead
(black color lead) to the nega-
tive terminal.
EBA00048
2. OWNER’S TOOL KIT
A: Secure the air gauge and the
owner’s tool kit to the rear
fender with the band.
EBA00049
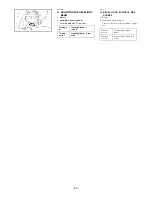
3. OWNER’S MANUAL
A: Place the owner’s manual in
the holder on the bottom of the
seat. Advise the customer of
the following when delivering
the machine.
NOTE:
The owner’s manual should
always be put in the plastic bag
and placed in the holder on the
bottom of the seat.
FBA00047
1. BATTERIE
A: Charger la batterie avant de la
monter.
N.B.:
_
Se reporter à “RÉGLAGES ET
ENTRETIENS AVANT LIVRAI-
SON”.
B: Brancher d’abord le câble positif
(rouge) à la borne positive.
C: Brancher ensuite le câble négatif
(noir) à la borne négative.
FBA00048
2. TROUSSE DE
RÉPARATION
A: Attacher le manomètre et la
trousse de réparation au garde-
boue arrière à l’aide de l’anneau
en caoutchouc.
FBA00049
3. MANUEL DU
PROPRIÉTAIRE
A: Disposer le manuel du proprié-
taire dans le compartiment situé
au dos de la selle. Informer le
client de ce qui suit au moment
de la livraison de la machine.
N.B.:
Toujours emballer le manuel du pro-
priétaire dans son sac en plastique et
le replacer dans son compartiment au
dos de la selle.
1
1
2
1
3
2
d = 6 (0.24), = 20 (0.79)
4
2
d = 6 (0.24), = 12 (0.47)
B
C
A
3
3
4
1
2
4
*
*
*
*
1
(3)-
1
2
(3)-
1
3
(3)-
1
3
2
1
A
*
*
*
1
(3)-
1
1
A
*


