background image

1

2

3

4

5

6

7

8

9

6-32

EAU1722A

PERIODIC MAINTENANCE AND ADJUSTMENT

are no open flames or sparks in 
the area, including pilot lights from 
water heaters or furnaces. Gasoline 
or gasoline vapors can ignite or 
explode, causing severe injury or 
property damage.

EAU25881

Troubleshooting

Although Yamaha scooters receive a 
thorough inspection before shipment 
from the factory, trouble may occur 
during operation. Any problem in the 
fuel, compression, or ignition systems, 
for example, can cause poor starting 
and loss of power.
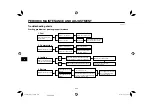
The following troubleshooting charts 
represent quick and easy procedures 
for checking these vital systems your-
self. However, should your scooter 
require any repair, take it to a Yamaha 
dealer, whose skilled technicians have 
the necessary tools, experience, and 
know-how to service the scooter prop-
erly.
Use only genuine Yamaha replace-
ment parts. Imitation parts may look 
like Yamaha parts, but they are often 
inferior, have a shorter service life and 
can lead to expensive repair bills.

EWA15141

WARNING

When checking the fuel system, do 
not smoke, and make sure there 

52S-F8199-E0_CS.indd   6-32

52S-F8199-E0_CS.indd   6-32

2011/11/16   13:07:02

2011/11/16   13:07:02

Process Black

Process Black

Summary of Contents for Xenter HW151

Page 1: ...52S F8199 E0 HW151 OWNER S MANUAL Read this manual carefully before operating this vehicle 52S F8199 E0_CS indd 1 52S F8199 E0_CS indd 1 2011 08 24 18 03 09 2011 08 24 18 03 09 ...

Page 2: ...is manual carefully before operating this vehicle This manual should stay with this vehicle if it is sold 52S F8199 E0_CS indd 2 52S F8199 E0_CS indd 2 2011 11 16 13 06 59 2011 11 16 13 06 59 Process Black Process Black ...

Page 3: ...en in this manual will help keep your scooter in the best possible condition If you have any further questions do not hesitate to contact your Yamaha dealer The Yamaha team wishes you many safe and pleasant rides So remember to put safety first Yamaha continually seeks advancements in product design and quality Therefore while this manual contains the most current product information available at ...

Page 4: ...le injury or death WARNING A WARNING indicates a hazardous situation which if not avoided could result in death or serious injury NOTICE A NOTICE indicates special precautions that must be taken to avoid damage to the vehicle or other property TIP A TIP provides key information to make procedures easier or clearer Product and specifications are subject to change without notice 52S F8199 E0_CS indd...

Page 5: ...st edition September 2011 All rights reserved Any reprinting or unauthorized use without the written permission of Yamaha Motor Taiwan Co Ltd is expressly prohibited Printed in Taiwan 52S F8199 E0_CS indd 5 52S F8199 E0_CS indd 5 2011 11 16 13 06 59 2011 11 16 13 06 59 Process Black Process Black ...

Page 6: ...and panels 6 7 Checking the spark plug 6 9 Engine oil and oil strainer 6 10 Final transmission oil 6 12 Coolant 6 13 Air filter and V belt case air filter elements 6 15 Checking the engine idling speed 6 16 Checking the throttle grip free play 6 16 Valve clearance 6 17 Tires 6 17 Cast wheels 6 19 Checking the front brake lever free play 6 19 Adjusting the rear brake lever free play 6 19 Checking t...

Page 7: ...ORAGE 7 1 Matte color caution 7 1 Care 7 1 Storage 7 3 SPECIFICATIONS 8 1 CONSUMER INFORMATION 9 1 Identification numbers 9 1 52S F8199 E0_CS indd 7 52S F8199 E0_CS indd 7 2011 11 16 13 06 59 2011 11 16 13 06 59 Process Black Process Black ...

Page 8: ... in traf fic is the predominating cause of automobile scooter accidents Many accidents have been caused by an automobile driver who did not see the scooter Mak ing yourself conspicuous appears to be very effective in reducing the chance of this type of acci dent Therefore Wear a brightly colored jacket Use extra caution when you are approaching and passing through intersections since in tersection...

Page 9: ... hazard The use of a jacket substantial shoes trousers gloves etc is effective in preventing or reducing abrasions or lacerations Never wear loose fitting clothes otherwise they could catch on the control levers or wheels and cause injury or an accident Always wear protective clothing that covers your legs ankles and feet The engine or exhaust system become very hot during or after operation and c...

Page 10: ...y as possible on both sides of the scooter to minimize imbalance or instability Shifting weights can create a sudden imbalance Make sure that accessories and cargo are securely attached to the scooter before riding Check accessory mounts and cargo restraints fre quently Properly adjust the suspen sion for your load suspension adjustable models only and check the condition and pres sure of your tir...

Page 11: ...t as possible and should be kept to a minimum Bulky or large accessories may seriously affect the stability of the scooter due to aerodynamic effects Wind may attempt to lift the scooter or the scooter may become unstable in cross winds These accessories may also cause instability when passing or being passed by large vehicles Certain accessories can dis place the operator from his or her normal r...

Page 12: ...ays wear a helmet gloves trousers tapered around the cuff and ankle so they do not flap and a bright colored jacket Do not carry too much luggage on the scooter An overloaded scooter is unstable Use a strong cord to secure any luggage to the carriers A loose load will affect the stability of the scooter and could divert your attention from the road See page 1 3 bed and choke it in a rail to pre ve...

Page 13: ...1 2 3 4 5 6 7 8 9 1 6 Q SAFETY INFORMATION 52S F8199 E0_CS indd 1 6 52S F8199 E0_CS indd 1 6 2011 11 16 13 06 59 2011 11 16 13 06 59 Process Black Process Black ...

Page 14: ... 6 21 5 Passenger footrest page 3 12 6 V belt air filter case cover page 6 15 7 Centerstand page 6 23 EAU10410 Left view 8 Air filter page 6 15 9 Carrier page 3 14 10 Rear turn signal light page 6 31 EAU10401 DESCRIPTION 1 2 3 4 5 6 7 8 9 10 52S F8199 E0_CS indd 2 1 52S F8199 E0_CS indd 2 1 2011 11 16 13 06 59 2011 11 16 13 06 59 Process Black Process Black ...

Page 15: ...age 3 8 4 Coolant reservoir page 6 13 5 Shock absorber assembly page 3 13 6 Seat page 3 11 7 Rear storage compartment page 3 13 8 Spark plug page 6 9 9 Battery page 6 25 10 Fuse box page 6 27 1 2 3 4 5 6 7 8 9 10 52S F8199 E0_CS indd 2 2 52S F8199 E0_CS indd 2 2 2011 11 16 13 07 00 2011 11 16 13 07 00 Process Black Process Black ...

Page 16: ...itch steering lock page 3 1 4 Multi function display page 3 3 5 Front storage compartment page 3 12 6 Luggage holder page 3 14 7 Right handlebar switch page 3 7 8 Front brake lever page 3 7 9 Throttle grip page 5 2 1 2 3 4 5 6 7 8 9 52S F8199 E0_CS indd 2 3 52S F8199 E0_CS indd 2 3 2011 11 16 13 07 00 2011 11 16 13 07 00 Process Black Process Black ...

Page 17: ...he engine is started and stay on until the key is turned to OFF even if the engine stalls EAU10661 OFF All electrical systems are off The key can be removed EWA10061 WARNING Never turn the key to OFF or LOCK while the vehicle is mov ing Otherwise the electrical sys tems will be switched off which may result in loss of control or an accident EAU10683 LOCK The steering is locked and all electri cal ...

Page 18: ...the key in and then turn it to OFF while still pushing it EAU11446 Coolant temperature warning light This warning light comes on if the engine overheats If this occurs stop the engine immediately and allow the engine to cool The electrical circuit of the warning light can be checked by turning the key to ON The warning light should come on for a few seconds and then go off If the warning light doe...

Page 19: ...5 Fuel level warning indicator 6 Fuel meter 7 Speedometer 8 Odometer 9 RESET button 10 Tripmeter 1 11 Ambient temperature display 12 Tripmeter 2 EWA14431 WARNING Be sure to stop the vehicle before making any setting changes to the multi function display Changing settings while riding can distract the operator and increase the risk of an accident The multi function display is equipped with the foll...

Page 20: ...traveled from that point In that case pushing the RESET button switches the display to the previous mode To reset a tripmeter select it by push ing the SELECT button until Trip or Trip F begins flashing Trip or Trip F will only flash for five seconds While Trip or Trip F is flashing push the RESET button for at least one second If you do not reset the fuel reserve tripmeter manually it will reset ...

Page 21: ...have a Yamaha dealer check the multi function display as it may be faulty V belt replacement tripmeter To reset the V belt tripmeter select it by pushing the SELECT button until V BELT and BELT TRIP are dis played and then push the RESET button for at least 3 seconds After resetting V BELT will disappear Push the SELECT button again to start the V belt tripmeter the display changes to ODO mode V b...

Page 22: ...art the clock Fuel meter The fuel meter indicates the amount of fuel in the fuel tank The display segments of the fuel meter disappear towards E Empty as the fuel level decreases When the bottom segment of the fuel meter and fuel level warn ing indicator starts flashing refuel as soon as possible When the key is turned to ON all of the display seg ments of the fuel meter will appear for a few seco...

Page 23: ... Press this switch to sound the horn EAUM1132 Start switch Push this switch while applying the front or rear brake to crank the en gine with the starter See page 5 1 for starting instructions prior to starting the engine EAUS2010 Front brake lever 1 1 Front brake lever The front brake lever is located on the right handlebar grip To apply the front brake pull this lever toward the handlebar grip Th...

Page 24: ...dditional free play can be felt in the front brake lever when the rear brake lever is be ing pulled The unified brake system does not function when the front brake is applied alone EAUT3590 Fuel tank cap 1 2 1 Fuel tank cap 2 Match marks To remove the fuel tank cap 1 Open the seat See page 3 11 2 Turn the fuel tank cap counter clockwise and pull it off To install the fuel tank cap 1 Insert the fue...

Page 25: ...water heaters and clothes dryers 2 Do not overfill the fuel tank When refueling be sure to insert the pump nozzle into the fuel tank fill er hole Stop filling when the fuel reaches the bottom of the filler tube Because fuel expands when it heats up heat from the engine or the sun can cause fuel to spill out of the fuel tank 3 Wipe up any spilled fuel im mediately NOTICE Immedi ately wipe off spill...

Page 26: ...her If knocking or pinging occurs use a gasoline of a different brand or premium unleaded fuel Use of unleaded fuel will extend spark plug life and reduce maintenance costs EAU13433 Catalytic converter This model is equipped with a cata lytic converter in the exhaust system EWA10862 WARNING The exhaust system is hot after op eration To prevent a fire hazard or burns Do not park the vehicle near po...

Page 27: ...sert the key into the main switch and then turn it counter clockwise to OPEN TIP Do not push inward when turning the key 3 Fold the seat up To close the seat 1 Fold the seat down and then push it down to lock it in place 2 Remove the key from the main switch if the scooter will be left unattended TIP Make sure that the seat is properly se cured before riding 52S F8199 E0_CS indd 3 11 52S F8199 E0_...

Page 28: ...t storage compartment 2 Button To open the storage compartment Push the button to open the storage compartment lid To close the storage compartment Push the storage compartment lid into the original position EWA10961 WARNING Do not exceed the load limit of 0 3 kg 0 7 lb for the storage compartment Do not exceed the maximum load of 179 kg 395 lb for the vehicle 52S F8199 E0_CS indd 3 12 52S F8199 E...

Page 29: ...will not get wet When washing the vehicle be careful not to let any water enter the storage compartment EAU46021 Shock absorber assembly 1 1 Shock absorber assembly EWA10221 WARNING This shock absorber assembly con tains highly pressurized nitrogen gas Read and understand the fol lowing information before handling the shock absorber assembly Do not tamper with or attempt to open the cylinder assem...

Page 30: ...ING Do not exceed the load limit of 5 kg 11 lb for the carrier Do not exceed the maximum load of 179 kg 395 lb for the vehicle EAUT3480 Luggage holder 1 1 Luggage holder Pull the luggage holder outward then move the top portion of the luggage holder as shown in order to hook items on it EWAT1090 WARNING Do not exceed the load limit of 3 kg 7 lb for the luggage holder Do not exceed the maximum load...

Page 31: ...dures and schedules described in the Owner s Manual EWA11151 WARNING Failure to inspect or maintain the vehicle properly increases the possibility of an accident or equipment dam age Do not operate the vehicle if you find any problem If a problem cannot be corrected by the procedures pro vided in this manual have the vehicle inspected by a Yamaha dealer 52S F8199 E0_CS indd 4 1 52S F8199 E0_CS ind...

Page 32: ...If soft or spongy have Yamaha dealer bleed hydraulic system Check lever free play Adjust if necessary Check brake pads for wear Replace if necessary Check fluid level in reservoir If necessary add specified brake fluid to specified level Check hydraulic system for leakage 6 19 6 22 Rear brake Check operation Lubricate cable if necessary Check lever free play Adjust if necessary 6 19 6 20 Throttle ...

Page 33: ...mooth Lubricate lever pivoting points if necessary 3 7 3 8 6 23 Centerstand Make sure that operation is smooth Lubricate pivot if necessary 6 23 Chassis fasteners Make sure that all nuts bolts and screws are properly tightened Tighten if necessary Instruments lights signals and switches Check operation Correct if necessary 3 2 3 7 52S F8199 E0_CS indd 4 3 52S F8199 E0_CS indd 4 3 2011 11 16 13 07 ...

Page 34: ...680 Starting the engine ECA10250 NOTICE See page 5 3 for engine break in instructions prior to operating the vehicle for the first time 1 Turn the key to ON The engine trouble warning light and coolant temperature warning light should come on for a few seconds then go off NOTICE If a warning light does not go off have a Yamaha dealer check its electrical circuit ECAT1170 2 Close the throttle compl...

Page 35: ...oss them with cau tion Keep in mind that braking on a wet road is much more diffi cult Ride slowly down a hill as braking downhill can be very difficult 1 Close the throttle completely 2 Apply both front and rear brakes simultaneously while gradually increasing the pressure EAU16761 Starting off TIP Before starting off allow the engine to warm up 1 While pulling the rear brake lever with your left...

Page 36: ...t operating clear ances During this period prolonged full throttle operation or any condition that might result in engine overheating must be avoided EAUT3540 0 150 km 0 90 mi Avoid prolonged operation above 1 3 throttle After every hour of operation stop the engine and then let it cool for five to ten minutes Vary the engine speed from time to time Do not operate the engine at one set throttle po...

Page 37: ...become very hot park in a place where pedestri ans or children are not likely to touch them and be burned Do not park on a slope or on soft ground otherwise the ve hicle may overturn increasing the risk of a fuel leak and fire Do not park near grass or other flammable materials which might catch fire 52S F8199 E0_CS indd 5 4 52S F8199 E0_CS indd 5 4 2011 11 16 13 07 00 2011 11 16 13 07 00 Process ...

Page 38: ...f you are not familiar with vehicle service have a Yamaha dealer per form service EWA15122 WARNING Turn off the engine when perform ing maintenance unless otherwise specified A running engine has moving parts that can catch on body parts or clothing and electrical parts that can cause shocks or fires Running the engine while ser vicing can lead to eye injury burns fire or carbon monox ide poisonin...

Page 39: ...rovided in the owner s tool kit are intended to as sist you in the performance of preven tive maintenance and minor repairs However additional tools such as a torque wrench may be necessary to perform certain maintenance work correctly TIP If you do not have the tools or expe rience required for a particular job have a Yamaha dealer perform it for you 52S F8199 E0_CS indd 6 2 52S F8199 E0_CS indd ...

Page 40: ...tools data and technical skills EAU46920 Periodic maintenance chart for the emission control system NO ITEM CHECK OR MAINTENANCE JOB ODOMETER READING ANNUAL CHECK 1000 km 600 mi 6000 km 3500 mi 12000 km 7000 mi 18000 km 10500 mi 24000 km 14000 mi 1 Fuel line Check fuel hoses for cracks or damage 2 Spark plug Check condition Clean and regap Replace 3 Valves Check valve clearance Adjust 4 Fuel injec...

Page 41: ... 5 Rear brake Check operation and adjust brake lever free play Replace brake shoes Whenever worn to the limit 6 Brake hose Check for cracks or damage Check for correct routing and clamping Replace Every 4 years 7 Wheels Check runout and for damage 8 Tires Check tread depth and for damage Replace if necessary Check air pressure Correct if necessary 9 Wheel bearings Check bearing for looseness or da...

Page 42: ...10 When the oil change indicator comes on 5000 km 3000 mi after the initial 1000 km 600 mi and every 6000 km 3500 mi thereafter Check oil level and vehicle for oil leakage Every 3000 km 1800 mi 18 Engine oil strainer Clean 5000 km 3000 mi after the initial 1000 km 600 mi and every 6000 km 3500 mi thereafter 19 Cooling system Check coolant level and vehicle for coolant leakage Change with ethylene ...

Page 43: ...brake fluid level and fill the reservoir as required Every two years replace the internal components of the brake master cylinder and caliper and change the brake fluid Replace the brake hose every four years and if cracked or damaged NO ITEM CHECK OR MAINTENANCE JOB ODOMETER READING ANNUAL CHECK 1000 km 600 mi 6000 km 3500 mi 12000 km 7000 mi 18000 km 10500 mi 24000 km 14000 mi 23 Moving parts an...

Page 44: ...T3560 Cowling A To remove the cowling 1 Remove the cowling screws and bolts 1 1 Cowling A 2 Disconnect the coupler shown and then take the cowling off 1 1 Coupler To install the cowling 1 Connect the coupler 2 Place the cowling in the original position 3 Install the cowling screws and bolts EAUT3600 Panel A To remove the panel 2 1 1 Luggage holder 2 Panel A 1 Remove the luggage holder by removing ...

Page 45: ... and quick fas tener and then take the panel off 1 2 1 Panel B 2 Quick fastener To install the panel Place the panel in the original posi tion and then install the quick fasten er and screws EAUT3620 Panel C To remove the panel 1 Open the seat See page 3 11 2 Remove the screws and then pull the panel off as shown 1 1 Panel C To install the panel 1 1 Projection 1 Insert the projections on the pan e...

Page 46: ... 035 in 2 Clean the surface of the spark plug gasket and its mating sur face and then wipe off any grime from the spark plug threads 3 Install the spark plug with the spark plug wrench and then tighten it to the specified torque Tightening torque Spark plug 13 Nm 1 3 m kgf 9 4 ft lbf EAUT1835 Checking the spark plug The spark plug is an important engine component which is easy to check Since heat ...

Page 47: ...check the oil level TIP The engine oil should be between the minimum and maximum level marks 4 If the engine oil is below the mini mum level mark add sufficient oil of the recommended type to raise it to the correct level 5 Insert the dipstick into the oil filler hole and then tighten the oil filler cap To change the engine oil and clean the oil strainer 1 Start the engine warm it up for several m...

Page 48: ... lbf 8 Refill with the specified amount of the recommended engine oil and then install and tighten the oil filler cap Recommended engine oil See page 8 1 Oil change quantity 1 10 L 1 16 US qt 0 97 Imp qt ECA11670 NOTICE Do not use oils with a diesel specification of CD or oils of a higher quality than specified In addition do not use oils la beled ENERGY CONSERVING II or higher Be sure no foreign ...

Page 49: ...ication chart 1 Start the engine warm up the fi nal transmission oil by riding the scooter for several minutes and then stop the engine 2 Place the scooter on the center stand 3 Place an oil pan under the final transmission case to collect the used oil 9 Start the engine and then let it idle for several minutes while checking it for oil leakage If oil is leaking immediately turn the en gine off an...

Page 50: ...ified in the periodic maintenance and lubrication chart 1 Place the vehicle on the center stand TIP The coolant level must be checked on a cold engine since the level varies with engine tem perature Make sure that the vehicle is po sitioned straight up when check ing the coolant level A slight tilt to the side can result in a false 1 1 Final transmission oil drain bolt 6 Install the final transmis...

Page 51: ...ness of the coolant will be reduced ECA10472 Coolant reservoir capacity 0 25 L 0 26 US qt 0 22 Imp qt 6 Close the seat EAU33031 Changing the coolant The coolant must be changed at the intervals specified in the periodic maintenance and lubrication chart Have a Yamaha dealer change the coolant WARNING Never attempt to remove the radiator cap when the engine is hot EWA10381 reading 2 Open the seat S...

Page 52: ...and then install it Cleaning the V belt case air filter element 1 Remove panel B See page 6 8 2 Remove the V belt air filter case cover by removing the bolts 1 1 V belt air filter case cover 3 Pull the air filter element out and then clean it with compressed air NOTICE To avoid damaging the air filter element handle it gently and carefully and do not twist it ECA10521 EAUT3550 Air filter and V bel...

Page 53: ...nd if necessary have a Yamaha dealer adjust it EAU44734 Checking the engine idling speed Check the engine idling speed and if necessary have it corrected by a Yamaha dealer Engine idling speed 1600 1800 r min 1 1 V belt case air filter element 4 Insert the element into the air fil ter case 5 Install the V belt air filter case cover by installing the bolts 6 Install the panel 52S F8199 E0_CS indd 6...

Page 54: ...essure should be checked and if necessary adjusted before each ride EWA10503 WARNING Operation of this vehicle with im proper tire pressure may cause severe injury or death from loss of control The tire air pressure must be checked and adjusted on cold tires i e when the tempera ture of the tires equals the am bient temperature The tire air pressure must be adjusted in accordance with the riding s...

Page 55: ...tires decreases riding stability and can lead to loss of control The replacement of all wheel and brake related parts includ ing the tires should be left to a Yamaha dealer who has the Tire inspection 1 2 1 Tire tread depth 2 Tire sidewall The tires must be checked before each ride If the center tread depth reaches the specified limit if the tire has a nail or glass fragments in it or if the sidew...

Page 56: ...erate the vehicle until the brake system has been checked or repaired by a Yamaha dealer EAU21962 Cast wheels To maximize the performance dura bility and safe operation of your ve hicle note the following points regard ing the specified wheels The wheel rims should be checked for cracks bends warp age or other damage before each ride If any damage is found have a Yamaha dealer replace the wheel Do...

Page 57: ...t brake pads and the rear brake shoes must be checked for wear at the intervals specified in the periodic maintenance and lubrication chart EAU22420 Front brake pads 2 3 1 1 Brake pad wear indicator groove 2 Brake pad 3 Brake disc Each front brake pad is provided with a wear indicator groove which al lows you to check the brake pad wear without having to disassemble the brake To check the brake pa...

Page 58: ... vapor lock ECA17640 NOTICE Brake fluid may damage painted surfaces or plastic parts Always clean up spilled fluid immediately As the brake pads wear it is normal for the brake fluid level to gradually EAU32345 Checking the brake fluid level 1 1 Minimum level mark Before riding check that the brake fluid is above the minimum level mark Check the brake fluid level with the top of the reservoir leve...

Page 59: ... engine oil EAU22721 Changing the brake fluid Have a Yamaha dealer change the brake fluid at the intervals specified in the TIP after the periodic maintenance and lubrication chart In addition have the oil seals of the brake master cyl inder and caliper as well as the brake hose replaced at the intervals listed below or whenever they are damaged or leaking Oil seals Replace every two years Brake h...

Page 60: ...icated by a Yamaha dealer at the intervals specified in the periodic maintenance and lubrication chart EAU23114 Checking and lubricating the throttle grip and cable The operation of the throttle grip should be checked before each ride In addition the cable should be lubri cated by a Yamaha dealer at the inter vals specified in the periodic mainte nance chart The throttle cable is equipped with a r...

Page 61: ...n Check the inner tubes for scratches damage and excessive oil leakage To check the operation 1 Place the vehicle on a level sur face and hold it in an upright position WARNING To avoid injury securely support the ve hicle so there is no danger of it falling over EWA10751 2 While applying the front brake push down hard on the handle bars several times to check if the front fork compresses and re b...

Page 62: ...ic maintenance and lubrication chart If there is play in the wheel hub or if the wheel does not turn smoothly have a Yamaha dealer check the wheel bearings EAU45511 Checking the steering Worn or loose steering bearings may cause danger Therefore the opera tion of the steering must be checked as follows at the intervals specified in the periodic maintenance and lubrica tion chart 1 Place the vehicl...

Page 63: ...in mind that the battery tends to discharge more quickly if the vehicle is equipped with optional electrical accessories ECA16521 NOTICE To charge a VRLA Valve Regu lated Lead Acid battery a special constant voltage battery charger is required Using a conventional battery charger will damage the battery To store the battery 1 If the vehicle will not be used for more than one month remove the batte...

Page 64: ...nd possibly a fire EWA15131 EAUT3750 Replacing the fuses 1 1 Fuse box The fuse box is located beside the battery compartment behind panel A See page 6 7 If a fuse is blown replace it as follows 1 Turn the key to OFF and turn off the electrical circuit in question ECA16530 NOTICE Always keep the battery charged Storing a discharged battery can cause permanent battery damage 52S F8199 E0_CS indd 6 2...

Page 65: ...not use a headlight bulb of a wattage higher than specified 1 Remove cowling A together with the headlight unit See page 6 7 2 Remove the bulb cover and then disconnect the headlight coupler 1 1 Headlight bulb cover 1 2 3 1 Headlight coupler 2 Headlight bulb holder 3 Headlight bulb Specified fuses Main fuse 20 A Ignition fuse 7 5 A Signaling system fuse 15 A Headlight fuse 15 A Backup fuse 7 5 A T...

Page 66: ...See page 6 7 2 Remove the socket together with the bulb by turning it counter clockwise 1 1 Turn signal light bulb socket 3 Unhook the headlight bulb holder and then remove the burnt out bulb 4 Place a new headlight bulb into position and then secure it with the bulb holder 5 Connect the coupler and then in stall the headlight bulb cover 6 Install the cowling together with the headlight unit 7 Hav...

Page 67: ...ll the socket together with the bulb by turning it clockwise 6 Install the cowling 1 1 Turn signal light bulb 3 Remove the burnt out bulb by pushing it in and turning it coun terclockwise 4 Insert a new bulb into the socket push it in and then turn it clock wise until it stops ECAU0080 NOTICE If a turn signal light bulb of differ ent wattage than recommended is used the turn signal light flashing ...

Page 68: ...lace the bulb EAUT3670 Replacing a rear turn signal light bulb 1 Remove the turn signal lens by removing the screw 1 1 Rear turn signal light bulb 2 Remove the burnt out bulb by pushing it in and turning it coun terclockwise 3 Insert a new bulb into the socket push it in and then turn it clock wise until it stops ECAU0080 NOTICE If a turn signal light bulb of differ ent wattage than recommended is...

Page 69: ...and loss of power The following troubleshooting charts represent quick and easy procedures for checking these vital systems your self However should your scooter require any repair take it to a Yamaha dealer whose skilled technicians have the necessary tools experience and know how to service the scooter prop erly Use only genuine Yamaha replace ment parts Imitation parts may look like Yamaha part...

Page 70: ... Remove the spark plug and check the electrodes 3 Ignition Wipe off with a dry cloth and correct the spark plug gap or replace the spark plug Have a Yamaha dealer check the vehicle The engine does not start Have a Yamaha dealer check the vehicle The engine does not start Check the battery Operate the electric starter 4 Battery The engine turns over quickly The engine turns over slowly The battery ...

Page 71: ...cap while turning it counterclockwise and then remove the cap Wait until the engine has cooled Check the coolant level in the reservoir and radiator The coolant level is OK The coolant level is low Check the cooling system for leakage Have a Yamaha dealer check and repair the cooling system Add coolant See TIP Start the engine If the engine overheats again have a Yamaha dealer check and repair the...

Page 72: ...rmance Before cleaning 1 Cover the muffler outlet with a plastic bag after the engine has cooled down 2 Make sure that all caps and cov ers as well as all electrical cou plers and connectors including the spark plug cap are tightly installed 3 Remove extremely stubborn dirt like oil burnt onto the crankcase with a degreasing agent and a brush but never apply such products onto seals gaskets and wh...

Page 73: ...lishing com pound after washing After normal use Remove dirt with warm water a mild detergent and a soft clean sponge and then rinse thoroughly with clean water Use a toothbrush or bottlebrush for hard to reach areas Stubborn dirt and insects will come off more easily if the area is covered with a wet cloth for a few minutes before cleaning After riding in the rain near the sea or on salt sprayed ...

Page 74: ... but treat them with a suitable care product Avoid using abrasive polishing compounds as they will wear away the paint TIP Consult a Yamaha dealer for ad vice on what products to use Washing rainy weather or humid climates can cause the headlight lens to fog Turning the headlight on for a short period of time will help remove the moisture from the lens EAU36563 Storage Short term Always store your...

Page 75: ...ound the spark plug elec trodes while turning the en gine over EWA10951 4 Lubricate all control cables and the pivoting points of all levers and pedals as well as of the sidestand centerstand 5 Check and if necessary correct the tire air pressure and then lift the scooter so that both of its wheels are off the ground Alter natively turn the wheels a little every month in order to prevent the tires...

Page 76: ...d engine oil grade API service SG type or higher JASO standard MA Engine oil quantity Periodic oil change 1 10 L 1 16 US qt 0 97 Imp qt Final transmission oil Type SAE 10W 30 type SE motor oil Quantity 0 20 L 0 21 US qt 0 18 Imp qt Cooling system Coolant reservoir capacity up to the maximum level mark 0 25 L 0 26 US qt 0 22 Imp qt Air filter Air filter element Oil coated paper element Fuel Recomme...

Page 77: ...n Right hand operation Specified brake fluid DOT 4 Rear brake Type Drum brake Operation Left hand operation Front suspension Type Telescopic fork Spring shock absorber type Coil spring oil damper Wheel travel 100 0 mm 3 94 in Rear suspension Type Unit swing Spring shock absorber type Coil spring gas oil damper Wheel travel 92 0 mm 3 62 in Electrical system Ignition system TCI Charging system AC ma...

Page 78: ... trouble warning light 12 V LED x 1 Fuses Main fuse 20 0 A Headlight fuse 15 0 A Signaling system fuse 15 0 A Ignition fuse 7 5 A Backup fuse 7 5 A Spare fuse 20 0 A x 1 Spare fuse 7 5 A x 1 Spare fuse 15 0 A x 1 52S F8199 E0_CS indd 8 3 52S F8199 E0_CS indd 8 3 2011 11 16 13 07 02 2011 11 16 13 07 02 Process Black Process Black ...
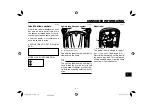
Page 79: ...e identification number 2 Front turn signal light The vehicle identification number is stamped into the frame TIP The vehicle identification number is used to identify your motorcycle and may be used to register your motorcy cle with the licensing authority in your area EAU26490 Model label 1 1 Model label The model label is affixed to the bot tom of the seat See page 3 11 Record the information o...

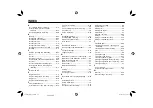
Page 80: ...tor lights and warning lights 3 2 L License plate light 6 31 Luggage holder 3 14 M Maintenance emission control system 6 3 Maintenance and lubrication periodic 6 4 Main switch steering lock 3 1 Matte color caution 7 1 Model label 9 1 Multi function display 3 3 P Parking 5 4 Part locations 2 1 Passenger footrest 3 12 R Rear brake lever free play adjusting 6 19 S Safe riding points 1 5 Safety inform...

Page 81: ...INDEX 52S F8199 E0_CS indd 9 3 52S F8199 E0_CS indd 9 3 2011 11 16 13 07 02 2011 11 16 13 07 02 Process Black Process Black ...
Page 82: ...INDEX 52S F8199 E0_CS indd 9 4 52S F8199 E0_CS indd 9 4 2011 11 16 13 07 02 2011 11 16 13 07 02 Process Black Process Black ...
Page 83: ...INDEX 52S F8199 E0_CS indd 9 5 52S F8199 E0_CS indd 9 5 2011 11 16 13 07 02 2011 11 16 13 07 02 Process Black Process Black ...
Page 84: ...PRINTED IN TAIWAN 2011 11 0 8 1 E 52S F8199 E0_CS indd 9 6 52S F8199 E0_CS indd 9 6 2011 08 24 18 03 12 2011 08 24 18 03 12 ...

Reviews: