background image

Auto Accompaniment

56

Changing the Accompaniment Section

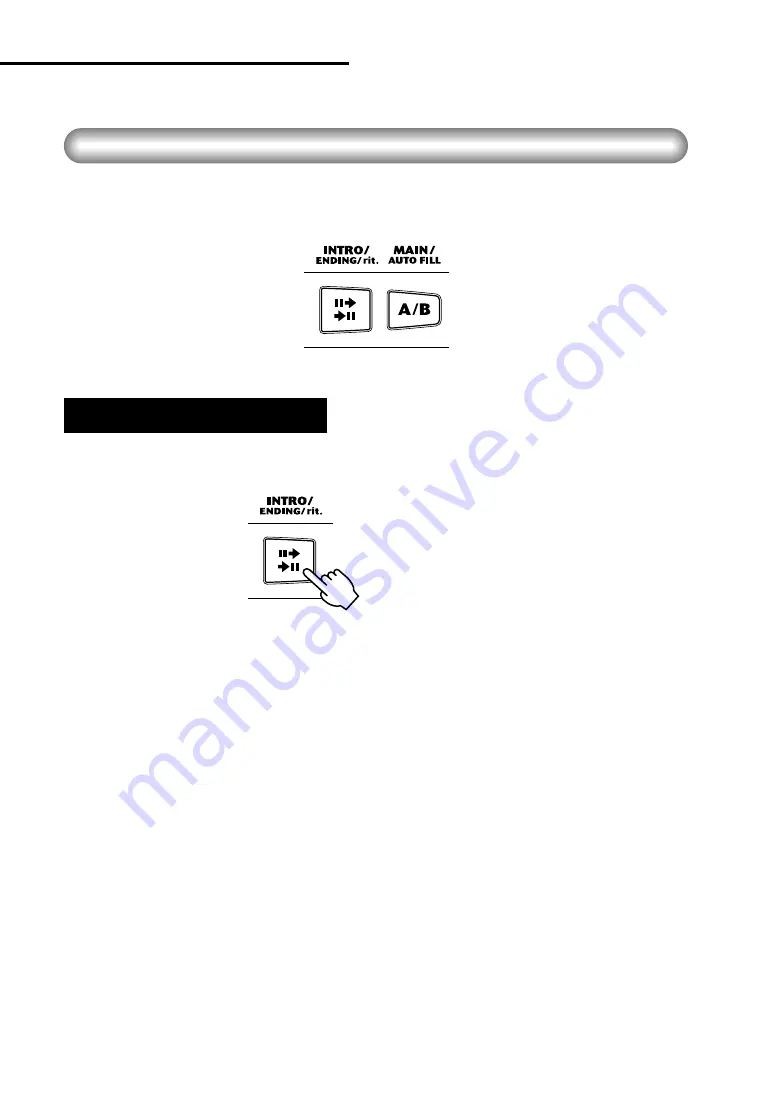
Accompaniment consists of Intro, Main A/B (Fill-in), and Ending sections. Using differ-
ent sections based on the structure of songs enables you to enhance musical 
expression.

Press the [

INTRO/ENDING

]  button before you start playing to select an Intro section. 

The Intro section is followed by the Main section.

Press the [

MAIN/AUTO FILL

] button before pressing the [

START/STOP

] button to spec-

ify the Main section that follows the Intro section.
To cancel the Intro section, press the [

INTRO/ENDING

] button again. The display indi-

cates the Main section (A or B) that will be played when the song starts.

Intro

Press the button before 
the rhythm part starts.

Summary of Contents for PortaTone EZ-20

Page 1: ...Owner s Manual ...

Page 2: ...disposal of products that contain lead batteries plastics etc If your dealer is unable to assist you please contact Yamaha directly NAME PLATE LOCATION The name plate is located on the bottom of the product The model number serial number power requirements etc are located on this plate You should record the model number serial number and the date of purchase in the spaces provided below and retain...

Page 3: ...akers or different types of batteries from the same maker since this can cause overheating fire or bat tery fluid leakage Do not dispose of batteries in fire Do not attempt to recharge batteries that are not intended to be charged When the batteries run out or if the instrument is not to be used for a long time remove the batteries from the instrument to prevent possible leakage of the battery flu...

Page 4: ...cher Select from any one of 100 songs on the EZ 20 and learn the left and right hand parts independently at first then together Lesson features three easy steps that help you master each song Timing Waiting and Minus One Grade Talking pages 38 and 39 The EZ 20 also has the Grade and Talking features Grade is a virtual teacher evaluating your practice sessions and rating your performance The conven...

Page 5: ...l in patterns Large custom LCD gives you easy at a glance confirmation of all important settings as well as chord and note indications 100 songs for your listening enjoyment or for use with the sophisticated learning tools of the Yamaha Education Suite Convenient control over accompaniment Styles including Tempo Tap Tempo and independent Accompaniment Volume Multi Pads for instantly adding special...

Page 6: ...usting the Tempo 30 Tap Function 30 Song Volume Level 31 Switching the Light Guide On and Off 32 Multi Pads 33 A B Repeat 34 Song Lesson 35 Using the Lesson Feature 35 ABC DoReMi Guide 37 Grade 38 Talking 39 Portable Grand 40 Using the Metronome 40 Setting a Tempo 40 Setting the Time Signature of the Metronome 41 Adjusting the Metronome Vol ume 41 Playing Voices 42 Selecting a Voice 42 Playing a V...

Page 7: ...nctions 58 About MIDI 58 MIDI Terminals 58 How Can MIDI be Used 59 Troubleshooting 60 Voice List 61 Sound Effects Drum Kit List 63 Style List Multipads 64 MIDI Implementation Chart 66 Specifications 69 Index 70 ...

Page 8: ...rt six 1 5 volt D size R20P LR20 or equivalent batteries as shown in the illustration making sure that the positive and negative termi nals are properly aligned 3 Replace the lid When the batteries run low and the battery voltage drops below a cer tain level the EZ 20 may not sound or function properly As soon as this happens replace them with a com plete set of six new batteries heeding the cauti...

Page 9: ...ontrols while playing the instrument to set the desired listening level This feature lets you use an optional foot switch Yamaha FC4 or FC5 to sustain the sound of the voices The footswitch func tions the same way as a damper pedal on an acoustic piano press and hold down the footswitch as you play the keyboard to sus tain the sound Make sure that the footswitch plug is properly connected to the S...

Page 10: ...46 0 Dict DICTIONARY button 52 A LESSON L Left and R Right buttons 35 B Numeric keypad ON and OFF buttons 25 C ACMP ON OFF A B REPEAT button 47 34 D SYNC START PAUSE button 47 29 E START STOP button 29 F INTRO ENDING rit REW button 56 29 G MAIN AUTO FILL FF button 57 29 H TEMPO TAP button 30 I LESSON 1 3 button 35 J ABC DoReMi button 43 K LIGHT ON OFF button 32 Rear Panel L MIDI IN OUT terminals 9...

Page 11: ...11 L N O M I J K 7 8 9 0 B A ...

Page 12: ... 001 starts playing When the song is complete the subsequent songs 002 003 start playing sequentially 2 Stop the Demo song Want to find out more See page 28 If you do not wish to play the Demo songs when you press the DEMO button turn on the power to the EZ 20 while pressing and holding down the DEMO button To activate the Demo playback function turn on the power to the EZ 20 in the normal manner ...

Page 13: ...uett J Krieqer 38 Liebesträume Nr 3 39 Blumenlied 40 Valse Des Fleurs From The Nutcracker 41 Air On The G String 42 Die Forelle 43 Marche From The Nutcracker 44 Humoreske 45 Pizzicato Polka 46 Ave Maria F Schubert 47 Ave Maria C Gounod 48 Wiegenlied B Flies 49 Wiegenlied F Schubert 50 Wiegenlied J Brahms No Song Name Duet 51 Ten Little Indians 52 Scarborough Fair 53 Wenn Ich Ein Vöglein Wär 54 To ...

Page 14: ...t 1 Select Timing Waiting or Minus One and start the lesson When the power of the EZ 20 is turned on the song of 003 Linus And Lucy and the right hand part are selected Lesson 1 Timing This step lets you work on the timing of the notes In Lesson 1 the particular note you play on the keyboard is unimportant The EZ 20 checks your timing and how rhythmically tight your playing is 2 1 ...

Page 15: ...s playing in tempo 2 When you re finished stop the Lesson Want to find out more See page 35 The EZ 20 has a built in evaluation function that monitors your practicing and like a real teacher tells you how well you did each practice Four grades are assigned depending on your performance Try Again Good Very Good and Excellent Want to find out more See page 38 This feature talks to you through the sp...

Page 16: ... automati cally reset the entire EZ 20 for piano play 1 Press the PORTABLE GRAND button The song and style are also set for piano performance 2 Play the keyboard Want to find out more See page 40 Playing along with the Metronome 1 Press the METRONOME button Want to find out more See page 40 1 1 2 1 1 ...

Page 17: ...he ABC DoReMi again 2 Play the keyboard Want to find out more See page 43 Selecting and Playing Other Voices The EZ 20 has a huge total of 100 dynamic and realistic instrument voices Let s try a few of them out now 1 Press the VOICE button 2 Select a voice 3 Play the keyboard Want to find out more See page 42 ABC DoReMi Off ...

Page 18: ... melodies and you ll sound like an entire band For more information on playing proper chords for the auto accompaniment see Using Auto Accompaniment Multi Finger ing on page 50 and Looking up Chords in the dictionary on page 52 1 Press the STYLE button 2 Select a style Refer to the Style List on page 64 6 2 1 3 4 7 Left hand Right hand Auto accompaniment for example bass guitar drums Melody Accomp...

Page 19: ...ay a chord with your left hand The auto accompaniment starts as soon as you play the keyboard Want to find out more See page 53 6 Select a section The auto accompaniment has four sections Intro Main A B and Ending 7 Stop the auto accompaniment Want to find out more See page 46 ...

Page 20: ...onary function teaches you how to play chords by showing you the individual notes In the example below we ll learn how to play a GM7 chord 1 Press the Dict button 15 Keys for entering the chord type A2 Bb3 Keys for entering the chord root C4 B4 Chord detection key range C1 F 2 G M7 Root note Chord type Example ...

Page 21: ... type of the chord in this case M7 4 Play the chord by pressing the keys lighted up The chord name flashes and a congratulations melody is played when the chord is played properly 5 To leave the Dictionary function press the Dict button again Want to find out more See page 52 ...

Page 22: ...DBY position electricity is still flowing to the in strument at the minimum level When you are not using the EZ 20 for a long time make sure you unplug the AC power adaptor from the wall AC outlet and or re move the batteries from the instrument Rotate the MASTER VOLUME dial Rotating the dial counter clockwise lowers the volume level Rotating the dial clockwise raises the volume level Panel Displa...

Page 23: ...sing and holding down the button incre ments decrements the value continuously For some functions pressing both buttons simultaneously restores the default setting ABC DoReMi GRADE TALKING TRANSPOSE TUNING ACMP SONG VOLUME METRONOME VOLUME Overall settings The OVERALL button en able you to make EZ 20 s global settings E g Transpose setting If you press the OVERALL button located in the upper left ...

Page 24: ...elects a voice to play on the keyboard Select a style for accompaniment Song Voice Select a voice using the numeric keypad The selected voice replaces the song s original melody voice If you select a song or accompaniment then select a voice the EZ 20 indicates the following Press the START STOP button to start the song Press the START STOP button to start the accompaniment Style Voice Select a vo...

Page 25: ...he number directly use the numeric keypad 0 9 For example to select Voice 002 HnkyTonk press 0 0 then 2 on the numeric keypad If the first digit is 0 you can skip pressing 0 If the first and second digits are both 0 you can also skip pressing 0 twice Pressing the button once increments the number by one Pressing the button once decrements the number by one Pressing and holding down the button incr...

Page 26: ...Panel Display Indications 26 ABC DoReMi indicators These show the guide voice ABC or DoReMi for the Lesson function Accompaniment On indicator This appears when the auto accompaniment has been turned on ...

Page 27: ...e notated within the score a note that is one octave lower or higher will be indicated on the score along with 8va at the top or bottom of the score Due to the limitation of the screen some notes in a chord may not be displayed Measure indicator The measure numbers of a song or accompaniment are displayed Fingering guide During the Lesson this guide suggests a fingering for playing the song Chord ...

Page 28: ...e g Piano Classical etc See page 13 that contains the selected song Turning the power on while pressing and holding down the DEMO button will dis able the Demo song playback function To enable the Demo song playback turn the power on in the normal manner Press the START STOP button or the DEMO button to stop Demo playback Selecting and Playing a Song Press the SONG button Song number Song name Ind...

Page 29: ...ART STOP button Other controls FF button Pressing this button during playback will fast forward the song Pressing this button while playback is stopped will increment the measure number REW button Press this button during playback will rewind the song No sound will be heard at this time Pressing this button while playback is stopped will decrement the measure number PAUSE button Pressing this butt...

Page 30: ...he numeric keypad or buttons to change the tempo value You can instantly restore the default setting by pressing both buttons When Tempo is selected You can set your own tempo intuitively Press the TEMPO TAP button four times for a four beat song and three times for a three beat song at a tempo at which you would like to play The Tap function is also available during song playback Tap Function ...

Page 31: ... button repeatedly until SONG VOL appears in the display Press the numeric keypad or buttons to set the song volume 000 127 You can instantly restore the default setting of 110 by pressing both but tons simultaneously When Song Volume is selected You can set the volume level of the selected song Current song volume ...

Page 32: ...board guide during song playback or while you are using the Lesson or the Dictionary function Press the LIGHT ON OFF button to turn the Light Guide on or off CAUTION Playing while looking at the lights for a long period of time may cause eye strain and stiff neck shoulders For your health and comfort we recommend that you take a ten minute break for every hour ...

Page 33: ...yboard range of C1 F 2 only when you play back songs that sup port the function Select a song that supports the Multi Pads function Songs 1 7 9 20 29 50 and 60 100 support the function Start the song Play the Multi Pads Press the Multi Pads keys C1 F 2 during the song playback The Multi Pads produce the same sound in all songs that support the function The Multi Pads function is disabled while son...

Page 34: ... As the song continues playing press the A B REPEAT button once again at the ending point to be repeated The selected phrase repeats indefinitely until stopped If you re repeat practicing a particularly difficult section try slowing down the Tempo to an appropriate speed to make it easier to play and master the part You may also want to slow down the Tempo while setting the A and B points this mak...

Page 35: ...ect the part you wish to work on left right or both If you want to work on the right hand part press the R button to work on the left press the L button Press the L and R buttons simultaneously to work with both hands The icon of the selected hand s appears Start the Lesson When you press one of the LESSON 1 3 buttons the Lesson song starts The display indicates the notes to play and the Light Gui...

Page 36: ...sson 1 Timing This lesson step lets you practice just the timing of the notes any note can be used The mel ody does not sound unless you play in rhythm Lesson 2 Waiting In this lesson step the EZ 20 waits for you to play the correct notes before continuing play back of the song When you play the correct note the next note to play is indicated Also the EZ 20 can sing the next note to play using A B...

Page 37: ...20 sings the next note to play using A B C or Do Re Mi in Lesson 2 To change the guide voice ABC or DoReMi press the ABC DoReMi button page 43 Press the OVERALL button to select ABC DoReMi Press the buttons to turn the ABC DoReMi Guide on or off ABC Guide is turned on ...

Page 38: ...ur grades are assigned depending on your performance Try Again Good Very Good and Excellent When the Talking function page 39 is on the EZ 20 also announces your grade Press the OVERALL button repeatedly to select GRADE Press the buttons to turn the Grade on or off The EZ 20 tells you your grade via the LCD Light Guide and the Talking function After displaying your grade the EZ 20 resumes the Less...

Page 39: ...e titles of the Lesson steps and the names of certain functions Press the OVERALL button repeatedly to select TALKING Press the buttons to turn the Talking on or off The Talking function includes the following announcements Dictionary LESSON 1 3 Try Again Good Very Good Excellent Talking off Talking on ...

Page 40: ...hm sound Using the Metronome Press the METRONOME button to play the Metronome in tempo with the accompa niment You can use this feature for your piano practice A high click sounds at every first beat of the measures To turn the Metronome off press the METRONOME button again To change the tempo press the TEMPO TAP button and use the numeric keypad or buttons to change the value See page 30 To resto...

Page 41: ...st the volume of the Metronome sound independently of the other EZ 20 sounds The volume range is 000 127 1 Press the OVERALL button repeatedly to select METRONOME VOLUME 2 Press the numeric keypad or buttons to set the desired Metronome Volume value To restore the default Metronome Volume value 100 press both buttons simultaneously when Metronome Volume is selected in the Overall menu Setting the ...

Page 42: ...d the upper voice from C3 Dual voices 089 096 blend two voices together for a rich layered sound ABC Oboe voice 097 DoReMi Oboe voice 098 When you play the keyboard the EZ 20 sings the corresponding notes using ABC or DoReMi If the Transpose value is adjusted other than 00 they sound using Oboe voice Drum kit 100 Playing different keys on the keyboard produces different drum sounds Playing a Voice...

Page 43: ... you can select the ABC Oboe voice 097 or DoReMi Oboe voice 098 The setting is also valid for the guide voice for the Lesson function page 37 1 Press the ABC DoReMi button repeatedly to select the ABC or DoRemi voice Pressing the ABC DoReMi button toggles among ABC voice DoReMi voice and Guide Off ABC voice DoReMi voice Guide Off ...

Page 44: ...or buttons to set the desired Transpose value 12 12 To transpose the pitch down simultaneously press and hold the button and use the numeric keypad to type in the negative value You can instantly restore the default setting of 00 by pressing both but tons simultaneously when Transpose is selected The Transpose function has no effect on the Drum Kits voices 088 099 and 100 If the Transpose value is...

Page 45: ...to select TUNING Press the numeric keypad or buttons to set the desired Tuning value 50 50 To tune the pitch down simultaneously press and hold the button and use the numeric keypad to type in the negative value You can instantly restore the default setting of 00 by pressing both but tons simultaneously when Tuning is selected The Tuning settings have no effect on the Drum Kit voice 088 099 and 10...

Page 46: ...nd play the keyboard using the auto accompaniment function Selecting a Style page 46 Starting Accompaniment page 47 Using Auto Accompaniment page 50 Playing a Melody along with the Accompani ment page 55 Changing the Accompaniment Section page 56 Stopping the Accompaniment page 48 Selecting a Style Press the STYLE button Select the desired style number Use the numeric keypad to directly enter the ...

Page 47: ...START button again At this time playing a chord in the accompaniment key range will produce bass sounds and chords without a rhythm section As soon as you press the START STOP button the rhythm part starts playing When you play a chord in the accompaniment key range the EZ 20 produces the bass and chords When you press the START STOP button only the rhythm part of the selected accompaniment starts...

Page 48: ...nters Sync start waiting mode and the icon flashes Then press the INTRO ENDING button The EZ 20 waits for the sync start that begins with an Intro section When you play a chord in the accompaniment key range the accompaniment starts with an Intro section followed by the Main A or B accompaniment section Press the START STOP button The accompaniment stops immediately Press the SYNC START button The...

Page 49: ...et the desired value You can also use the convenient Tap Tempo function to change the tempo by tapping a new one in real time When the rhythm part is stopped selecting an accompaniment style automati cally sets a tempo suitable for the accompaniment You can instantly restore the default setting by pressing both buttons simultaneously when Tempo is selected Current Tempo value ...

Page 50: ...hord you indicate and then automatically generates the accompaniment Chords that can be produced in Single Finger operation are major minor seventh and minor seventh The illustration shows how to produce the four chord types The key of C is used here as an example other keys follow the same rules For example Bb7 is played as Bb and A A root key and keys you play Single Finger Chords C To play a ma...

Page 51: ...ds are recognized only in root position However all other inver sions are interpreted as minor 7th flatted 5th If augmented and diminished 7th chords are inverted the lowest note will be rec ognized as the root 7th flatted 5th chords may be played with the lowest note as the root or the flat ted 7th Augmented 7th and diminished 7th chords are interpreted as simple augmented and diminished The foll...

Page 52: ...cify the root of the chord Press the key on the keyboard that corresponds to the desired chord root as printed on the panel Pressing this key selects the root G Specify the type of the chord major minor seventh etc Press the key on the keyboard that corresponds to the desired chord type as printed on the panel In this example play M7 key Usually a Major chord name is represented by a root note nam...

Page 53: ...ecause it anchors the sound harmonically by determining its key and forms the basis for how we hear the other notes of the chord The second note of this chord is four semitones higher than the first and the third is three semitones higher than the second Keeping our root note fixed and changing these notes by a semitone up or down sharp or flat we can create four different chords Keep in mind that...

Page 54: ...on top of each other and the stacked notes are indicated in the chord name of the chord type as a number the number being the distance of the note from the root See the keyboard dia gram below For example the minor 6th chord includes the 6th note of the scale the major 7th chord has the 7th note of the scale etc The Intervals of the Scale To better understand the intervals and the numbers used to ...

Page 55: ...ns to set the desired Accompaniment Volume value 000 127 You can instantly restore the default setting of 100 by pressing both but tons simultaneously when Accompaniment Volume is selected Accompaniment Volume cannot be changed unless the Style mode is active Adjusting the Accompaniment Volume Accompaniment key range While playing different chords with your left hand Play a melody with your right ...

Page 56: ...ING button before you start playing to select an Intro section The Intro section is followed by the Main section Press the MAIN AUTO FILL button before pressing the START STOP button to spec ify the Main section that follows the Intro section To cancel the Intro section press the INTRO ENDING button again The display indi cates the Main section A or B that will be played when the song starts Intro...

Page 57: ... section appropriate for the song then stops the performance Main About the Fill in Patterns Ending Ritardando rit If you press the INTRO ENDING button during the Ending section the song gets slower little by little and then stops 1 2 3 4 1 2 3 4 1 2 3 1st measure 2nd measure 3rd measure Beat and the Main A or B section begins here If you press the MAIN AUTO FILL button before beat 4 a fill in pat...

Page 58: ...nts communicate with each other by sending messages or MIDI data The sending instrument usually assigns the data to one of sixteen MIDI channels then transmits it over the MIDI cable The cable itself however is not divided up into six teen channels Just as with a television set that receives programs on different channels it is up to the receiving instrument to tune into the proper MIDI channel If...

Page 59: ... should also be played back from the EZ 20 Data may not play back as expected when using other sound sources such as the internal sounds of the QY100 Also a connected sound source may sound at a different octave from that origi nally played on the EZ 20 MIDI data cannot be transmitted during song playback Avoid using MIDI cables 15 meters or longer since doing so can result in MIDI errors Viewing ...

Page 60: ...When a set of headphones is plugged into this jack no sound is output When using the Dictionary function page 52 the keys in the right hand section are used only for entering the chord root and type The auto accompaniment doesn t turn on even when pressing the ACMP ON OFF button When playing back one of the Pianist styles 89 100 the rhythm cannot be heard The Pianist styles have no drums or bass o...

Page 61: ...2 14 13 ACCORDION 2 15 14 HARMONICA 1 GUITAR BASS 16 15 SOFT GUITAR 1 17 16 FOLK GUITAR 1 18 17 12STRINGS GUITAR 2 19 18 JAZZ GUITAR 1 20 19 ELECTRIC GUITAR 2 21 20 DISTORTION GUITAR 2 22 21 WOOD BASS 1 23 22 FINGER BASS 1 24 23 SLAP BASS 1 STRINGS MALLET 25 24 STRINGS 1 26 25 VIOLIN 1 27 26 CELLO 1 28 27 HARP 1 29 28 SITAR 1 30 29 BANJO 1 31 30 VIBRAPHONE 1 32 31 MARIMBA 1 33 32 STEEL DRUMS 1 WIN...

Page 62: ...Electric Piano 2 1 6 Harpsichord 1 7 Clavi 1 8 Celesta 1 11 Vibraphone 1 12 Marimba 1 16 Electric Organ 1 1 17 Electric Organ 2 1 19 Church Organ 1 21 Accordion 1 22 Harmonica 1 23 Wave Organ 2 24 Soft Guitar 1 25 Folk Guitar 1 26 Jazz Guitar 1 27 Electric Guitar 1 28 12Strings Guitar 2 29 Rich Guitar 2 30 Distortion Guitar 1 32 Wood Bass 1 33 Finger Bass 1 34 Mute Bass 1 36 Slap Bass 1 38 Synth B...

Page 63: ...c Snare Drum 57 A2 Electronic Floor Tom 58 A 2 Shaker 59 B2 Electronic Low Tom 60 C3 Electronic Mid Tom 61 C 3 Claves 62 D3 Electronic High Tom 63 D 3 Rim Shot 64 E3 Bass Drum 1 65 F3 Bass Drum 2 66 F 3 1 Hi Hat Close 67 G3 Cat Snare Drum 1 68 G 3 1 Hi Hat Pedal 69 A3 Snare Drum 2 70 A 3 1 Hi Hat Open 71 B3 Floor Tom 72 C4 Low Tom 73 C 4 Crash Cymbal 74 D4 Mid Tom 75 D 4 Splash Cymbal 76 E4 High T...

Page 64: ...B 42 Funk 43 Soul 44 Soul Ballad 45 Motown 46 Gospel Shuffle 47 6 8 Gospel 48 6 8 Blues JAZZ 49 Swing1 50 Swing2 51 Cool Jazz 52 Jazz Ballad 53 Jazz Waltz 54 Big Band Swing 55 Big Band Ballad 56 Jazz Quartet 57 Fusion No Style Name COUNTRY WESTERN 58 Dixieland 59 Bluegrass 60 2 4 Country 61 Country Waltz 62 Country Ballad 63 Country Shuffle 64 Cowboy Boogie LATIN 65 Bossa Nova 66 Salsa 67 Samba 68...

Page 65: ...C 1 Piano 1 38 D1 Check this out 39 D 1 Piano 2 40 E1 Excellent 41 F1 Very Good 42 F 1 Piano 3 43 G1 Good 44 G 1 Piano 4 45 A1 Try Again 46 A 1 Twinkle 1 47 B1 1 2 48 C2 1 2 3 49 C 2 Twinkle 2 50 D2 1 2 3 4 51 D 2 Twinkle 3 52 E2 1 2 1 2 3 4 53 F2 Go 54 F 2 Twinkle 4 ...

Page 66: ...7 0 127 Number True voice 0 127 Velocity Note ON o 9nH v 1 127 1 o 9nH v 1 127 Note OFF x 9nH v 0 x 9nH v 0 or 8nH After Key s x x Touch Ch s x x Pitch Bend x x 0 32 o 2 o 2 Bank Select LSB MSB 7 o o Volume 10 o o Pan 6 38 x x Data Entry Control 64 o o Sustain 71 74 x x Change 84 o o Portamento Cntrl 96 97 x x RPN Inc Dec 98 99 x x NRPN LSB MSB 100 101 x x RPN LSB MSB 91 93 94 x x Prog o 0 127 3 o...

Page 67: ... x Common Song Sel x x Tune x x System Clock x x Real Time Commands x x Aux All Sound OFF x x Reset All Cntrls x x Local ON OFF x x All Notes OFF x x Mes Active Sense o o sages Reset x x Mode 1 OMNI ON POLY Mode 2 OMNI ON MONO o Yes Mode 3 OMNI OFF POLY Mode 4 OMNI OFF MONO x No ...

Page 68: ...SB 7FH Rhythm Voice LSB Refer to Voice list 3 For program change values refer to the voice list Program change and other like channel messages received will not affect the EZ 20 panel settings or what is being played on the keyboard 4 GM System on F0H 7EH 7FH 09H 01H F7H All data is restored to the default values 5 MIDI does not function transmit receive in the Song mode ...

Page 69: ...l Included in Voice Harmony Echo Included in Voice Split Included in Voice Sustain Preset Song 100 Songs Auxiliary jacks PHONES OUTPUT DC IN 12V MIDI IN OUT SUSTAIN Amplifier 2 W 2 W Speakers 12 cm x 2 Power Supply Adaptor Yamaha PA 3B AC power adaptor Batteries Six D size R20P LR20 or equivalent batteries Power Consumption 10 W when using PA 3B power adaptor Dimensions W x D x H 931 x 348 8 x 127...

Page 70: ... H Headphones 9 I Intro 56 L Lesson 35 Light Guide 32 M Main A B 57 Metronome 40 MIDI 58 MIDI Implementation Chart 66 MIDI terminals 58 Multi Fingering 50 Multi Pads 33 Music Stand 9 N numeric keypad 25 O OVERALL 23 P PHONES OUTPUT jack 9 Portable Grand 40 Q Quick Guide 12 R Root 53 S sections accompaniment 56 Single Finger chords 50 Song Volume 31 songs selecting and playing 28 Specifications 69 ...

Page 71: ...e You may also contact Yamaha directly at the address provided below 2 Deliver the unit to be serviced under warranty to the retailer selling the product an authorized service center or to Yamaha with an explanation of the problem Please be prepared to provide proof purchase date sales receipt credit card copy etc when requesting service and or parts under warranty 3 Shipping and or insurance cost...

Page 72: ...Greece Tel 01 364 7111 SWEDEN Yamaha Scandinavia AB J A Wettergrens Gata 1 Box 30053 S 400 43 Göteborg Sweden Tel 031 89 34 00 DENMARK YS Copenhagen Liaison Office Generatorvej 8B DK 2730 Herlev Denmark Tel 44 92 49 00 FINLAND F Musiikki Oy Kluuvikatu 6 P O Box 260 SF 00101 Helsinki Finland Tel 09 618511 NORWAY Norsk filial av Yamaha Scandinavia AB Grini Næringspark 1 N 1345 Østerås Norway Tel 67 ...

Page 73: ......

Page 74: ...M D G PA DMI Division Yamaha Corporation 2001 Yamaha Corporation V AP 01A0 Printed in China Yamaha Manual Library English versions only http www2 yamaha co jp manual english ...

Reviews: