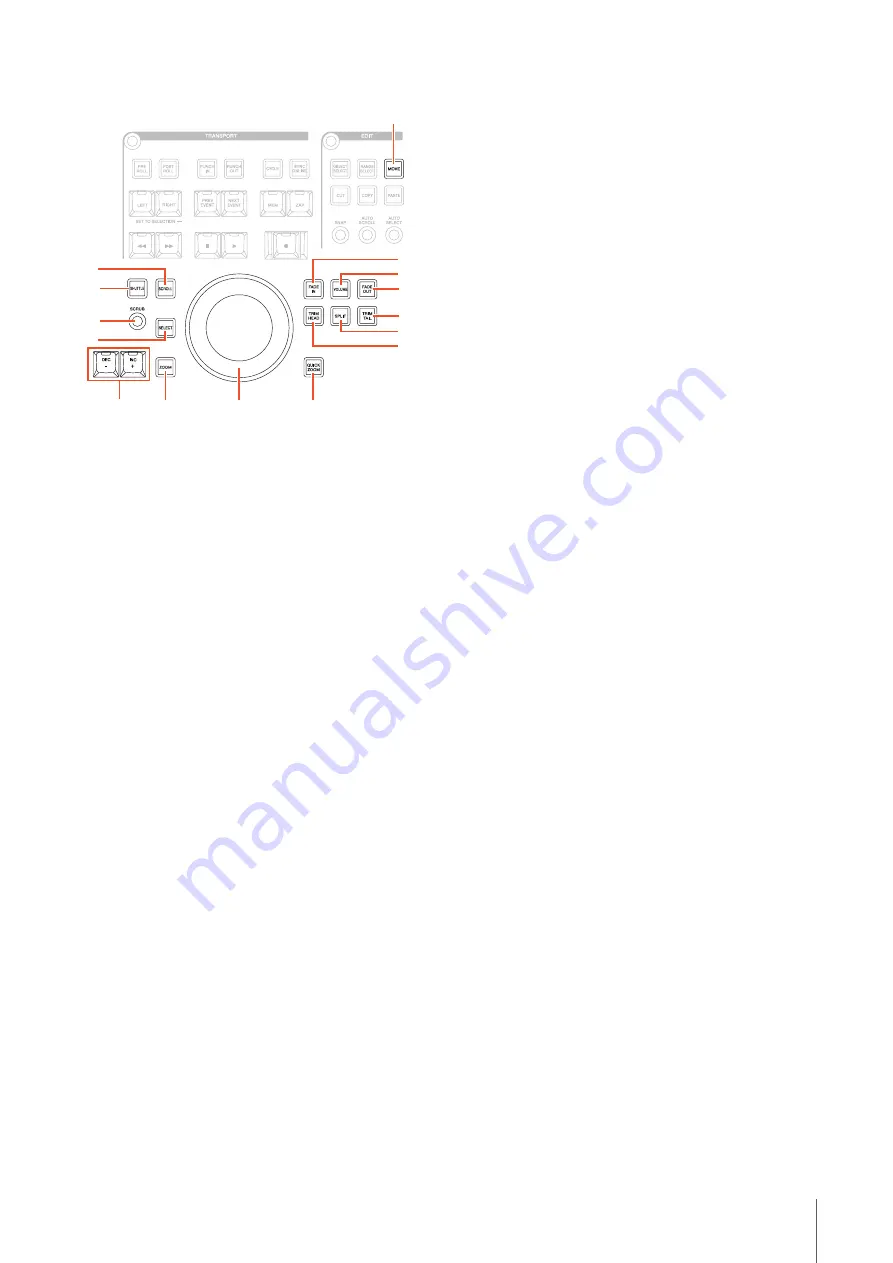
Description of the Device
NUAGE MASTER Operation Manual
13
Controls and Functions
1
[Jog wheel]
Operates various parameters. The particular parameter
which [Jog wheel] affects changes depending on the
mode or function of the [Jog wheel].
2
[INC +]/[DEC -]
Increases or decreases the [Jog wheel]-controlled
parameter incrementally. Holding down [INC +]/[DEC -]
continuously increases/decreases the parameter.
3
[SHUTTLE]
Switches [Jog wheel] operation to the Shuttle mode. While
the Shuttle mode is active, Scrubbing is always on. Keep
in mind that the Shuttle mode cannot be selected during
recording. In the Shuttle mode, you can use the [Jog
wheel] to change playback speed from a complete stop to
four times faster. The [Jog wheel] is an “infinite” controller
with no defined positions. When enabled, the current
wheel position is at 0 or stop. Turning it roughly 135
degrees to the right fast-forwards playback by four times
normal; turning it 135 degrees to the left fast-reverses by
four times. Between these two positions, playback speed
can be continuously and smoothly adjusted.
4
[SCRUB]
Turns Scrubbing on (lit) and off (dim).
5
[SCROLL]
Switches [Jog wheel] operation to the Scroll mode. In the
Scroll mode, you can scroll through the current Project by
using the [Jog wheel].
6
[SELECT]
Operates the Select function. The operation of the Select
function differs depending on the selected Tools, Object
Selection or Range Selection. To switch between Object
Selection and Range Selection, use [OBJECT SELECT]
(
) and [RANGE SELECT] (
) in the EDIT
section, or do this within Nuendo, etc.
When the Object Selection Tool is selected, you can
select the event under the Project Cursor position in the
selected channel.
When the Range Selection Tool is selected, you can select
the range with the [Jog wheel]. The following steps
illustrate by example.
1.
Select the channel(s) for which you want to
specify the range.
2.
Press [RANGE SELECT] in the Edit section
to switch to the Range Selection Tool.
[RANGE SELECT] lights.
3.
Select the desired start position and press
[SELECT] to fix it.
[SELECT] lights.
4.
Turn the [Jog wheel] to set the end position.
In this condition, you can set the end position by
turning the [Jog wheel] clockwise, or set the start
position (to before the position specified in step 3
above) by turning the [Jog wheel] counter-
clockwise.
5.
Press [SELECT] to select the range.
When you press [ZOOM] in step 3, the [Jog wheel]
operates Zoom In and Zoom Out temporarily. When you
press [ZOOM] again, the [Jog wheel] function returns
back to the previous one. Also, when you press [PREV
EVENT] or [NEXT EVENT] in step 3, the Project Cursor
moves to the start position or end position of the range.
7
[ZOOM]
Switches [Jog wheel] operation to the Zoom mode. In the
Zoom mode, you can control Zoom In and Zoom Out by
using the [Jog wheel].
8
[MOVE]
Switches [Jog wheel] operation to the Move mode. In the
Move mode, you can move the selected events or range
by using the [Jog wheel].
3
5
6
4
2
1
7
%
9
)
8
!
$
#
@


