background image

48

~~~~~~

å

Nam:xxx

~

xxxxxxxx

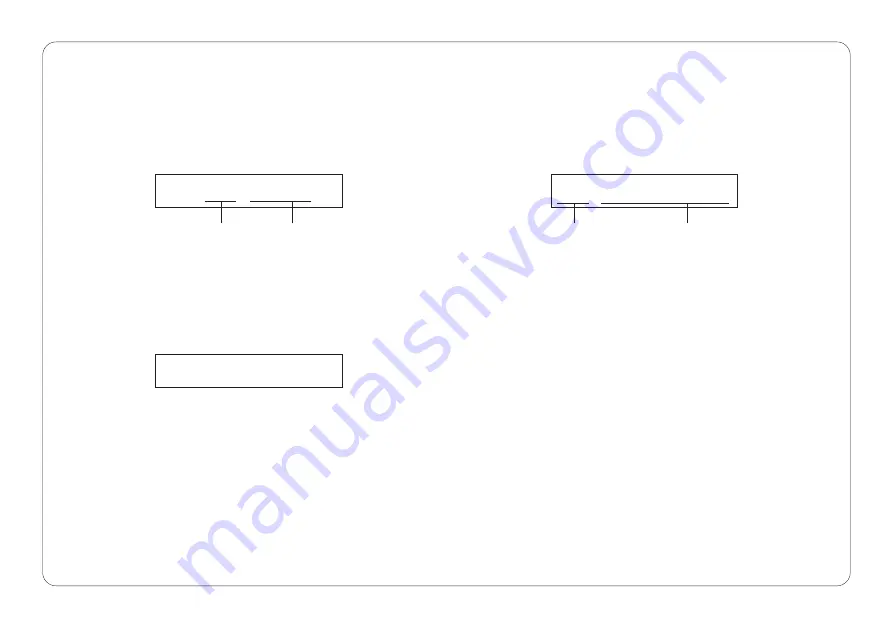
File Names in UTILITY Mode

SEQ data files, on the other hand, will be indicated by
the letter “S”:

The files will be displayed in numerical order. The MDR
files will appear first, and SEQ files will follow.

If there are no files on a disk, the following display will
appear when you select a UTILITY mode function.

In UTILITY mode, file names appear differently than in
other modes. The letter “M” will appear before the file
numbers of MDR data files:

When this display appears, you can not utilize any of the
UTILITY mode functions.

Nam:M01

~

MDRå01

file number

file name

Selected function

Indicates there is no file

Nam:S01

~

SONGå01

Summary of Contents for MDF3

Page 1: ...d in the users manual may cause interference harmful to the operation of other electronic devices Compliance with FCC regulations does not guarantee that interference will not occur in all installations If this product is found to be the source of interference which can be determined by turning the unit OFF and ON please try to eliminate the problem by using one of the following measures Relocate ...

Page 2: ...t are not limited to the following PRECAUTIONS PLEASE READ CAREFULLY BEFORE PROCEEDING Please keep these precautions in a safe place for future reference CAUTION Always follow the basic precautions listed below to avoid the possibility of physical injury to you or others or damage to the instrument or other property These precautions include but are not limited to the following Do not place the AC...

Page 3: ...her electrical products such as televisions radios or speakers since this might cause interference which can affect proper operation of the other products Do not place the instrument in an unstable position where it might ac cidentally fall over Before moving the instrument re move all connected adaptor and other cables When cleaning the instrument use a soft dry cloth Do not use paint thinners so...

Page 4: ...at will eventually cause read and write errors To maintain the disk drive in optimum working order Yamaha recommends that you use a commercially available dry type head cleaning disk to clean the head about once a month Ask your Yamaha dealer about the avail ability of proper head cleaning disks Never insert anything but floppy disks into the disk drive Other objects may cause damage to the disk d...

Page 5: ...of the floppy disk inside Do not expose the disk to magnetic fields such as those produced by televisions speakers motors etc since magnetic fields can partially or completely erase data on the disk rendering it unreadable Never use a floppy disk with a deformed shutter or housing Do not attach anything other than the provided labels to a floppy disk Also make sure that labels are attached in the ...

Page 6: ...trademark of Atari Corporation IBM PC AT is the registered trademark of International Business Machines Corporation MS DOS is the registered trademark of Microsoft Corporation The company names and product names in this owner s manual are the trademarks or registered trademarks of their respective companies ...

Page 7: ...gle bulk or sequence data file can occupy the disk s total ca pacity of roughly 1 200 600 kilobytes of data In sequencer mode this corresponds to approximately 150 000 75 000 notes worth of sequence data CONGRATULATIONS You are now the proud owner of a Yamaha MDF3 MIDI Data Filer This compact data storage unit is capable of storing bulk data from nearly any MIDI equipped synthesizer tone generator...

Page 8: ...ok This manual is accompanied by the following supplementary documentation MIDI Implementation Chart This chart summarizes the MDF3 s MIDI capabilities and helps you to determine whether the MDF3 is compatible with the other equipment you are using MIDI Data Format Advanced MIDI users who do their own programming will want to refer to this document for a detailed description of the MIDI Data Forma...

Page 9: ...g and Playback 38 JOB MODE 39 Repeating Playback 40 Creating a Playback Program 41 Changing the Record Tempo 43 Selecting a MIDI Sync Mode 44 Enabling MIDI Control Messages 45 Notes on MIDI Synchronization 46 UTILITY MODE 47 File Names in UTILITY Mode 48 Renaming Files 49 Deleting Files 51 Copying or Appending Files 52 Copying Disks 54 Formatting Disks 56 Displaying Disk Information 57 THE STANDAR...

Page 10: ... and patch bays not to mention MIDI data recorders such as the MDF3 MIDI data Data in a format that complies with the MIDI standard MIDI data can be divided between two broad categories sequence data and bulk data sequence The data used to record and play back music data Generally speaking sequence data consists of note on and off messages control change mes sages and program change messages In sp...

Page 11: ... writes the bulk data it receives to disk as an MDR data file transmission Generally speaking the sending of data from one MIDI device to another In this manual transmission means specifically the transmis sion of MDR data by the MDF3 When the MDF3 transmits the contents of an MDR data file it simultaneously reads data from the disk and outputs it via the MIDI OUT jack SEQ mode The mode of operati...

Page 12: ...or rewind a file during playback in SEQ mode t FILE DATA These keys are used to select a file in the MDR keys and SEQ modes or a function in the JOB and UTILITY modes They can also be used to change the tempo during playback in SEQ mode y REC key This key is used in combination with the START STOP key to begin the reception recording of data in MDR and SEQ modes u PAUSE key This key pauses the rec...

Page 13: ...tional AC power adapter Yamaha PA 3B can be con nected here 3 POWER This switch turns the power to the MDF3 on and off 4 Disk Drive This 3 5 disk drive is capable of ac cepting both 2HD and 2DD floppy disks 5 Eject button This button ejects the floppy disk from the disk drive 6 Disk Access This LED lights when data is being LED written to or read from a disk Never attempt to remove a disk from the...

Page 14: ... during electrical storms Using Batteries Under normal operating conditions the MDF3 can be oper ated continuously for approximately three hours using a fresh set of batteries Before you begin to insert the batteries check to make sure that the POWER switch on the rear panel is turned off Then place six size AA alkaline batteries in the battery compart ment located on the underside of the unit Mak...

Page 15: ...nt will allow you to avoid the repeated changing of MIDI cable connections Turning the Power On To turn on the MDF3 simply press the POWER switch on the rear panel The message YAMAHA MDF3 will appear in the LCD for a few moments Then if there is no disk in the disk drive this message will be replaced by the following display Insert the 3 5 2HD 2DD floppy disk that came with your MDF3 in the disk d...

Page 16: ...e the key will light 2 Select 05 Format Press the FILE DATA key four times The following message will appear in the LCD 3 Press the START STOP key The LED above the key will flash and the following mes sage will appear in the LCD 4 Insert a disk If you have not already done so insert the 2HD 2DD disk to be formatted in the disk drive Note If you format a disk that has been used before any data it ...

Page 17: ...ngle floppy disk When the disk has been completely formatted the START STOP LED will begin to flash again and the Format disk message will reappear 6 Format another disk If you wish to format another disk at this point eject the disk and insert a new one Then press the START STOP key to be gin formatting once more 7 Exit the function When you re done formatting disks press any mode key MDR SEQ JOB...

Page 18: ... disk drive while the disk access LED is lit Doing so can damage the floppy disk or the disk drive Avoid touching the shutter of a disk Never open the shutter and touch the actual disk surface Avoid placing disks close to speakers televisions magnets or other objects with magnetic fields Even weak magnetic fields can damage or erase the data on a disk Do not leave your disks in cars or other locat...

Page 19: ...ad the data on the disk as usual However if you try to receive or record data using the disk the MDF3 will display an error message telling you that the disk is write protected You will see the same message if you try to format a write protected disk or change the data it contains using one of the UTILITY mode functions Note To protect disks against accidental erasure it is a good idea to set the ...

Page 20: ... this mode the MDF3 can also play back the SEQ data files it creates You can also play back the MDF2 s SEQ data files as well as Yamaha ESEQ data files and standard MIDI files created by other devices JOB mode page 39 This mode lets you play back SEQ data files repeatedly or in a programmed order It also allows you to set the sequence data playback tempo and to enable or disable the transmis sion ...

Page 21: ...d re ception of MIDI realtime control messages i e START CONTINUE and STOP mes sages as well as the trans mission of MIDI clock sig nals page 45 UTILITY mode functions This function lets you change the names of MDR or SEQ data files which have been saved to disk page 49 This function lets you delete unneeded MDR or SEQ data files from a disk page 51 This function creates a copy of a file or append...

Page 22: ...22 ...

Page 23: ...tion function is used to receive bulk data sent from another MIDI device The MDF3 automatically writes the bulk data it receives to disk as an MDR data file using Standard MIDI File format 0 You can save up to 99 MDR data files on a single disk Transmitting bulk data The bulk data transmission function lets the MDF3 output the data which it has previously saved as an MDR data file to a MIDI device...

Page 24: ...of the cur rently selected MDR data file will appear in the LCD 3 Select an empty file Using the FILE DATA keys select the number of the empty file where you want to save the data The names of empty files will be blank Note If you select a file which already con tains data that data will be erased when the incoming data is received If you choose such a file make sure it does not contain data that ...

Page 25: ... begin changing to indicate the amount of data received The MIDI LED will go out when all of the bulk data has been received Hint To stop reception temporarily press the PAUSE key The LED above the key will blink and the MDF3 will complete the reception of the current data block Once the block has been received the PAUSE key LED will light steadily to indicate that the MDF3 has paused Pressing the...

Page 26: ... In more complex MIDI systems you can use the same technique to store data e g the settings you will use during a live perfor mance for a number of different devices 7 End MDF3 reception When you ve finished sending data to the MDF3 make sure that all the data you sent has been received then press the START STOP key The data you sent will be saved to the MDR data file you selected using the defaul...

Page 27: ...ntaining the bulk data in the MDF3 disk drive 2 Enter MDR mode Press the MDR key The LED above the key will light and the name of the cur rently selected MDR data file will appear in the LCD 3 Select a file to transmit Using the FILE DATA keys select the file to be transmitted MIDI OUT external MIDI device keyboard sequencer etc MDF3 MIDI cable MIDI IN å 01 MDRå01 03 Pfåsound file number file name...

Page 28: ...when the transmission of MDR data is complete Hint To stop transmission temporarily press the PAUSE key The LED above the key will blink and the MDF3 will complete its trans mission of the current data block Once the block has been transmitted the PAUSE key LED will light steadily to indicate that the MDF3 has paused The MDF3 will resume transmission when you press the PAUSE key again or press the...

Page 29: ...om a MIDI device that will require inter vals greater than one second between blocks when you attempt to transmit the data back to the device record the bulk data in SEQ mode Refer to Recording bulk data on page 38 Transmission MDR file formats In addition to its own files the MDF3 is capable of transmitting bulk data files which other de vices save to disk using Standard MIDI File format 0 More o...

Page 30: ...30 ...

Page 31: ...on a single disk Playing Back Sequence Data The MDF3 can of course play back the files it records in SEQ mode It can also play back files written by other devices using Standard MIDI File format 0 or 1 as well as sequence files written in the ESEQ format used by the QX3 and other Yamaha de vices You can also play back the MDF2 s SEQ data files Note If you will be using the MDF3 to play sequence fi...

Page 32: ...the name of the cur rently selected SEQ data file will appear in the LCD 3 Select an empty file Using the FILE DATA keys select the number of the empty file where you want to record the data The names of empty files will be blank Note If you select a file which already con tains data that data will be erased when the incoming data is received If you choose such a file make sure it does not contain...

Page 33: ...on your MIDI key board As soon as the MDF3 receives MIDI data from the keyboard it will can cel the pause and start recording the data Hint To pause during recording simply press the PAUSE key The MDF3 will begin record ing again as soon as it receives any MIDI data except bulk data or if you press the PAUSE key once more You can also resume record ing by pressing the foot switch if it is con nect...

Page 34: ... the START STOP key again The data you sent will be saved to the SEQ data file you selected using the de fault file name SONG_ followed by the file number Hint If you would like to give the file an other name you can do so using the Re name function page 49 03 SONGå03 ...

Page 35: ...ne so already place a disk containing the sequence data in the MDF3 disk drive 2 Enter SEQ mode Press the SEQ key The LED above the key will light and the name of the cur rently selected SEQ data file will appear in the LCD 3 Select a file to transmit Using the FILE DATA keys select the file to be played back MIDI OUT MDF3 MIDI cable MIDI IN å 01 SONGå01 file number file name ...

Page 36: ...start the playback with greater accuracy press the PAUSE key immediately after pressing the START STOP key and wait until the START STOP LED lights The MDF3 will begin play ing the file as soon as you press the PAUSE key a second time or press the foot switch if it is connected 6 Change the tempo You can use the FILE DATA keys to change the playback tempo while the file is playing When you press o...

Page 37: ...hen the MDF3 reaches the end of the file If you want to stop the playback before the MDF3 comes to the end of the file sim ply press the START STOP key When playback ends the name of the currently selected file will appear Hint Files can be played back repeatedly using the Repeat play function page 40 If a disk contains more than one SEQ data file the files can be played back in a specified order ...

Page 38: ...layback SEQ file formats In addition to its own SEQ files the MDF3 is capable of playing back sequence data files which other devices have written to disk using Standard MIDI File format 0 or 1 a format which is supported by a broad range of computer based MIDI software It is also capable of playing back ESEQ sequence data files cre ated by the QX3 and other Yamaha products You can also play back ...

Page 39: ...equencers Selecting a JOB mode function To use a JOB mode function first press the JOB key then use the FILE DATA keys to select the function When the name of the desired function is displayed in the LCD press the START STOP key Note that you must place a disk in the disk drive before you select Repeat play or Prog play in order to use these function Exiting a JOB mode function When you have finis...

Page 40: ...etting the MDF3 repeatedly plays all of the SEQ data files on the disk in numerical order 2 Select the desired setting Use the FILE DATA keys to select one of the three possible repeat settings When you select 1 the MDF3 will play the SEQ data file you select repeatedly This setting turns the repeat function off Hint You can change the order in which Repeat all plays songs by changing the SEQ file...

Page 41: ... you press the START STOP key the following display will appear in the LCD 2 Select a file Using the FILE DATA keys select the song to be played for the currently dis played program step 3 Press the START STOP key Your setting for the step will be registered and the display will change to the next step 02 Prog play Prog 01 program step file name file number Prog 01 01 SONGå Prog 02 ...

Page 42: ...t file 5 Start playback When you ve finished creating your program press the SEQ mode key and start playback The MDF3 will play the songs you selected in the programmed order Hint If you set the Repeat play function to either 1 or all you entire program of songs will be repeated indefinitely in the pro grammed order If the Repeat play function is set to off however the program will be played only ...

Page 43: ...t value of 120 beats per minute 2 Select the desired tempo To increase the tempo press the FILE DATA key To decrease it press the FILE DATA key The tempo can be changed within a range from 30 to 250 beats per minute 3 Start recording When you begin recording data in SEQ mode the tempo you set here will be recorded at the start of the file as the SEQ file s playback tempo Hint When you record seque...

Page 44: ...ress the START STOP key the current sync mode setting will ap pear in the LCD Note Whenever the MDF3 s power is turned on the sync mode is automatically set to the internal clock 2 Select the desired setting Using the FILE DATA keys select either setting If you set the sync mode to int the MDF3 will ignore any clock signals out put by other devices and run at the tempo set by its internal clock If...

Page 45: ...3 s power is turned on the MIDI control function will automati cally be set to on 2 Select the desired setting Using the FILE DATA keys select either setting When the MIDI control function is turn on the MDF3 will transmit and receive Start Continue and Stop messages It will also transmit MIDI clock signals When this function is turned off the MDF3 will neither transmit nor receive the MIDI Start ...

Page 46: ... system control messages When synchronizing the MDF3 to another device both the Sync mode and MIDI control functions must be set to appropriate values The possibilities for combining these settings are summarized in the table below 04 Sync mode 05 MIDI control MDF3 operation MIDI on Functions as a slave device int on Functions as a master device MIDI off Cannot be used int off Manual playback no M...

Page 47: ... mode function first press the UTIL key then use the FILE DATA keys to select the function When the name of the desired function is displayed in the LCD press the START STOP key Note You must place a disk in the disk drive in order to use the UTILITY mode functions Exiting a UTILITY mode function When you have finished using a UTILITY mode function you can exit the function by pressing any of the ...

Page 48: ...ow If there are no files on a disk the following display will appear when you select a UTILITY mode function In UTILITY mode file names appear differently than in other modes The letter M will appear before the file numbers of MDR data files When this display appears you can not utilize any of the UTILITY mode functions Nam M01 MDRå01 file number file name Selected function Indicates there is no f...

Page 49: ...T STOP key the name of the first file on the disk will appear in the LCD 2 Select a file Using the FILE DATA keys select a file to rename Hint In addition to MDF3 or MDF2 files you can also rename MDR files created by the QX3 Other files cannot be renamed 3 Move the cursor to the file name Press the CURSOR key to move the cursor to the file name area 01 Rename Nam M01 MDRå01 cursor file data Nam M...

Page 50: ...nd 5 as needed until you have changed the entire name 6 Press the START STOP key When you ve finished changing the name press the START STOP key The MDF3 will write the new name to disk You can now press the CURSOR key to move the cursor back to the file num ber area and select a new file to rename or press any of the mode keys MDR SEQ JOB or UTIL to exit the function Nam M03 TDRå03 Hint You can r...

Page 51: ... MDF2 or MDR files cre ated by the QX3 3 Press the START STOP key When you are sure of your selection press the START STOP key The MDF3 will delete the file and the name of the next file in order will appear in the LCD Note If you press the START STOP key at this time the MDF3 will delete that file as well Be very careful not to delete important files If you want you can now select a new file to d...

Page 52: ... be copied The copied file will be given the same name as the source file 1 In UTILITY mode select 03 Append When you press the START STOP key the following display will appear in the LCD 2 Select a source file Using the FILE DATA keys select the file to be copied or appended 3 Move the cursor to the right Press the CURSOR key to move the cursor to the destination file number å 03 Append Apn M01 M...

Page 53: ...he source file You will not be allowed to append an MDR file to a SEQ file or vice versa 5 Press the START STOP key The MDF3 will append or copy the source file to the destination you speci fied You can now press the CURSOR key to move the cursor back to the source file number area and select a new source file to copy or append or press any of the mode keys MDR SEQ JOB or UTIL to exit the function...

Page 54: ... which is called the target 1 In UTILITY mode select 04 Backup When you press the START STOP key the following message will appear in the LCD 2 Insert the source disk Place the disk to be copied in the disk drive 3 Press the START STOP key The following display will appear as the MDF3 reads data from the source disk After a few moments the following mes sage will appear Insert Source 04 Backup Now...

Page 55: ...data at one time When you copy a disk containing a large amount of data you will have to repeat steps 2 through 5 several times If you want to estimate the number of times you will have to exchange disks to complete the backup process use the Disk Info func tion to check how much of the source disk has been used before you execute the function If you have a personal computer with two disk drive ca...

Page 56: ...tain any important data before you for mat it 3 Press the START STOP key The LED above the key will light steadily and the LCD will display a message tell ing you what percentage of the disk has been formatted The MDF3 will recog nize the inserted floppy disk type 2HD or 2DD and format it automatically in appropriate size 1 440 kilobytes for 2HD and 720 kilobytes for 2DD When the disk has been for...

Page 57: ...ew other disk information Press the FILE DATA key once to dis play the amount of available memory space remaining on the disk Press the FILE DATA key a second time to display the total number of files on the disk 3 Display file information Pressing the FILE DATA key additional times will display the name of each file and its size in kilobytes 06 Disk info Used mem k total amount of disk memory use...

Page 58: ...ESEQ sequence files while in SEQ mode It distinguishes between standard MIDI files and ESEQ files by checking the file header No conversion pro cess is required to play back ESEQ files Note Files named such as PIANODIR FIL MUSIC DIR NAME MDA included in the ESEQ disks are the setup files and cannot be played back If you will use the MDF3 to play sequence files recorded by other devices be sure to ...

Page 59: ...each of the MDF3 file names is followed by a three character extension The MDF3 uses these extensions to organize the files on its disks Extensions beginning with the letter B indicate that the file in question contains MDR data whereas files bearing exten sions beginning with the letter X contain SEQ data The second two characters of each extension indicates the file number by which the MDF3 refe...

Page 60: ...ust as if you had gone through the trouble of moving them Note When you are renaming files be careful not to give two or more files the same extension If you do so the MDF3 will only be able to read one of the files Changing MDR files to SEQ files The MDF3 s Prog play function is handy so long as the synthesizer or tone generator that plays the data can use the same data setup for all of the songs...

Page 61: ...les in SEQ mode by changing their file name exten sions to X Remember when you attempt this that the second and third characters of the extension must be num bers and that the extension must be different from those of all other SEQ files There s another way to trick the MDF3 into playing a mixture of SEQ files and other sequence files you can rename all the SEQ files on the disk so that they have ...

Page 62: ... diagrams below For recording For playback An Extended MIDI System In a complete MIDI system which already includes a per sonal computer or a sequencer In such a system you would normally use the master keyboard and the sequencer to record parts for each of the slave tone generators then play the data back all at once If you connect the MDF3 to the system as shown in the illustration below you can...

Page 63: ...her than X the MDF3 will de cide that the disk can be used for sequence data playback only The MDF3 has run out of disk space while recording SEQ data or receiving MDR data If this message appears while recording SEQ data the MDF3 will create a SEQ file containing the data that it receives before the error occurred If the message appears while receiving MDR data all of the received data will be lo...

Page 64: ... execute the function again MIDI related errors There is something wrong with the MIDI data being received Check the transmit ting MIDI device and the MIDI cable The amount of MIDI data received at one time has exceeded the MDF3 s process ing capacity Decrease the amount of data being transmitted to the MDF3 Other errors The batteries are running low The MDF3 is not capable of functioning any long...

Page 65: ...he letter X By inspecting a device s implementation chart you will get a good idea whether the device is more suitable for use as a master or a slave in your MIDI system Generally speaking the more O s a device has in the transmission column the better it will perform as a master device the more O s it has in the reception column the better it will serve as a slave To determine whether two devices...

Page 66: ...rmat 0 Play File Format Standard MIDI File Format 0 1 or Yamaha ESEQ Controls Panel Switches MDR SEQ JOB UTIL CURSOR CURSOR FILE DATA FILE DATA REC PAUSE START STOP SPECIFICATIONS Displays LCD 16 digit liquid crystal display LED green x 4 MDR SEQ JOB UTIL red x 4 REC PAUSE START STOP MIDI External Memory Medium 3 5 2HD 2DD micro floppy disk File Capacity 112 files disk max 2DD 198 files disk max 2...

Page 67: ...ite protect 5 19 Display 12 DOS Mounter 59 E Eject button 13 Error messages 63 ESEQ files format 58 playback 38 F Fast forward during playback 37 File appending 52 copying 52 deleting 51 ESEQ format 58 MDR data 29 renaming 49 SEQ data 38 standard MIDI file 58 FILE DATA keys 12 File name extensions 59 file management techniques 59 renaming files 49 UTILITY mode display 48 Floppy disk see Disk Foot ...

Page 68: ... Power AC adapter 14 batteries 14 switch 13 R REC key 12 Realtime control messages 45 Reception definition 11 procedure 24 realtime control messages 45 Recording bulk data 38 definition 11 procedure 32 Record tempo 43 Rename file 49 Repeat play all songs 40 one song 40 program 41 Rewind 37 S SEQ data definition 11 file format 38 playback 35 recording 32 SEQ mode definition 11 description 20 31 Seq...

Page 69: ... Hamamatsu Japan 430 Tel 053 460 2312 MIDDLE EAST TURKEY CYPRUS Yamaha Europa GmbH Siemensstraße 22 34 25462 Rellingen F R of Germany Tel 04101 3030 OTHER COUNTRIES Yamaha Corporation International Marketing Division Nakazawa cho 10 1 Hamamatsu Japan 430 Tel 053 460 2312 ASIA HONG KONG Tom Lee Music Co Ltd 11 F Silvercord Tower 1 30 Canton Road Tsimshatsui Kowloon Hong Kong Tel 730 1098 INDONESIA ...

Page 70: ......

Page 71: ......

Page 72: ...unction or effect works when the unit is operating as designed are not covered by the manufacturer s warranty and are therefore the owners responsibility Please study this manual carefully and consult your dealer before requesting service ENVIRONMENTAL ISSUES Yamaha strives to produce products that are both user safe and environmentally friendly We sincerely believe that our products and the produ...

Reviews: