ENGINE INSPECTION
5-1
EAS1SD1025
ENGINE INSPECTION
EAS20710
MEASURING THE COMPRESSION
PRESSURE
TIP
Insufficient compression pressure will result in a
loss of performance.
1. Remove:
• Storage box
Refer to “GENERAL CHASSIS” on page 4-1.
2. Measure:
• Valve clearance
Out of specification
→
Adjust.
Refer to “ADJUSTING THE VALVE CLEAR-
ANCE” on page 3-4.
3. Start the engine, warm it up for several min-
utes, and then turn it off.
4. Disconnect:
• Spark plug cap
5. Remove:
• Spark plug
NOTICE
ECA1SD1010
Before removing the spark plug, use com-
pressed air to blow away any dirt accumulat-
ed in the spark plug wells to prevent it from
falling into the cylinder.
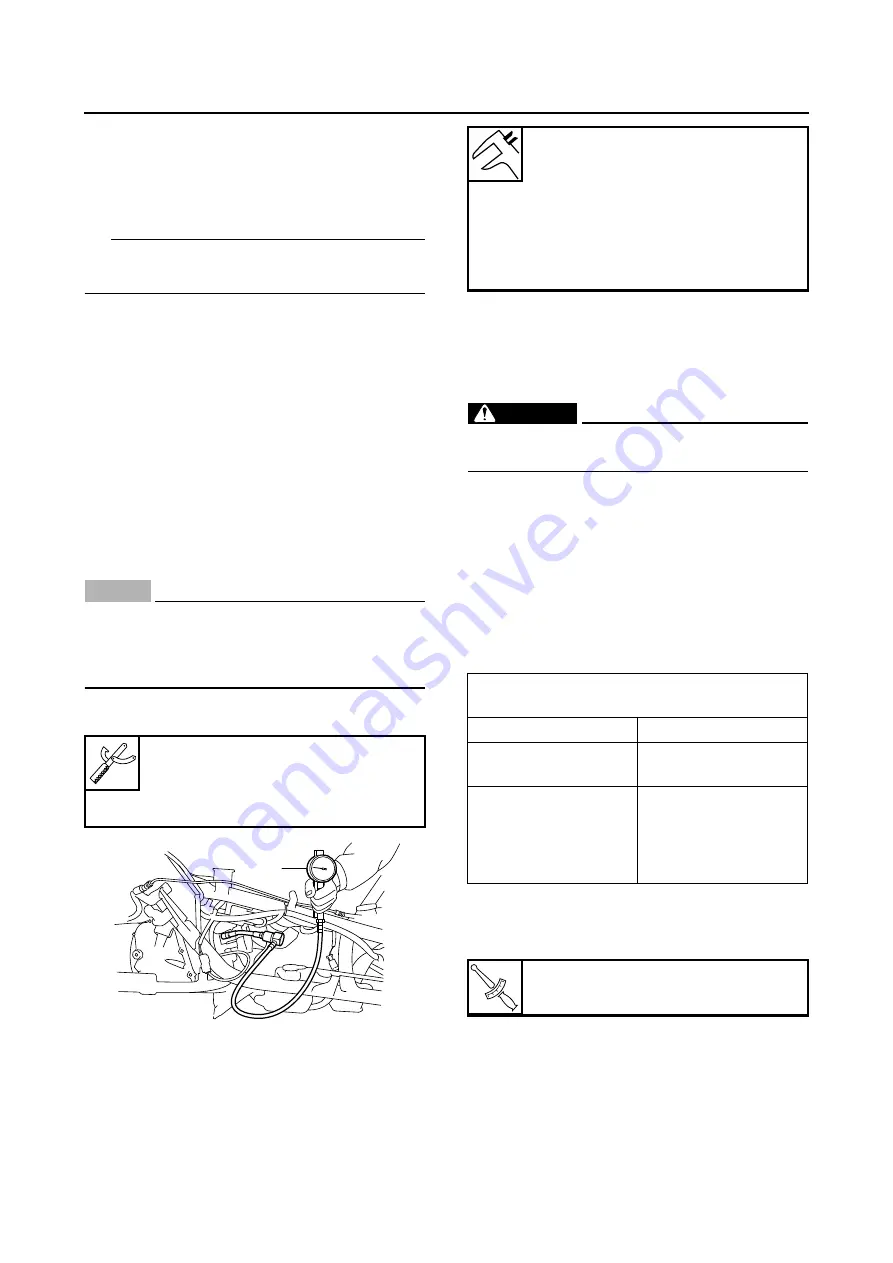
6. Install:
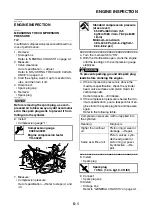
• Compression gauge “1”
7. Measure:
• Compression pressure
Out of specification
→
Refer to steps (c) and
(d).
▼▼▼
▼
▼ ▼▼▼
▼
▼ ▼▼▼
▼
▼ ▼▼▼
▼
▼ ▼▼▼
▼
▼ ▼▼▼
▼
▼▼▼
a. Turn the main switch to “ON”.
b. With the throttle wide open, crank the engine
until the reading on the compression gauge
stabilizes.
WARNING
EWA12940
To prevent sparking, ground all spark plug
leads before cranking the engine.
c. If the compression pressure is above the
maximum specification, check the cylinder
head, valve surfaces and piston crown for
carbon deposits.
Carbon deposits
→
Eliminate.
d. If the compression pressure is below the min-
imum specification, pour a teaspoonful of en-
gine oil into the spark plug bore and measure
again.
Refer to the following table.
▲▲▲
▲
▲ ▲▲▲
▲
▲ ▲▲▲
▲
▲ ▲▲▲
▲
▲ ▲▲▲
▲
▲ ▲▲▲
▲
▲▲▲
8. Install:
• Spark plug
9. Connect:
• Spark plug cap
10.Install:
• Storage box
Refer to “GENERAL CHASSIS” on page 4-1.
Compression gauge
90890-03081
Engine compression tester
YU-33223
1
Standard compression pressure
(at sea level)
550 kPa/680 r/min (5.5
kgf/cm²/680 r/min, 78.2 psi/680
r/min)
Minimum–maximum
480–620 kPa (4.8–6.2 kgf/cm²,
68.3–88.2 psi)
Compression pressure (with oil applied into
the cylinder)
Reading
Diagnosis
Higher than without
oil
Piston ring(s) wear or
damage
→
Repair.
Same as without oil
Piston, valves, cylin-
der head gasket or
piston ring(s) possi-
bly defective
→
Re-
pair.
T
R
.
.
Spark plug
13 Nm (1.3 m·kgf, 9.4 ft·lbf)
Summary of Contents for MBK XMAX 2014
Page 1: ...2014 SERVICE MANUAL YP125R YP125RA 2DM F8197 E0 ...
Page 6: ......
Page 8: ......
Page 64: ...TIGHTENING TORQUES 2 17 Muffler tightening sequence 1 2 3 ...
Page 72: ...LUBRICATION SYSTEM DIAGRAMS 2 25 EAS2DM1116 LUBRICATION SYSTEM DIAGRAMS 1 2 3 4 5 3 ...
Page 78: ...CABLE ROUTING 2 31 Steering head front view 1 2 3 4 5 6 8 8 A 7 7 ...
Page 80: ...CABLE ROUTING 2 33 Front brake left side view for YP125R 1 2 2 1 1 2 2 D E A B C ...
Page 82: ...CABLE ROUTING 2 35 Front brake left side view for YP125RA 2 1 1 2 1 2 2 A B D E C ...
Page 92: ...CABLE ROUTING 2 45 Frame right side view 3 2 4 1 2 3 A B 6 5 3 A B 3 3 2 3 3 A A B A B B 3 ...
Page 94: ...CABLE ROUTING 2 47 Engine right side view 6 6 6 6 C D C D D C 10 B 9 5 6 1 2 8 3 4 5 6 7 A ...
Page 98: ...CABLE ROUTING 2 51 Frame left side view C D C D 2 1 E 1 2 D C 6 1 4 5 3 2 1 7 3 2 1 A B ...
Page 100: ...CABLE ROUTING 2 53 Engine left side view 1 1 1 1 1 2 3 4 5 6 7 8 9 7 7 A B A B A B 1 ...
Page 106: ...CABLE ROUTING 2 59 Rear brake right side view 2 2 2 2 2 2 1 1 2 3 A B C 3 ...
Page 110: ...CABLE ROUTING 2 63 ...
Page 228: ...REAR SHOCK ABSORBER ASSEMBLIES AND SWINGARM 4 89 ...
Page 231: ......
Page 291: ...CRANKSHAFT 5 60 a 1 ...
Page 292: ...CRANKSHAFT 5 61 ...
Page 302: ...WATER PUMP 6 9 ...
Page 313: ......
Page 331: ...CHARGING SYSTEM 8 18 ...
Page 349: ...COOLING SYSTEM 8 36 ...
Page 391: ...FUEL PUMP SYSTEM 8 78 ...
Page 400: ...IMMOBILIZER SYSTEM 8 87 a Light on b Light off ...
Page 401: ...IMMOBILIZER SYSTEM 8 88 ...
Page 405: ...ABS ANTI LOCK BRAKE SYSTEM for YP125RA 8 92 ...
Page 439: ...ABS ANTI LOCK BRAKE SYSTEM for YP125RA 8 126 ...
Page 464: ...ELECTRICAL COMPONENTS 8 151 ...
Page 476: ......
Page 477: ......
Page 478: ......

