101
9
Input/output patching
Inserting an external device into a channel
LS9-16/32 Owner’s Manual
If necessary, you can insert an internal effect/GEQ or an external device such as an effect pro-
cessor into the signal path of INPUT channels 1–32 or any output channel (MIX, MATRIX, STE-
REO, MONO). When doing so, the type of input/output port used for the insertion and the signal
patch location of the insertion can be specified individually for each channel.
Here we will explain how an external device connected to an I/O card in a slot can be inserted
into the desired channel.
1
Connect your external device to the I/O card
installed in a slot {1/2}.
2
Press the [HOME] key to access the
SELECTED CH VIEW screen, and use the
[SEL] keys to select the channel into which
you want to insert an external device.
1
INSERT popup button
3
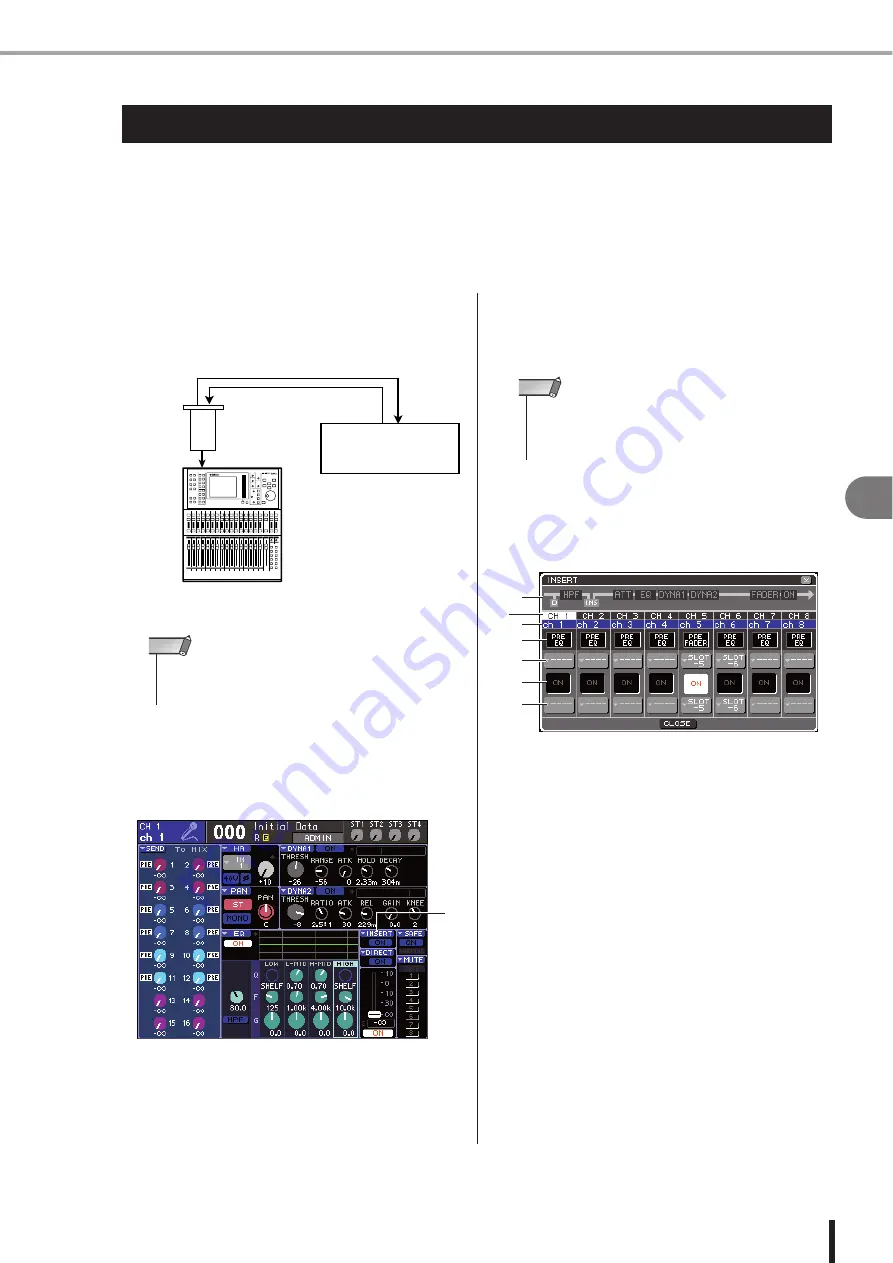
Move the cursor to the INSERT popup but-
ton in the screen, and press the [ENTER]
key.
The INSERT popup window will appear. In this popup
window, you can view the insert input/output port,
change the insert position and switches the insert on/
off, in groups of eight channels.
1
Channel block diagram
This shows the direct output position (only for INPUT
channels) and the position of the insert connection for
the selected channel.
B
Channel number
This is the channel number.
C
Channel name
This is the channel name.
D
Insert point select box
This selects the insert point for the signal. Move the
cursor to this box and use the dial or the [DEC]/[INC]
keys to switch between PRE EQ (immediately before
the EQ) or PRE FADER (immediately before the
fader).
Inserting an external device into a channel
DIGITAL OUT
LS9
DIGITAL IN
DIGITAL OUT
DIGITAL IN
Effect processor
Digital I/O
card
• If you install a digital I/O card in a slot and digitally connect an
external device, you must synchronize the word clock of the
LS9 and the external device (
NOTE
1
• For the INPUT channels, insert connections can be made
only for channels 1–32. If an INPUT channel 33–64 is
selected on the LS9-32, the INSERT popup button is not
shown.
NOTE
1
2
3
4
5
7
6
Summary of Contents for LS9 Editor
Page 1: ...Owner s Manual LS9 16 LS9 32 EN ...
Page 80: ...80 LS9 16 32 Owner s Manual ...
Page 90: ...90 LS9 16 32 Owner s Manual ...
Page 94: ...94 LS9 16 32 Owner s Manual ...
Page 286: ...286 LS9 16 32 Owner s Manual ...


