LOWR
Lower unit
6-35
6C13G11
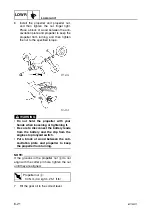
2.
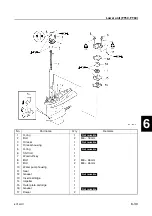
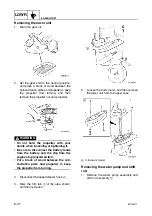
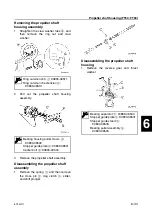
Remove the ball bearing.
CAUTION:
Do not reuse the bearing, always replace
it with a new one.
3.
Remove the oil seals and needle bear-
ing.
Checking the propeller shaft housing
1.
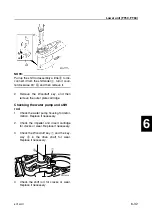
Clean the propeller shaft housing using a
soft brush and cleaning solvent, and then
check it for cracks. Replace if necessary.
2.
Check the teeth and dogs of the reverse
gear for cracks or wear. Replace the
gear if necessary.
3.
Check the bearings for pitting or rum-
bling. Replace if necessary.
Checking the propeller shaft
1.
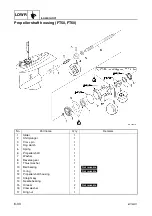
Check the propeller shaft for bends or
wear. Replace if necessary.
2.
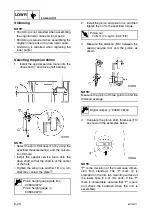
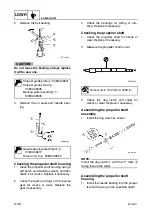
Measure the propeller shaft runout.
3.
Check the dog clutch and slider for
cracks or wear. Replace if necessary.
Assembling the propeller shaft
assembly
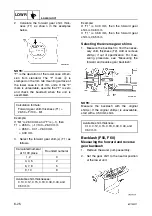
1.
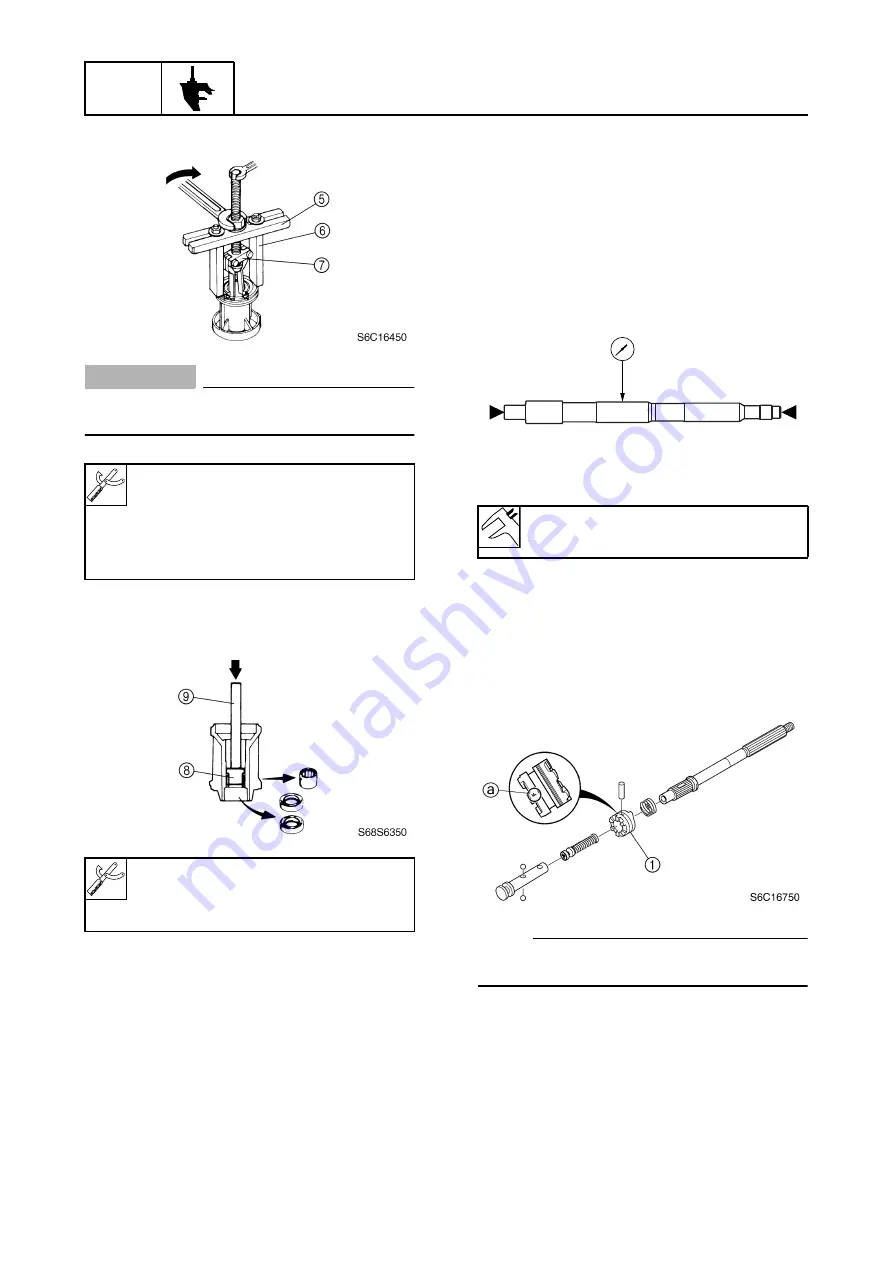
Install the dog clutch as shown.
NOTE:
Install the dog clutch
1
with the “F” mark
a
facing toward the slider.
Assembling the propeller shaft
housing
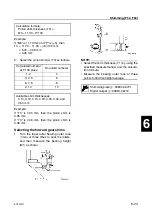
1.
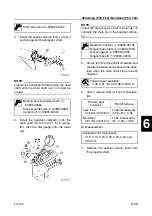
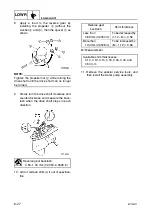
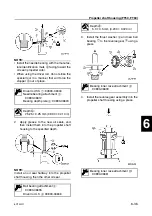
Install the needle bearing into the propel-
ler shaft housing to the specified depth.
Stopper guide plate
5
: 90890-06501
Stopper guide stand
6
:
90890-06538
Bearing puller assembly
7
:
90890-06535
Needle bearing attachment
8
:
90890-06612
Driver rod L3
9
: 90890-06652
Runout limit: 0.02 mm (0.0008 in)
S6D56510
Summary of Contents for F50F
Page 1: ...F50F FT50G F60C FT60D SERVICE MANUAL 6C1 28197 3G 11 290551 ...
Page 4: ......
Page 48: ...SPEC Specifications 2 25 6C13G11 MEMO ...
Page 190: ...LOWR Lower unit 6 47 6C13G11 Shimming FT50 FT60 6 ...
Page 195: ...6C13G11 6 52 1 2 3 4 5 6 7 8 9 MEMO Backlash FT50 FT60 ...
Page 221: ...6C13G11 7 24 1 2 3 4 5 6 7 8 9 Steering arm ...
Page 249: ...6C13G11 7 52 1 2 3 4 5 6 7 8 9 MEMO Power trim and tilt electrical system ...
Page 272: ...ELEC Electrical systems 8 21 6C13G11 MEMO ...
Page 301: ...6C13G11 i 5 1 2 3 4 5 6 7 8 9 Index MEMO ...
Page 303: ......
Page 304: ...YAMAHA MOTOR CO LTD Printed in the Netherlands Jul 2004 1 2 1 CR E_2 ...

