Setup
DTX400K/DTX430K/DTX450K Owner’s Manual
11
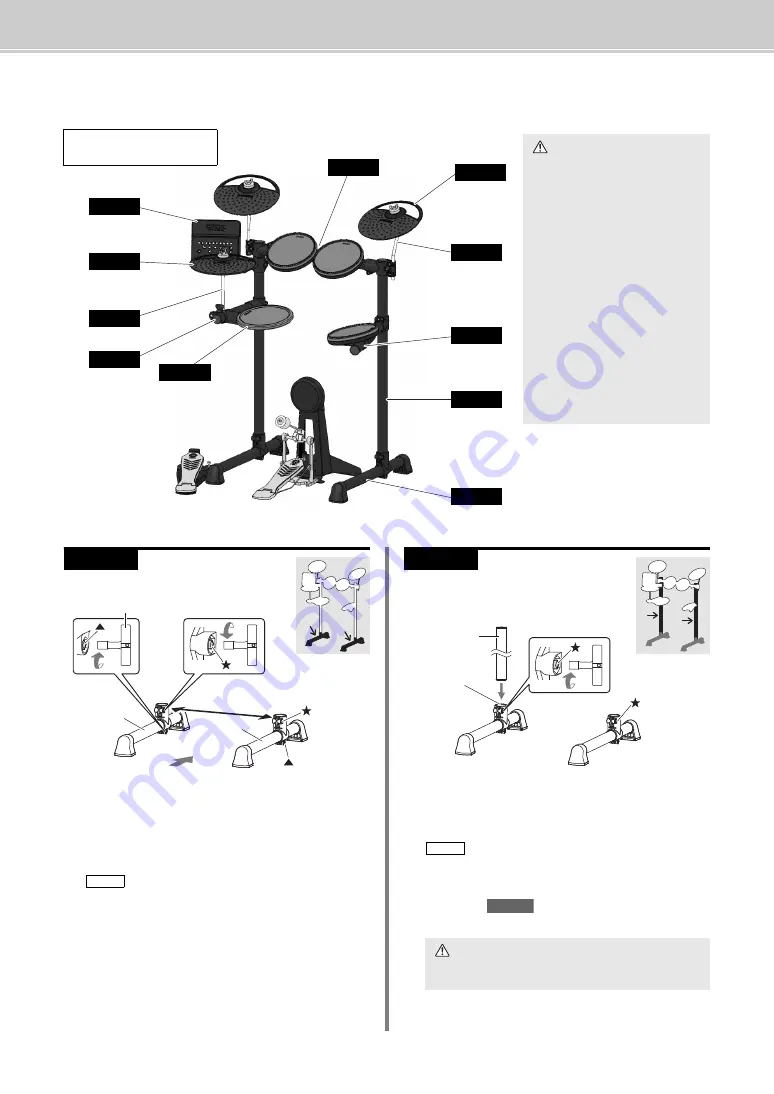
Assembly Guide
Preparing the base
supports
1.
Take the two base supports (
q
) and the tuning key (
!7
)
from the package, and using the tuning key, securely
tighten the
s
key bolts (i.e., the key bolts labeled
s
in
the figure).
2.
Using the tuning key, loosen the
key bolt on each of
the two base supports (
q
).
3.
Viewing from the front as shown in the figure, place the
base supports (
q
) at the left and right approximately 50
cm apart.
Attaching the verti-
cal supports
1.
Take a vertical support (
w
) from the package, and
insert it fully into the joint on the left base support.
2.
Using the tuning key, tighten the
key bolt that you
loosened in
in order to secure the vertical sup-
port (
w
) in place.
3.
Repeat
1.
and
2.
to assemble the right upright bar.
Fully assembled drum kit
(DTX450K shown)
CAUTION
• Choose a flat, hard surface on
which to assemble your elec-
tronic drum kit.
• Take care to avoid mixing up
parts or assembling them in the
wrong direction. In addition, the
assembly steps should be com-
pleted one at a time in the order
described.
• The assistance of at least one
other person will be required
when assembling the electronic
drum kit.
• Once a piece has been assem-
bled, be sure to tighten the cor-
responding nuts or bolts.
• To disassemble your electronic
drum kit, carry out the assembly
sequence in reverse.
Step 5
Step 10
Step 8
Step 4
Step 7
Step 6
Step 11
Step 9
Step 3
Step 2
Step 1
The two base supports are identical.
Step 1
!7
q
q
50 cm
Front
NOTE
The two vertical supports are identical.
CAUTION
After completing this step, lay the assembly down
safely to prevent it from falling over.
Step 2
w
Joint
Left
Right
NOTE
Step 1


