Using the CP1 with a Computer
36
CP1 Owner’s Manual
Quic
k Star
t Guide
7
Press Knob 6 (
ZoneEdit [PUSH]
).
The Zone Edit screen will be displayed.
8
Turn Knob 1 and select the zone to be edited.
Zone 1 corresponds to Part 1, and Zone 2 corresponds to Part 2; meanwhile, Zones 3 and 4 are for playing other
MIDI devices. The MIDI channel for each zone is permanently set and cannot be changed. For details, see
Zone Edit
from the
Reference
section (page 52).
9
Turn Knobs 2 to 6 to set parameters for the zone selected in the previous step.
For details on each of these parameters, see
Zone Edit
from the
Reference
section (page 52).
10
Use the [PAGE
R
] button to navigate to the second page of the Zone Edit screen, and then turn Knobs 2 to 6 to set
parameters for the zone selected in Step 8.
11
Setup the MIDI instrument to receive MIDI messages on channel 3 or 4.
This action matches the receive channel with the send channels for Zone 3 or Zone 4, which are used to play
external instruments. With this type of setup, you can play the CP1 and MIDI instrument at the same time using the
stage piano’s keyboard and have each of them produce different sounds.
Using the CP1 with a Computer
The CP1 can also be connected to a computer in order to exchange MIDI data. For example, a sequencer running on a
computer could be used to play the stage piano, or you could send MIDI data created by playing the CP1 keyboard to
the computer for processing.
Connecting via USB
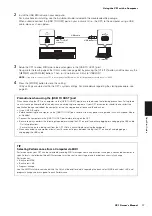
The following procedure describes how to connect the [USB TO HOST] port on the rear of the CP1 to a USB port on your
computer using a USB cable. When connected in this way, the CP1 and computer can exchange MIDI messages (but no
other types of data).
NOTE
In order to enjoy the sounds produced by the CP1, you will need to connect it to a stereo system or to an amplifier and speakers. Alternatively, a
pair of headphones can always be connected for direct monitoring of the stage piano. For details, see
Connecting Audio Equipment
from the
section,
Setting Up
1
Using your computer, download the Yamaha USB-MIDI driver from the following website.
After you click
Download
, select a convenient location for the installation file.
http://www.global.yamaha.com/download/usb_midi/
NOTE
Information on system requirements can also be found on the above website.
NOTE
The USB-MIDI driver may be revised and updated without prior notice. Make sure to check the above website for the latest version and
related information.
TIP
The MIDI [THRU] connector is used to forward MIDI data received at the CP1’s MIDI [IN] connector, regardless of whether or not it
is also used within the instrument. When playing the CP1 from another MIDI device, therefore, the performance data can be output
from this MIDI [THRU] connector to also play other instruments.

